
Nội dung
As you all know, AZDIGI only uses LiteSpeed Webserver Enterprise on all Hosting services. Using LiteSpeed Webserver will help websites load faster and save resources than traditional Apache Webserver.
Not only that, all hosting packages at AZDIGI have supported LiteSpeed Cache to help websites cache more optimally, load faster and save maximum resources, such as reducing CPU usage. , Physical Memory, IOPS.
How to install LiteSpeed on Hosting
For WordPress website
If you are using WordPress, disable all caching plugins like WP Super Cache, W3 Total Cache, WP Rocket,…
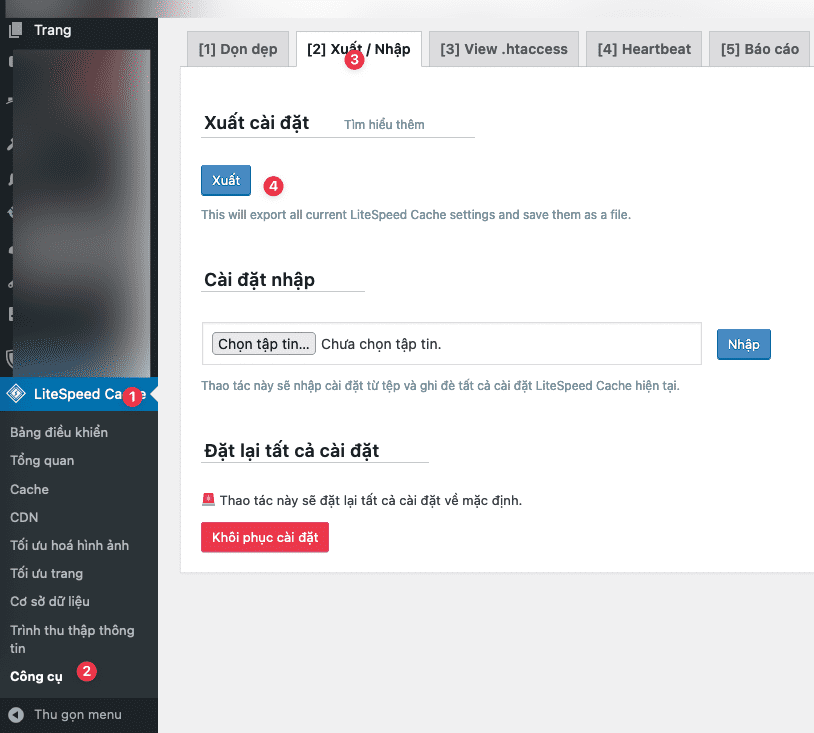
Then install the LiteSpeed Cache plugin and you have successfully activated it. You can import AZDIGI’s pre-optimized configuration by importing the configuration file into the plugin, going to LiteSpeed Cache => Tool => Export/Import.
Then download this file to your computer: Download LiteSpeed Cache plugin configuration file
And proceed to import into LiteSpeed Cache.
Next, you proceed to flush the cache again by going to the Litespeed Cache menu on the admin bar, select Clear all.

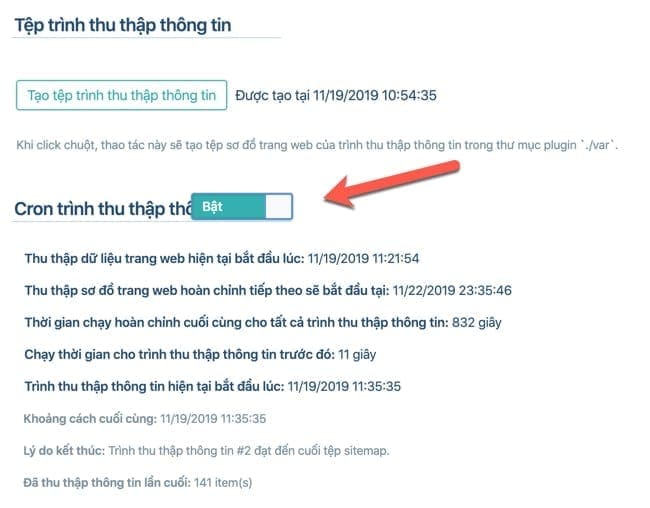
Finally, you turn on the Crawler feature in LiteSpeed Cache by going to LiteSpeed Cache => Crawler and turning it on, this is a great feature at AZDIGI to help your website always have a cached version.
To check if the website has been cached, go to http://www.webconfs.com/http-header-check.php and type the domain name of the website and press Submit to check the HTTP Header, if there is a lineX-LiteSpeed-Cache is successful, it has two valuesmiss andhit . If it shows to miss, it means that the page has not been cached, but if you submit it again, it will hit, which means the page is cached.
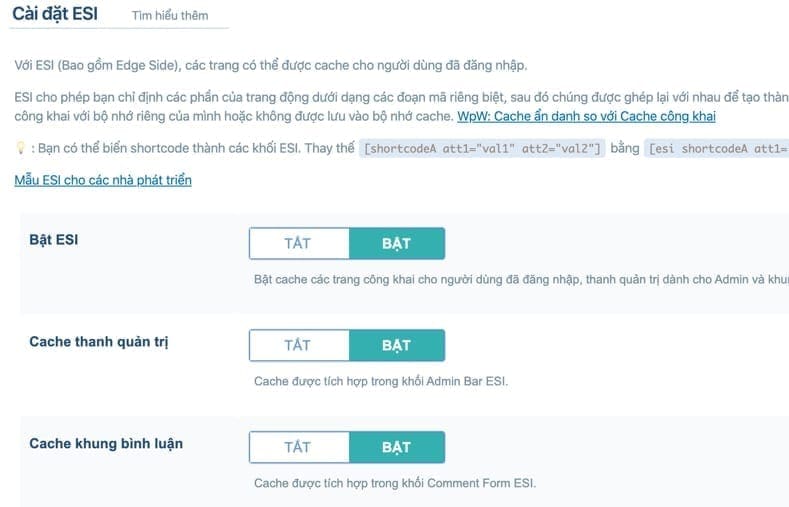
ESI for WordPress
LiteSpeed Cache at AZDIGI supports ESI, in a word, can cache some content elements for logged-in users by caching separately for each user to speed up access even when logged in.
To enable ESI, go to LiteSpeed Cache and enable ESI.
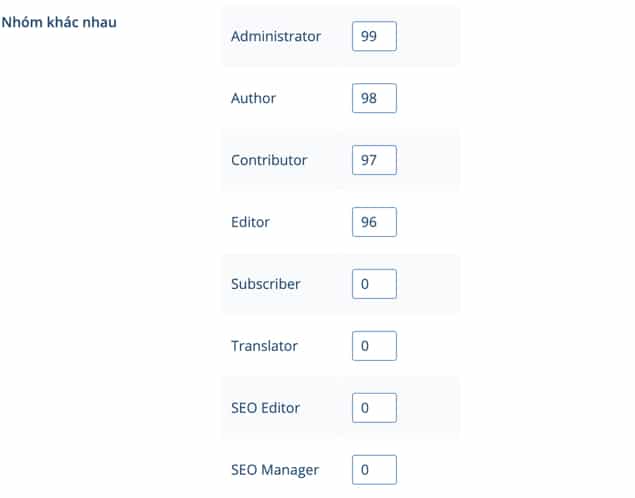
In the Other Groups section, you assign each group a different ID to identify each group to ensure that each group always has a private cache.
Then go to Appearance =strong, > Widget and enable cache for each widget as follows:
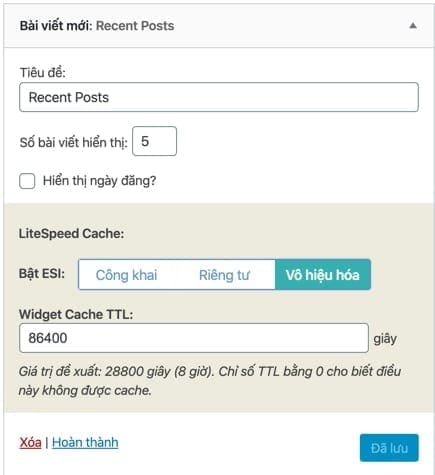
- Public: You should enable the widget to be public cached if you want to cache this widget so that it is visible to all visitors (e.g., list of latest posts, new products,…)
- Private: You should enable the widget to be a private cache if the widget displays different information for each person. For example, a list of recently viewed articles, products added to the cart, etc.
For Xenforo website
If you use Xenforo, just install LiteSpeed Cache Add-on and when activated, you have successfully enabled cache.
For Joomla website
For Joomla, you just need to install the LSCache for Joomla plugin and then activate it. You can refer to this guide for more details.
So you have finished activating LiteSpeed Cache. If you have difficulty setting up LiteSpeed Cache on your website, please contact Technical Department via ticket or support@azdigi.com for assistance.
