
Nội dung
In today’s article, AZDIGI will show you how to use Snapshots Jetbackup on cPanel.
I. Overview
The backup system is an indispensable part of the administrator. It helps to keep your data safe, avoiding any possible risks. Most hosting service providers in Vietnam in general and AZDIGI in particular have a data backup system by day, week or even month. AZDIGI supports 7 consecutive days of backup to keep customers’ data safe. The providers all set automatic backup schedules, on schedule the system will automatically back up and that’s the backup provider’s backup for you. If you want to keep your data even more secure, you can also back up your data yourself.
Today, AZDIGI will introduce you to a function in JetBackup called Snapshots. Snapshots function helps you capture all current data or at the time you Snapshots to keep, and when necessary, you can Restore to the version that has been Snapshots. This is very useful for you who are preparing to edit a website that needs a snapshot for backup. And to do that, please see the following article.
II. How to use Snapshots JetBackup on cPanel
Step 1: Take Snapshots in JetBackup
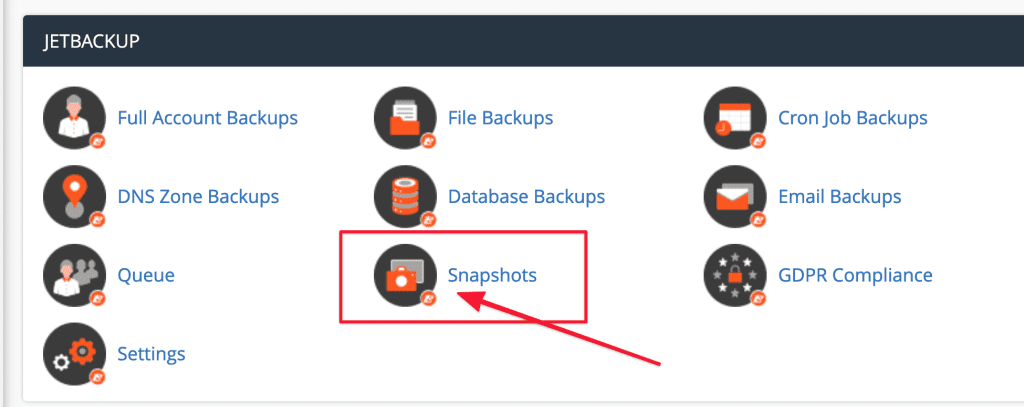
After logging into cPanel, go to the JETBACKUP section and select Snapshots.
Next, click Create new Snapshot to create a new Snapshot.
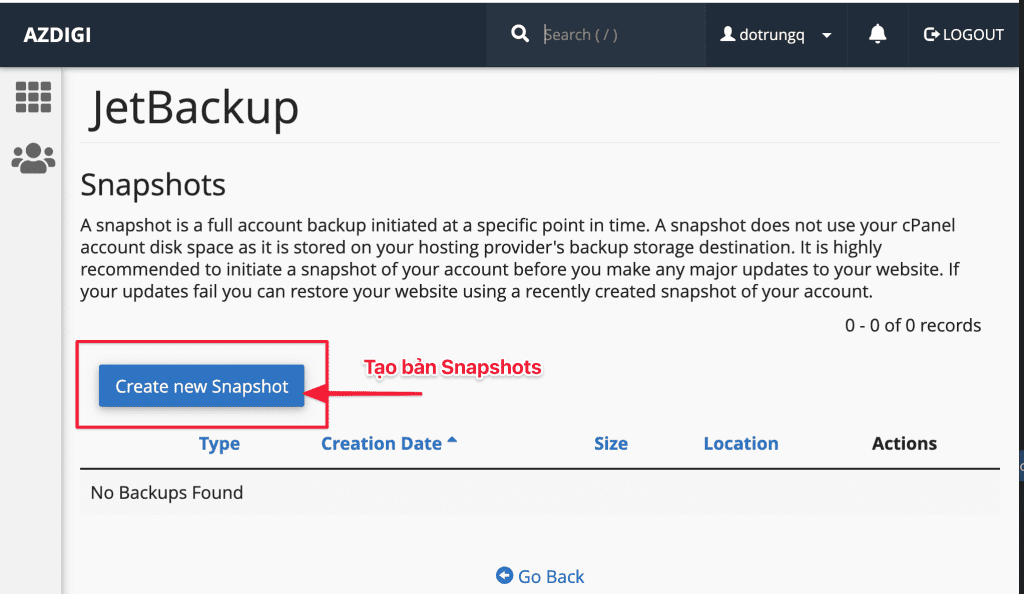
The system will notify Success and you go to Queue to track the progress of creating Snapshots.

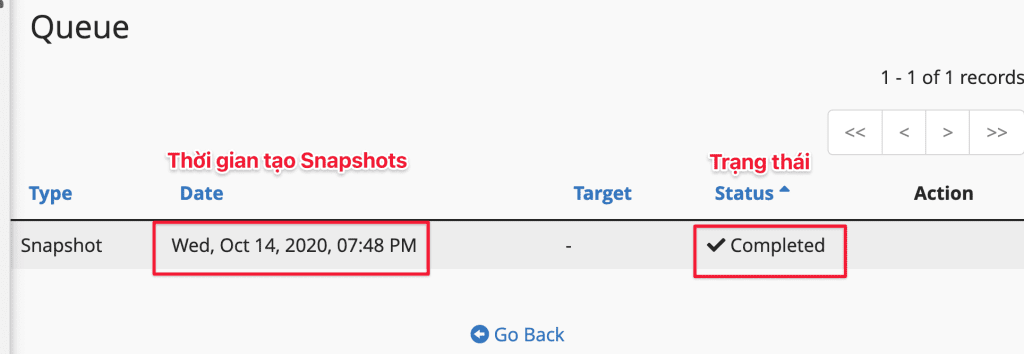
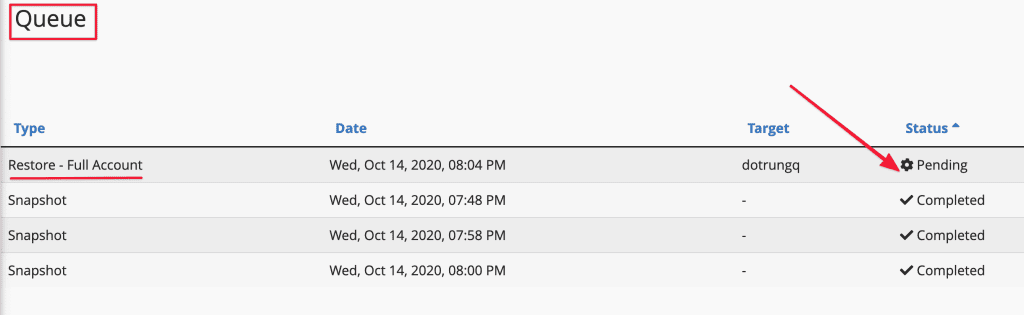
You go back to JETBACKUP and click on Queue to track the progress. If the Status shows Processing then the system is running. If it shows Completed, the process of creating Snapshots is complete.

Thus, you have completed the steps to create a Snapshots. You can keep it for backup when you need it. To download the Snapshots or Restore them, please follow the next steps.
Note: This snapshot does not take up space in your hosting because Snapshots are saved on the provider’s backup system.
Step 2: Restore Snapshots in JetBackup
If you want to restore the created Snapshots, follow these steps:
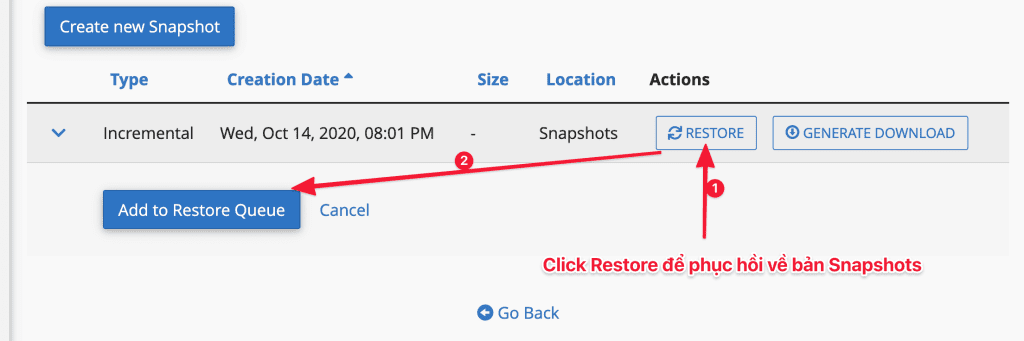
Access Snapshots.
then select RESTORE and Add to Restore Queue to start the restore process.
If you want to download these Snapshots, click on GENERATE DOWNLOAD.
The process will then begin, you can track it at Queue:
Thus, AZDIGI completed the steps to create a Snapshot in Jetbackup and restored it to the created Snapshots. Hopefully, this article will help you back up your data before performing an unsafe or uncertain operation.
If you need assistance, you can contact support in the ways below:
- Hotline 247: 028 888 24768 (Ext 0)
- Ticket/Email: You use the email to register for the service and send it directly to: support@azdigi.com
- You can refer to the cheap Hosting here.
