
Nội dung
What is WHM?
WHM stands for Web Host Manager, a program with many powerful features that allow administrators to access the last locations of cPanel Hosting. WHM manages everything such as Server management, domain DNS management, customer management, order management… An easy-to-use interface gives customers the most powerful utilities to control all functions. This system also helps you regularly update the latest and advanced versions to make the management system more robust.
What is cPanel?
cPanel is a client’s web hosting manager and one of the best WHMs available today. With an easy-to-see interface, diverse functions and constant release of the latest updates, cPanel is one of the most developed and trusted controls at the moment.
In this article, AZDIGI will show you how to install WHM/cPanel on Centos 7 server so you can experience it.
Installation Requirements
- Operating systems: CentOS 7
- RAM: Minimum 1GB (recommend 2GB RAM)
- Disk Space: Minimum 20GB (recommended 40GB)
- License cPanel (If you don’t have a License, you can use the License Trial for 15 days, you can activate the License Trial after completing the installation)
Implementation guide
Step 1: SSH into your VPS
First, you need to SSH into your server as root, if you don’t know how to SSH, you can check out the instructions below:
Step 2: Install and enable/disable some necessary services
Before going into the WHM/cPanel installation, you must ensure that Perl – Curl is installed on your server. If you haven’t installed it, install it with the 2 commands below:
yum install perl
yum install curl
Disabled SELinux
You can disable SELinux by running the following 2 commands in turn:
sed -i 's/SELINUX=/#SELINUX=/g' /etc/selinux/config
SELINUX=disabled >> /etc/selinux/config
Disable Network Manager
By default, from version 68 onwards, cPanel will not support the Network Manager service, so you need to disable this service before installing with the following command:
systemctl stop NetworkManager.service
systemctl disable NetworkManager.service
Next, you can start the Network:
systemctl enable network.service
systemctl start network.service
Update VPS
Update services to the latest versions, patch old vulnerabilities and update new features.
yum update -y
Step 3: Install WHM/cPanel
To install WHM/cPanel, run the following commands in turn:
cd /home
curl -o latest -L https://securedownloads.cpanel.net/latest
sh latest
Command annotation:
- Move to the home folder
- Download the installation file of the latest version of WHM and cPanel from the homepage
- Run the install command
If you want to install quickly and with only 1 command, you can use the command below, it will combine and run at the same time as the commands above.
cd /home && curl -o latest -L https://securedownloads.cpanel.net/latest && sh latest
The installation process will take place as shown below:
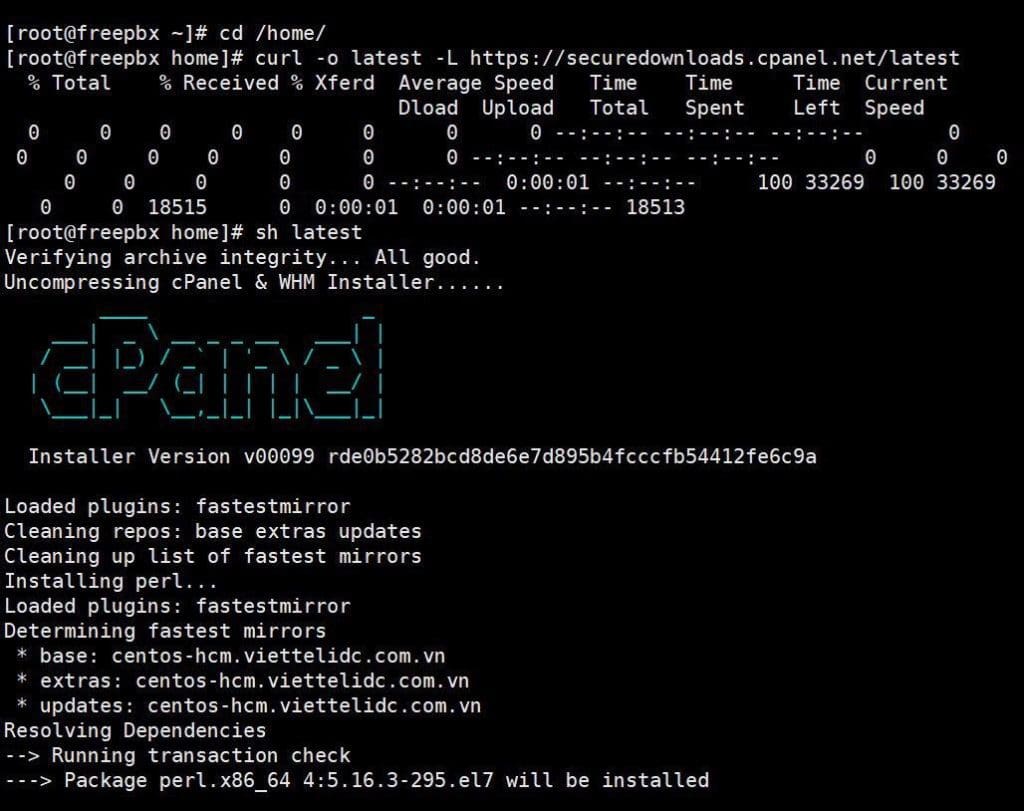
The installation process can take 30 minutes to 1 hour, depending on each VPS. Once the installation is complete, you will receive the message: Congratulations! Your installation of cPanel & WHM 11.90 is now complete, and you will be sent a link to access WHM as follows:
[2020-09-24 06:25:09 +0700] [31642] ( INFO): Completed execution of “/usr/bin/systemctl start cpcleartaskqueue” in 0.008 second(s)
[2020-09-24 06:25:09 +0700] [31642] ( INFO): Flushing the task queue
[2020-09-24 06:25:09 +0700] [31642] ( INFO): cPanel install finished in 6 minutes and 50 seconds!
[2020-09-24 06:25:09 +0700] [31642] ( INFO): Congratulations! Your installation of cPanel & WHM 11.90 is now complete. The next step is to configure your server.
[2020-09-24 06:25:09 +0700] [31642] ( INFO):
[2020-09-24 06:25:09 +0700] [31642] ( INFO): Before you configure your server, ensure that your firewall allows access on port 2087.
[2020-09-24 06:25:09 +0700] [31642] ( INFO):
[2020-09-24 06:25:09 +0700] [31642] ( INFO): After ensuring that your firewall allows access on port 2087, you can configure your server.
[2020-09-24 06:25:09 +0700] [31642] ( INFO):
[2020-09-24 06:25:09 +0700] [31642] ( INFO): 1. Open your preferred browser
[2020-09-24 06:25:09 +0700] [31642] ( INFO):
[2020-09-24 06:25:09 +0700] [31642] ( INFO): 2. Navigate to the following url using the address bar and enter this one-time autologin url:
[2020-09-24 06:25:09 +0700] [31642] ( INFO):
[2020-09-24 06:25:09 +0700] [31642] ( INFO): https://45-252-249-106.cprapid.com:2087/cpsess9834459325/login/?session=root%3a2aIZ0LRUzqPlP3XL%3acreate_user_session%2c63c7ef151f691412fd5e54ae65e07324
[2020-09-24 06:25:09 +0700] [31642] ( INFO):
[2020-09-24 06:25:09 +0700] [31642] ( INFO): After the login url expires you generate a new one using the 'whmlogin' command or manually login at:
[2020-09-24 06:25:09 +0700] [31642] ( INFO):
[2020-09-24 06:25:09 +0700] [31642] ( INFO): https://45.252.2xx.xxx:2087
[2020-09-24 06:25:09 +0700] [31642] ( INFO):
[2020-09-24 06:25:09 +0700] [31642] ( INFO): Visit https://go.cpanel.net/whminit for more information about first-time configuration of your server.
[2020-09-24 06:25:09 +0700] [31642] ( INFO):
[2020-09-24 06:25:09 +0700] [31642] ( INFO): Visit http://support.cpanel.net or https://go.cpanel.net/allfaq for additional support
[2020-09-24 06:25:09 +0700] [31642] ( INFO):
[2020-09-24 06:25:09 +0700] [31642] ( INFO): Thank you for installing cPanel & WHM 11.90!
Step 4: Set up WHM/cPanel
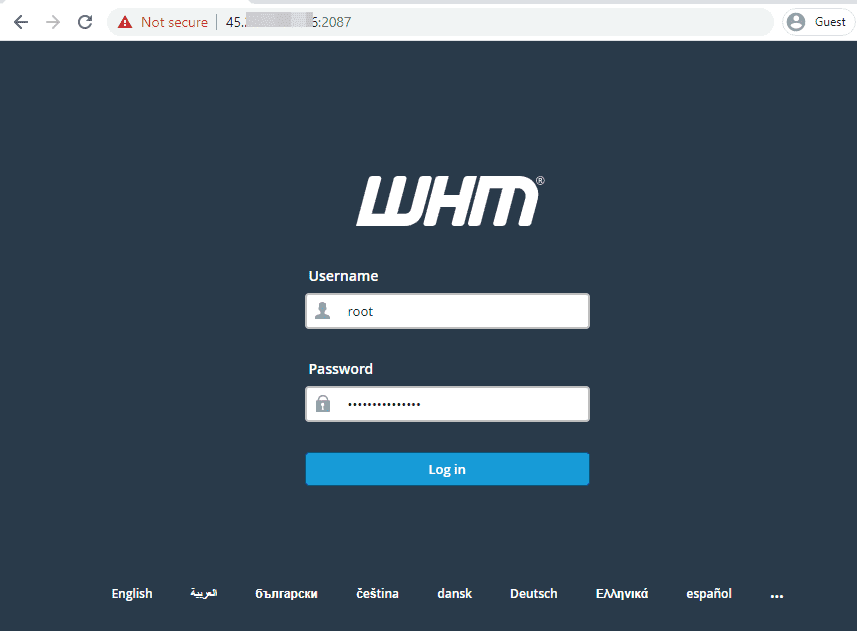
You open the browser and access with the address: https://45.252.2xx.xxx:2087 in Step 3, here you will see the WHM interface as shown below. Please enter your VPS’s root information to login.
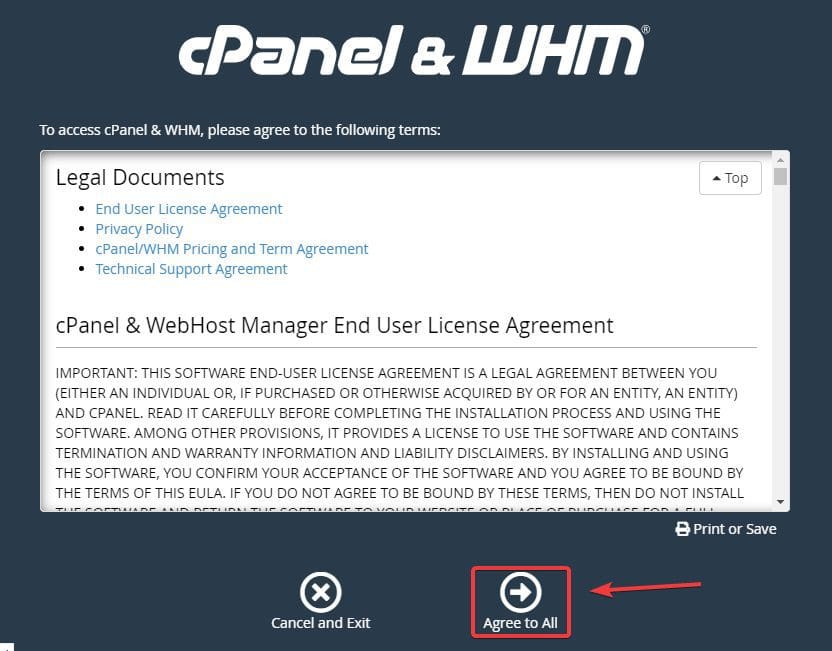
You read the terms of WHM and cPanel => click Agree to ALL.
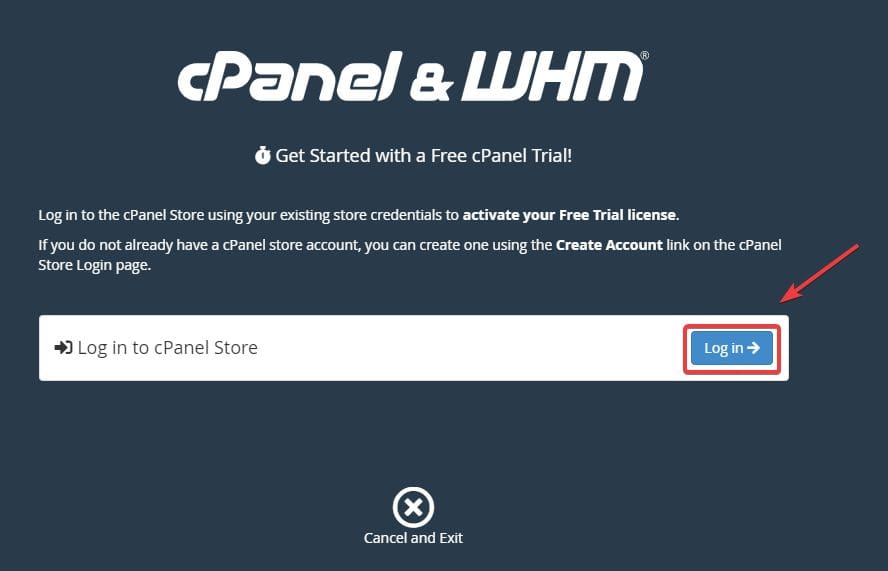
In the next step, if you do not have a License available on the VPS’s IP, the system will ask you to register for a 15-day free Trial License to be able to continue the installation. Click Login and register for a 15-day free Trial license (you just need to create an account and fill in your account information to activate the trial license)
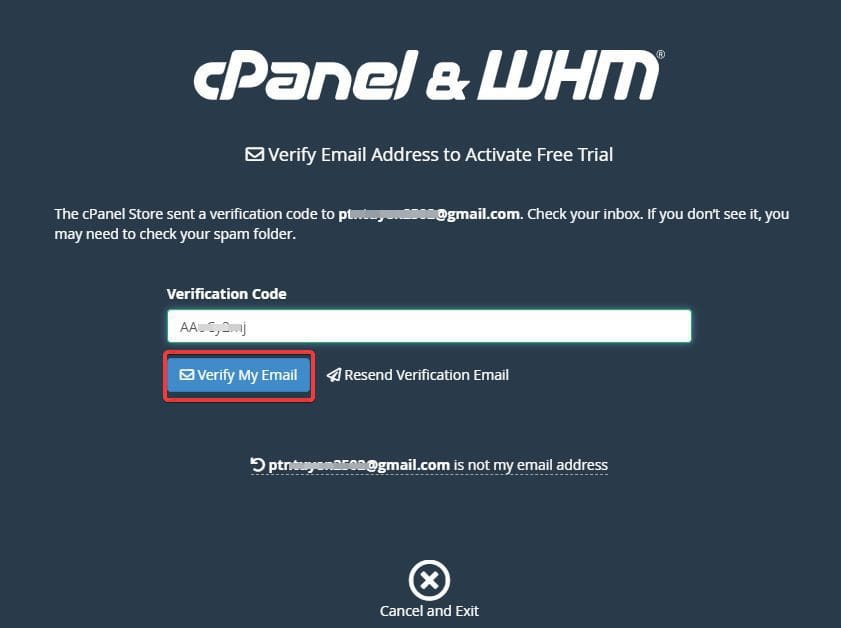
After successfully registering an account to Trial, check your registered email to receive the verification code sent by the firm and fill in the Verification Code section.
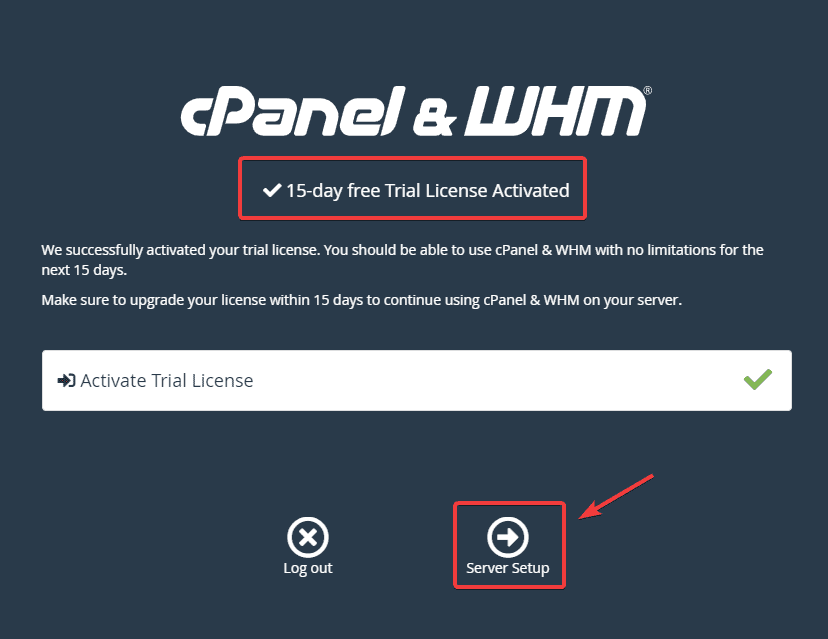
After successful registration, you will receive the message: 15-day free Trial License Activated, click Server Setup to set up the next steps.
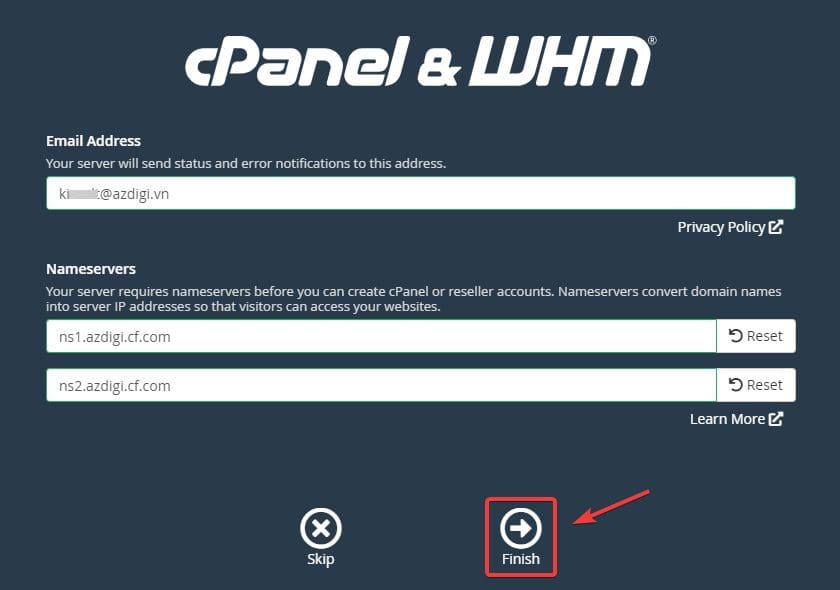
Next, in the Email Address section, enter your administrative email information.
Nameserver: You can name a pair of Nameservers for your server, keeping it simple and easy to remember. This nameserver you can later use as a DNS server of VPS.
After filling in all the information, press Finish to complete the installation.
WHM’s interface after the installation is complete will display as shown below:

Summary
So in this article, AZDIGI has shown you how to install WHM on a complete Centos 7 server completely. With WHM, you can easily master Web Host Manager with a few clicks. Surely using WHM/cPanel will give you a great experience and your work performance will improve. If you find this helpful article, please share it widely!
You can refer to some other tutorials about cPanel below:
Wishing you success!
If you need assistance, you can contact support in the ways below:
- Hotline 247: 028 888 24768 (Ext 0)
- Ticket/Email: You use the email to register for the service and send it directly to: support@azdigi.com
