
Nội dung
How to back up DirectAdmin data to Google Drive
I. Overview
As you know, data is very important for each individual and business. Your website lost can be rebuilt, but the data inside it, once lost, is very difficult to restore without backup. Rclone is certainly no stranger to system administrators. However, it is still strange to novices or non-specialists in the system. In this article, AZDIGI will guide you to use an external Backup tool, store it on the Drives that are Rclone.
Please follow the steps to backup DirectAdmin data to Google Drive below.
II. Install RCLONE
To backup DirectAdmin data to Google Drive, follow these steps: First, you need SSH into the server/VPS that has DirectAdmin installed.
Step 1: Install Rclone
To install Rclone, run the following commands:
Note:
- Command 1: download the rclone tool
- Command 2: extract the downloaded rclone file
- Command 3: cp rclone to the /usr/sbin directory
cd /root/
wget https://downloads.rclone.org/v1.53.1/rclone-v1.53.1-linux-amd64.zip
unzip rclone-v*.zip
cp rclone-v*-linux-amd64/rclone /usr/sbin/
Commands to use Rclone:
- rclone config – Configure the connection to the cloud service.
- rclone copy – Copy files from the server to the cloud, skip if data already exists.
- rclone sync – Synchronize between server and cloud, only update data on the cloud.
- rclone move – Move files from the server to the cloud.
- rclone delete – Delete the data of the folder.
- rclone purge – Delete the data of the folder and all its contents.
- rclone mkdir – Create folder.
- rclone rmdir – Delete the empty folder at the path.
- rclone rmdirs – Delete all empty folders at the path. The timer includes:
- ms – Milliseconds
- s – Seconds
- m – Minutes
- h – Hours
- d – Days
- w – Weeks
- M – Months
- y – Years
- rclone check – Check whether the server and cloud data are in sync.
- rclone ls – List all data, including size and path.
- rclone lsd – List entire directories.
- rclone lsl – List all data, including modification time, size and path.
- rclone size – Returns the directory size.
Step 2: Create Rclone
After the Rclone installation is complete, run the rclone config command to display the installation settings and follow the steps below.
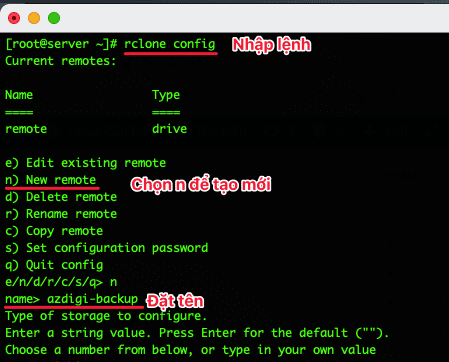
Enter the command rclone config, select N to create a new one, and name it as shown below:
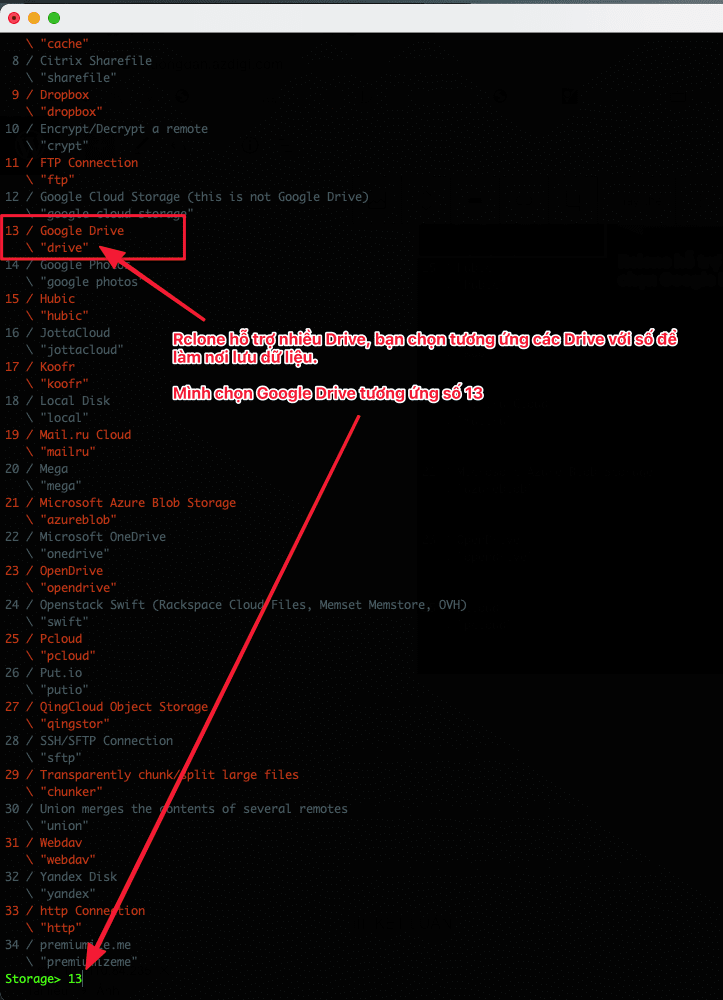
In the image below, Rclone supports a lot of storage drives, please choose the corresponding one. I’m backing up to Google Drive, so I will choose the number 13 corresponding to Google Drive.
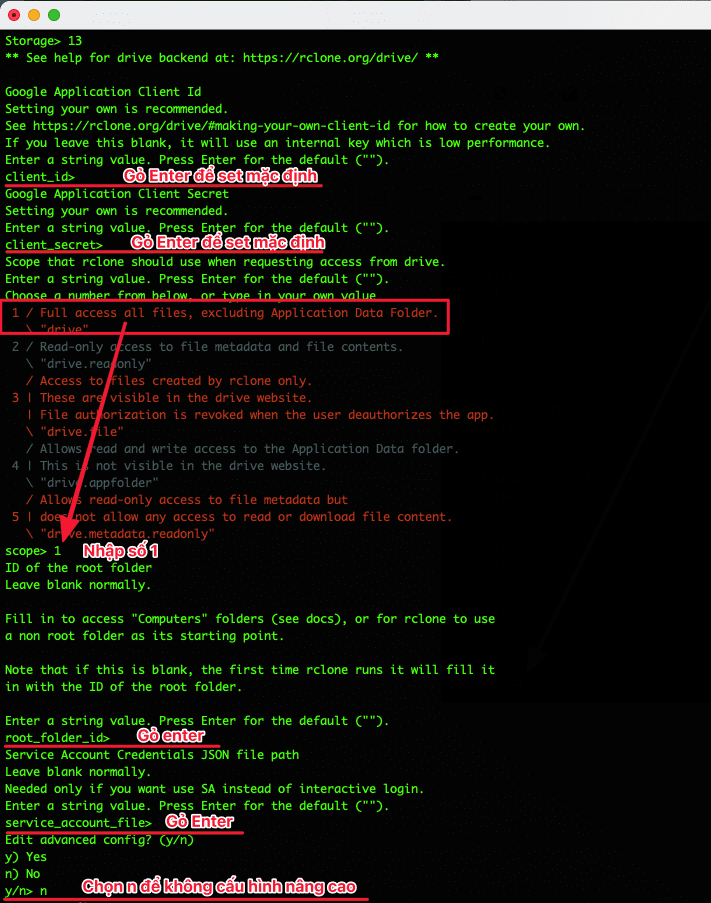
- client_id: You enter Enter to default
- client_secret: You enter Enter to default
- scope: enter 1
- root_folder_id: enter Enter to default
- service_account_file: enter Enter to default
As shown below, you will see a URL, copy this URL and paste it into your browser and select the drive account.
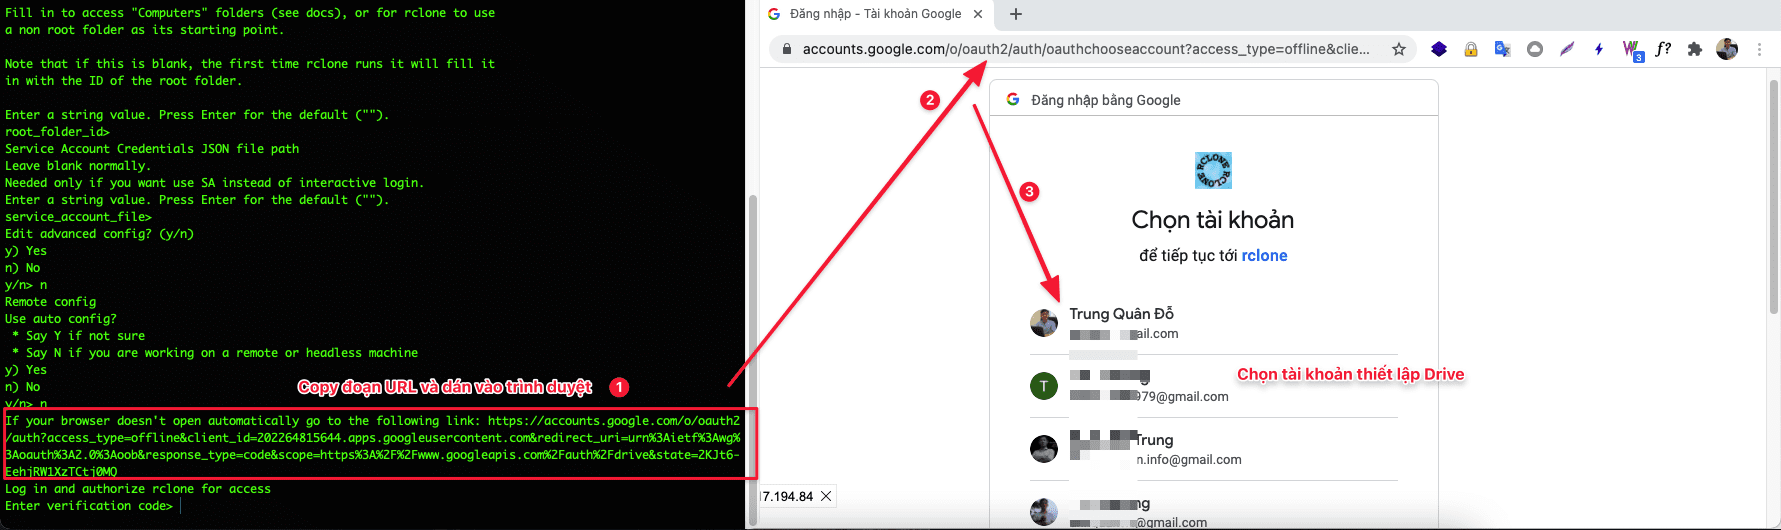
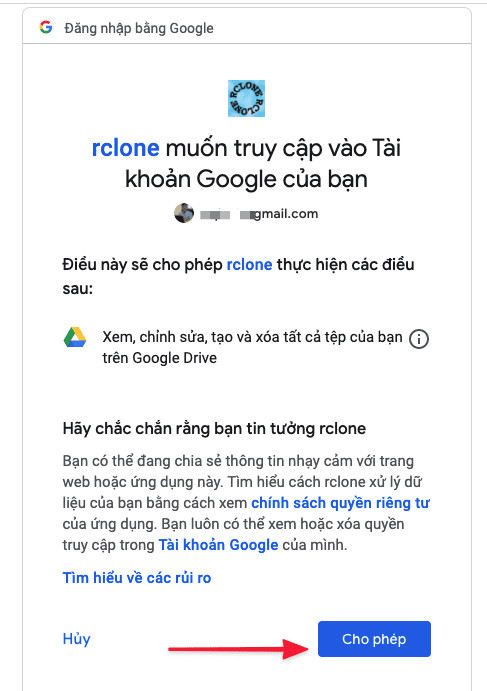
Drive will show an access code, copy this code and paste it into the Enter Verification code section.

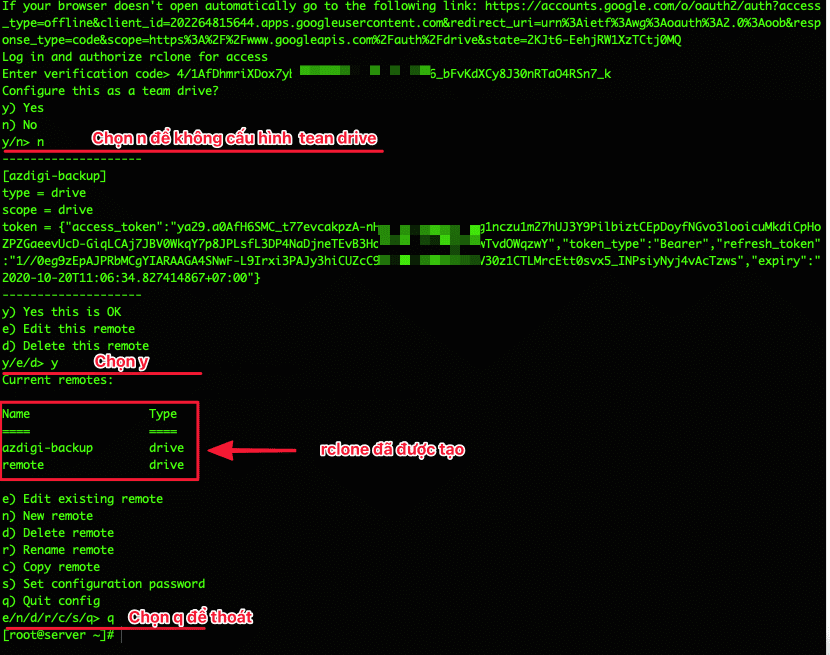
After pasting, you continue to choose the steps to set up:
- Configure this as a team drive: n
- Select y to agree with the created rclone
Step 3: Create DirectAdmin backup file
After creating Rclone, the next step is to create an automatic backup on DirectAdmin.
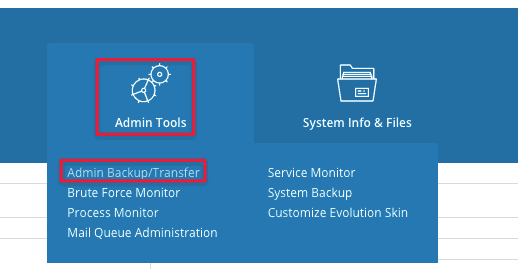
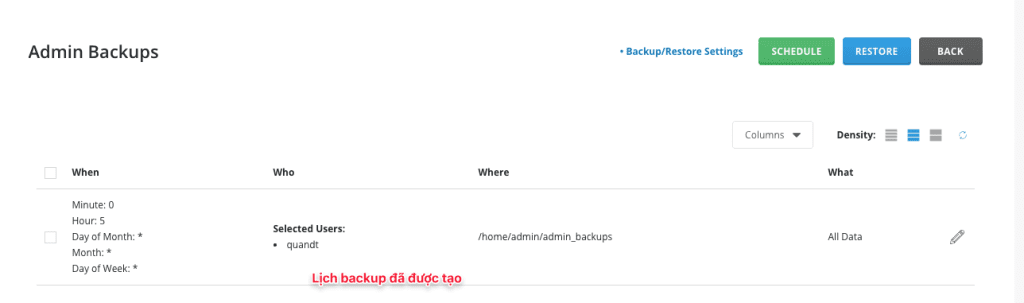
Access DirectAdmin Control, select Admin Tools => Admin backup/transfer
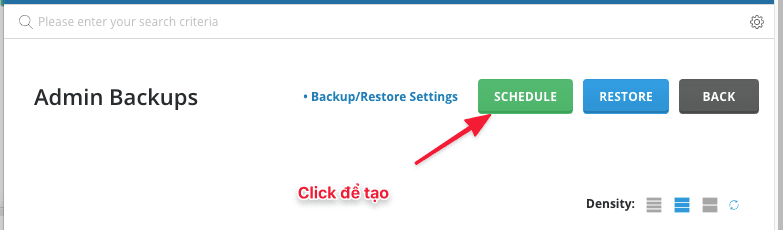
Click SCHEDULE to start creating.
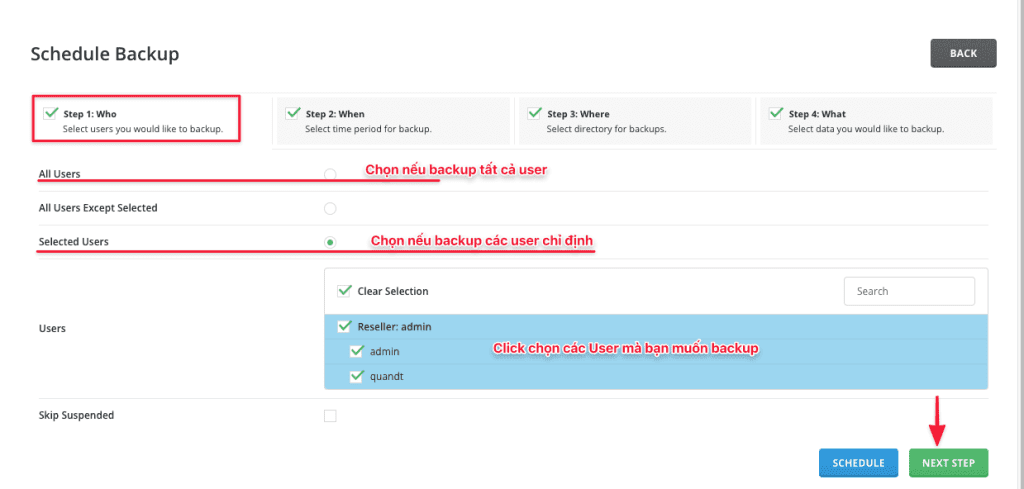
Step1: Who
- All user: If you choose this option, it will backup all users on the DA
- Select User: Specify the user to backup
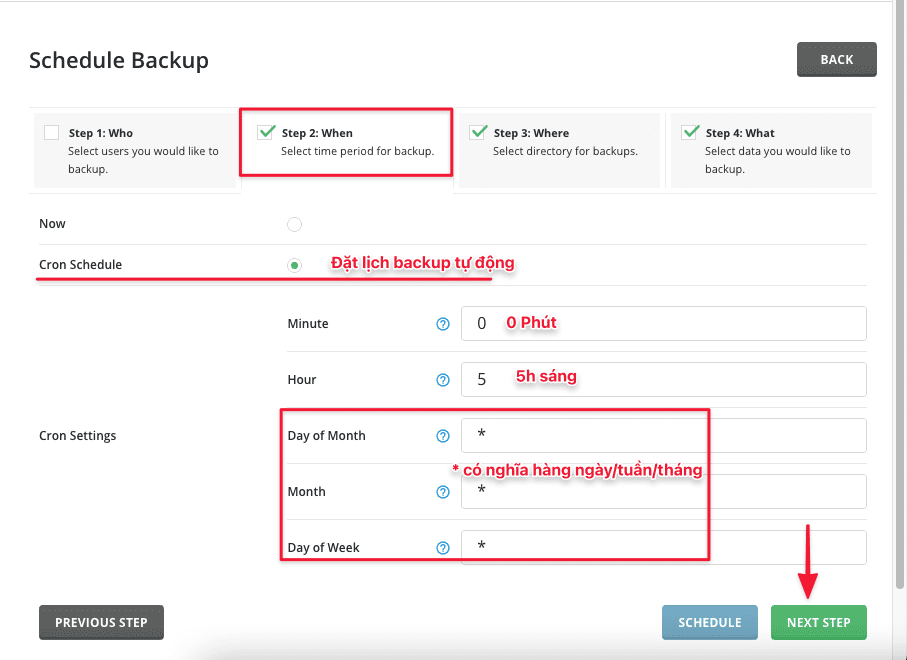
Step 2: When
- Now: If you choose Now, the system will backup immediately, due to scheduling, I did not choose NOW
- Cron Schedule: Choose to create a backup schedule
- Cron settings: Choose a time to backup
Step 3: Where
Choose where to save the backup file
- Local: I choose this option to save the backup file on the server
- Local path: The path of the directory where the backup file is saved
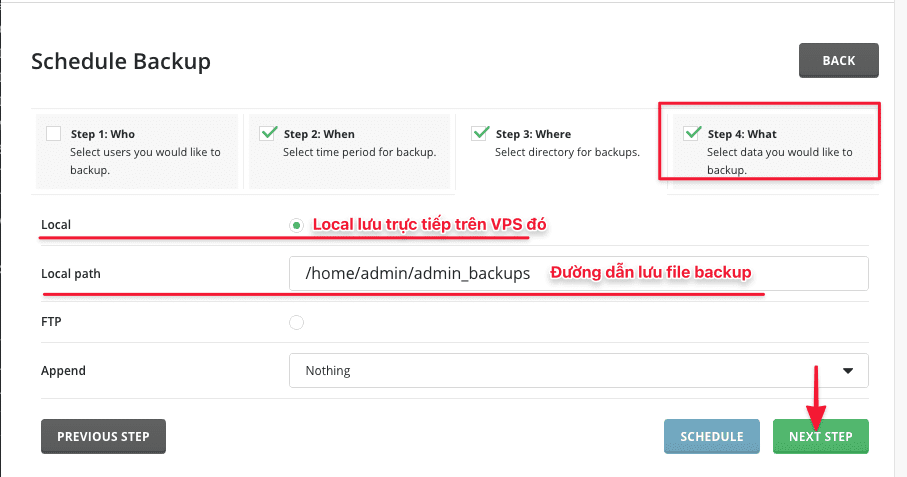
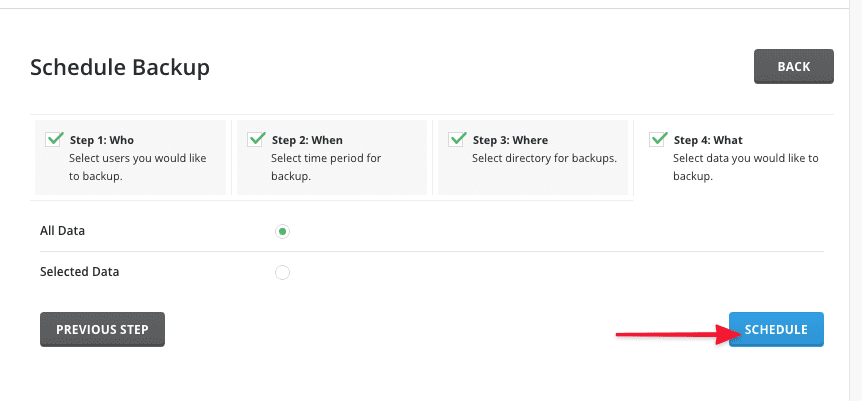
Step 4: What
Options for data to be backed up
- All data: This option will backup all data (source code, database, ssl, ftp, mail…)
- Select Data: Or you specify the data to backup
Step 4: Upload the backup file to Google Drive
After creating a backup schedule, next, set a schedule to upload the backup file to Google Drive.
You enter the command crontab -e to create cron. I will annotate the lines below and to learn about crontab, you can see it here.
crontab -e
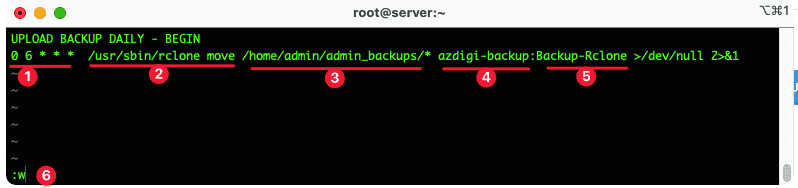
Note:
- Time of cron: as above, at 6 am every day, the cron will work.
- This command will move the file to Google Drive and delete it at local
- The directory to save the created backup file (review step 3)
- Generated rclone name (review step 2)
- Folder to save backup files (This folder is created in Google Drive)
- Choose :w to save the cron file.
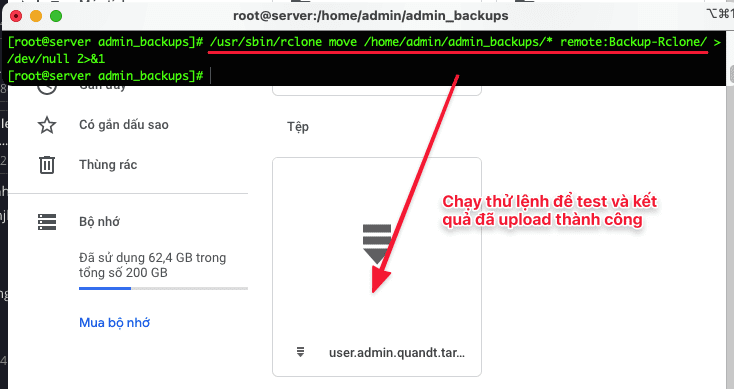
I tested the upload and it was successful, the image shows the file has been backed up and uploaded to Google safely.
If you need to download files from Google to the server/VPS, run the command:
rclone copy "azdigi-backup:/user.admin.quandt.tar.gz" /home/admin/admin_backups
Note:
- rclone copy: Command to execute copy
- azdigi-backup: Created rclone name
- user.admin.quandt.tar.gz: File backup
- /home/admin/admin_backups: File storage directory
III. Summary
Hopefully, this article will be helpful when you are looking for a solution to back up your data periodically. From there, you can rest assured your data is always safe.
