

Nội dung
In this article, AZDIGI will guide you to install CloudLinux OS from CentOS 7 on DirectAdmin, it helps you to upgrade a DirectAdmin server running CentOS 7 to CloudLinux with just a few basic steps.
I. What is CloudLinux?
The CloudLinux operating system is the premier platform for versatility. It help improves server stability, density and security by isolating each hosting tenant and giving users a certain amount of allocated server resources. This creates an environment more like a virtual server than a shared hosting account. By doing so, CloudLinux OS reduces operating costs and increases the level of users on a server while increasing profits.

CloudLinux OS is designed for shared hosting providers. It isolates each client into a separate “Lightweight Virtualization Environment” (also known as LVE), partitioning, allocating and limiting server resources, such as RAM, CPU, I/O and the number of connections per user.
This ensures that users cannot jeopardize the stability of your server, slowing down all websites or even stopping them. CloudLinux operating system also “nests” tenants together to avoid security breaches. This way, unstable scripts or malware cannot spread over your client’s websites, causing serious harm.
If you want to know more information, you can refer to the official CloudLinux OS page at the following link:
II. Install CloudLinux OS from CentOS 7 is running DirectAdmin
To install CloudLinux OS from CentOS 7, follow these 5 steps.
Step 1: Sign up for a trial of CloudLinux to get an activation key
To sign up for the trial of CloudLinux OS, you just need to access this link and enter complete information in the registration form. Wait a moment, you will receive a trial information email as below:
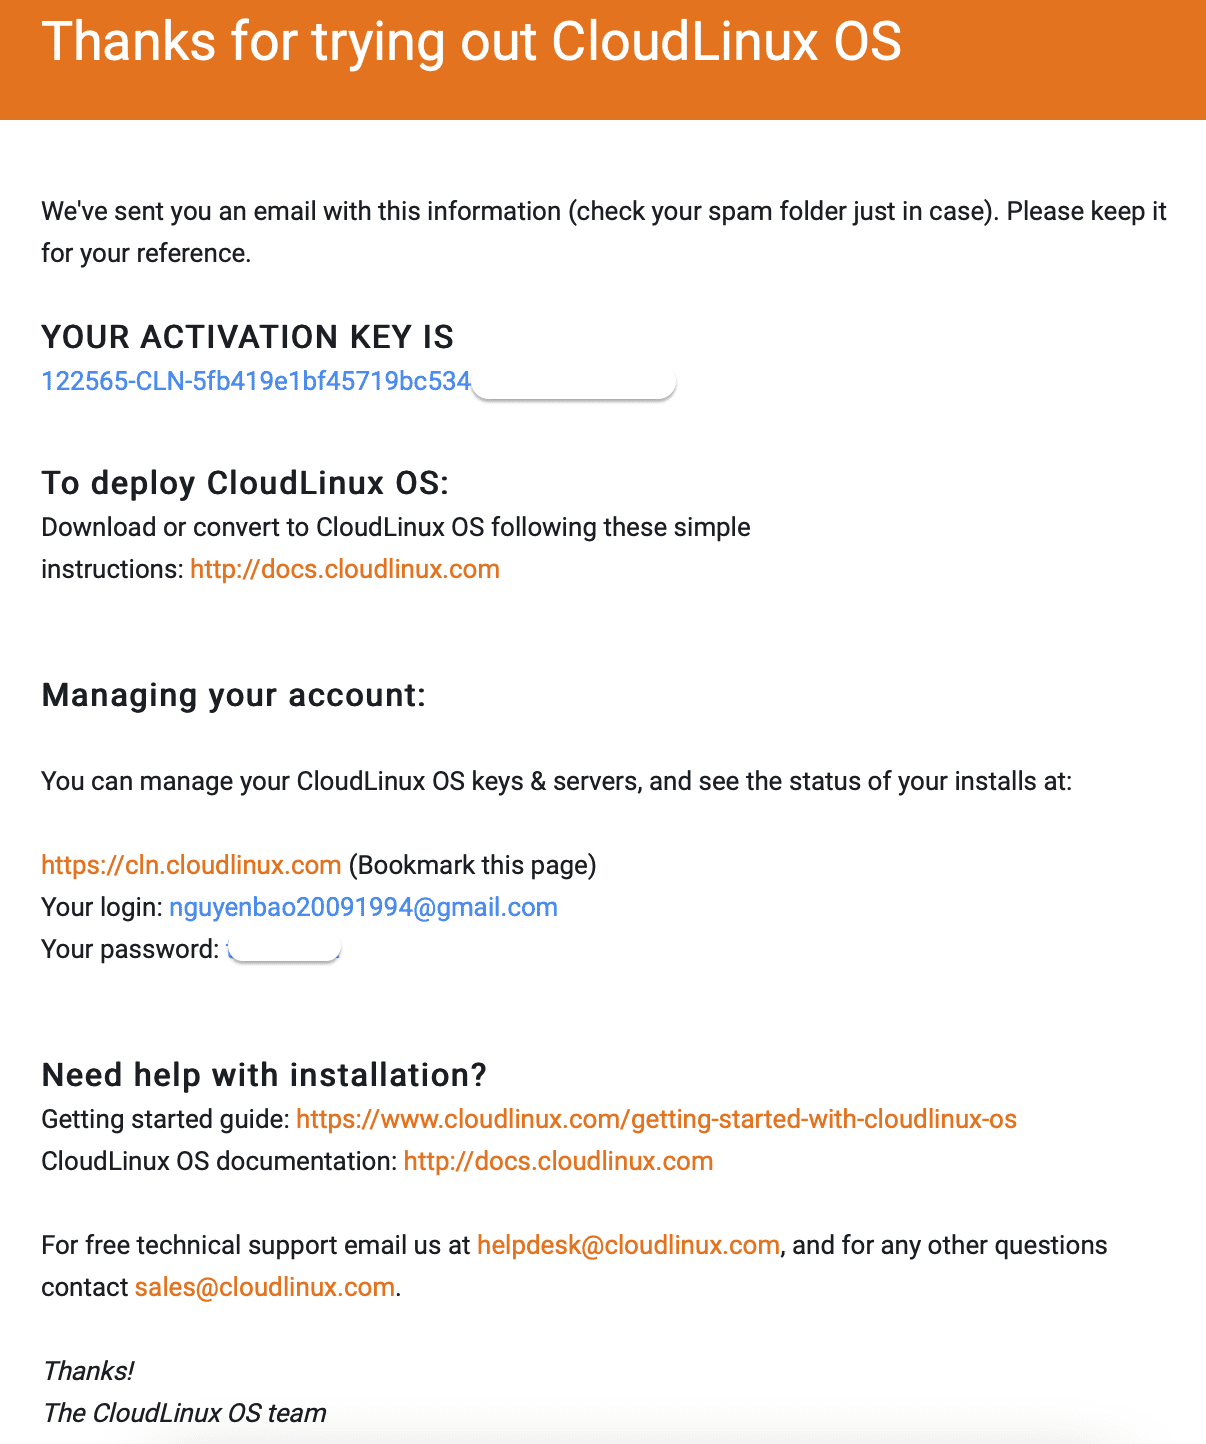
Once you have this information, continue to step 2 to SSH into your VPS/Server.
Step 2: SSH into your CentOS 7 server
To install CloudLinux OS from CentOS 7, we first need to SSH or access your VPS/server with root privileges. If you do not know how to SSH into your VPS/Server, you can refer to the following tutorial:
After successfully SSHing, we continue with step 3 to execute the commands to install CloudLinux OS from CentOS 7.
Step 3: Execute the commands to install CloudLinux OS from CentOS 7
The commands to install CloudLinux OS from CentOS 7 are extremely simple and easy to understand. There are two different cases in which you use the received key or install without using the key if your server’s IP address has been licensed based on the IP address.
Case 1: Use the key to install
wget https://repo.cloudlinux.com/cloudlinux/sources/cln/cldeploy
sh cldeploy -k activation_key
You will have to replace your key to activation_key, for example, I already have the key 122565-CLN-5fb419e1bf45719bc534a4db50e4XXXX then I will enter the following command:
wget https://repo.cloudlinux.com/cloudlinux/sources/cln/cldeploy
sh cldeploy -k 122565-CLN-5fb419e1bf45719bc534a4db50e4XXXX
Case 2: You have registered a license for your VPS/Server IP address
wget https://repo.cloudlinux.com/cloudlinux/sources/cln/cldeploy
sh cldeploy -i
The installation process is relatively long. For my VPS 4 Core CPUs, the installation took 25 minutes, maybe due to the transmission line when I installed it was not strong enough because I had to download a lot of support packages.
Wait for the installation to take place and display as shown below, the installation is complete:
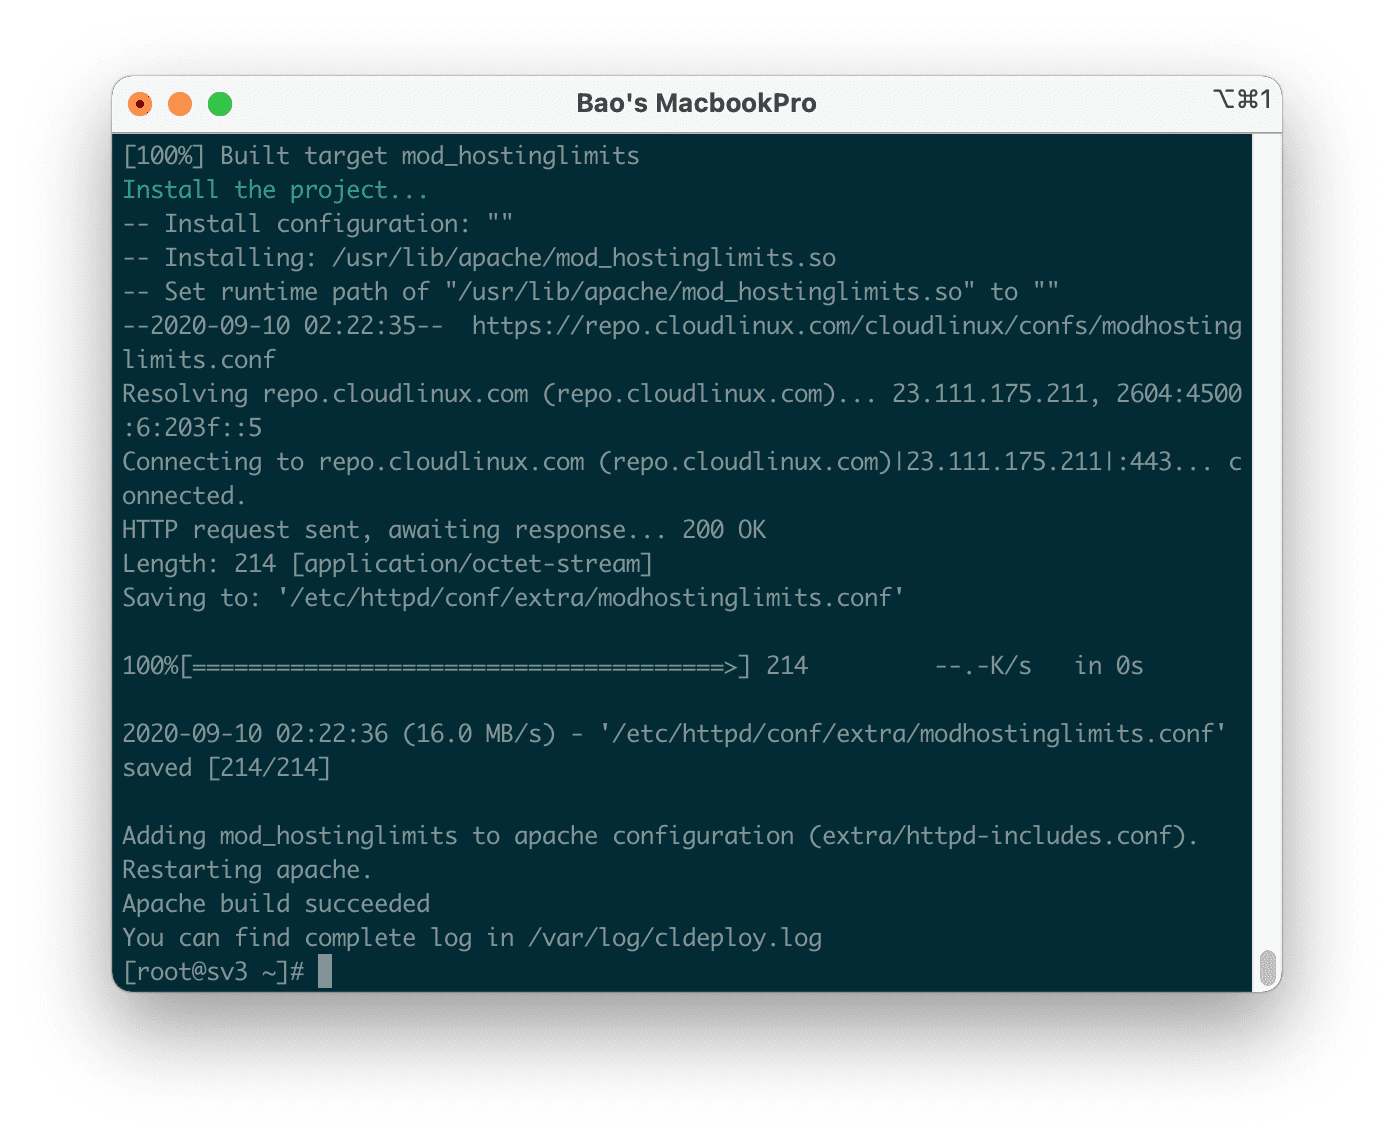
Add some interesting information to you is that the CloudLinux OS installation script is very smart, it is capable of detecting the installation environment, virtualization type, control panel (DirectAdmin, cPanel, Plesk), hardware tools that can meet the installation requirements and many more…
Step 4: Reboot the OS
After the installation of CloudLinux OS from CentOS 7 has been completed, we need to restart the VPS/Server for the operating system to receive the new Kernel kernel, which is created specifically for the operation of limited user resources and support LVE.
We use the following command to reboot VPS/Server:
reboot
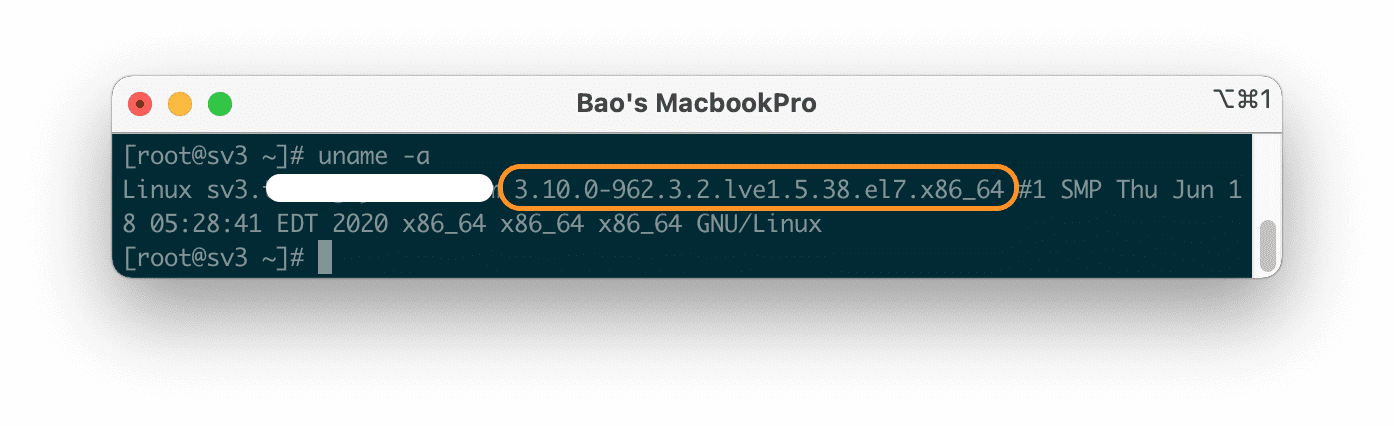
Step 5: Check that the kernel is properly recognized
You can skip this step, but to ensure everything is okay, you should check whether the kernel is properly recognized because this will affect whether the LVE feature will function properly.
To check, we use the command uname -a, if the kernel has the information lve as shown below, it is recognized correctly.
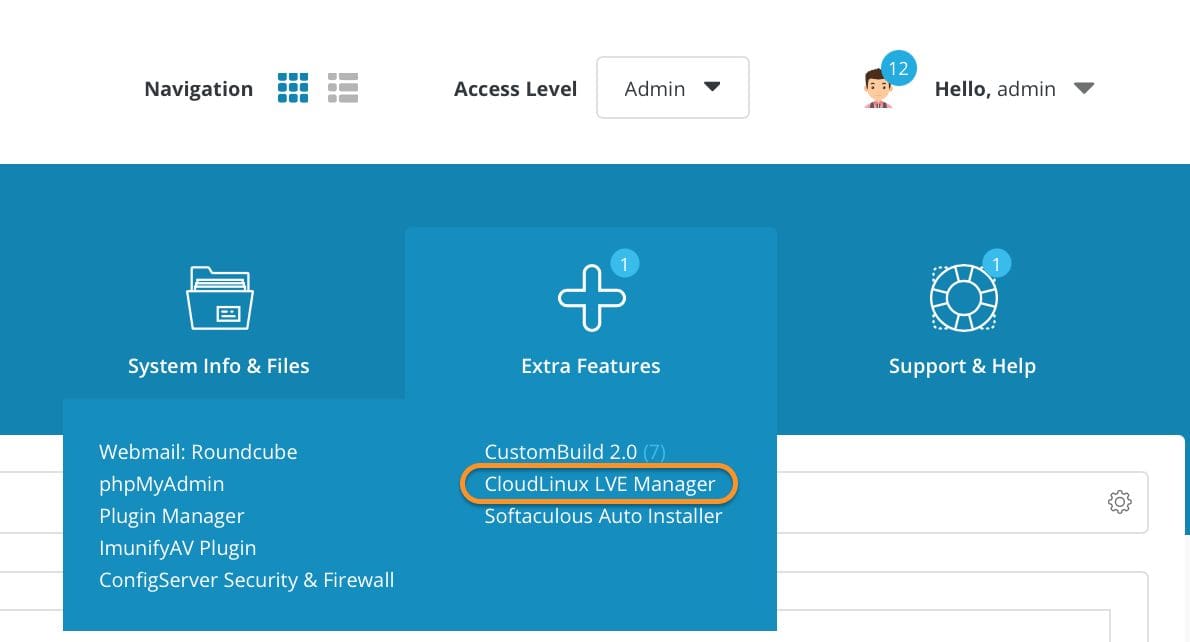
Now let’s check the DirectAdmin interface. CloudLinux LVE Manager plugin was installed during the conversion.
So the installation of CloudLinux OS from CentOS 7 is complete. However, it is not enough because there is a lack of using LVE Manager to limit the resources used by users, AZDIGI will guide you in detail in the next article.
III. Summary
Through this article, we know what CloudLinux OS is, and how to install CloudLinux OS from CentOS 7 to run DirectAdmin. Hope the article is useful to you.
Wishing you success.
See more useful articles about DirectAdmin at the following link:
If you need assistance, you can contact support in the ways below:
- Hotline 247: 028 888 24768 (Ext 0)
- Ticket/Email: You use the email to register for the service and send it directly to: support@azdigi.com
