
Nội dung
In today’s article, AZDIGI will show you how to install Easy Spam Fighter on DirectAdmin to restrict the problem of Spam Email going in and out of your server.
I. What is Easy Spam Fighter?
Easy Spam Fighter is a spam scoring software for incoming and outgoing mail. If the spam score exceeds the allowable limit, the message is considered spam.
With more and more people using email services and control panels like cPanel and DirectAdmin becoming increasingly popular, providing professional email services on these platforms is not lacking. And with that, we will need a spam filter to avoid turning our server IP into an untrusted IP address.
Let’s continue to follow the article to know how to install Easy Spam Fighter on DirectAdmin.
II. Install Easy Spam Fighter on DirectAdmin
To install Easy Spam Fighter on DirectAdmin, we follow these 2 steps.
Step 1: SSH into your DirectAdmin system
To install Easy Spam Fighter on DirectAdmin, we first need to SSH or access your VPS/server with root privileges. If you don’t know how to SSH into your VPS/Server, you can refer to the following tutorial:
After successfully SSH, we continue with step 2 to perform the Easy Spam Fighter installation commands on DirectAdmin.
Step 2: Execute the Easy Spam Fighter installation commands on DirectAdmin
First, check if your VPS/Server is running CustomBuild 2.0 version. To check the version of CustomBuild you are using, please check out the following short tutorial:
In case your CustomBuild version is lower than 2.0 then you need to upgrade CustomBuild 1.x to 2.0 , you can check out the following tutorial:
After having CustomBuild 2.0, we continue to perform the Easy Spam Fighter installation commands, although it is not difficult, but it is quite a lot of commands. Therefore, I will explain in detail each command for you to understand.
Let’s execute the commands below:
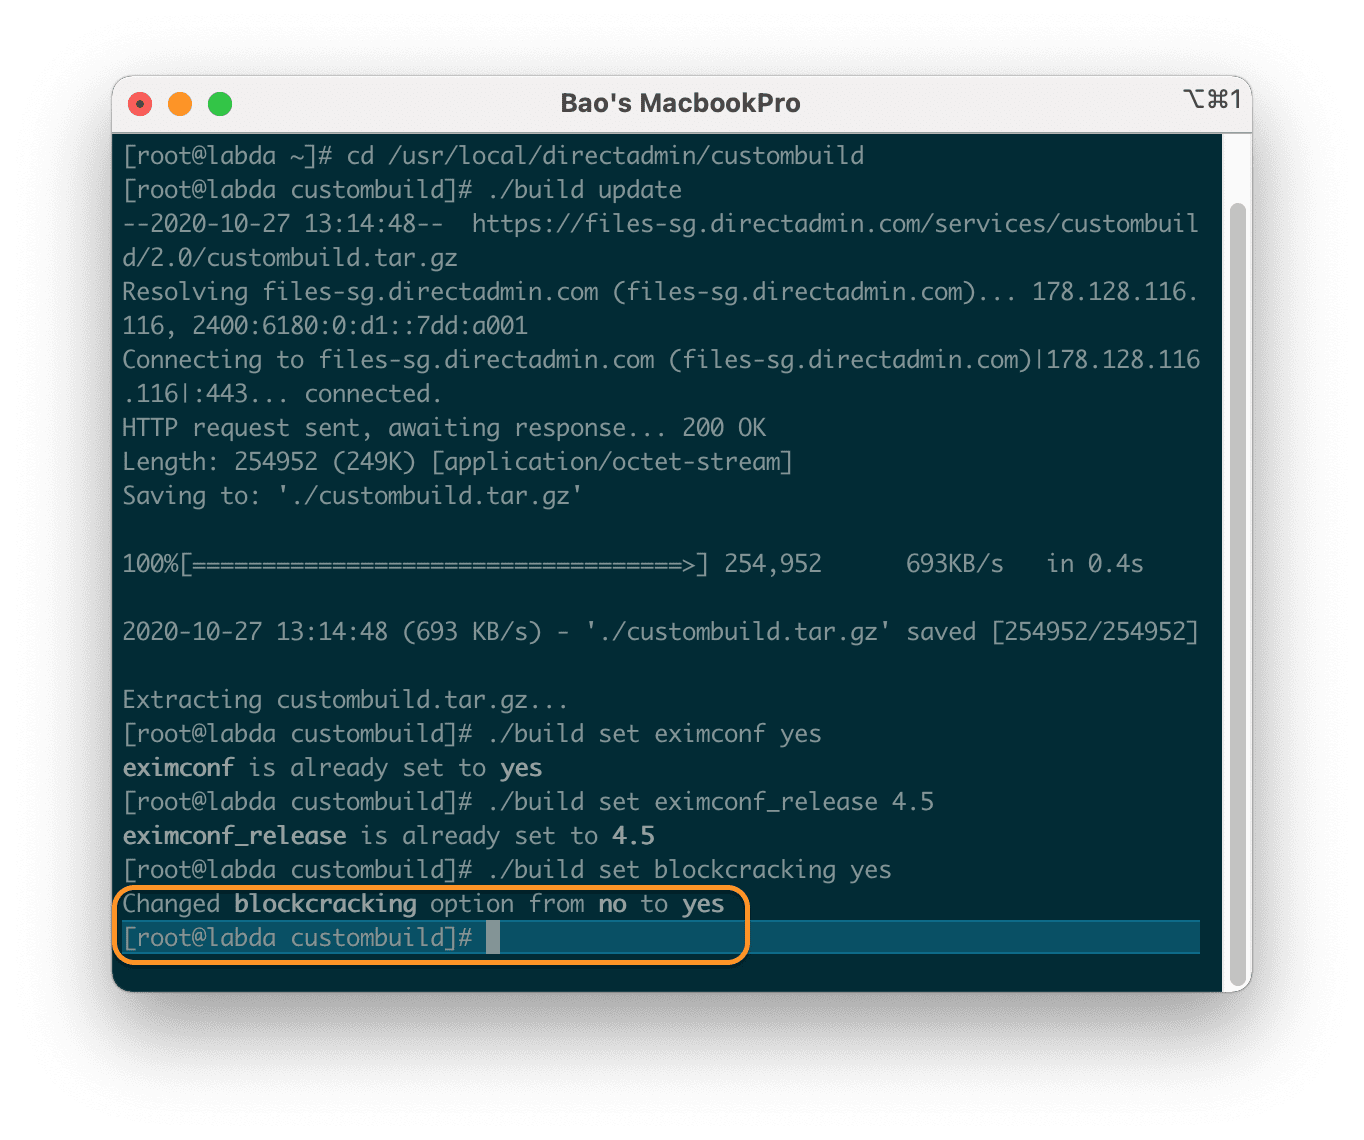
cd /usr/local/directadmin/custombuild
./build update
./build set eximconf yes
./build set eximconf_release 4.5
./build set blockcracking yes
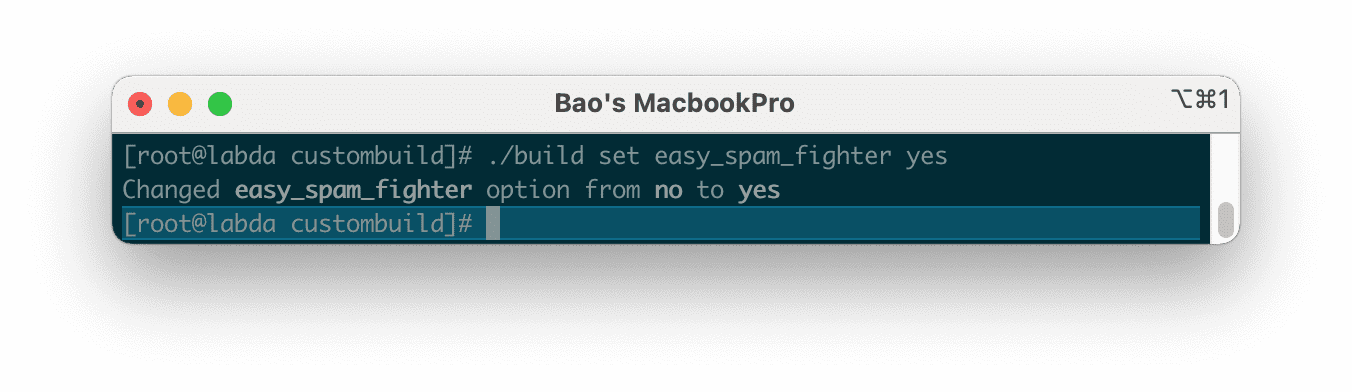
./build set easy_spam_fighter yes
./build set spamd spamassassin
./build set exim yes
./build exim
./build set dovecot_conf yes
./build dovecot_conf
./build spamassassin
./build update
./build exim_conf
Explanation of the above commands:
- Command 1: Move to the
directadminfolder. - Command 2: Update
custombuild script. - Command 3: Enable the
eximconfoption in the configuration. - Command 4: After enabling
eximconf, we need to select the version to install. The latest version will be 4.5, we can track the latest version at this link: SpamBlocker Versions. - Command 5: Enable the
blockcrackingoption in the configuration. - Command 6: Enable the
easy_spam_fighteroption in the configuration. - Command 7: Adjust
spamassassinwill be anti-spam software in the configuration. - Command 8: Enable the
eximoption in config. - Command 9: Install
eximwith the new configuration. - Command 10: Enable the
dovecot_confoption in the configuration. - Command 11: Install
dovecot_confwith the new configuration. - Command 12: Install
spamassassin. - Command 13: Update the
custombuild scriptscript again. - Command 14: Install
exim_confwith the new configuration.
Here is my installation process:
easy_spam_fighter option in the configuration.
spamassassin will be anti-spam software in the configuration.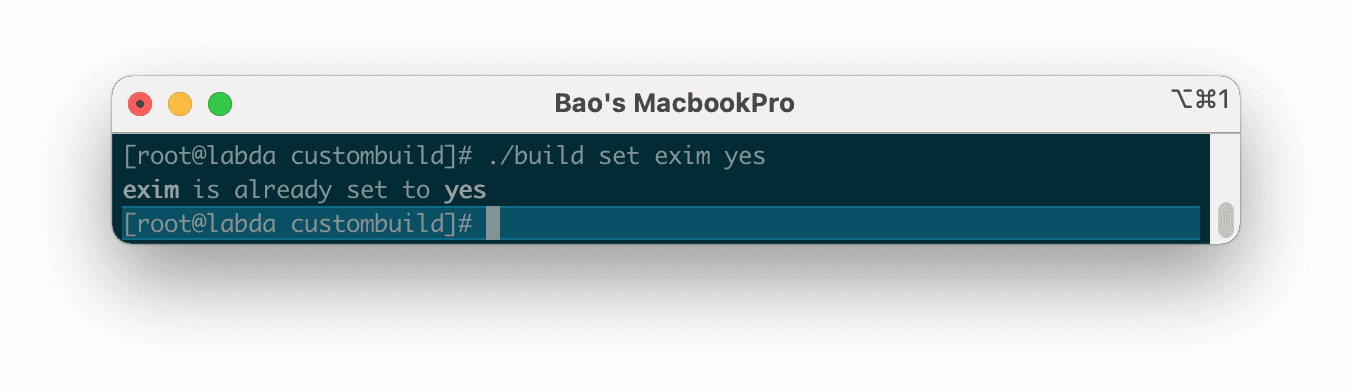
exim option in config. However, the default configuration is enabled.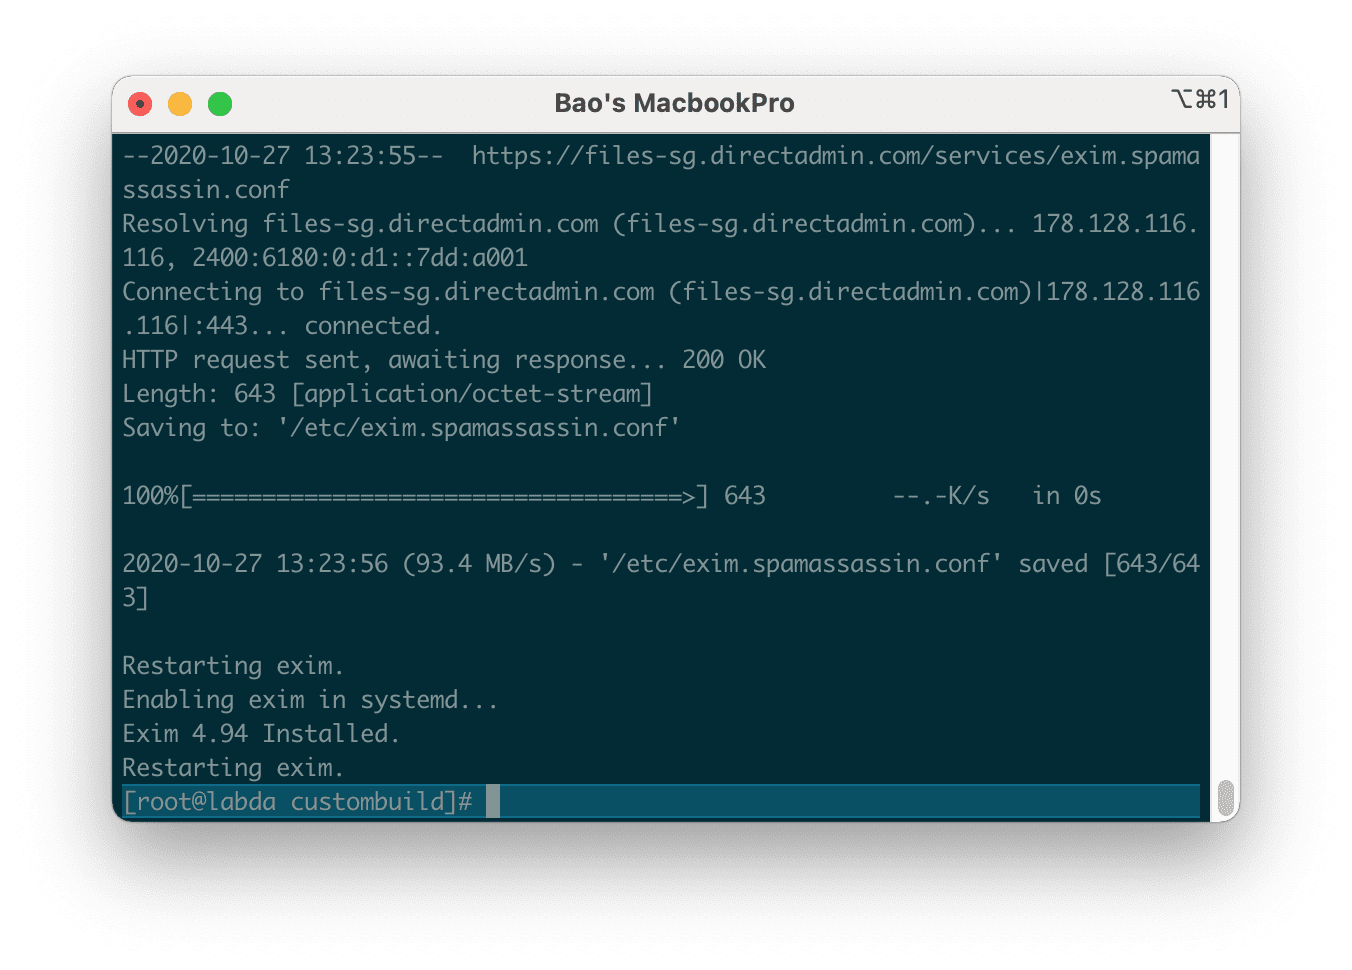
exim with the new configuration. As shown above, I have reinstalled it.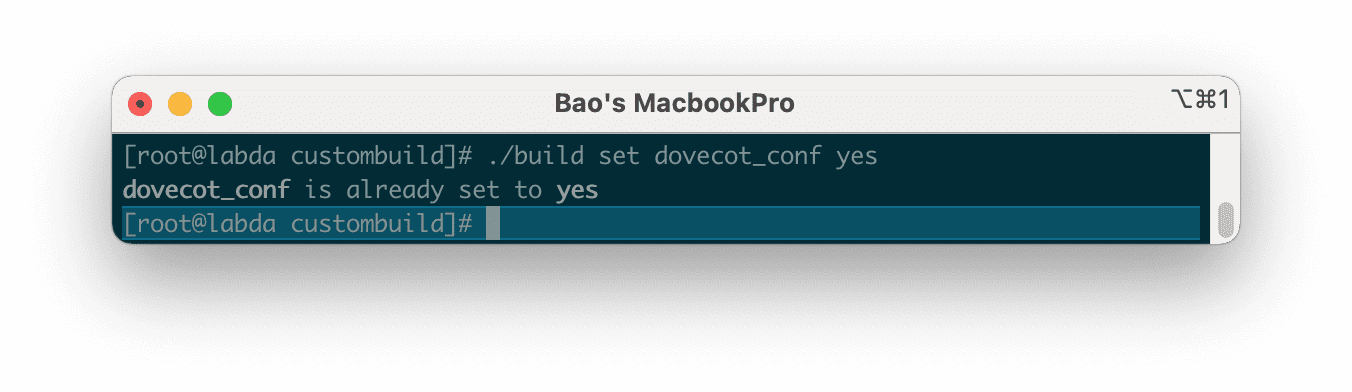
dovecot_conf option in the configuration. However, the default configuration is already enabled.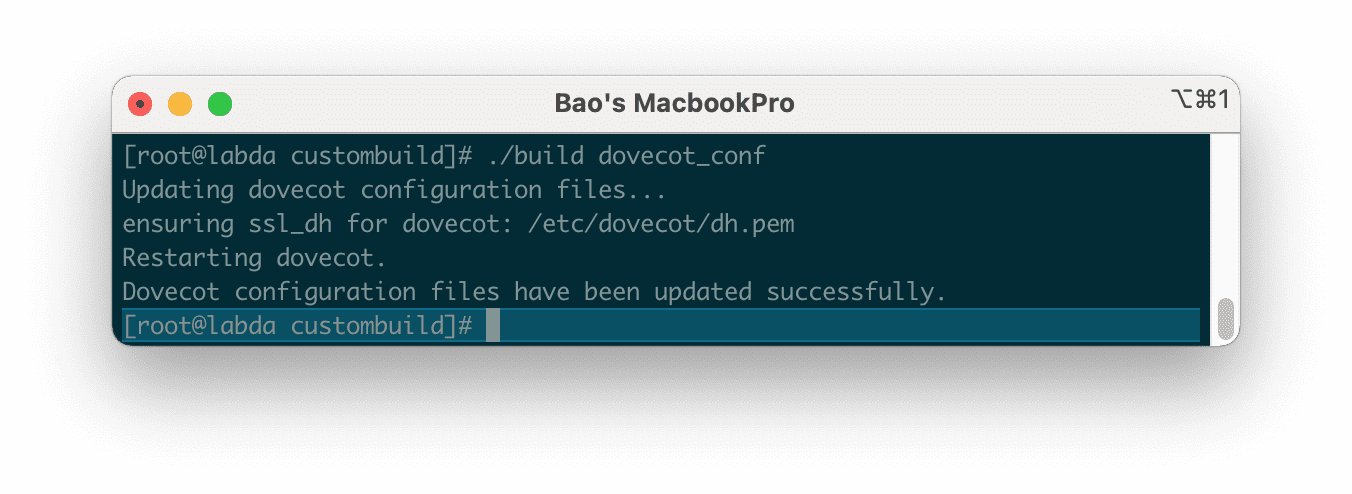
dovecot_conf with the new configuration.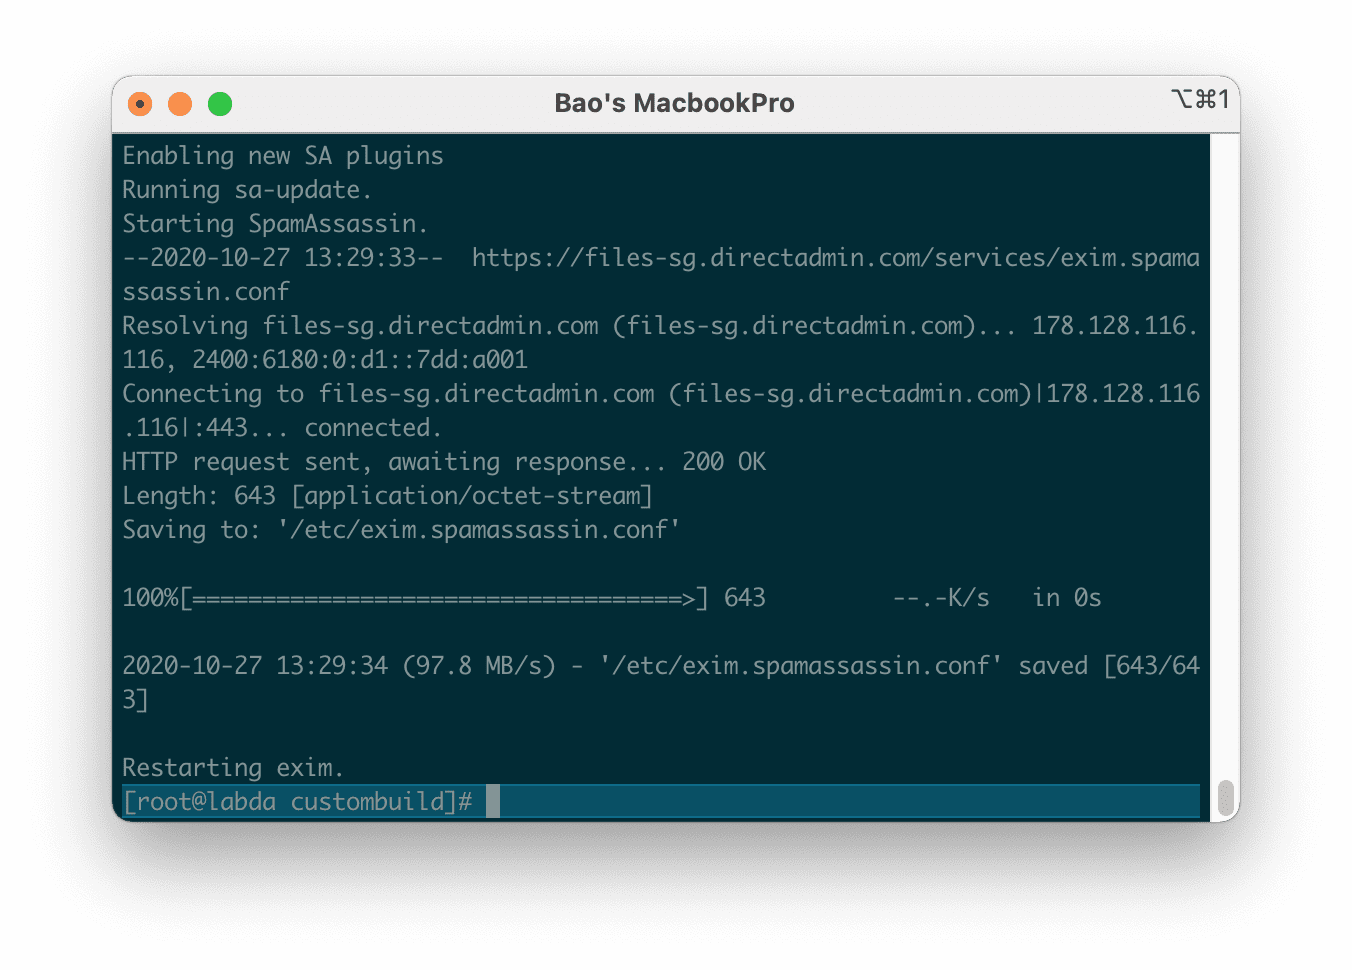
spamassassin.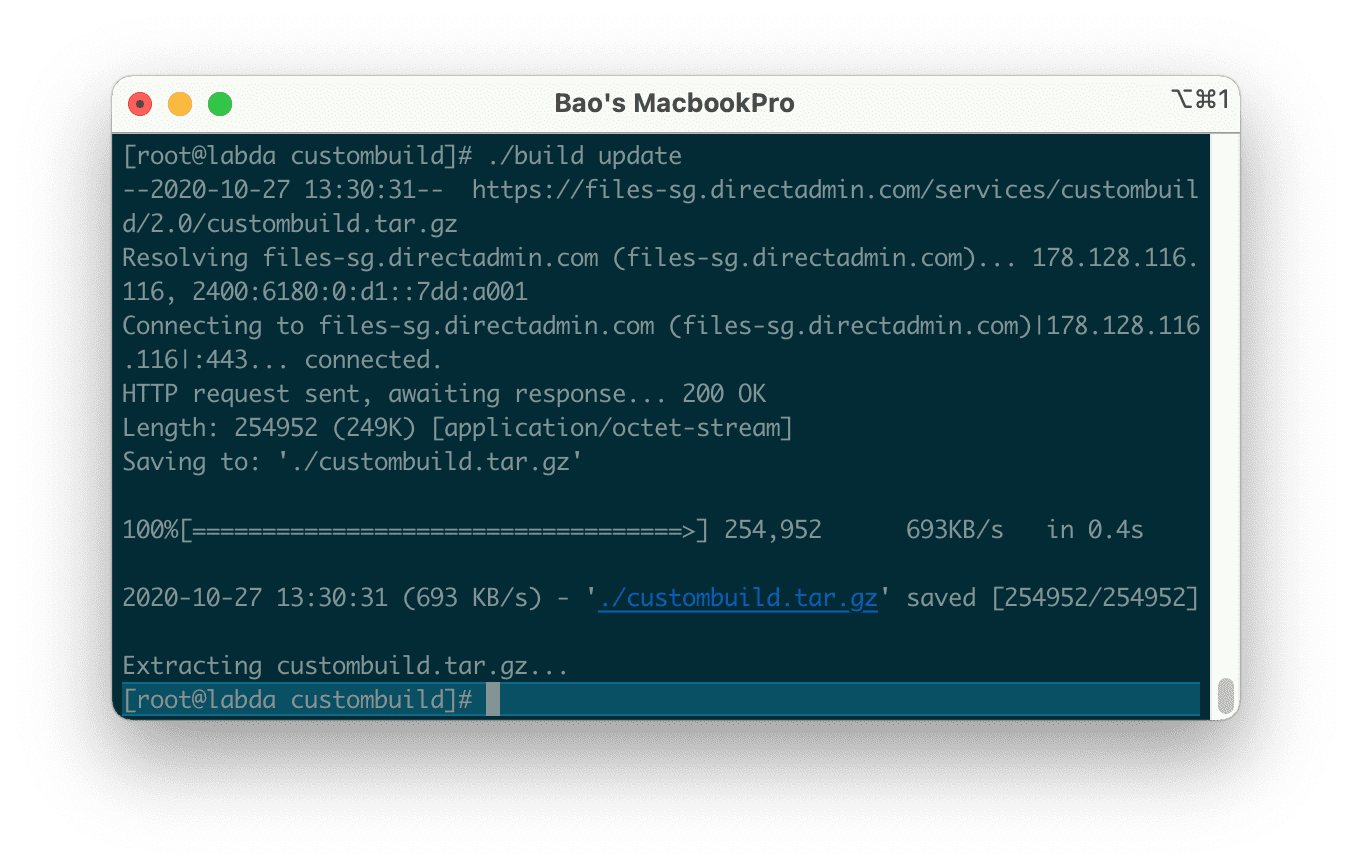
custombuild script script again.
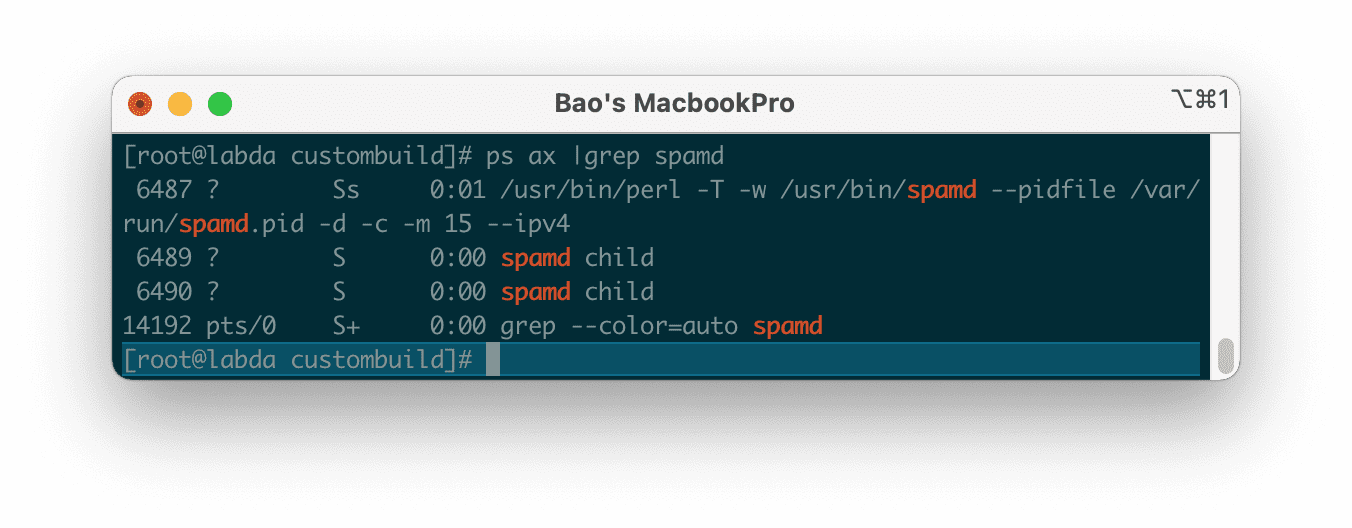
exim_conf with the new configuration.So we have successfully installed Easy Spam Fighter on DirectAdmin. However, how to know if Easy Spam Fighter is working? You run the following command:
ps ax |grep spamd
If the screen shows something similar to below, which means Easy Spam Fighter is active.
To use it, we select the user to configure and access the Spamassassin Setup feature as shown below:
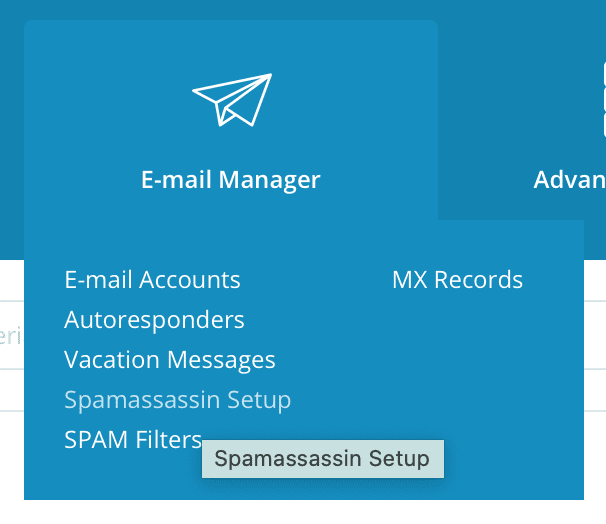
and click Enable Spamassassin.

Below is the interface of this feature. Depending on your needs, you can configure it accordingly.

III. Summary
Hopefully, through this article, you know how to install Easy Spam Fighter on DirectAdmin and how to activate it for users who need it.
Hope this article will be of help to you.
