
Nội dung
In this article, AZDIGI will guide you to install Memcached on DirectAdmin to help speed up your website.
I. Overview
Memcached is a system storing copies of objects and data accessed multiple times to speed up access. It is commonly used to optimize data loading from the database for web-based applications. Initially, the memcached system was developed by Danga Interactive and used for LiveJournal. Then memcached became popular and used on other websites.
Memcached is highly scalable, based on key-value stores value and object whenever RAM is available for the fastest access, without having to access databases or resources raw on the hard disk.
II. Steps to install Memcached on DirectAdmin
To install Memcached on DirectAdmin, follow these 3 steps:
Step 1. SSH into the Server/VPS system
To install Memcached on DirectAdmin, we first need to SSH or access your VPS/server with root privileges. If you don’t know how to SSH into your VPS/Server, you can refer to the following tutorial:
Step 2: Install the Memcached service
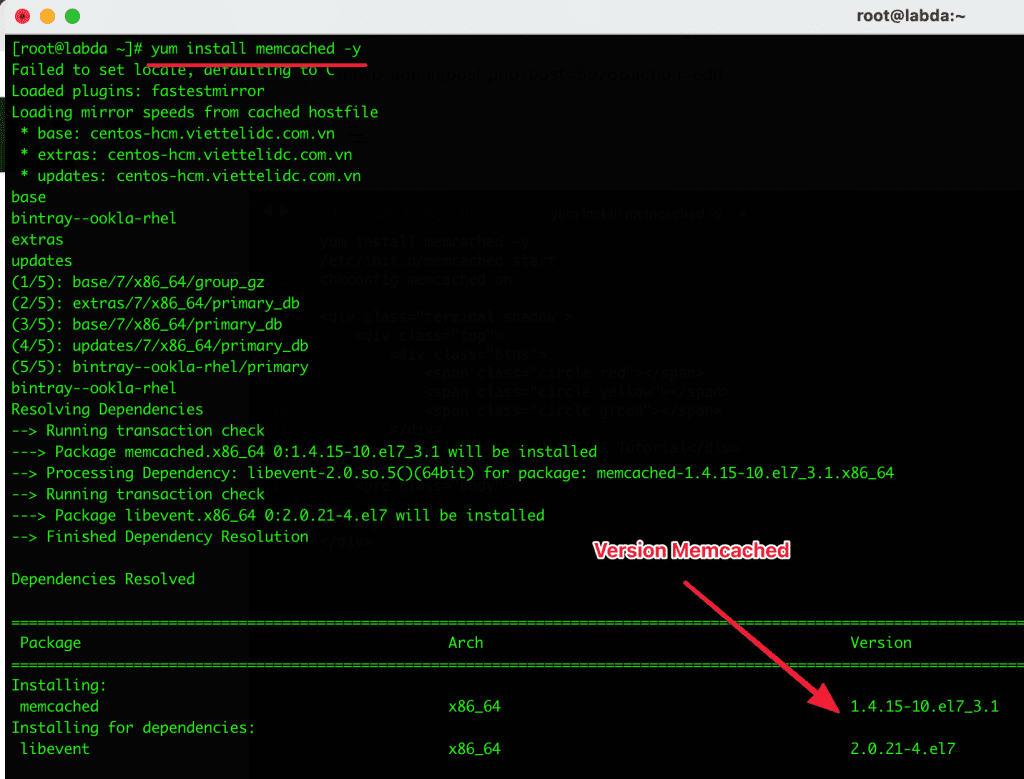
To install Memcached on DirectAdmin, you need to install the memcached service, we will use the yum command to install:
yum install memcached -y
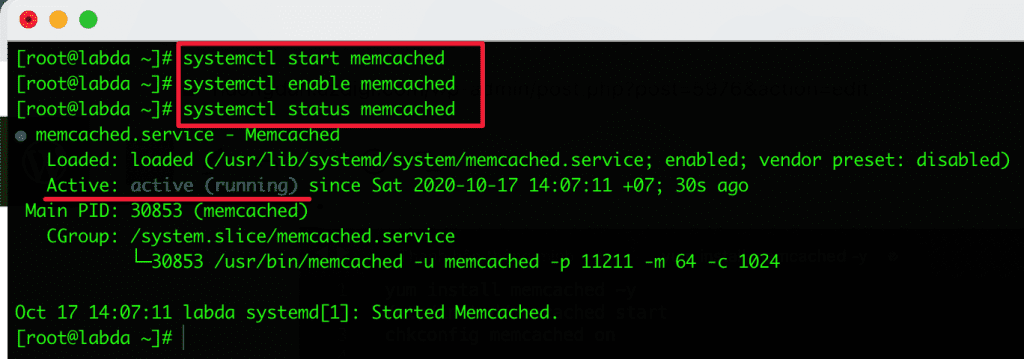
systemctl start memcached
systemctl enable memcached
systemctl status memcached
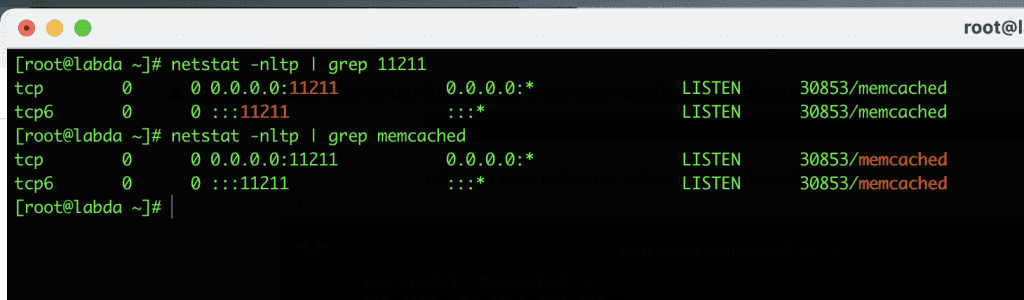
Thus, completing the installation of Memcached on DirectAdmin, the next step is to install the php extension memcache to connect. Memcached listens to Port 11211, so you need to open port 11211 for this to work. If you are using CSF, you can refer to the following article to know how to use CSF:
To be sure, you can netstat check with port or services:
netstat -nltp | grep 11211
netstat -nltp | grep memcached
Step 3: Install libmemcached and memcached module
After installing Memcached on DirectAdmin, you need to install the libmemcached library and the memcached module to connect. I have consulted some documents on how to install Memcached on DirectAdmin, we need to manually install libmemcached and then install the memcached module. In this article, I guide you to use an available script to install memcached, memcached-devel, libmemcached-devel, libmemcached.
You run the following commands to install:
wget https://launchpad.net/libmemcached/1.0/1.0.18/+download/libmemcached-1.0.18.tar.gz
gunzip libmemcached-1.0.18.tar.gz
tar -xvf libmemcached-1.0.18.tar
cd libmemcached-1.0.18
./configure
cd /usr/local/directadmin/scripts/custom
wget https://raw.githubusercontent.com/poralix/directadmin-utils/master/php/php-extension.sh -O php-extension.sh
chmod 750 php-extension.sh
./php-extension.sh install memcached
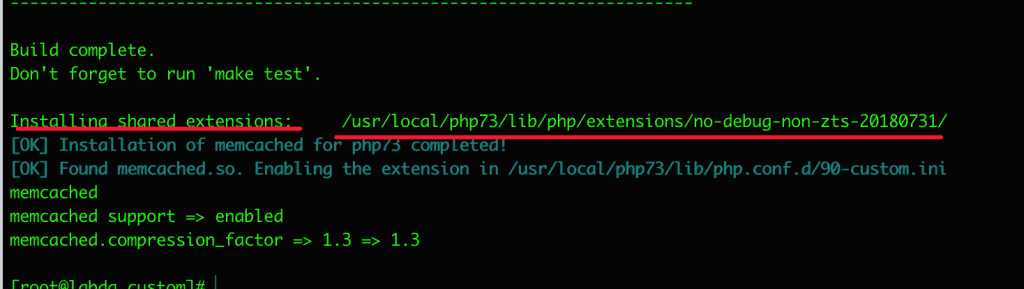
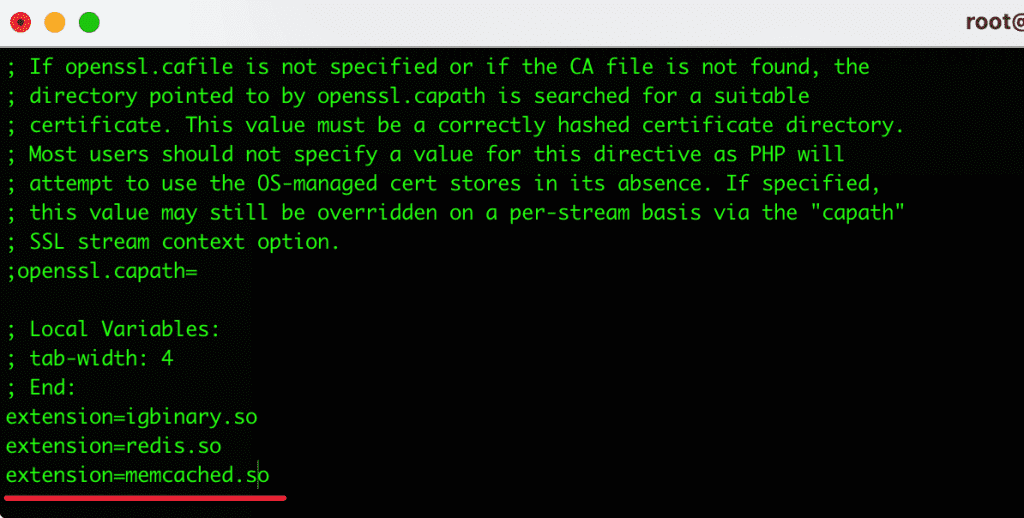
When you finish running the install memcached command, you will see a path Installing shared extensions /usr/local/php7x/lib/php/extensions/no-debug-non-zts-20180731/ as shown below. Open the php.ini file and add the extension memcached.so:
Use the command php -i | grep php.ini to search for the loader file php.ini. Then scroll to the bottom of the file and add extension=memcached.so as shown below:
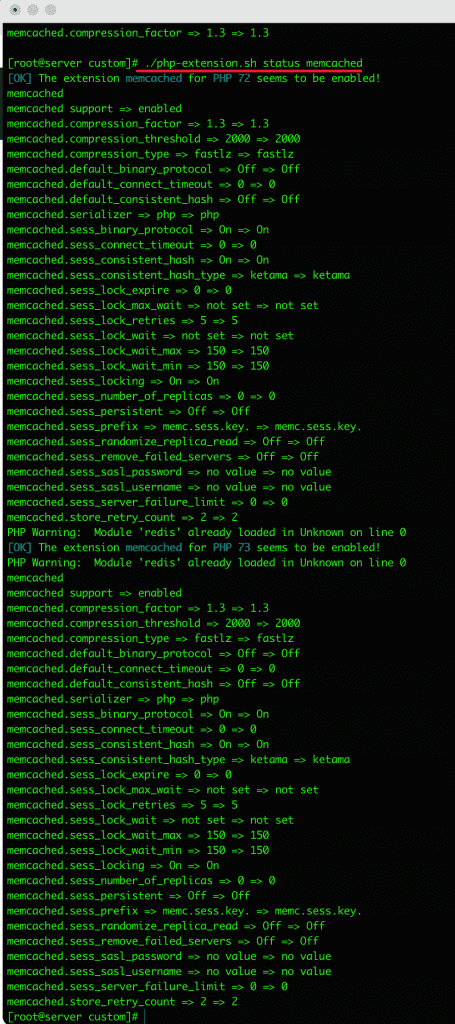
To check memcached operation, use the following command:
wget https://launchpad.net/libmemcached/1.0/1.0.18/+download/libmemcached-1.0.18.tar.gz
gunzip libmemcached-1.0.18.tar.gz
tar -xvf libmemcached-1.0.18.tar
cd libmemcached-1.0.18
./configure
cd /usr/local/directadmin/scripts/custom
./php-extension.sh status memcached
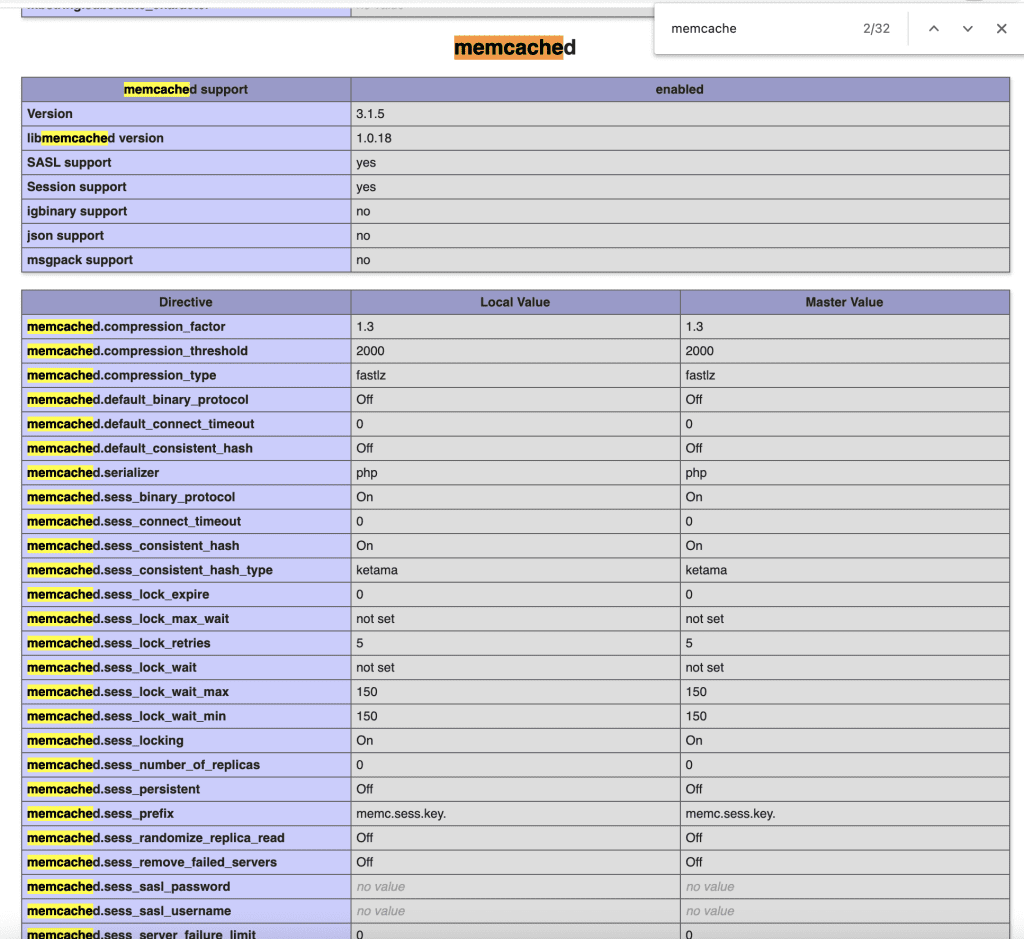
Another method to check the memcached extension is to create an info.php file and check it as shown below. Go to the directory containing the source code, create a new file named info.php and paste the following code:
<?php
phpinfo();
?>
After creating the file info.php, go to mydomain/info.php to check:
Step 4: Configure Memcached on the website
After installing Memcached on DirectAdmin is complete, let’s configure Memcached on the website. In this article, I use the LiteSpeed Cache Plugin to configure because, by default, Litespeed cache has built-in support for memcache and Redis via TCP connection.
You open LiteSpeed Cache => Cache => Object and turn it on and enter the following:
- Object Cache: ON
- Method: Memcached
- Host: localhost
- Port: 11211. By default, memcached uses this port.

III. Summary
Hopefully, this article will be informative and useful to you after installing and using it. In fact, when using memcached, my website works very well. So try to experience it.
If you need support, you can contact our Technical Department for the fastest support.
You can see more useful articles about DirectAdmin at the following link:
If you need assistance, you can contact support in the ways below:
- Hotline 247: 028 888 24768 (Ext 0)
- Ticket/Email: You can use your email to register for the service and send it directly to: support@azdigi.com
