
Nội dung
In this article, AZDIGI will show you how to install paid SSL on DirectAdmin in the simplest and fastest way.
I. Overview
Currently, having a website without SSL will lose points in front of visitors and in front of leading search engines like Google because since July 2018, Google has required websites to run ads must have SSL. Similarly, websites with SSL will be favored by Google for higher rankings than websites without SSL certificates.
By default, on DirectAdmin, which has a built-in free SSL feature, Let’s Encrypt, you can completely install it without any cost by following this guide:
However, if your company or business wants to use paid SSL, you can refer to how to install paid SSL on DirectAdmin in this article.
You can refer SSL Certificate service of AZDIGI here:
II. How to install paid SSL on DirectAdmin
In this article, I will take an example that you are using SSL at AZDIGI.
To install a paid SSL on DirectAdmin, we follow these 3 steps.
Step 1: Access your DirectAdmin account
To access your DirectAdmin account, enter the browser address with the information http://IP:2222 and Enter, remember to change the IP to the server IP address or your DirectAdmin hosting IP address.
After accessing your DirectAdmin account, we continue with step 2 to upload and extract the WordPress source code.
Step 2: Configure the basic information of SSL
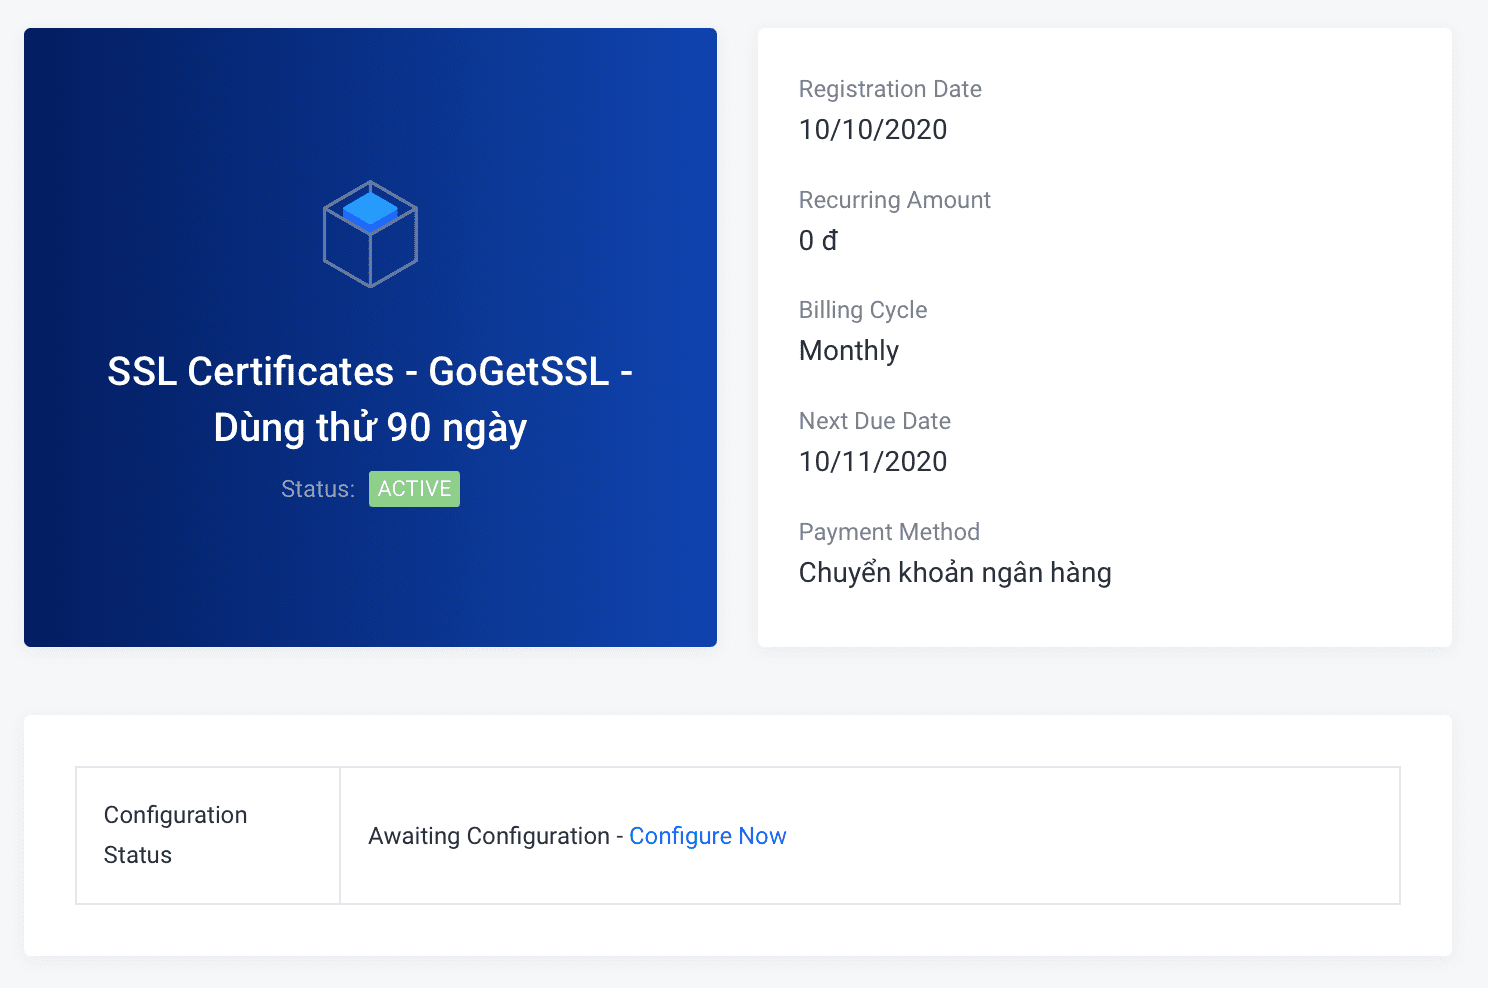
Before configuring SSL into DirectAdmin, we need to fill in the basic information to receive the configuration information. First, go to the SSL admin interface and select Configure Now.
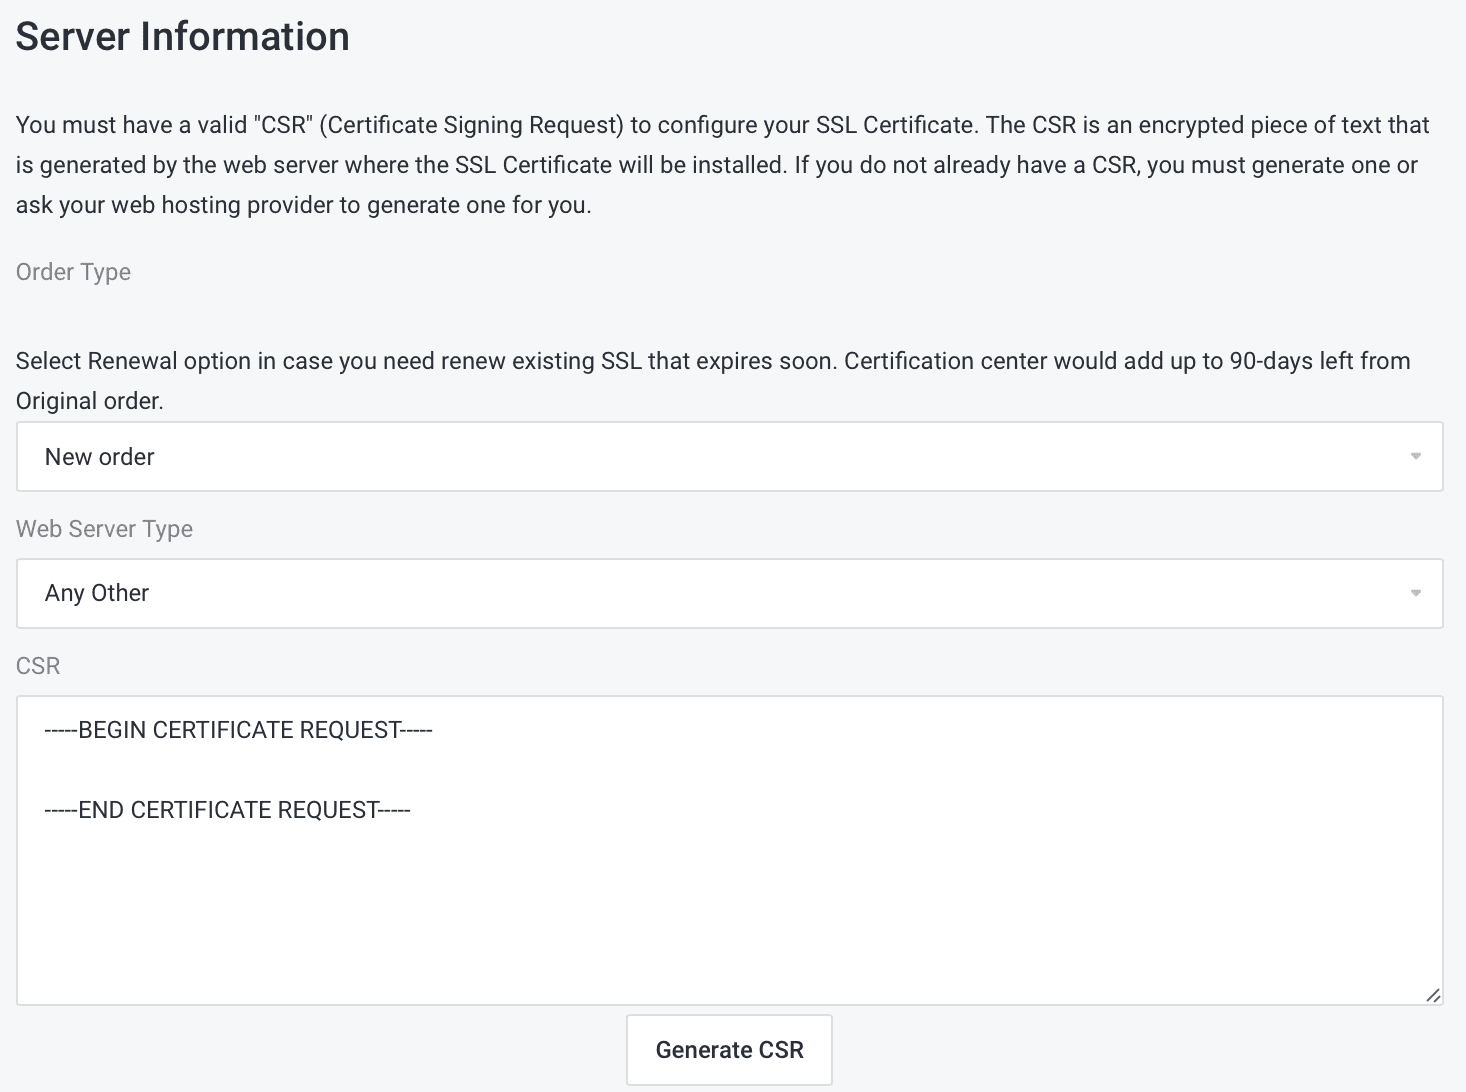
Next, select New order if it is a new registration, and if it is a renewal, select Renewal. For example, I have a new registration, so I choose New order and Any Other for Web Server Type, so your webserver is not IIS. After choosing, click Generate CSR.
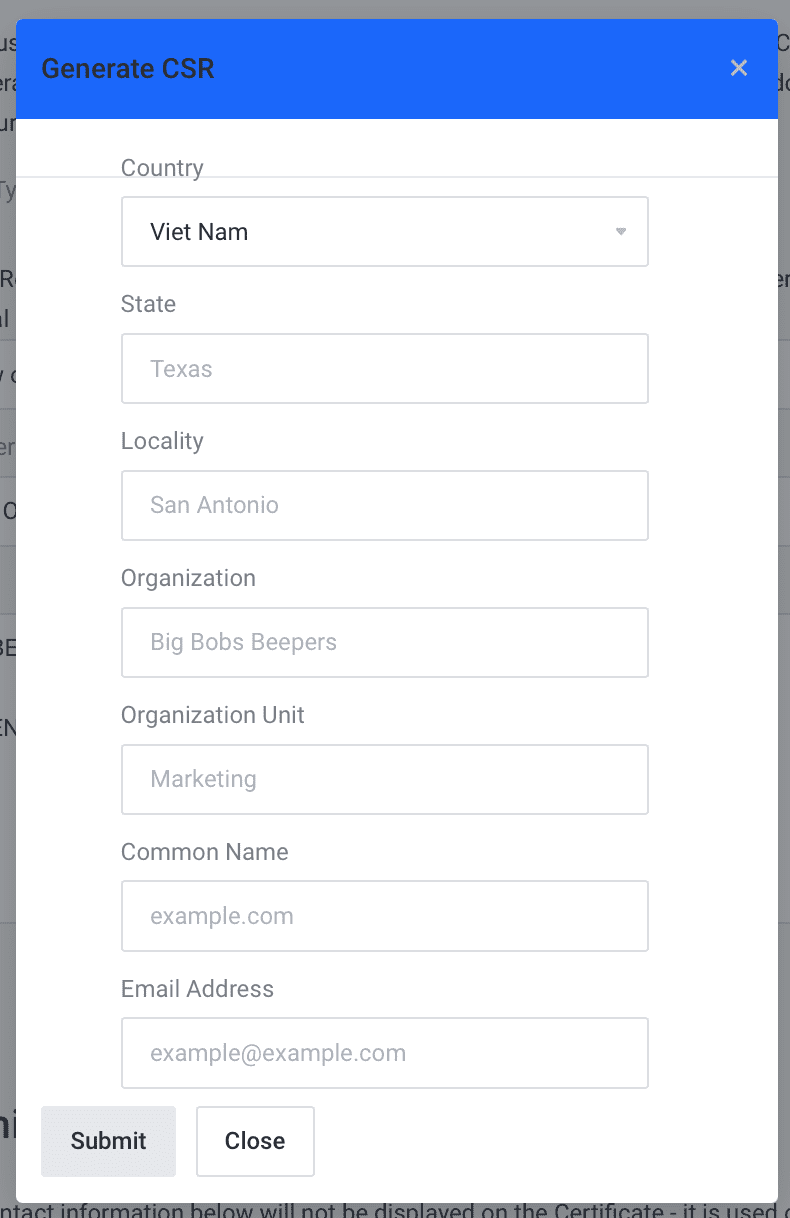
At the Generate CSR interface, fill in the details => click Submit.
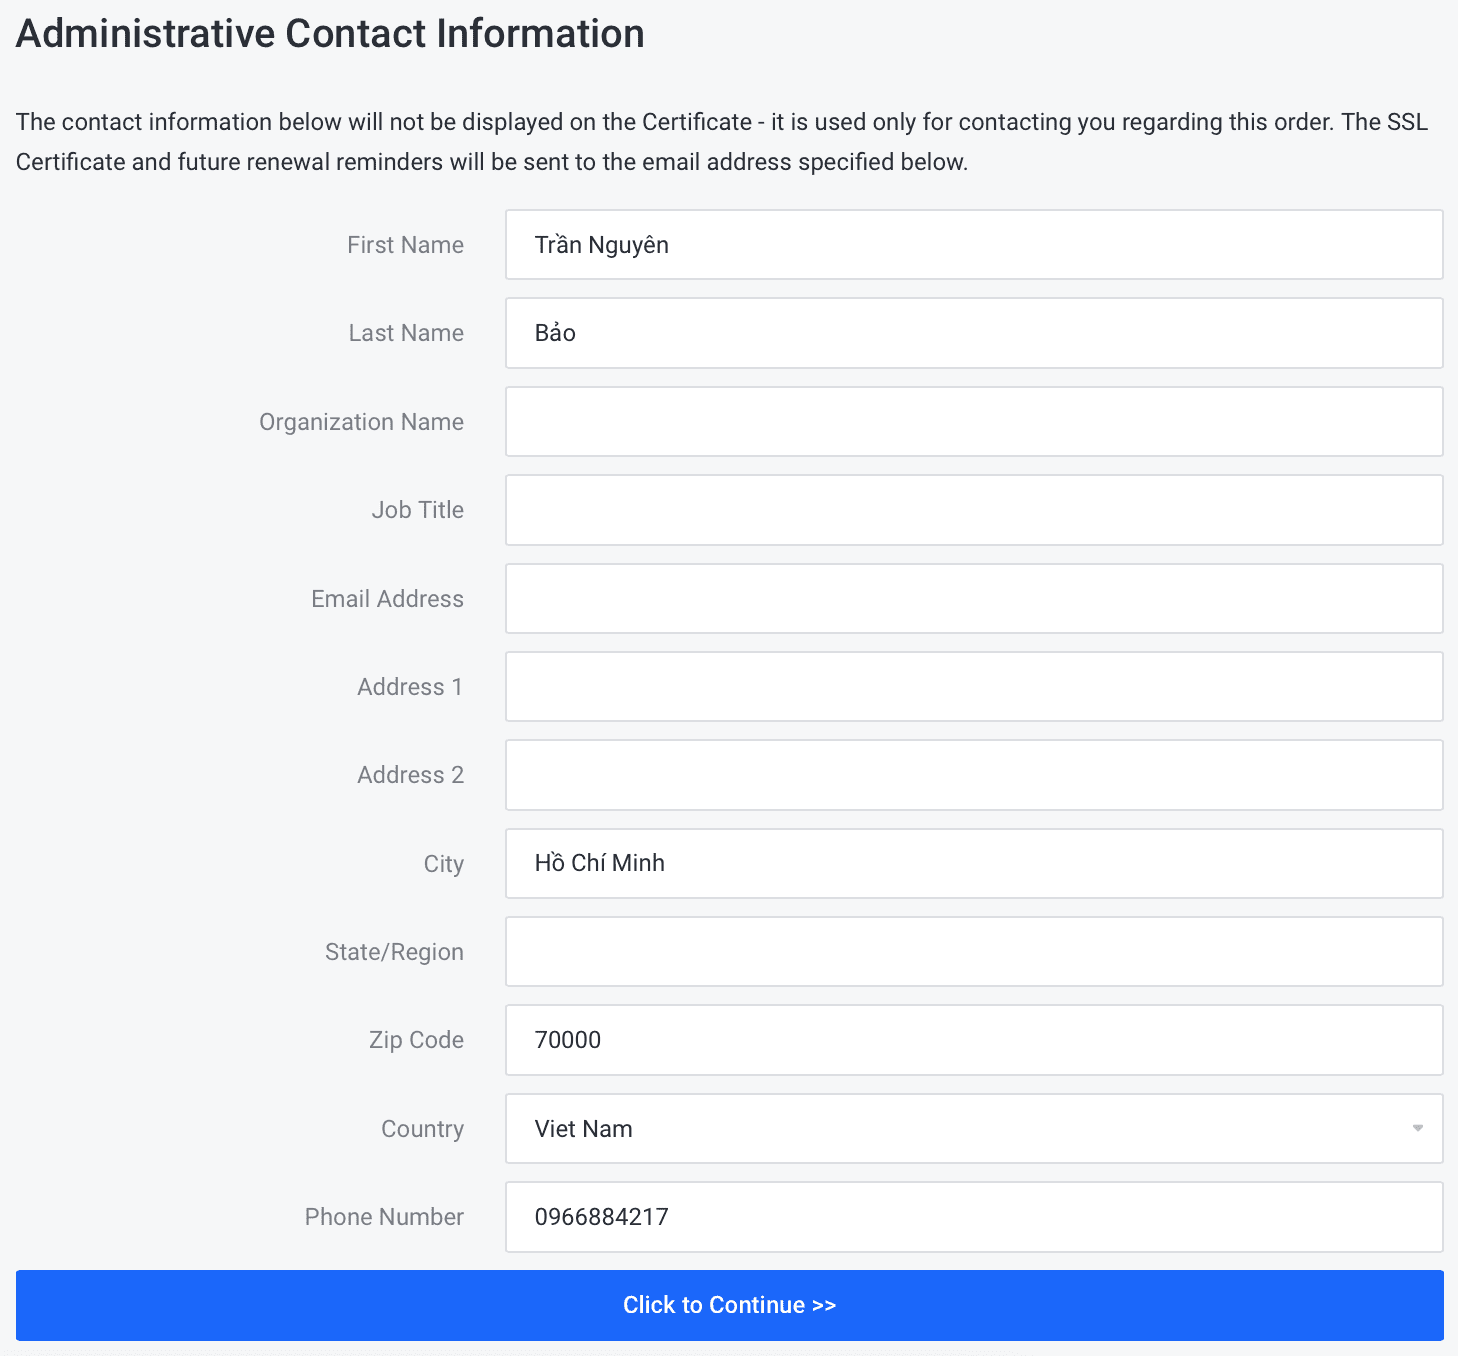
Then scroll down, fill in some administrator information and select Click to Continue.
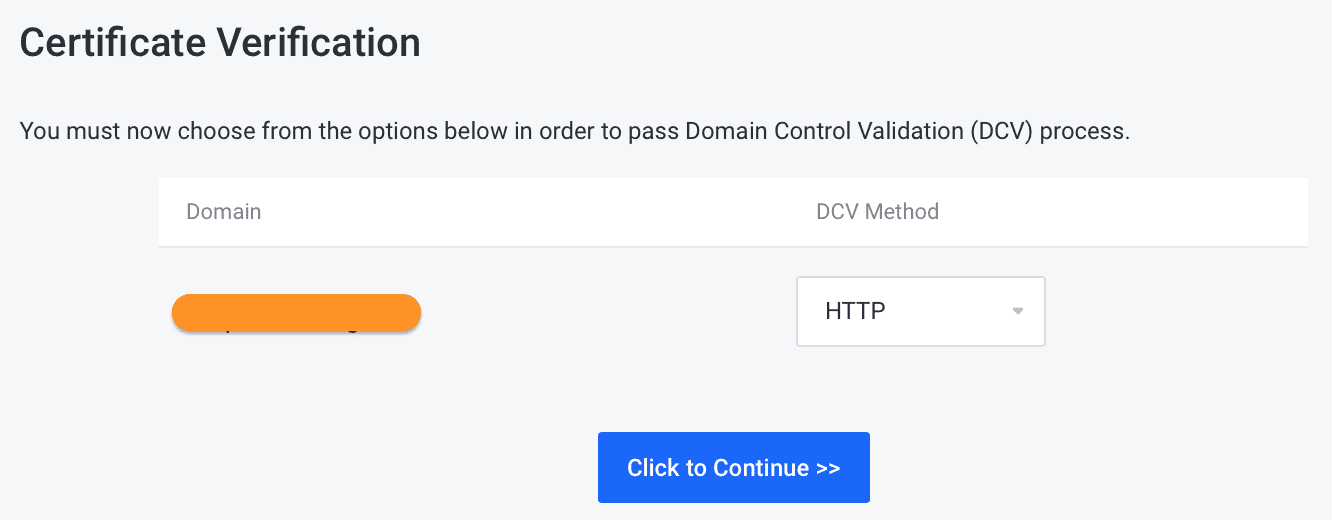
At this step, we need to verify that we are the owner of the website to be granted a certificate. And there are 3 ways to authenticate:
- HTTP: Authentication via txt file but without SSL.
- HTTPS: Authentication via txt file and SSL.
- DNS: Authenticate by adding a CNAME record to the domain admin page.
Here I will choose to authenticate via txt file but without SSL => select Click to Continue.
So we have completed the step of Configuring the basic information of SSL, we continue to step 3 to verify the website owner.
Step 3: Verify the website owner
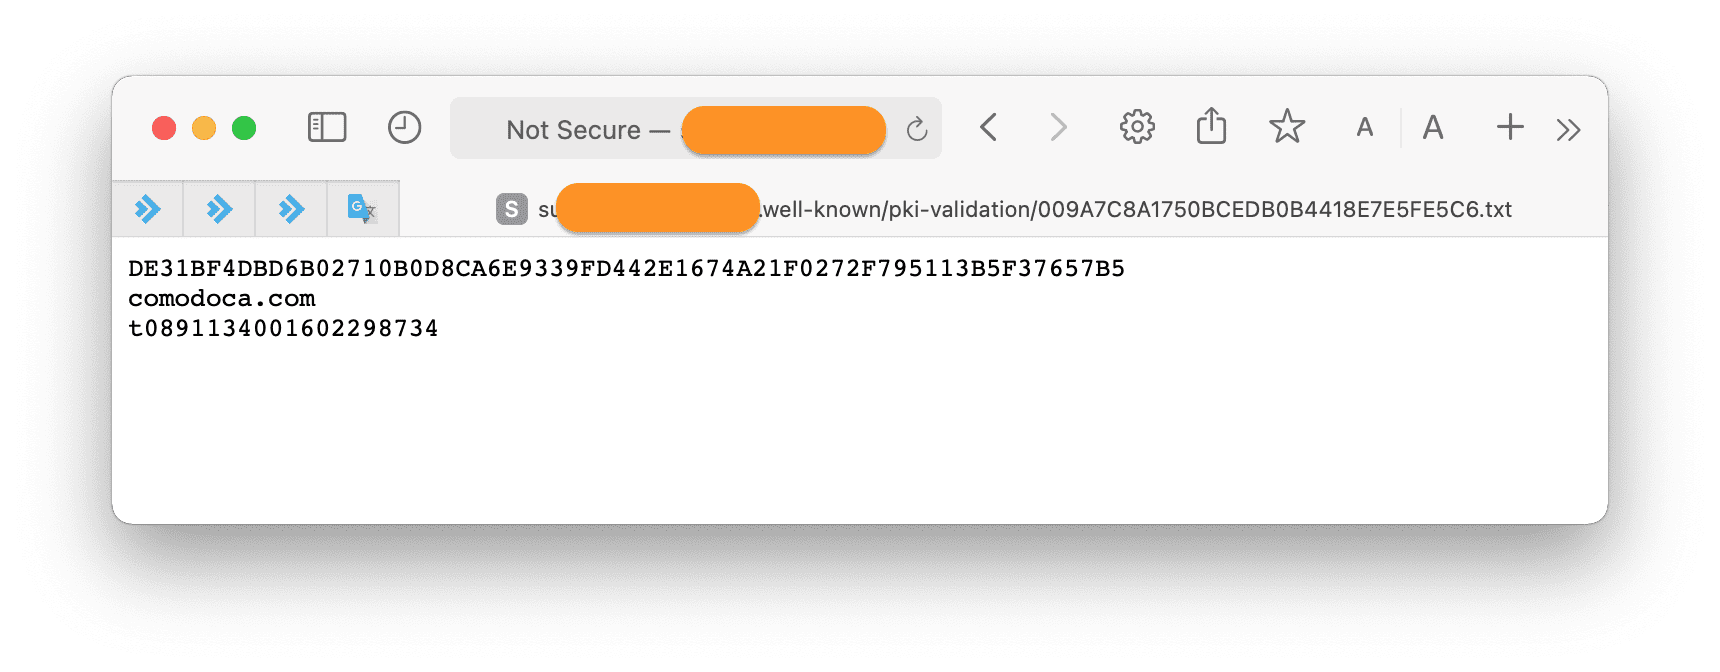
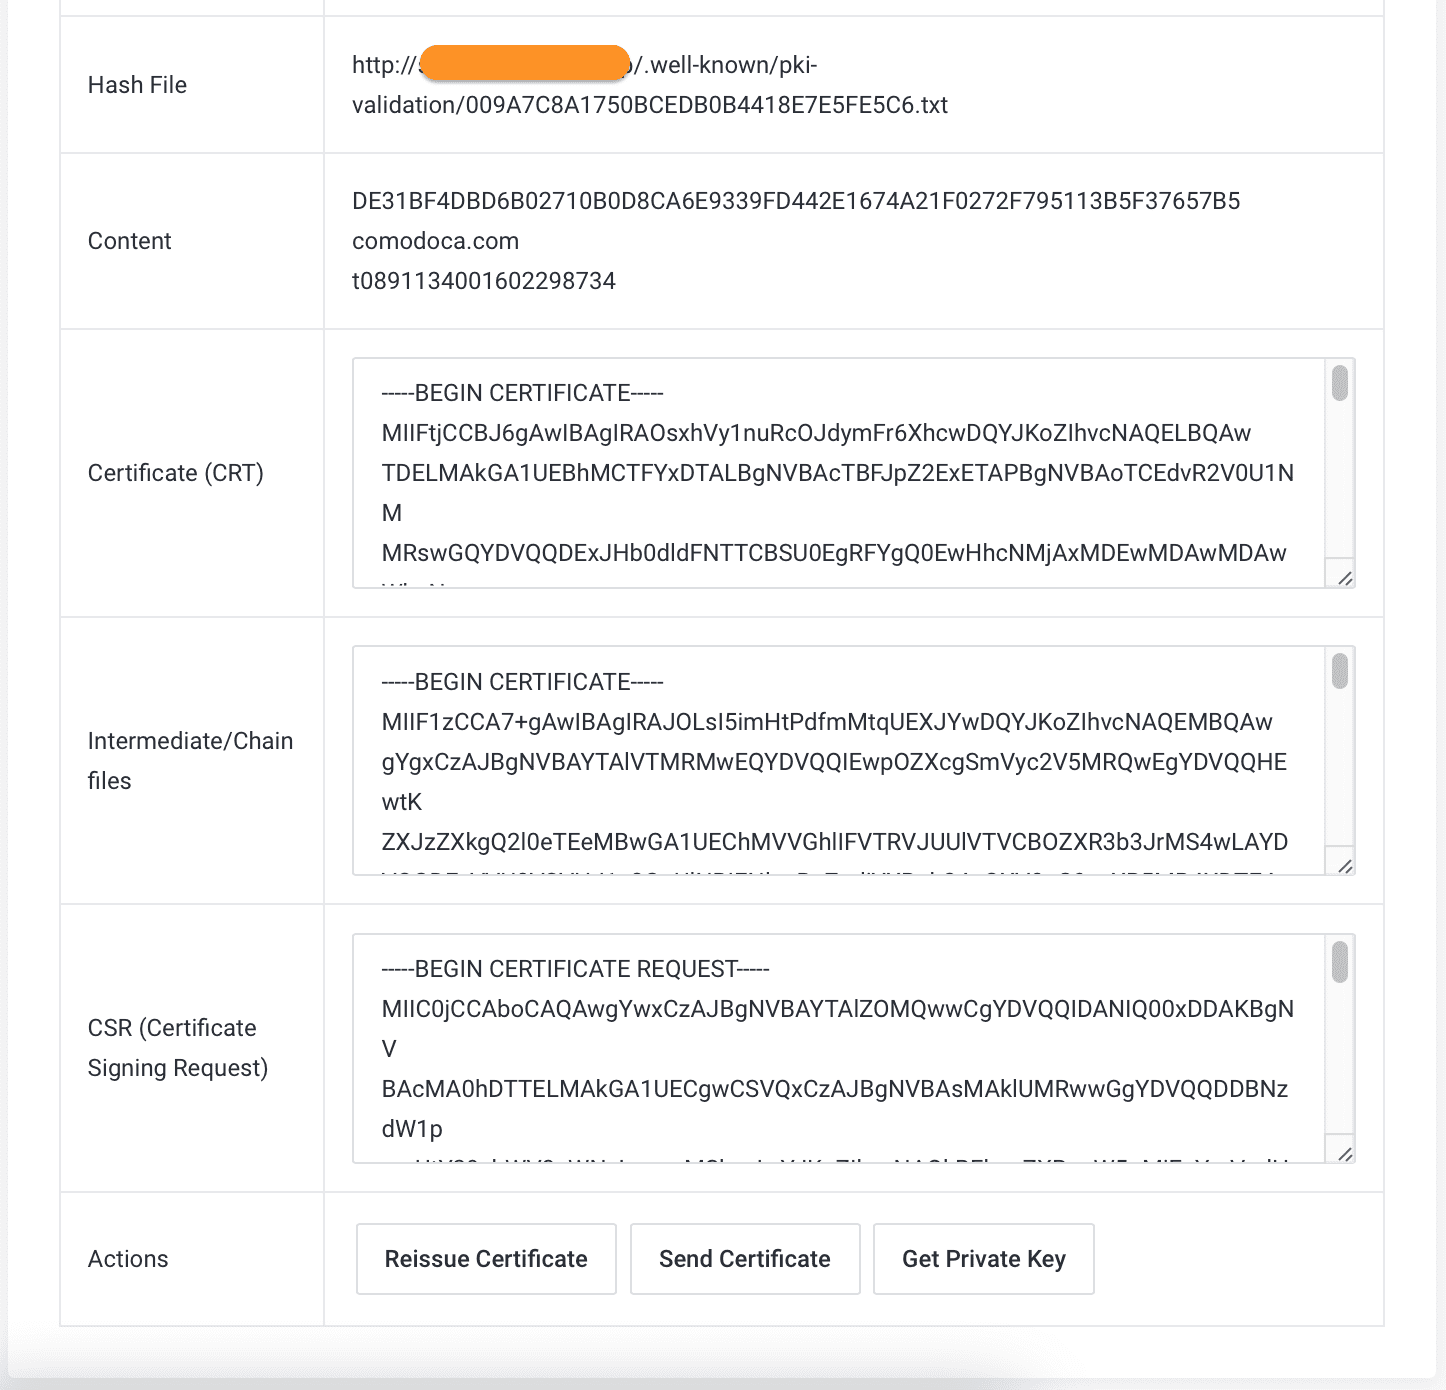
Returning to the SSL details page, we will see the Hash File information for us to authenticate as the website owner, as shown below. Also, once we have that file, we need to copy the content in the Content section to that file.
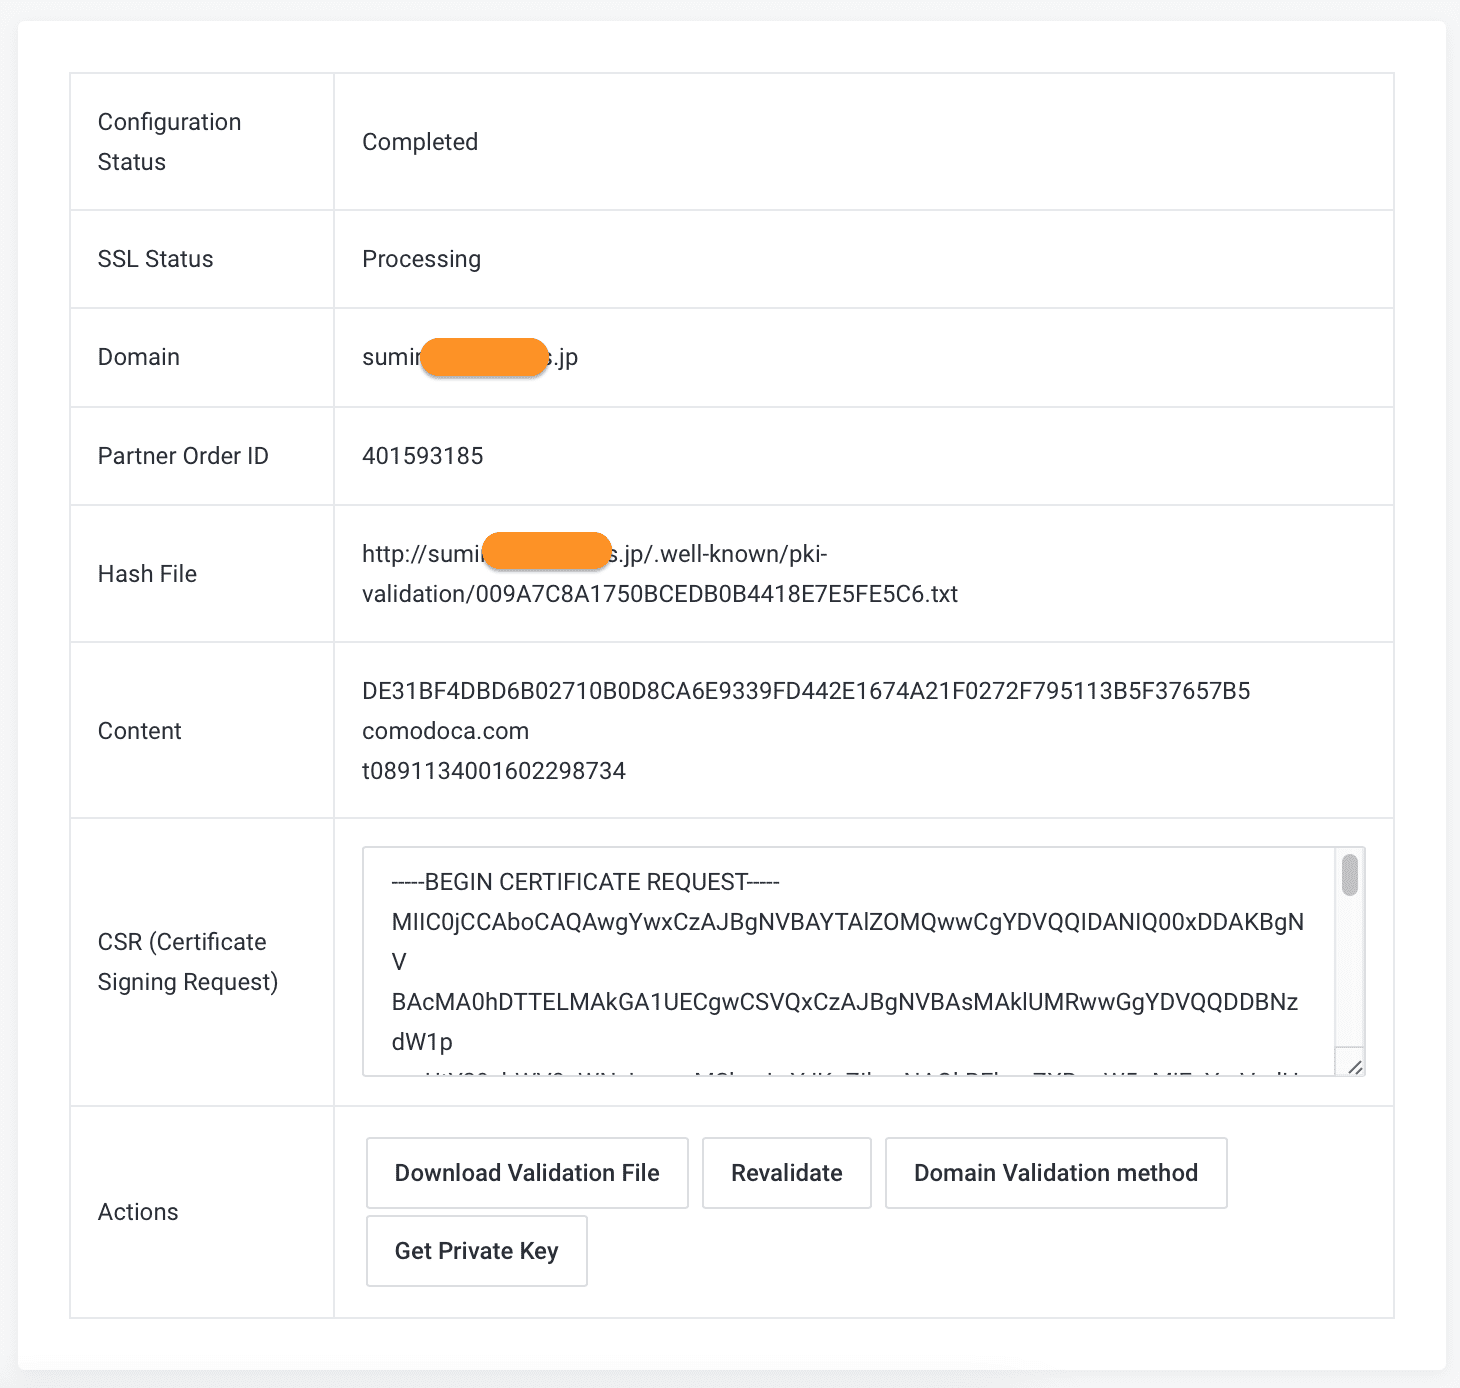
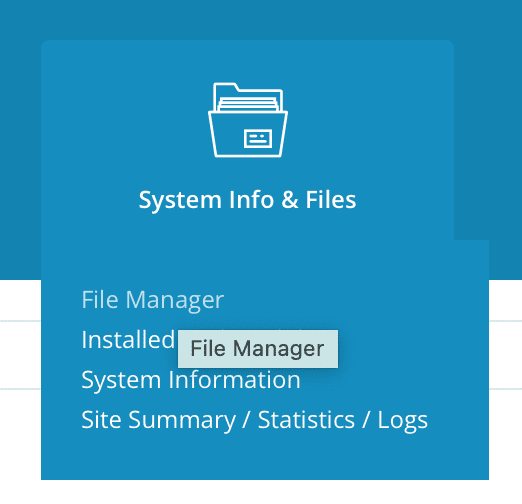
To create a Hash File, access the File Manager feature on DirectAdmin.
Remember to access the correct public_html folder of that website as shown below: Like my illustration below.
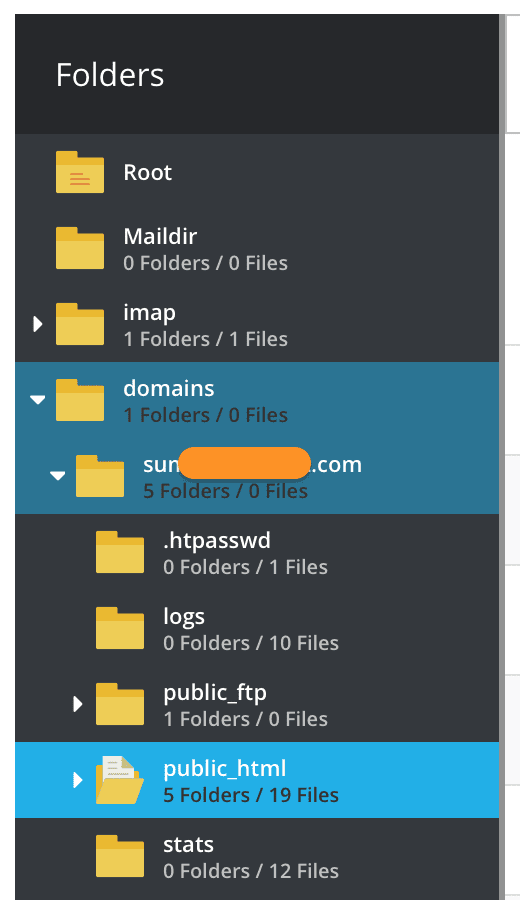
Once you have entered the correct path, you create a new folder with the New Folder button and the directory path .well-know/pki-validation as required by the Hash File entry.
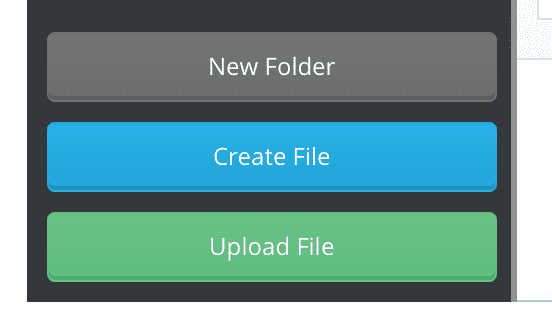
After creating and entering the pki-validation folder, click Create File to create the corresponding xxxxxxxx.txt file. At the same time, copy the content in the Content section to the newly created txt file. Then you try to access the path containing this txt file, check if it shows the correct content as in the Content section.
Then you go back to the SSL control panel and select Revalidate to send the authentication request to the SSL provider.

Wait for a few minutes and press F5 to reload the SSL details page, you will see the details of the SSL certificate.
That’s it, the step of verifying the website owner is complete. We continue to step 4, which is the step to install the paid SSL on DirectAdmin.
Step 4: Install paid SSL on DirectAdmin with the information received in step 3
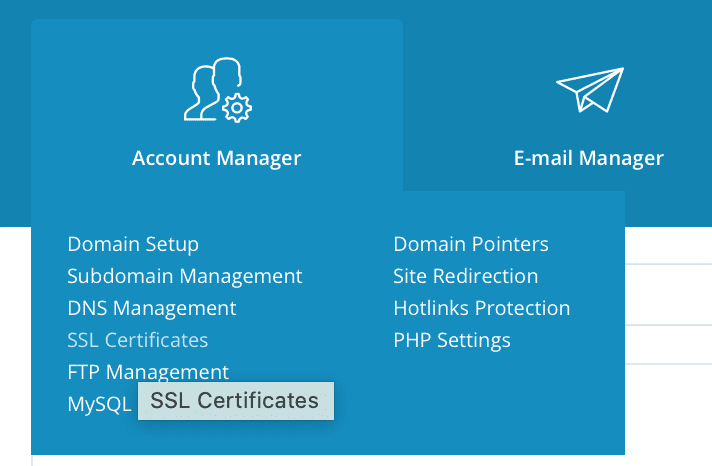
You return to the DirectAdmin interface and select SSL Certificates to enter the SSL installation interface.
At this interface, select Paste a pre-generated certificate and key to install the purchased SSL.

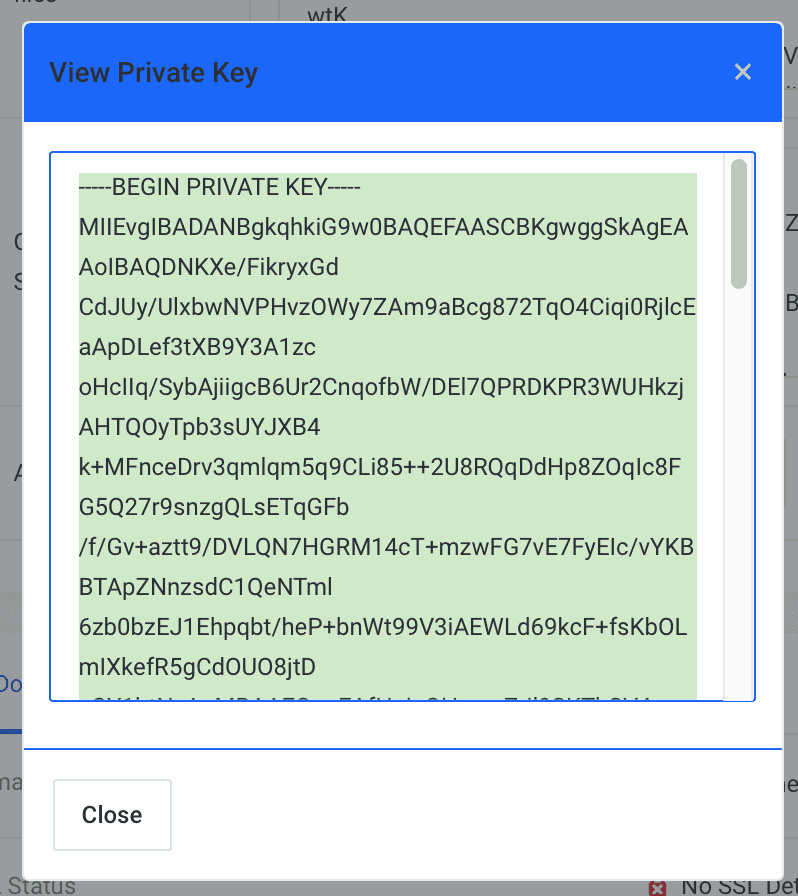
In the first box, you will enter the Private Key. You return to the SSL detailed interface and select Get Private Key to get the Private Key.
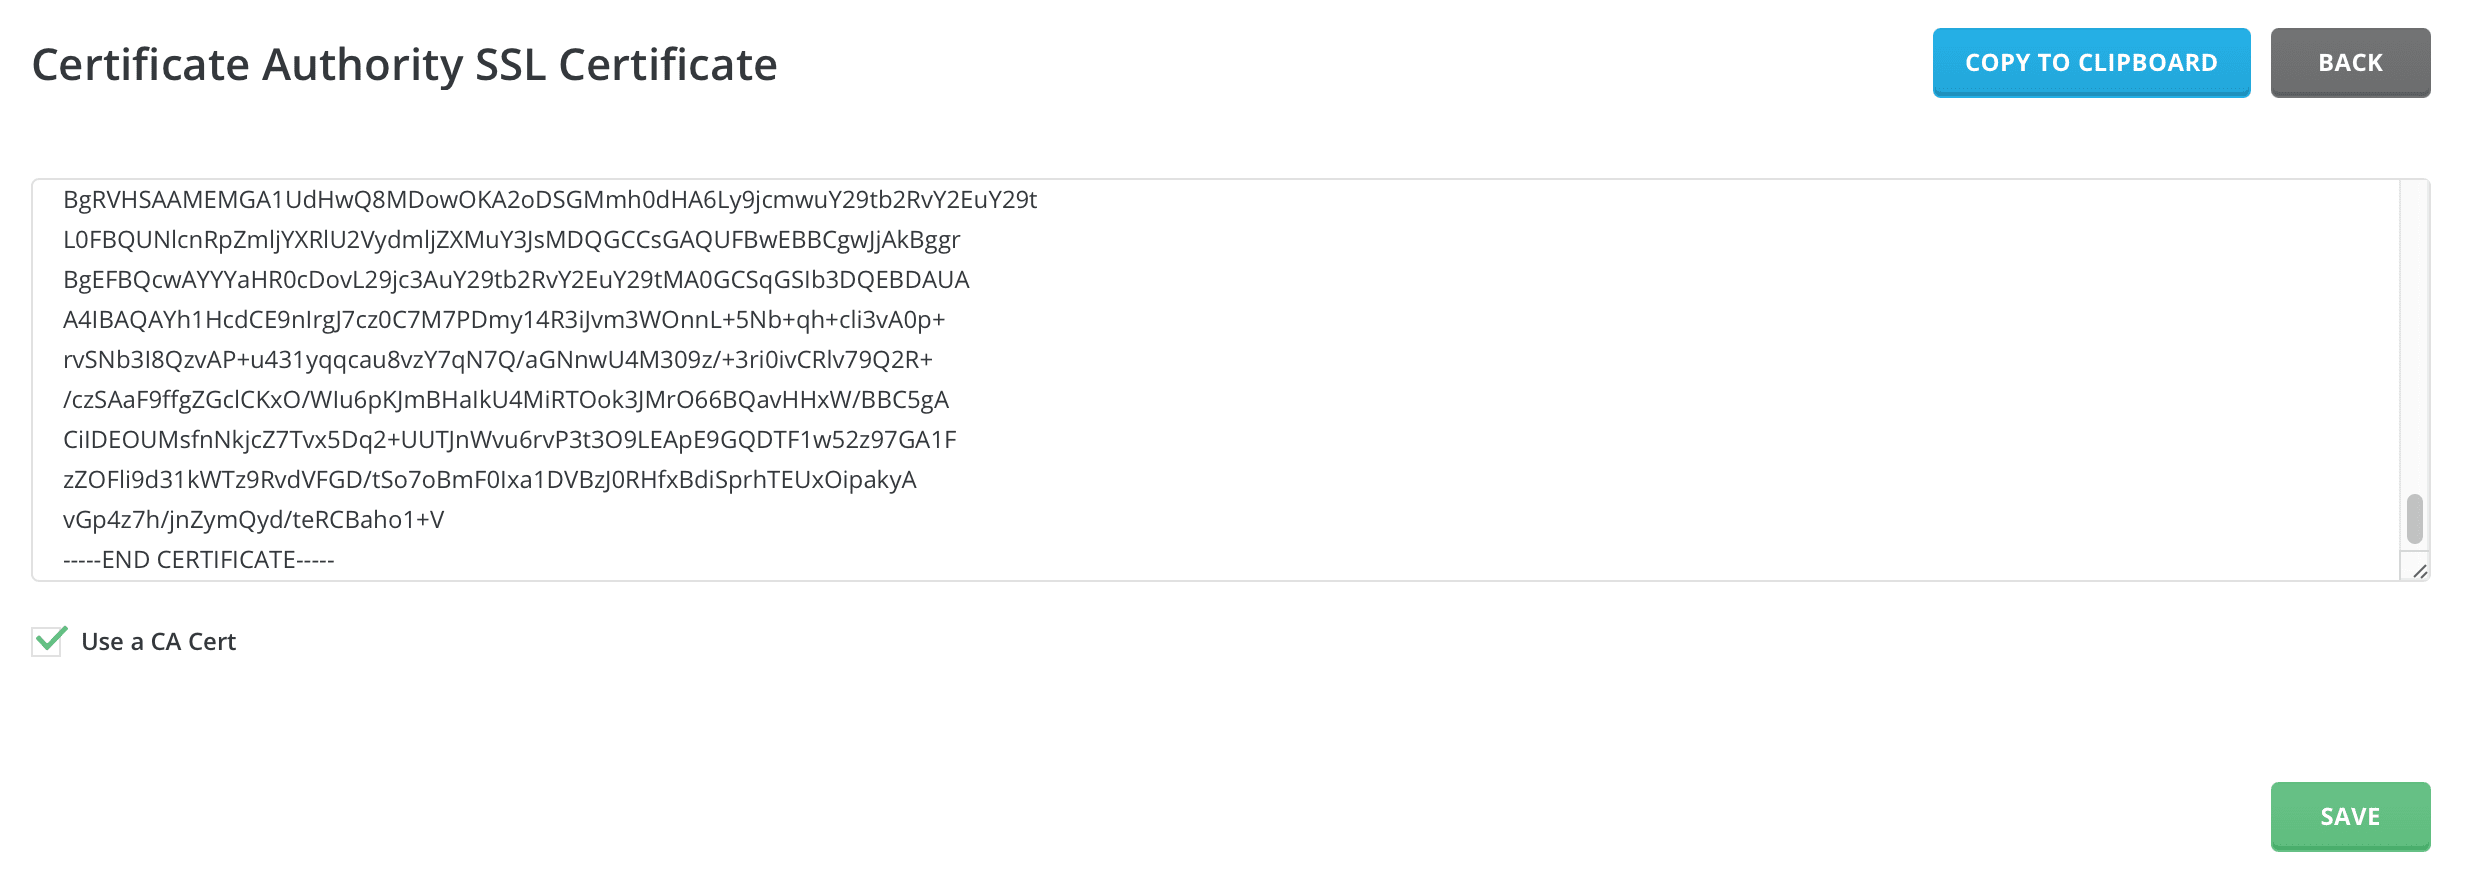
In the Certificate box on DirectAdmin, we will copy the Certificate (CRT) contents on the SSL details page. Then you will need to configure the CA, select the CA Root Certificate and copy the entire contents of the Intermediate/Chain => select Save.
So complete all the steps to install the paid SSL on DirectAdmin. But we should double-check with the SSLShopper tool to make sure it worked.
Below is my results:
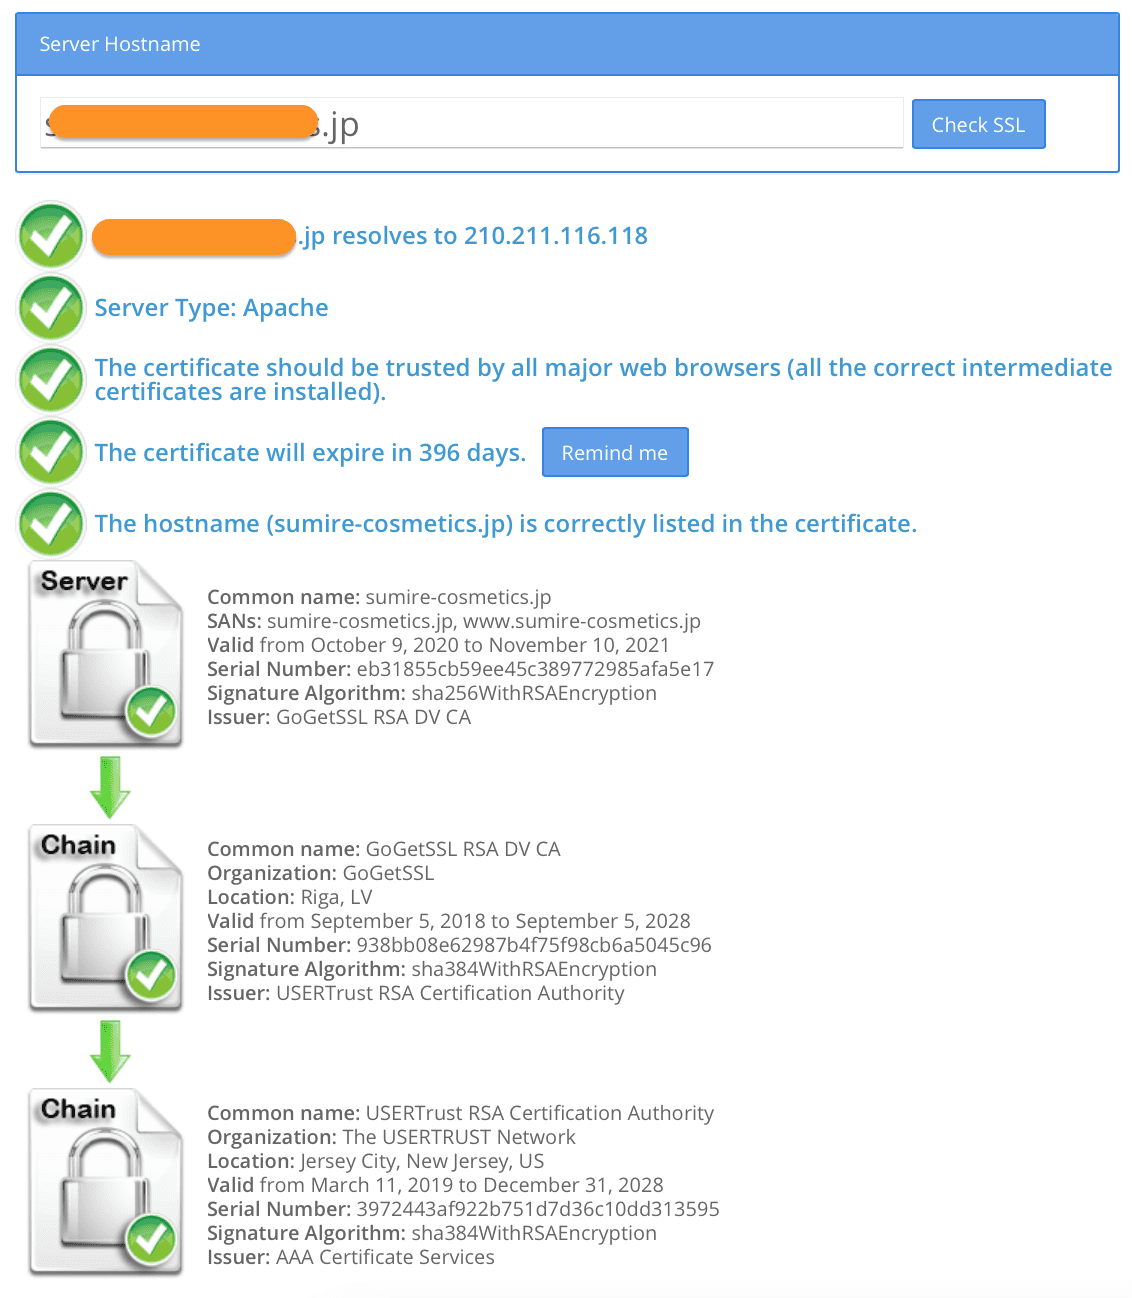
If everything is shown above, we successfully installed the paid SSL on DirectAdmin.
III. Summary
So AZDIGI has completed the steps to install paid SSL on DirectAdmin. Because each SSL provider will have a different interface, the authentication and installation methods will also be similar.
Hope the article is helpful for you. Wishing you success!
See more useful articles about DirectAdmin at the following link:
If you need assistance, you can contact support in the ways below:
- Hotline 247: 028 888 24768 (Ext 0)
- Ticket/Email: You use the email to register for the service and send it directly to: support@azdigi.com
- Refer to the SSL certificate service here!
