
Nội dung
Currently, Jetbackup has released version 5 and AZDIGI is gradually implementing a replacement for Jetbackup 4 that has been equipped on all Hosting servers. In addition, AZDIGI will support users to backup data for the last 7 days, this is a solution to help users protect data. However, this is only an additional support feature on the service, AZDIGI always encourages customers to back up their data periodically to ensure more safety proactively.
Compared to Jetbackup 4, Jetbackup 5 will have an almost entirely different operating interface. So this article, AZDIGI will show you the new interface of Jetbackup 5. Please follow along.
Term used
- Restore
- Backup
- Download
1. Use Jetbackup to Restore all hosting data
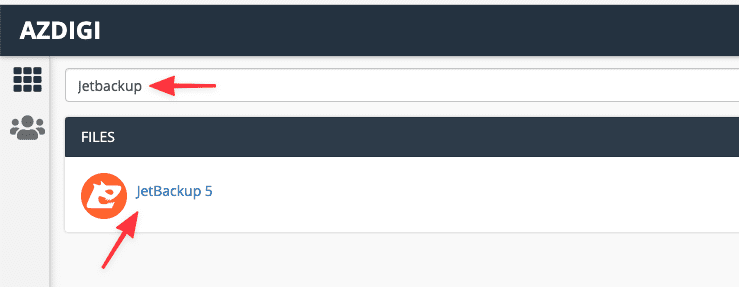
You can search for Jetbackup 5 application on cPanel và click it.
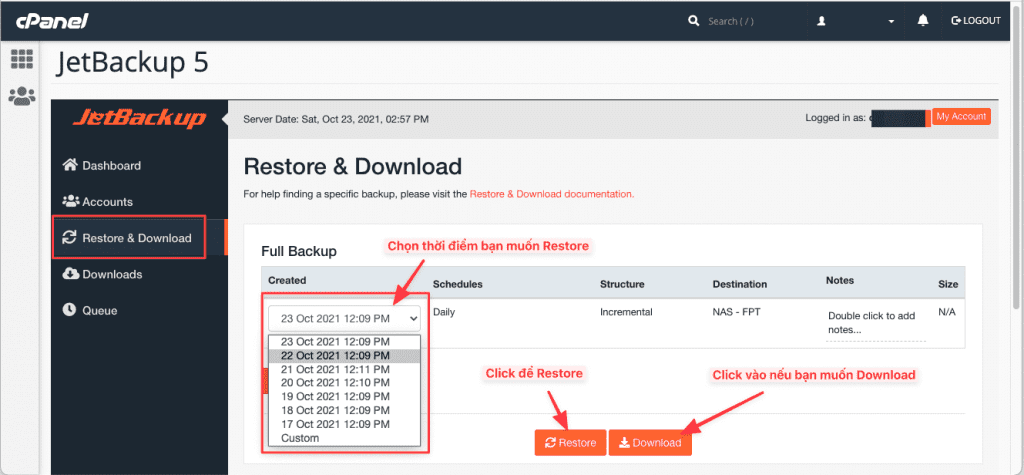
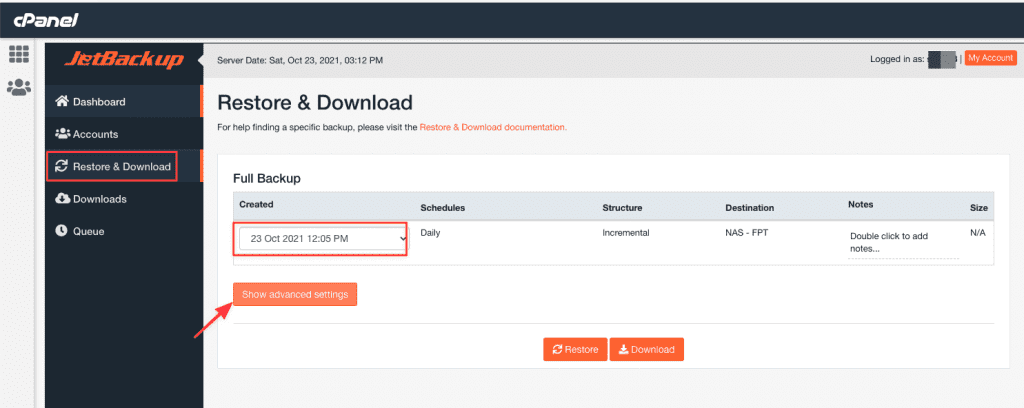
Next, select Restore & Download to do:
- Restore: Used to restore hosting to the time it was backed up.
- Download: If you want to download the backup to your PC.
When you click on Restore & Download, you will see the Created section, click on it to select the backup you want to restore. After you have chosen the time, click Restore.
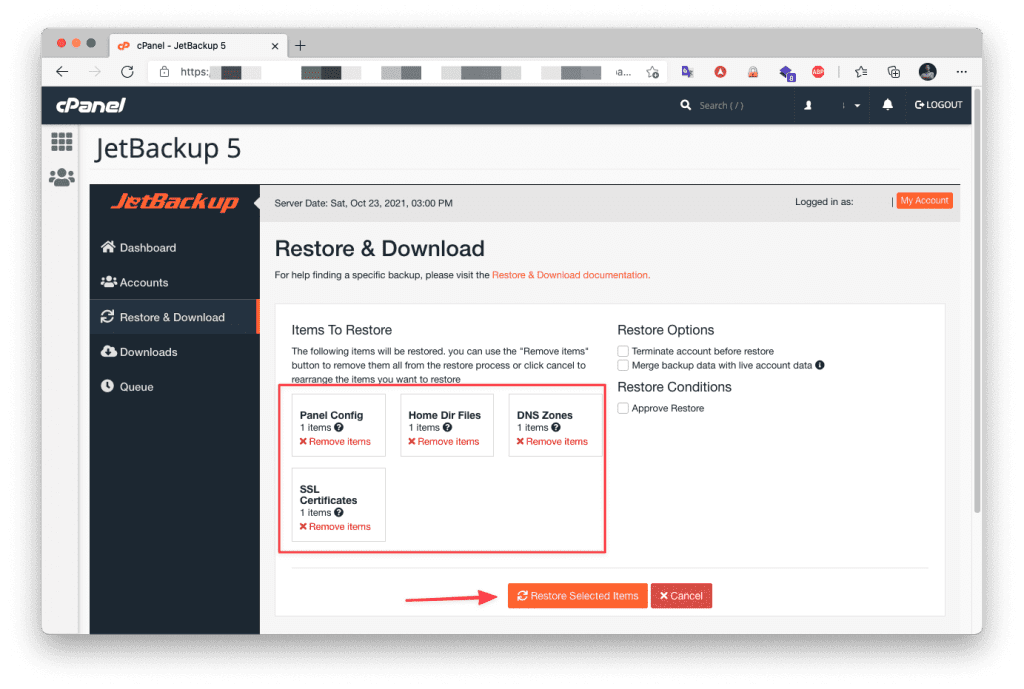
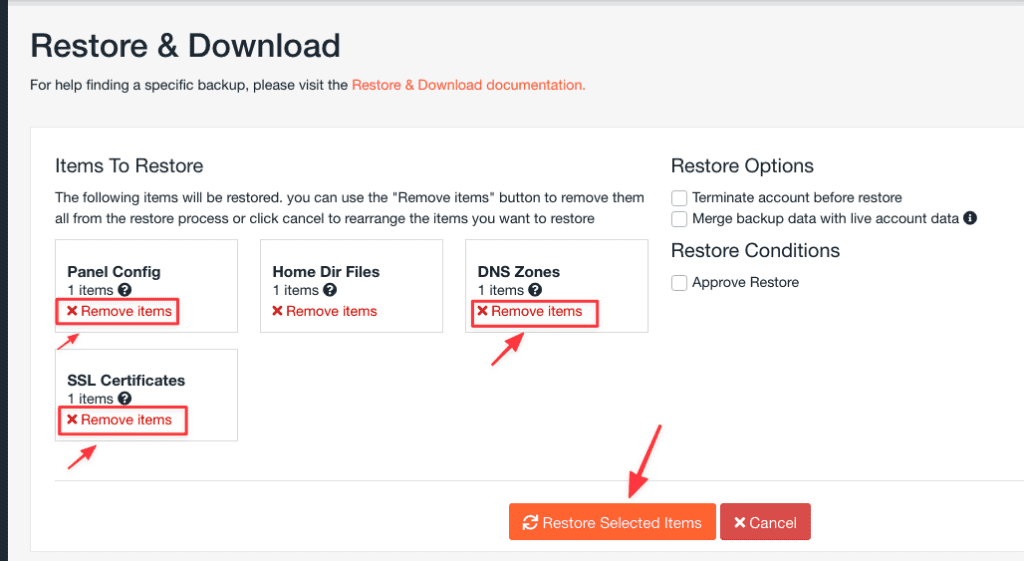
After clicking Restore, Jetbackup 5 will default display the items it will restore. If you want to Restore the entire hosting, click Restore Selected Items to start the Restore.
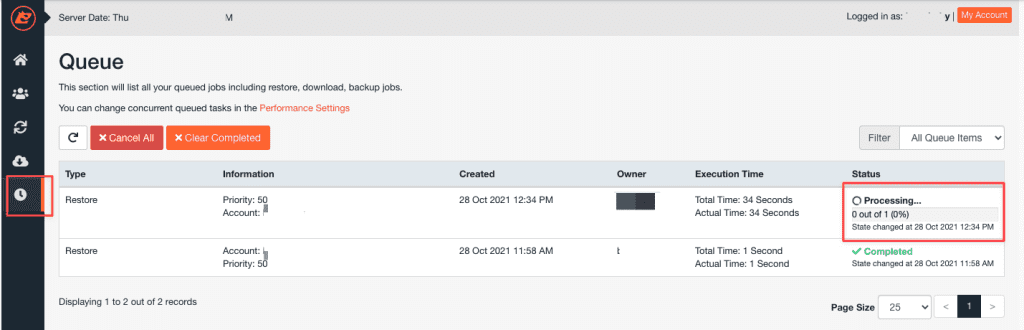
Note: After clicking Restore, you cannot access hosting during the Restore process. Because the system will delete all settings and download the old Backup to perform, depending on the size of your data, the completion time will vary. After the Restore is complete, please access Queue to check.
2. Restore any File or Folder on Hosting
In some cases, you do not want to Restore the entire hosting, but just want to Restore 1 file or any folder on the hosting. Please do as follows:
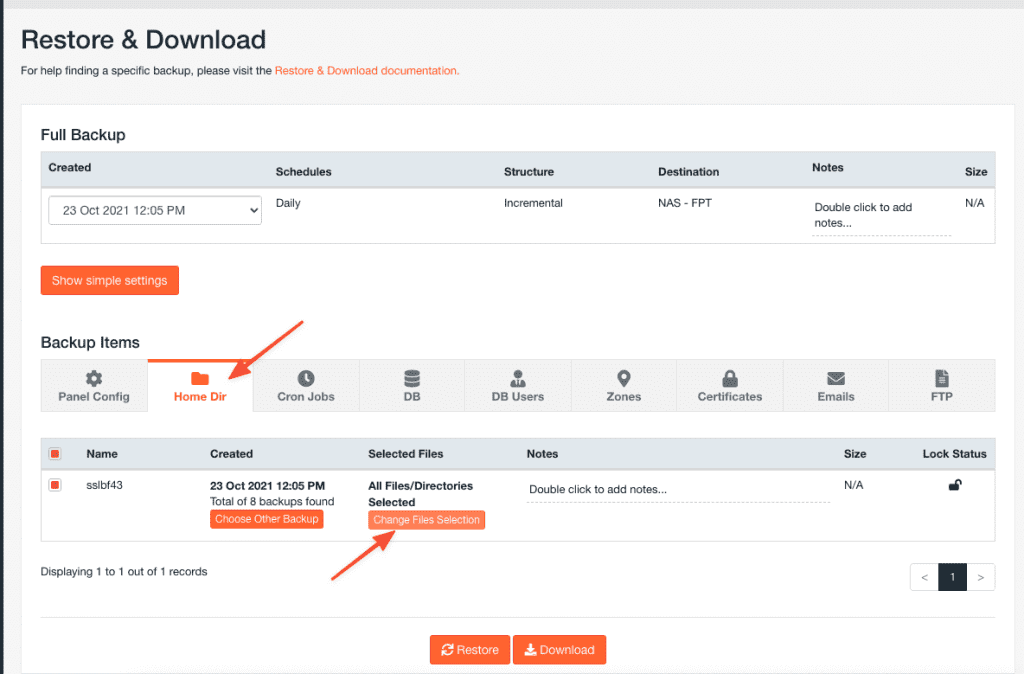
You click Restore & Download, choose the time needed to Restore and select Show advanced settings
At Show advanced settings, select the Home Dir tab => Change Files Selection
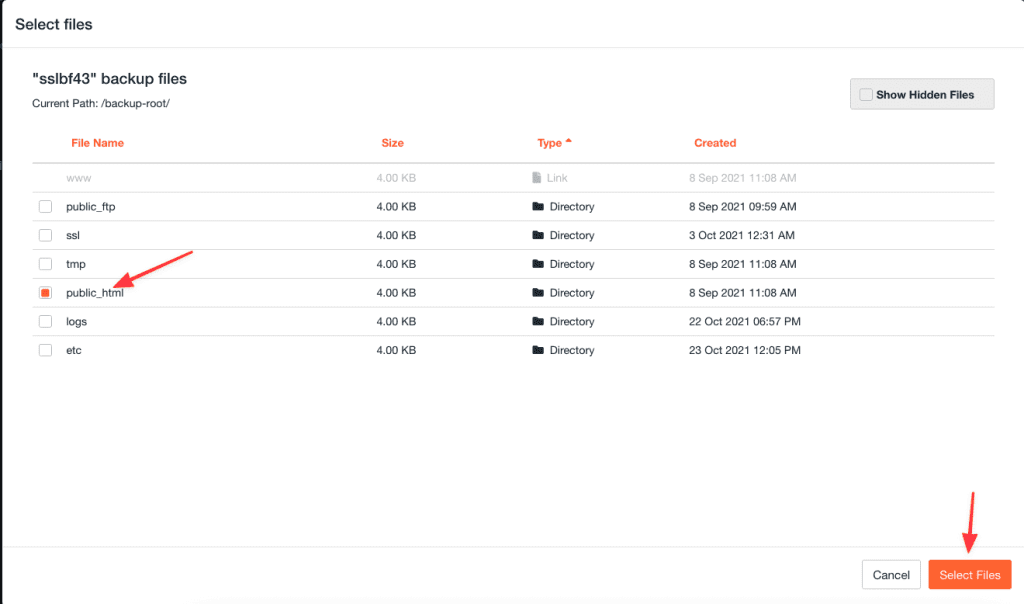
The system will display all the Folders and Files, you need to tick the file or folder you want to Restore => Select Files
Click Restore to perform.
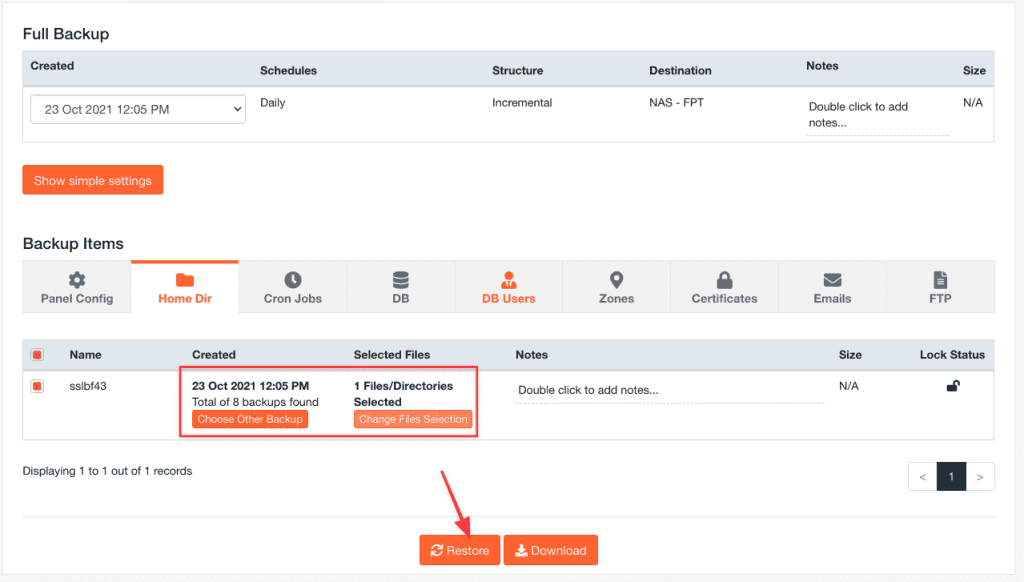
In the Restore window, delete all Items and leave only Home Dir Files, then click Restore Selected Items
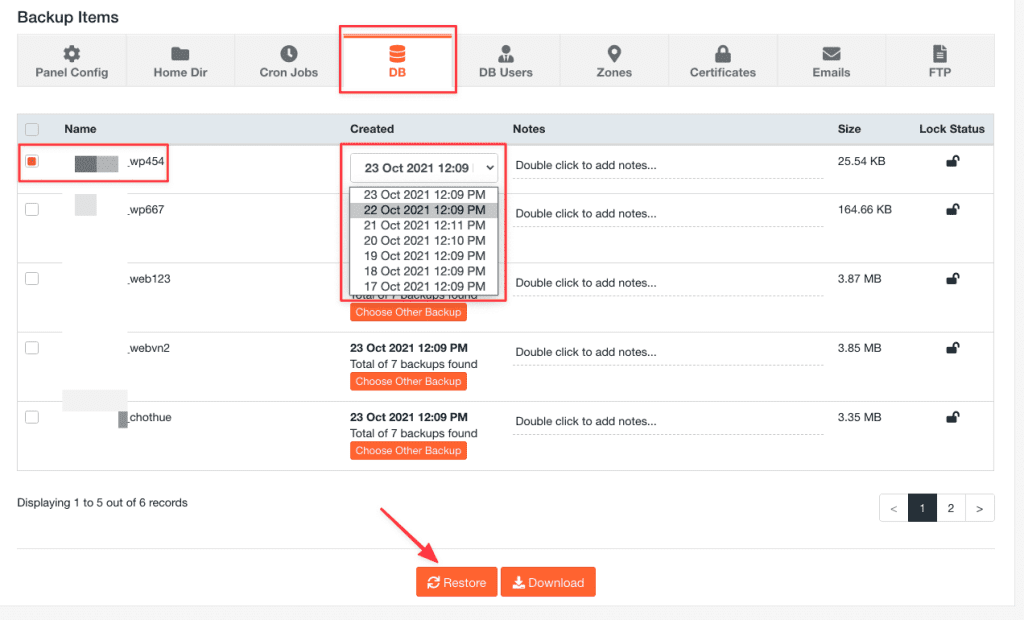
3. Restore Database
If you want to Restore any Database on hosting, follow these steps:
You click Restore & Download, choose the time needed to Restore and select Show advanced settings
You click the DB tab then select the database name, the time to restore and select Restore to do it.
Thus, AZDIGI has completed the guide to using Jetbackup 5 on cPanel to restore data. Thank you for following up here. Wishing you success.
If you need assistance, you can contact support in the ways below:
- Hotline 247: 028 888 24768 (Ext 0)
- Ticket/Email: You use the email to register for the service and send it directly to: support@azdigi.com .
