
Users can quickly create a new WordPress website with full customization options such as cache through a single command line.
With EasyEngine, there will be some common options as follows:
- –wp: Self-install a simple WordPress website.
- –user: user options.
- –pass: password option.
- –ssl=le hoặc –letsencrypt: Web Deployment with Lets Encrypt’s Free SSL
- –wpredis: Self-install a WordPress website using Redis as Page Cache and Object Cache.
- –wpfc: Self-install a WordPress website running with NGINX FastCGI Cache.
- –w3tc: Self-install a WordPress website running with the W3 Total Cache plugin.
- –wpsc: Self-install a WordPress website running with the WP Super Cache plugin.
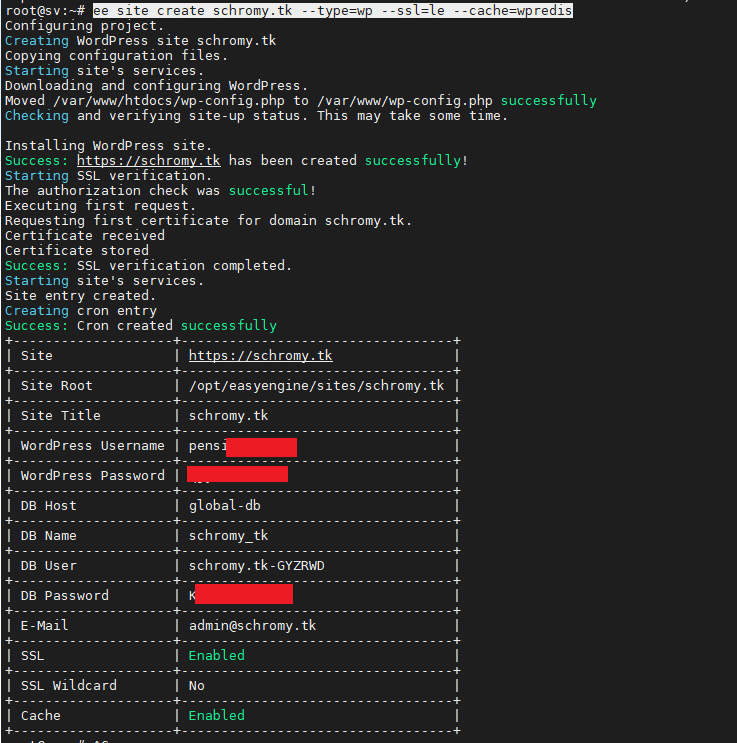
In this tutorial, I will create a new website completely using WordPress and using Redis cache with the command:
ee site create domain.com --type=wp --ssl=le --cache=wpredis
When completed, all relevant information will be displayed on the website including the administrator account, database, and the address of the directory containing the source code. Users need to save the above information for later use.
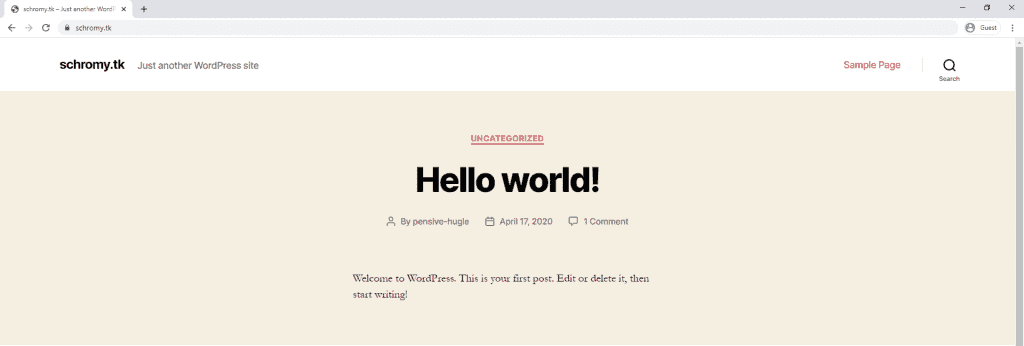
Access the website that has been created by default WordPress and has SSL available
During operation, you can change the website configuration options, for example, you can configure to use WP Super Cache with the command:
ee site update domain.com --cache=wpsc
Install admin-tools to manage the website
Easy Engine 4 has admin-tools support for website administrators with service installers like phpMyAdmin. However, this toolkit needs to be activated manually before use.
On the VPS, execute the command:
ee admin-tools enable example.com
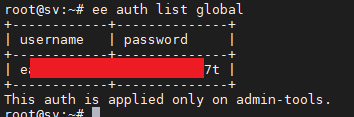
Next, get the credentials with the command:
ee auth list global
Login to this admin-tools page with the address example.com/ee/admin and enter the account information above
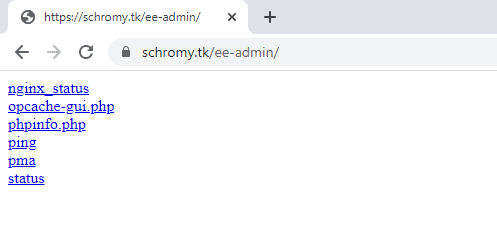
In there:
- nginx_status
- opcache-gui.php: opcache management interface on VPS
- php: PHP parameters and installed extensions parameters
- ping: accessibility test
- pma: phpMyAdmin
- status: general information about request status, process parameters
So you have successfully installed the default WordPress with EasyEngine, follow AZDIGI to update the next articles!
