
Nội dung
CloudFlare is probably no longer a strange name to everyone. CloudFlare is an intermediary DNS service that coordinates traffic between servers and clients through CloudFlare protection and manages DNS records. Usually, users choose CloudFlare as the main place to manage DNS because CloudFlare supports many different record types, fast DNS update times and Proxy support. In this article, AZDIGI will guide you through configuring the aaPanel connection with CloudFlare to manage DNS, then you do not need to log in to CloudFlare but still create records through the API Token connection.
Conditions apply:
- Domain name using CloudFlare’s Name Server (NS)
Implementation guide
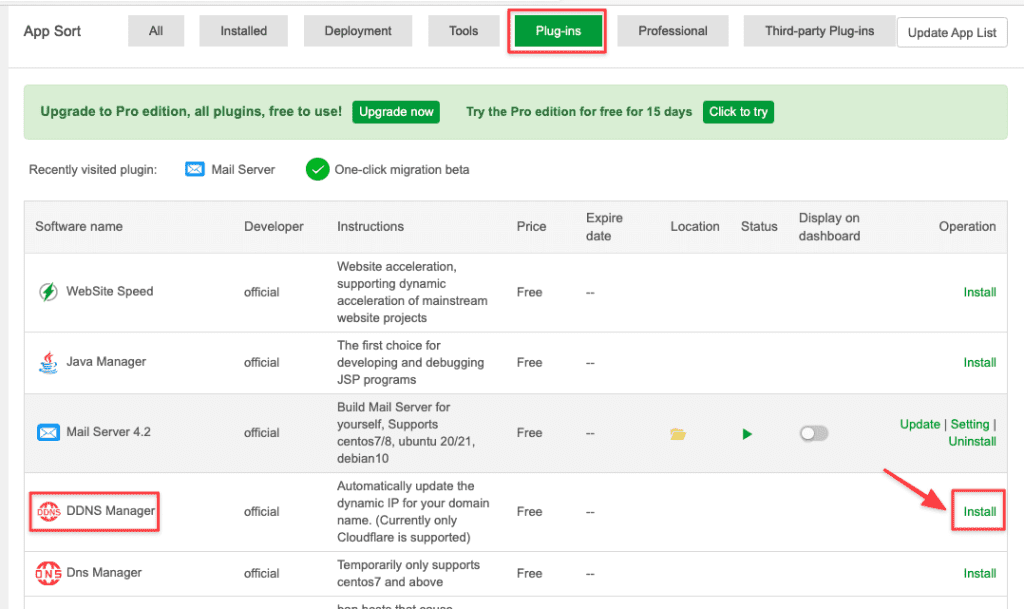
Step 1: Install DDNS Manager
aaPanel already supports this feature, you can install it from the App Store library, and you go to Plugins find an application called DDNS Manager and click Install.
Next, click confirm to agree to the installation.
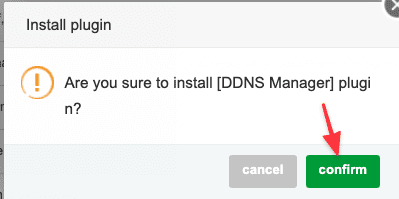
After successfully installing the DDNS Manager application, you need to go to step 2 to get the API from CloudFlare.
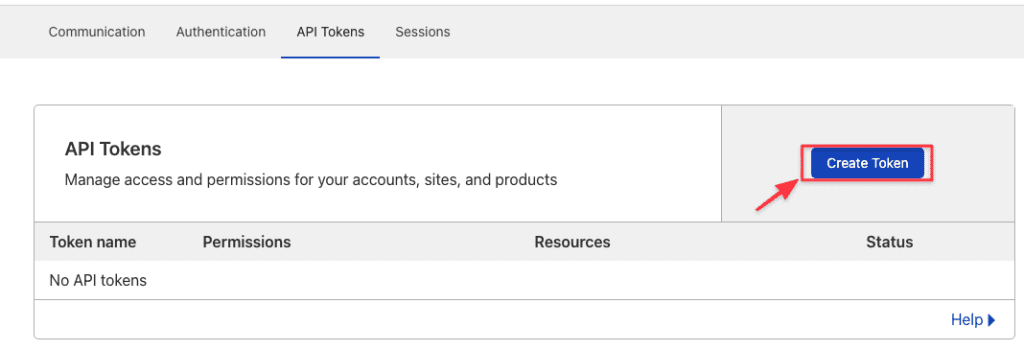
Step 2: Get API Token
You log in to CloudFlare with your previously registered account and click on the link below to get API tokens directly to the page.
- Access link: https://dash.cloudflare.com/profile/api-tokens
Then you click Create Token to create a new one.
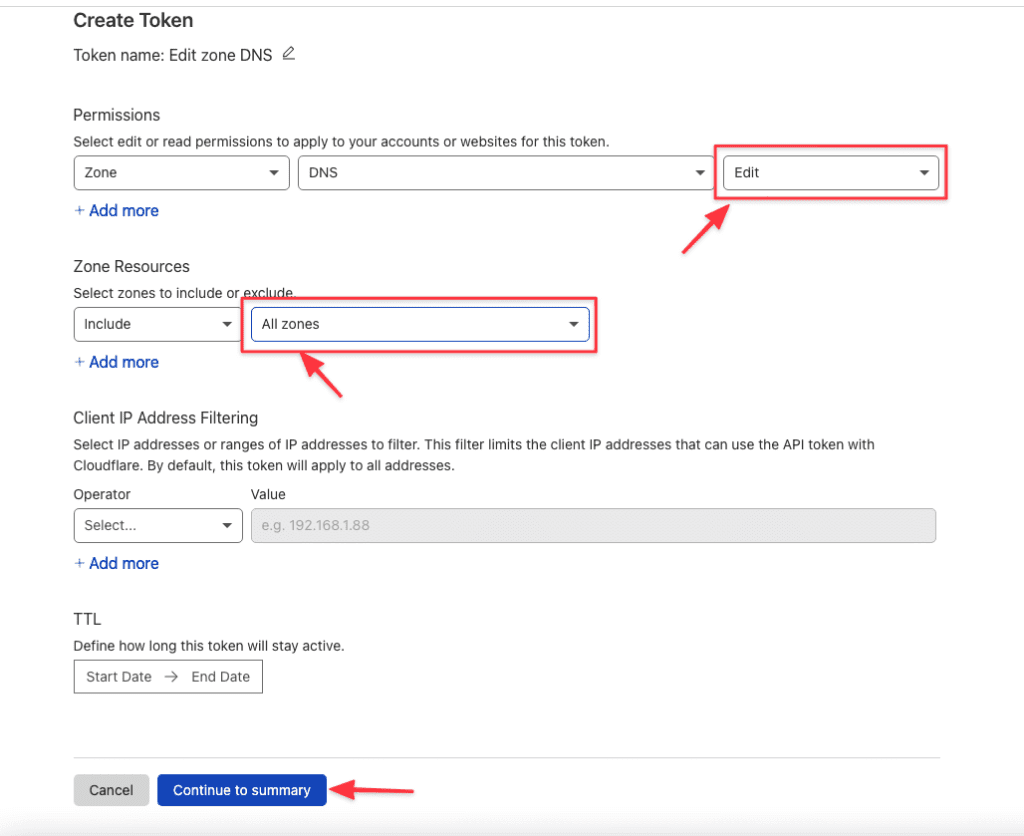
In this interface, there are many Templates and I will choose Template Edit zone DNS to use in this article.
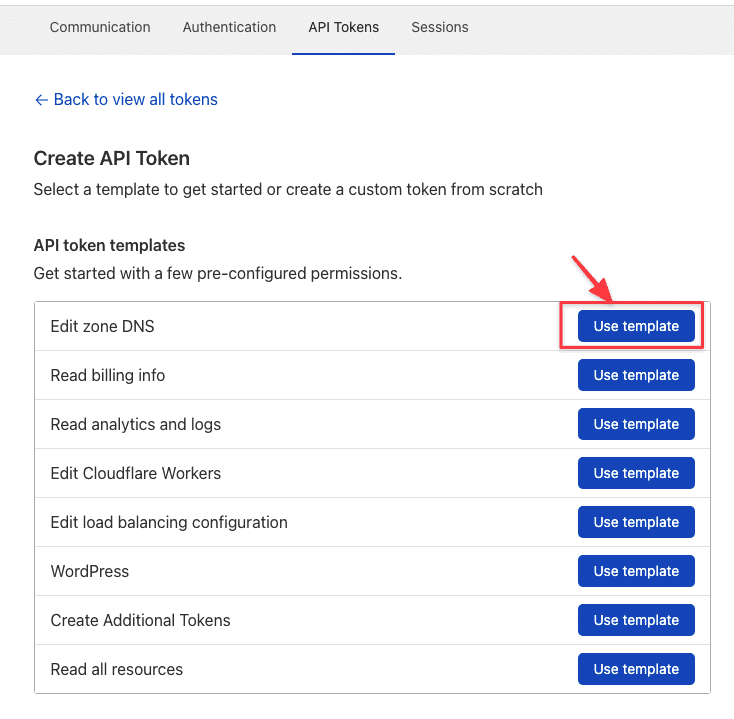
Next, you have the following options:
- Permissions Zone DNS: select Edit to have the right to adjust instead of the default of Read.
- Zone Resources: select All zones.
Then click Continue to summary to finish.
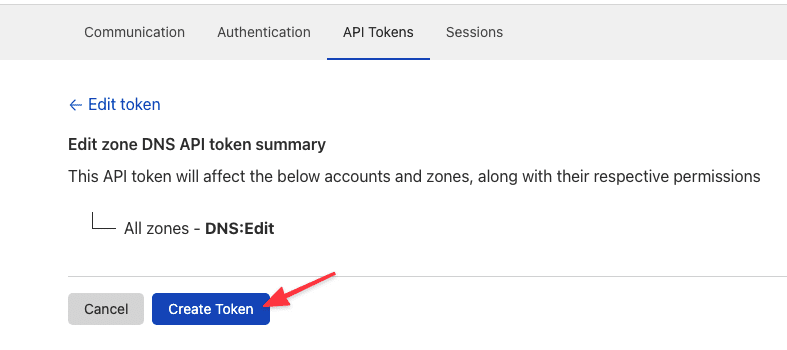
Finally, click Create Token to complete.
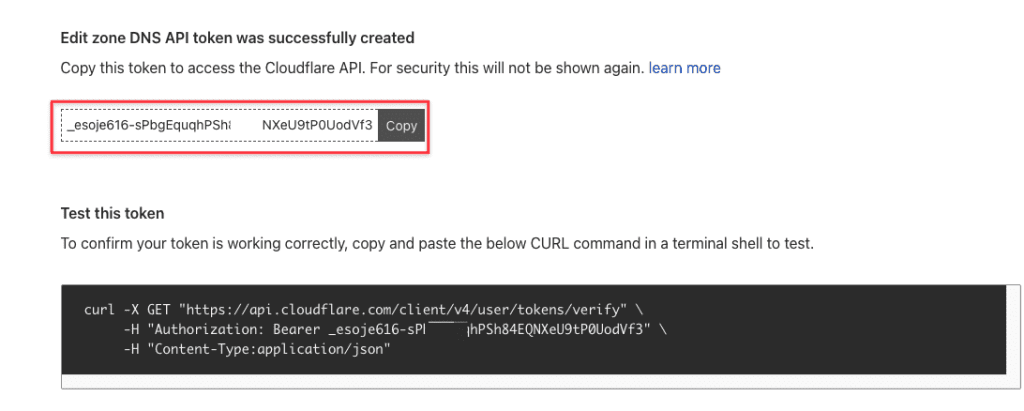
Once done, an API Token string will be displayed, save it for further configuration in Step 3.
Step 3: Configure DDNS
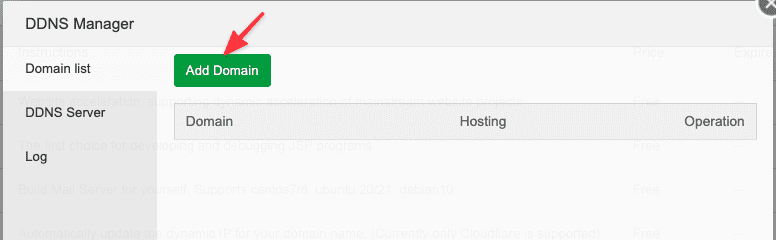
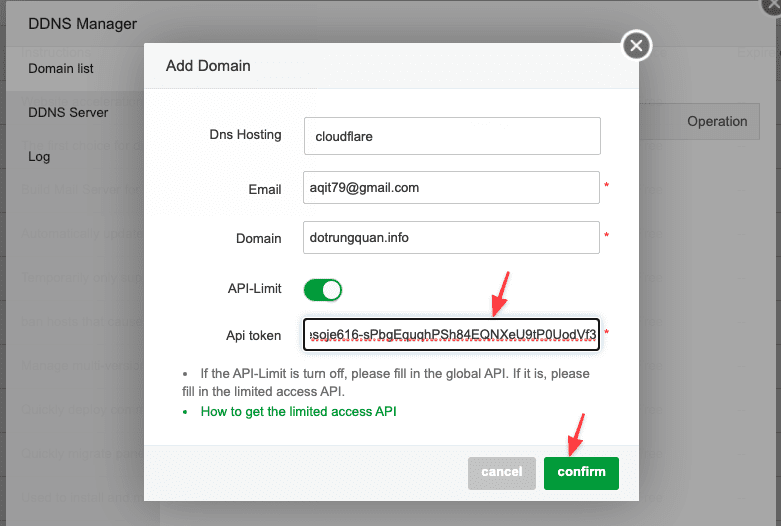
You go back to the aaPanel interface => click DDNS Manager => select Add Domain to add a new domain name.
At the Add Domain interface, enter the following information:
- Dns Hosting: Select cloudflare (default)
- Email: Enter the email of your CloudFlare account
- API-Limit: Turn on
- Api Token: Paste in the Token string taken in Step 2.
After entering the information, click confirm to complete.
Now I will try to add a record (Record) directly in the aaPanel interface to see if it syncs to CloudFlare or not.
You click Add DDNS.
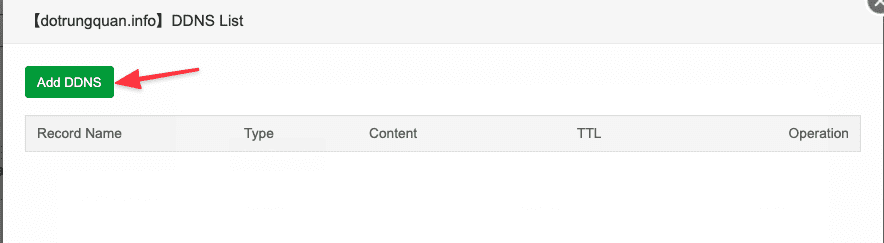
Next, enter an A record and select confirm to complete.

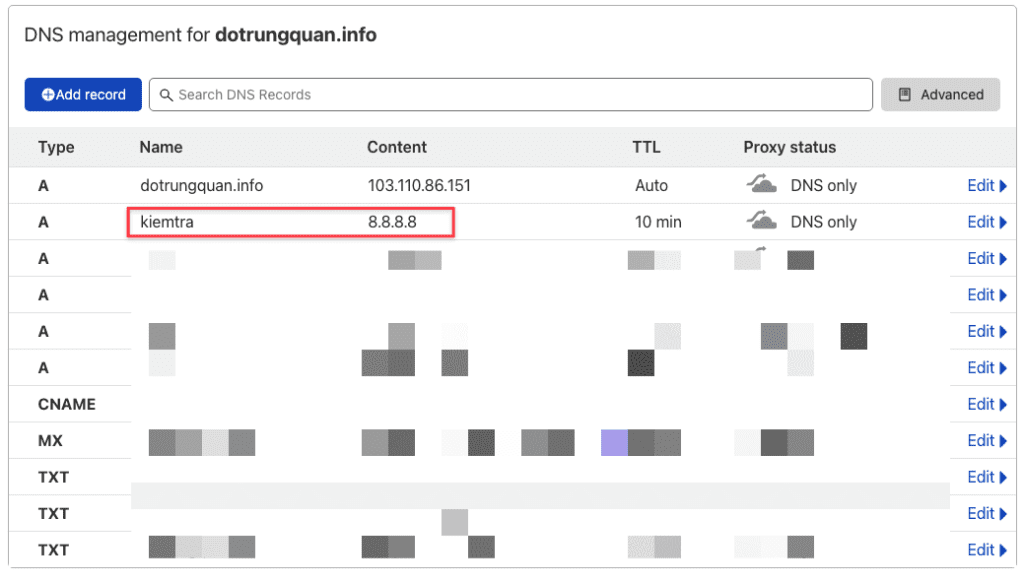
When complete entering, go back to the CloudFlare DNS interface and you’ll see the updated record here.
Thus, AZDIGI has completed the guide to configure DDNS aaPanel on CloudFlare. This way will help you manage DNS records from aaPanel quickly without having to go to CloudFlare to create anymore.
In addition, you can refer to some other articles about aaPanel at the link below.
If you need assistance, you can contact support in the ways below:
- Hotline 247: 028 888 24768 (Ext 0)
- Ticket/Email: You use the email to register for the service and send it directly to: support@azdigi.com
- Refer to the best hosting at https://azdigi.com/
