
Nội dung
In this article, AZDIGI will guide you to use Mailing Lists cPanel to manage email groups in your mailing list effectively and easily.
I. Overview
Mailing Lists cPanel can simplify sending messages to a group of people. You can add a group of email addresses to your mailing list to avoid entering those addresses every time you send a message. This can be very useful when sending newsletters or other updates to mail groups.
II. Setting up Mailing Lists on cPanel
To set up Mailing Lists on cPanel, follow these steps:
1. Log in to cPanel
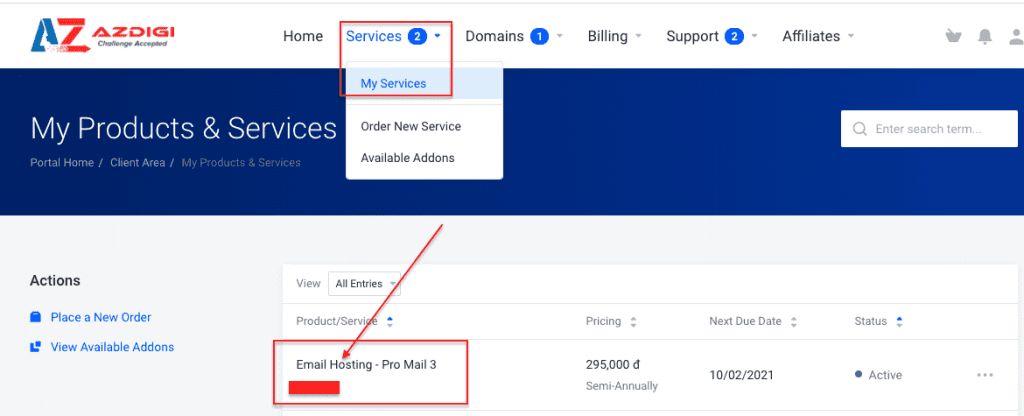
To create Mailing Lists on cPanel, you need to login to your cPanel mail package. You go to the service administration in my.azdigi.com
Click Services => My Services and select the corresponding mail service.
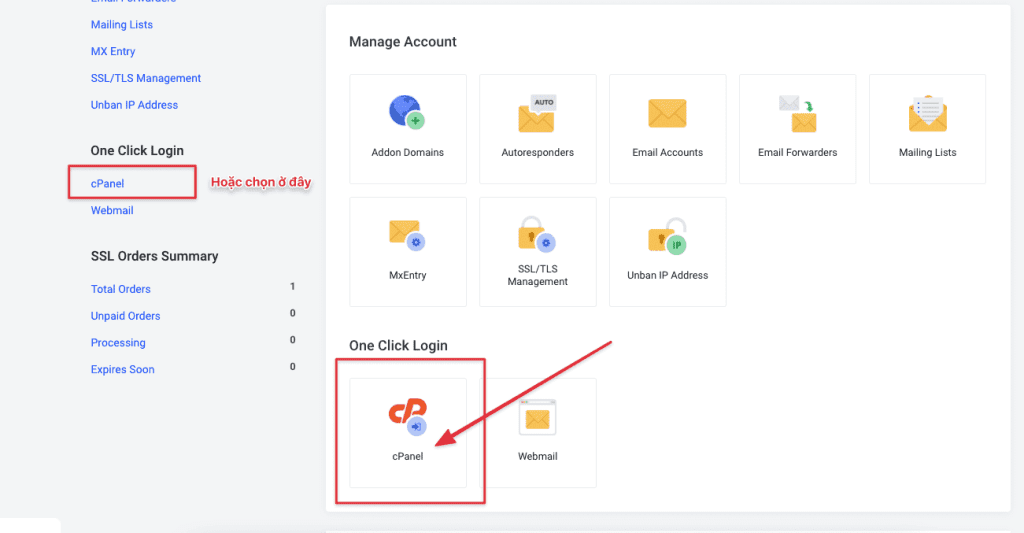
Next, you select the cPanel icon as shown below:
2. Create a Mailing List
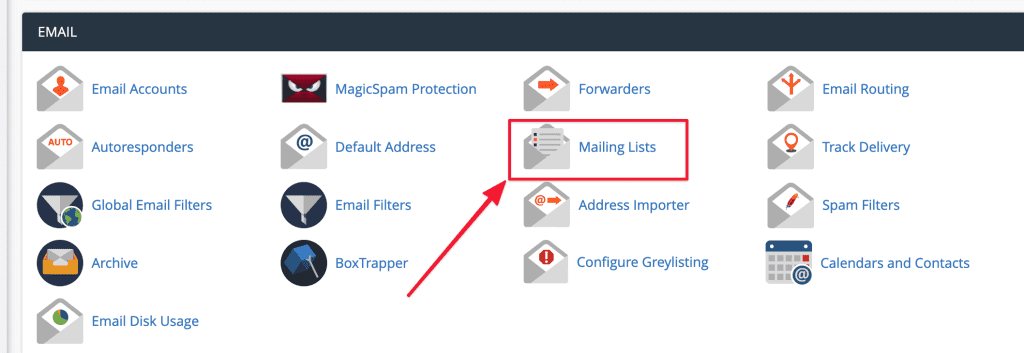
At the cPanel interface, click on Mailing List as shown below:
The system will display an interface for you to set a name and password for the mailing list.
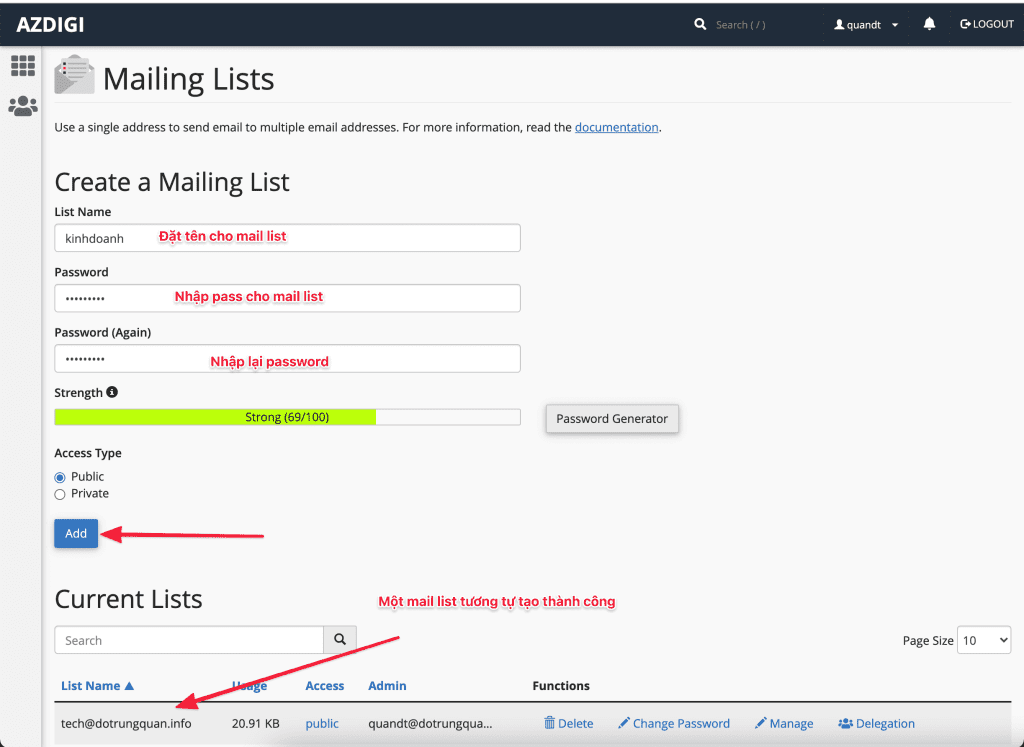
To import a new mailing list, do the following:
- List name: Enter the mailing list name. The example I made is a list of tech and kinhdoanh Departments.
- Password and Password (Again): Set a password for the mailing list.
- Access Type:
- Public: A public archive exists for this mailing list. Subscriptions are opened and the Mailman interface shows the mailing list.
- Private: Private archive exists for this mailing list. The admin has to approve the subscription and the Mailman interface doesn’t show the mailing list.
- Next, click Add to create the list.
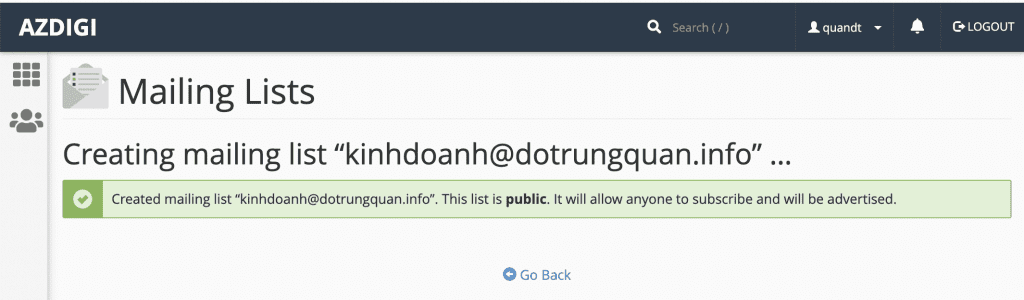
3. Mailing List Administration
After creating the Mailing List, you add accounts to the created mail group. As the example above, I created a group as kinhdoanh so that I will add all accounts belonging to kinhdoanh into this group.
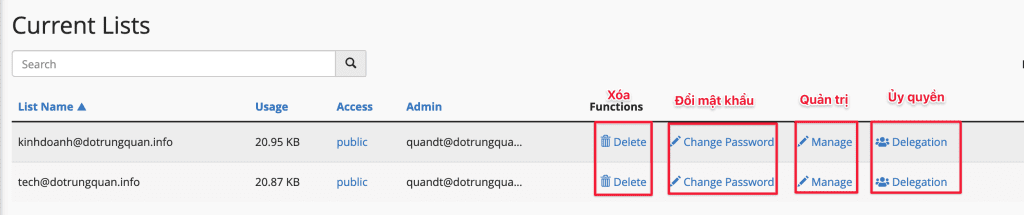
The Current List section will display a list of groups that you have created with the following descriptions:
- List Name: List of mail groups
- Usage: The capacity used
- Access: Public/Private
- Admin: A row-separated list of email addresses for mailing list administrators.
- Functions: Admin functions for the mailing list:
- Delete: Delete the group
- Change Password: Change the password for the mail group.
- Manage: Access to the Mailman configuration interface
- Delegation: Administrative authorization.
3.1. Add or remove members in Mailing Lists
3.1.1. Add members to Mailing List
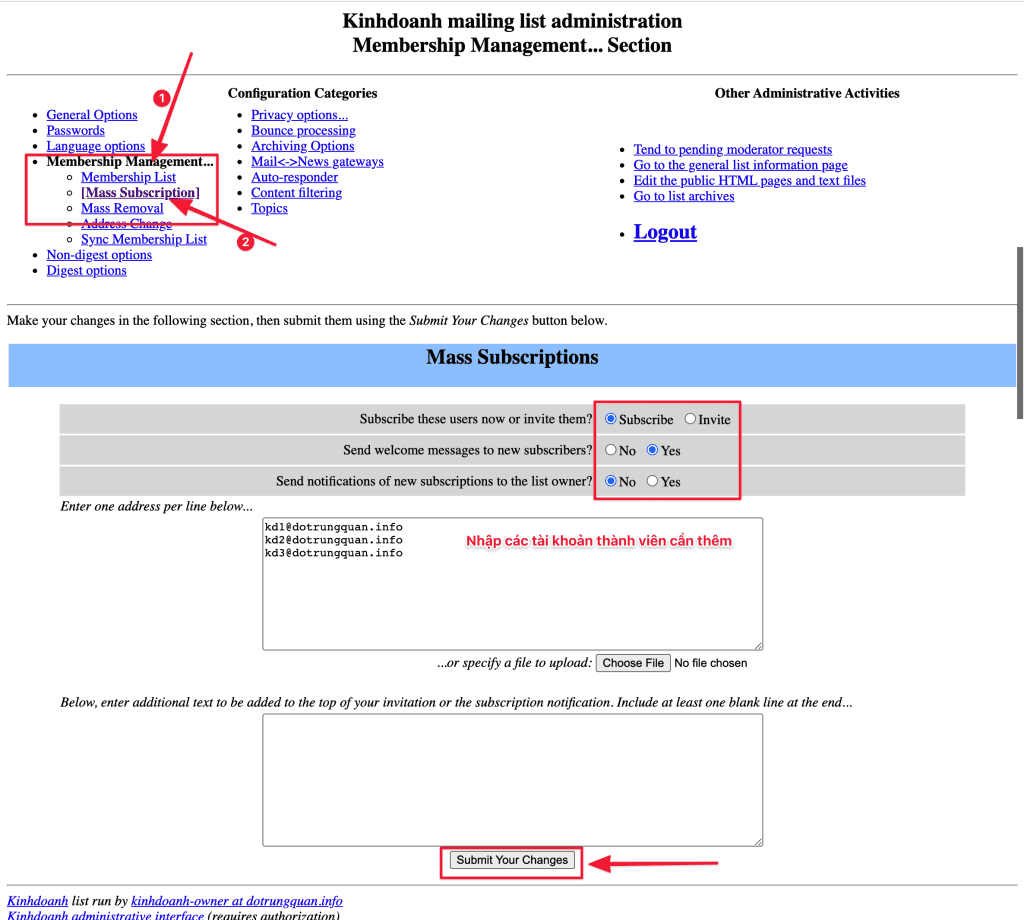
You click Manage of the created mail group to start adding members.
Click on Membership Management => Mass Subscription to add members as shown below. After adding, click Submit Your Changes to apply.
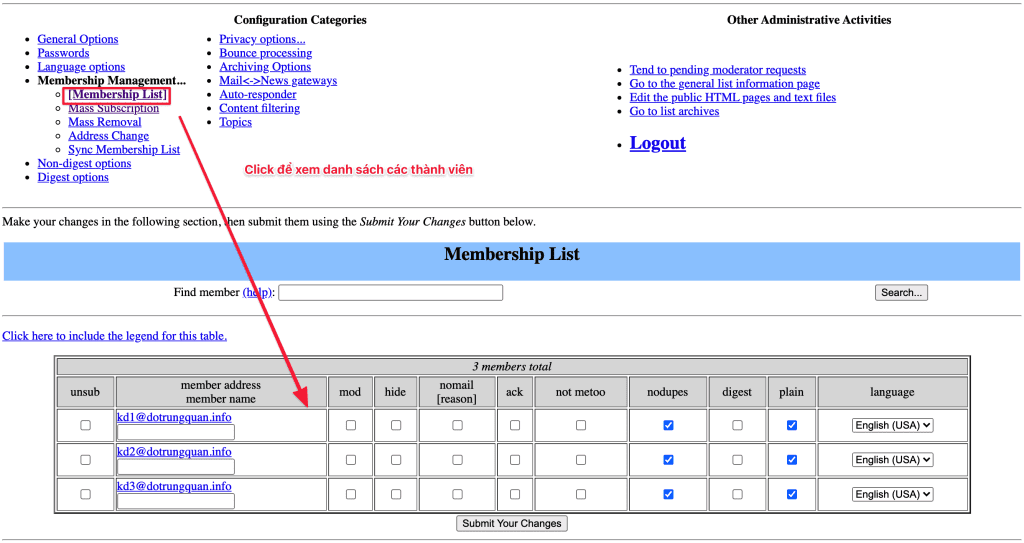
To see the list of members in the group, click [Membership List].
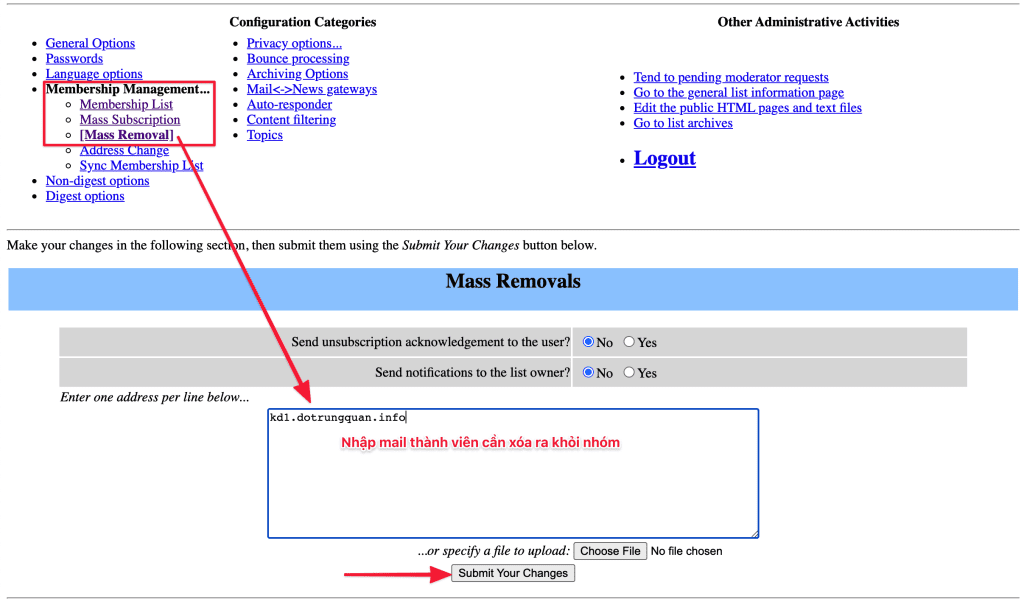
3.1.2. Remove members from Mailing List
To remove a member from the group, click Membership Management => [MassRemoval] and enter the member’s email to delete.
4. Decentralize Mailing List
In the section on decentralizing mailing list, it means decentralizing sending permissions to members and I will divide it into 2 types: send to members of the Mailing List or external email addresses.
For example:
- The email address sent to is a member of the mailing list
- The members in the above Mailing list are kd1@dotrungquan.info, kd2@dotrungquan.info, kd3@dotrungquan.info.
- The inbound email address is not a member of the Mailing list.
4.1. The mailing address is a member of the Mailing List
As the example below, I do not allow 2 accounts kd1 and kd2 to be sent to the mailing list.
You click on Membership List => tick the mod with the account you don’t allow to send (I choose kd1 and kd2). After selecting, click Submit your changes to apply.
Note: Accounts in mod status are accounts marked as in Custom state.

To adjust the actions to send mail to the Mailing list of accounts in mod status, go to the sender configuration section => click Privacy options => Sender filters.
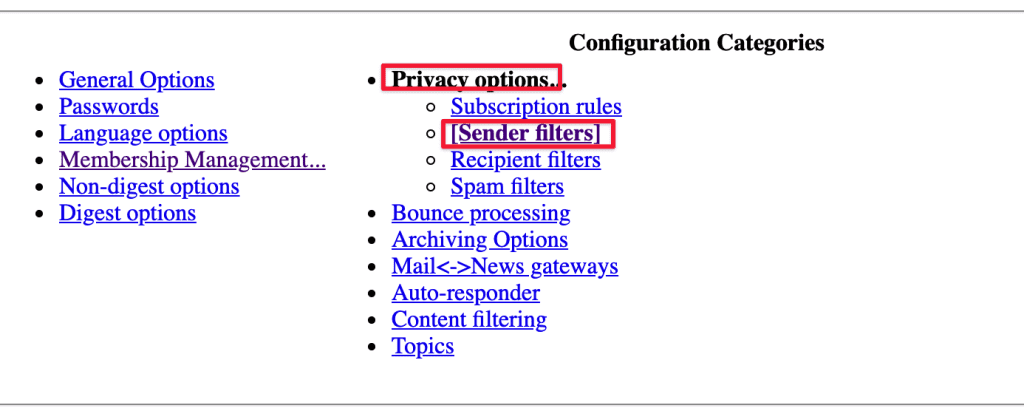
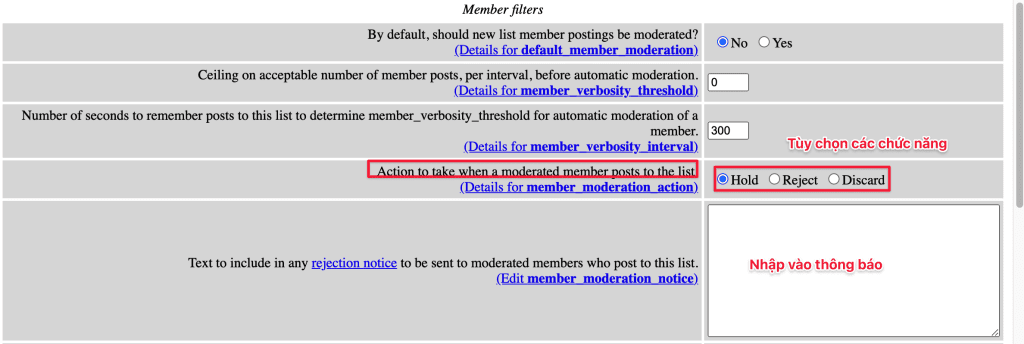
Then the screen will appear in the Sender filters interface. You will see the Member Filter section (Sending filter is a mailing list member).
You see the section Action to take when a moderated member posts to the list with 3 options as follows:
- HOLD: Incoming mail from ticked mod members will be kept in the queue. You can see the queue of the Mailing list in the Tend to pending moderator requests section, and the admin user will censor these emails.
- REJECT: Incoming mail from members who are ticked mod will be rejected and the system will send an error message.
- DISCARD: Incoming mail from members marked with mods will be rejected and no error messages will be returned.
4.2. Sent to not a member of Mailing List
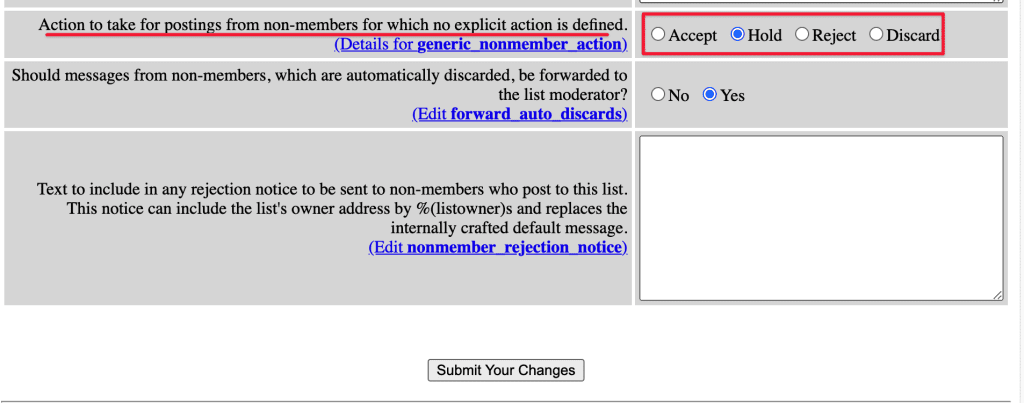
To configure sending mail to external mailing addresses that are not on the mailing list, select Non-member filters.
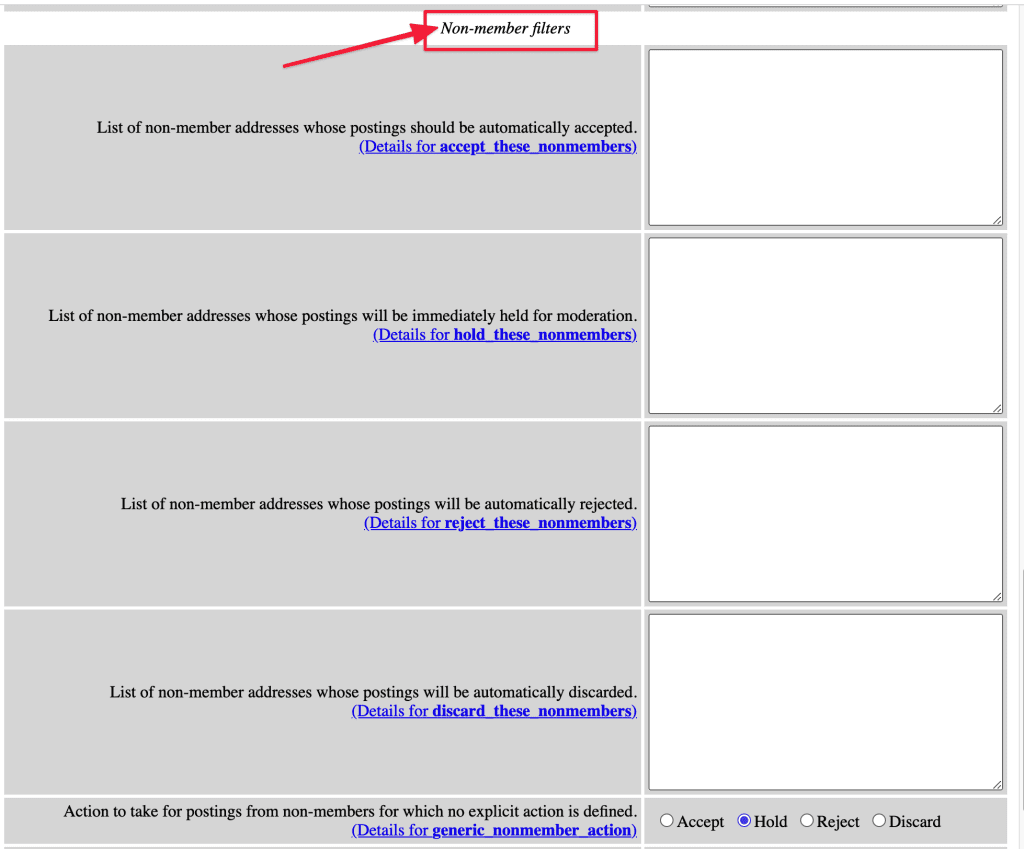
In the Action to take for postings from non-members for which no explicit action is defined, there will be 4 detailed options as follows:
- Accept
- Hold
- Reject: Reject and return the message
- Discard: Reject but not send notification
5. Adjust Mailing List size
To change the size of the Mailing List, select the General Options tab. [General Options]

Next, go to Additional settings => Maximum length in kilobytes (KB) of a message body. Use 0 for no limit and reset the capacity.
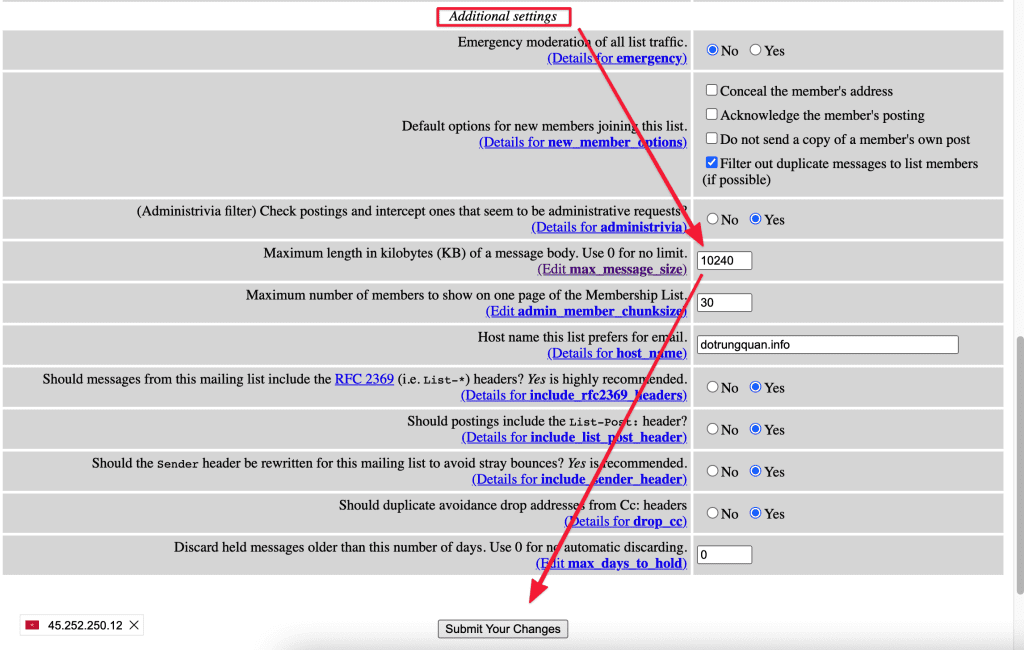
Size is in KB, so please customize accordingly to use and select Submit Your Changes to apply changes.
III. Summary
Hopefully, this tutorial will help you create mailing lists for your mailing purposes.
