

Nội dung
In this article, AZDIGI will show you how to install OPCACHE to Cyber Panel to improve PHP efficiency many times and help reduce CPU load for your VPS/server.
Overview
When installing CyberPanel, the PHP version installed by the system will be 7.1 and if you want to change this default version, you can see the instructions below:
With Cyber Panel, you can choose PHP versions simply because Cyber Panel supports versions from 5.3 => 7.4. To customize the PHP version for your website, you can refer to the instructions below:
And one more note is that OPcache will be installed separately for each PHP version. For example, if you use PHP 7.1 version, when you install OPcache, OPcache will only work in PHP 7.1 but not on PHP other versions. If you want to use it in other versions, you need to install it similarly. So what is OPcache PHP Extension and how to install it, please continue reading this article.
What is OPcache?
Originally called Zend Optimizer +, OPcache (introduced in PHP 5.5.0) is a powerful PHP extension built to enhance PHP performance, thus increasing overall application performance. It is available as an extension through PECL for PHP versions 5.2, 5.3 and 5.4. It works by storing precompiled script-bytecode in shared memory or RAM, thus eliminating the need for PHP to load and parse the script on each request.
Features of OPcache:
- Helps reduce %CPU usage for the server.
- Reduce TTFB of all PHP sites on the server.
- Increase website loading speed.
So how to integrate Opcache PHP Extension on CyberPanel, please do the following steps.
Install OPCache on CyberPanel
In this tutorial, I will do an example with a website running PHP 7.1.
Step 1: Access the CyberPanel admin page
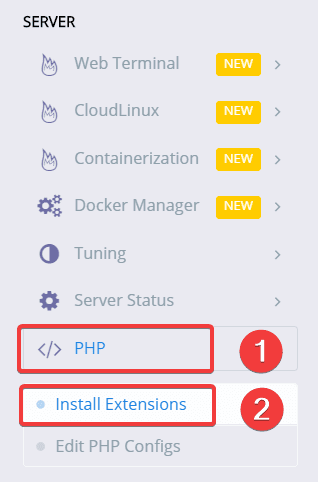
You access the CyberPanel admin page under the link https://IP:8090/. After successful login, access
PHP (1) => Install Extension (2)
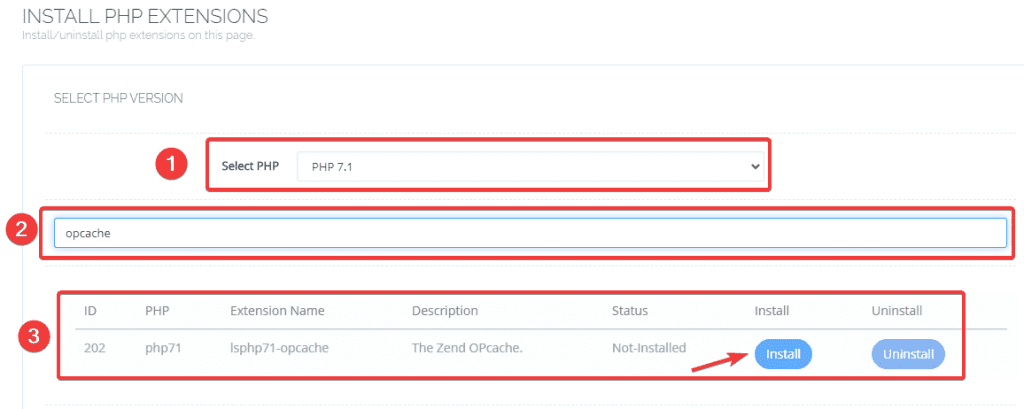
At the next interface, you choose exactly the following information:
- Select PHP (1): You choose the correct PHP version your website uses.
- Search Extensions (2): You can fill in Opcache for a quick search.
- Tại Extension cần cài đặt (3): You click Install to install Extension.
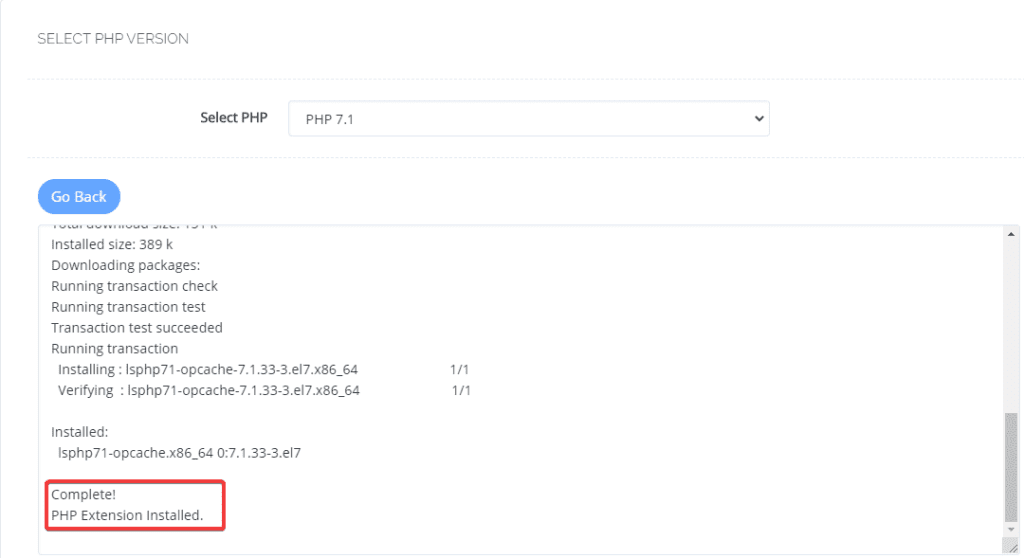
The installation process will take a few minutes and when the installation is successful, you will receive a message as shown below:
Step 2: Check the operation of OPcache
After installation, you need to check if OPcache has been successfully installed and working properly through the 2 methods below:
Method 1:
If the PHP website version you are using is the same as the system’s default PHP, you can SSH into the VPS and quickly check with the command:
If you don’t know how to SSH into VPS, you can check out the instructions here.
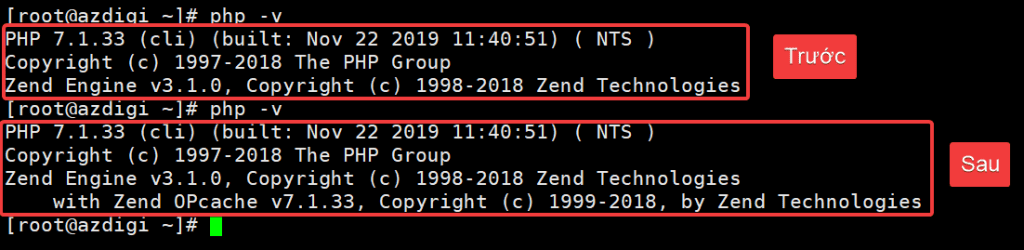
php -v
The screen shown below is that you have successfully installed:
Method 2:
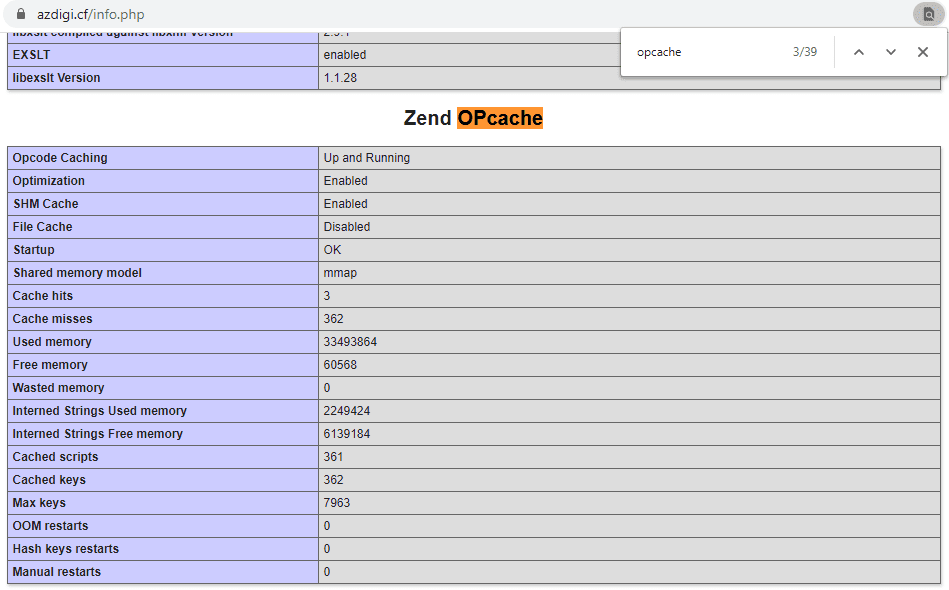
If the PHP website version you use is different from the system’s default PHP, you can check by creating the info.php file in the directory containing the website source code, inserting the content below, and checking.
<?php
phpinfo();
?>
The screen shown below is that you have successfully installed:
Summary
So in this article, AZDIGI has introduced to you what Opcache is and how to install Opcache on Cyber Panel in the simplest way. Integrating OPCACHE into your server will bring significantly optimal performance in website operation. In the following articles, AZDIGI will guide you on how to optimize OPcache. If you find the article interesting and useful, you can share it widely.
