

Nội dung
You can backup data to Google Drive, Dropbox with UpdraftPlus very simply with just 2 steps.
Introduction
n the previous article, AZDIGI introduced and showed you how to Backup/Restore website data with UpdraftPlus directly on the website, to continue with UpdraftPlus tutorials, so today, AZDIGI will show you how to backup and upload data to notable cloud storage services like Google Drive, Dropbox.
Configuration Guide
Step 1: Link UpdraftPlus with Google Drive
You access Settings >> UpdraftPlus >> Setup to proceed with backup setup. At this screen, it will be the place to configure Automatic Backup and sync File Backup to 3rd party storage services. You can refer to how to configure it as below:
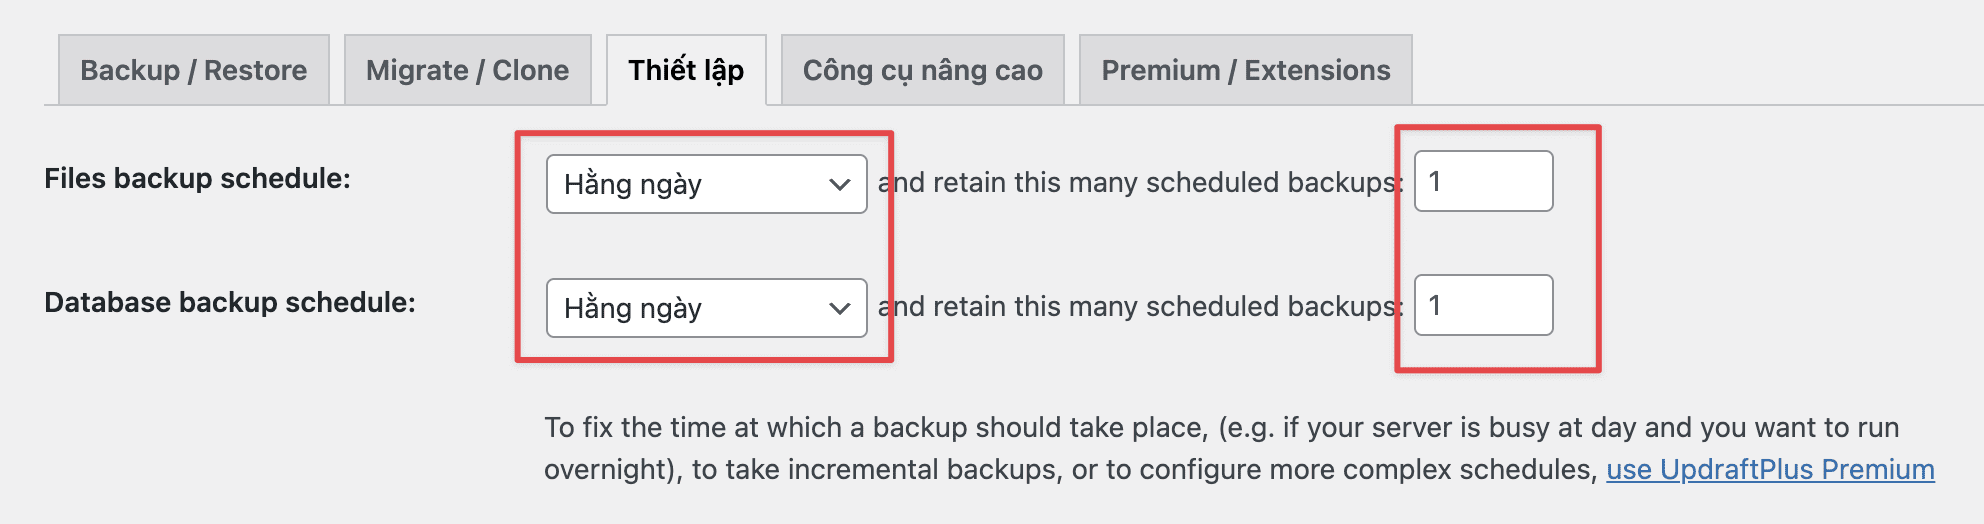
– Set time to Backup File and Database automatically
In there:
- Files backup schedule: Set the time and number of backups to keep.
- Database backup schedule: Set the time and number of backups to keep.
– Connect UpdraftPlus to Google Drive
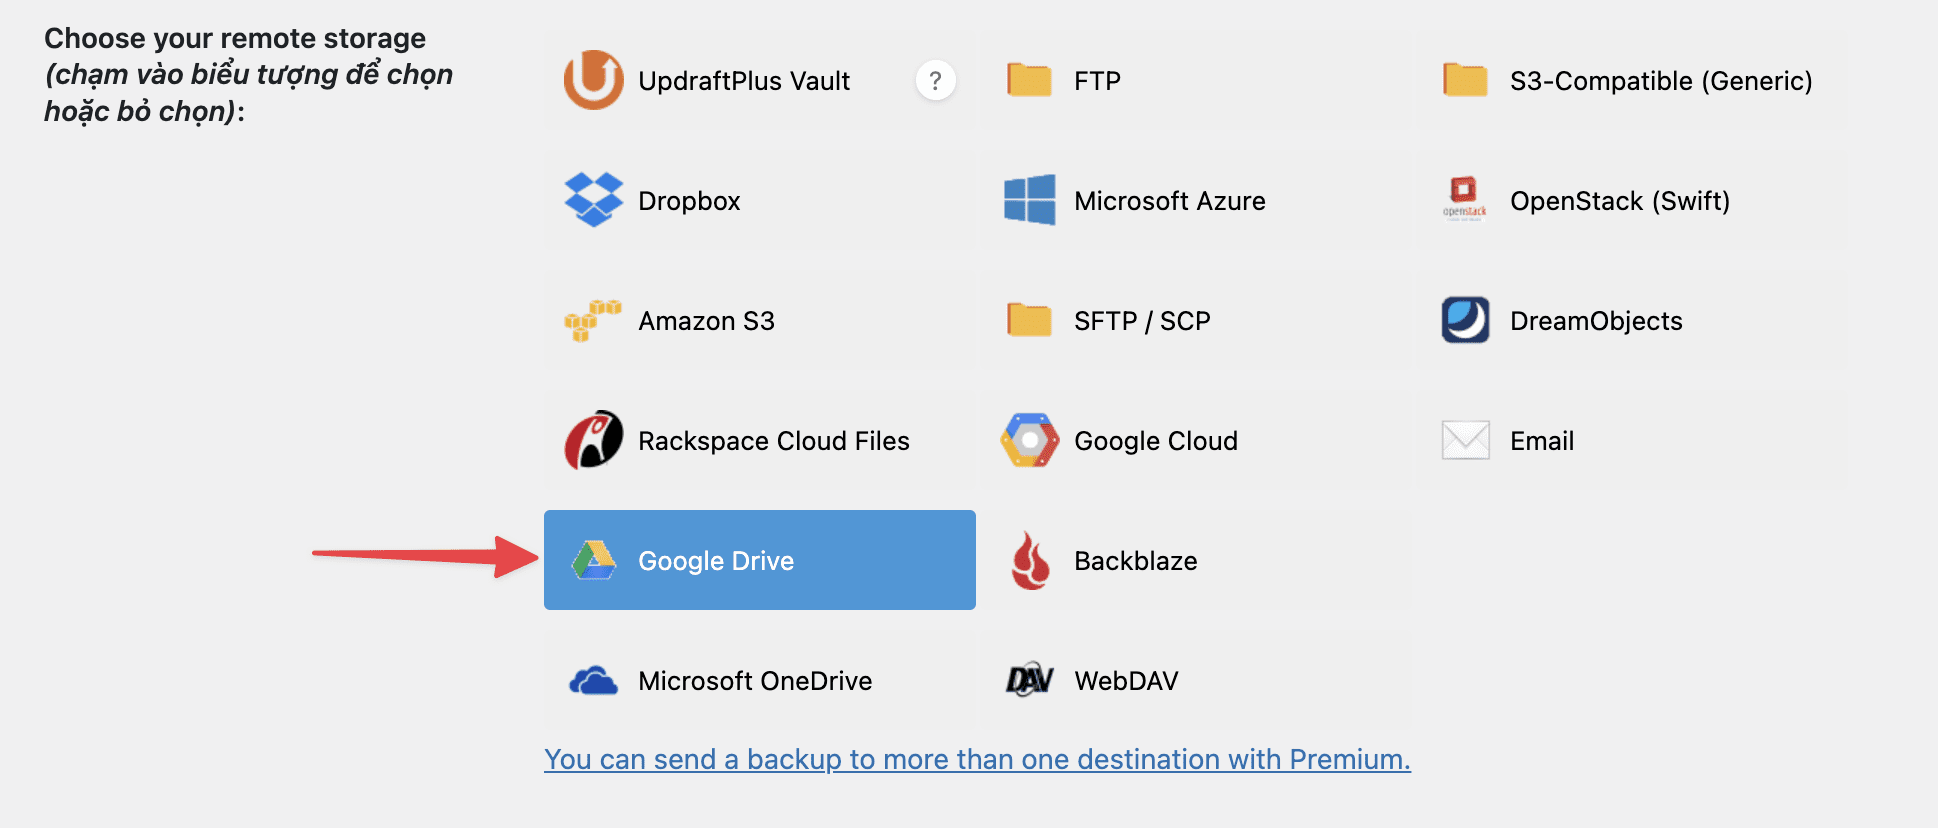
After selecting the Google Drive icon, scroll to the end and click Save Changes. After saving, a popup will appear asking you to connect to your Google Drive account.
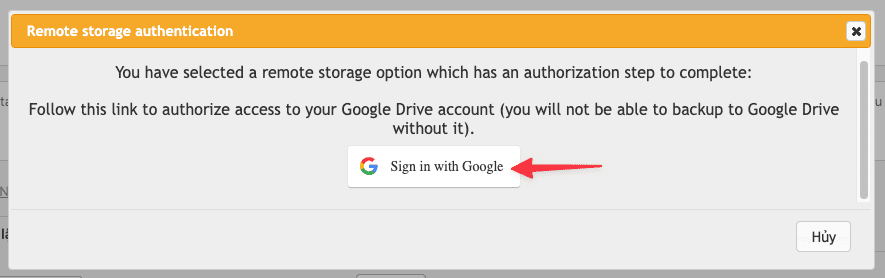
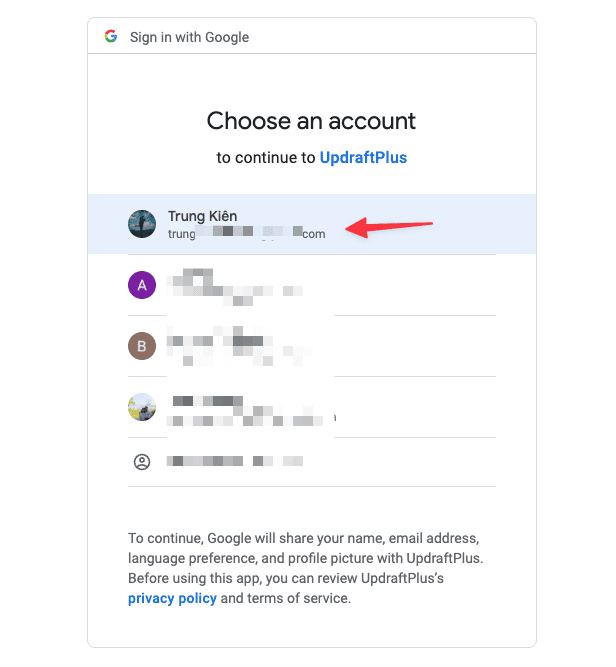
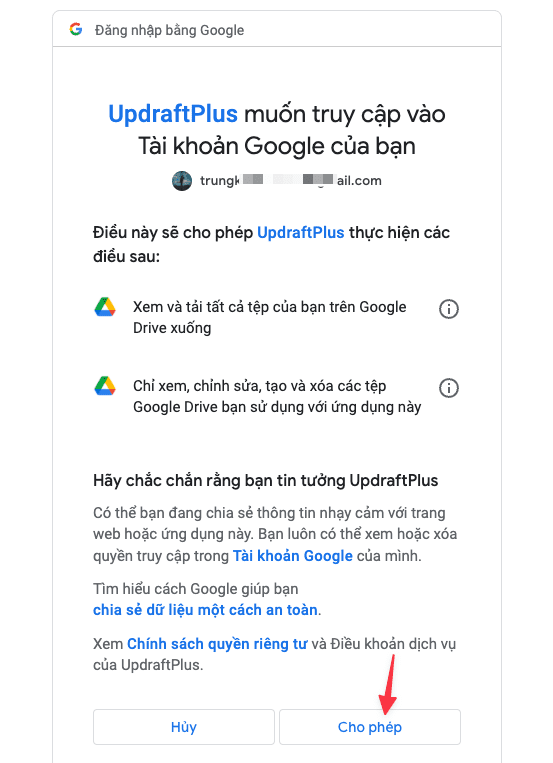
Then you need to sign in or select the Google account to link.
Next, click Allow to grant UpdraftPlus permission to access your Google Drive account.
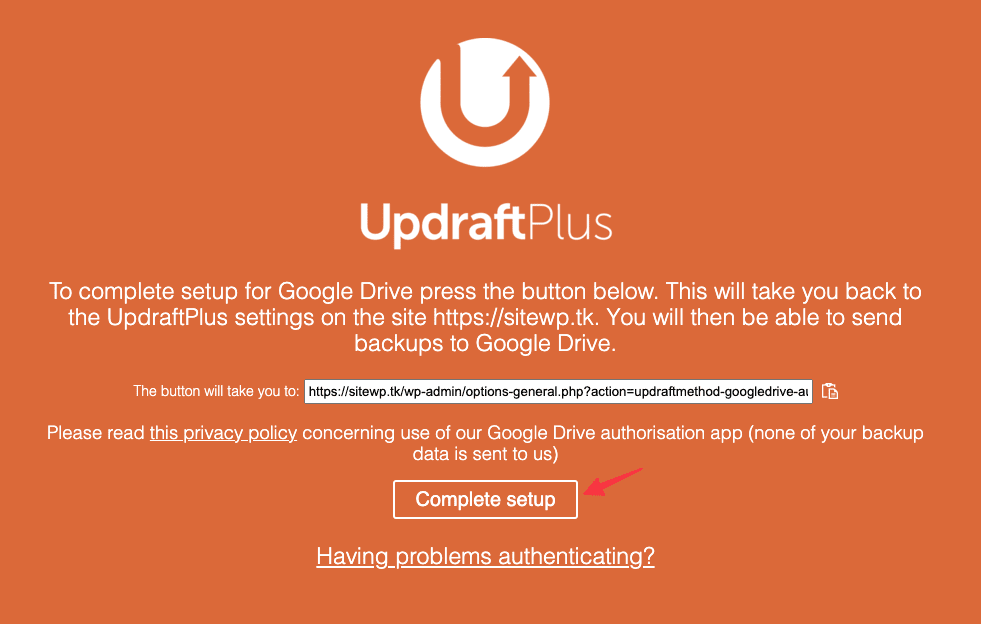
Lastly, you just need to click Complete setup to complete the configuration.
– Customize files/folders with or without Backup
By default, the plugin will pre-select the files and folders that need to be backed up and remove the files and folders that don’t need to be backed up. However, you can adjust this part according to your needs.
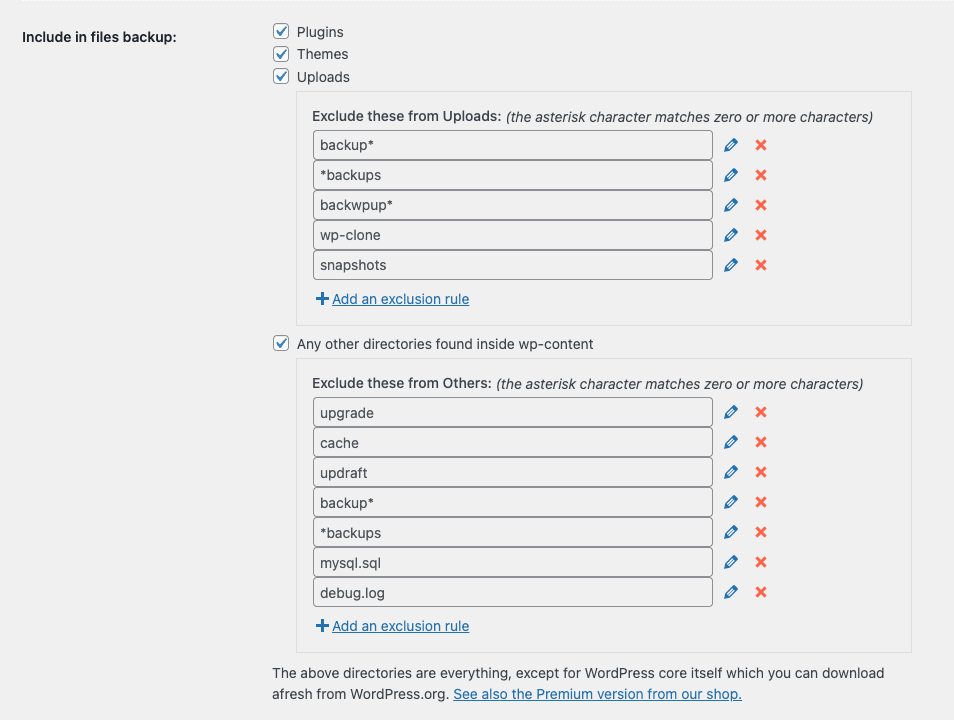
After selecting the components that need to be backed up, scroll down and click Save changes to apply the configuration.
Step 2: Create a Backup manually
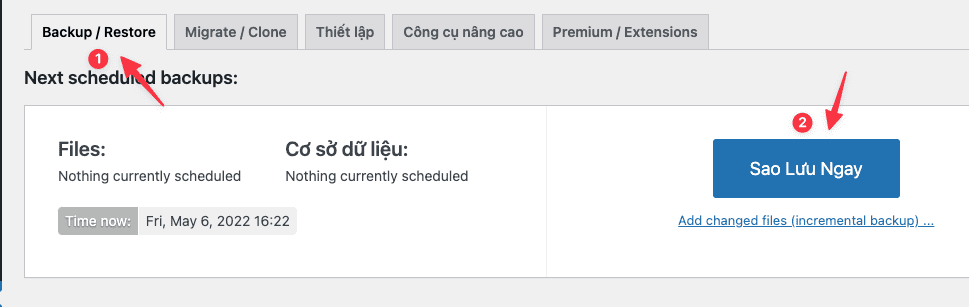
To Backup, select the Backup/Restore tab and click the Backup now button to create a backup.
After clicking Backup now, a popup will appear (as shown below):
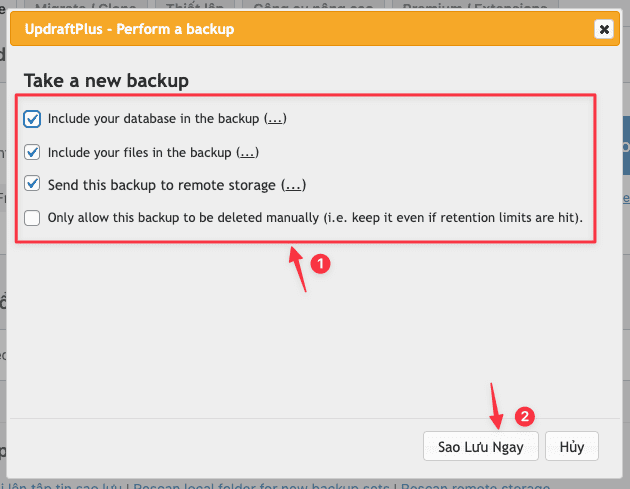
In there:
- Include your database in the backup: Select Database to backup (only the paid version can select individual tables)
- Include your files in the backup: Select File to backup.
- Send this backup to remote storage: Send File Backup to the storage servers you have set up (Google Drive)
- Only allow this backup to be deleted manually: Select if you want to delete this backup manually (you must be logged in to hosting or Google Drive to delete)
After selecting, click Backup Now to start the backup process. The backup process is fast or slow, depending on your website’s data.
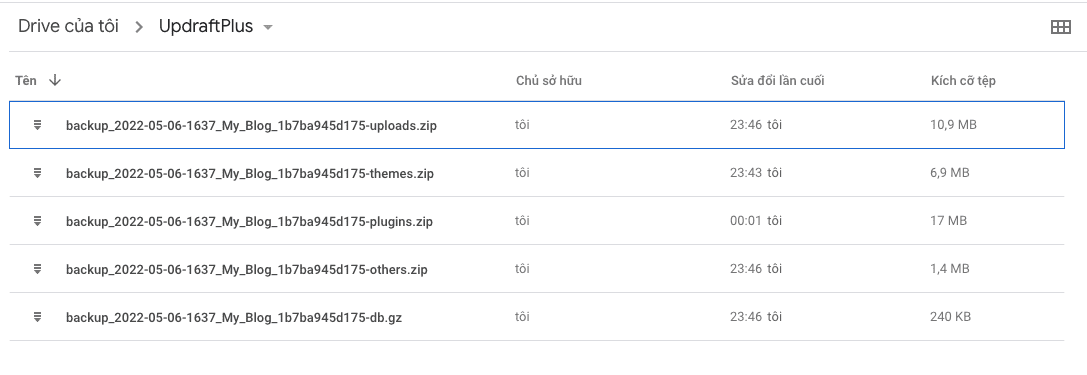
When the backup is complete, you will see the message “The backup apparently succeeded and is now complete”, and now check Google Drive to see if the Backup has been successfully uploaded or not. As shown below, the Backup process was successful.
Step 3: Restore data from File Backup
In the data recovery section (Restore), you will operate as simply as Backup through the usual UpdraftPlus. If you don’t know how to restore it, you can refer to the instructions below:
In this article, AZDIGI showed you how to backup data and synchronize that data to Google Drive in a very simple way, linking to a large server like Google Drive to store data is a real thing. Make a wise decision, with the stability of Google Drive, you can rest assured that your data will always be secure.
You can refer to other instructions at the link below:
If you need assistance, you can contact support in the ways below:
- Hotline 247: 028 888 24768 (Ext 0)
- Ticket/Email: You use the email to register for the service and send it directly to: support@azdigi.com .
