
Nội dung
What is SMTP?
SMTP – Simple Mail Transfer Protocol is a standard for transferring email messages over the Internet. You can understand that SMTP will help your website to send mail or receive mail through a pre-set address on the website, this function is responsible for receiving notifications when your customers, users make perform order operations on the website, and at the same time, the mail will also be sent back to the user’s email address to notify about their operations and orders.
Install SMTP with Gsuite
Step 1: Get the app password
To configure SMTP with G Suite, you need an application password to configure SMTP because configuring SMTP will not use the same password as your G Suite account.
To get the application password, please access your Gsuite account by following the link here.
After successfully logging in, at the admin interface, you access Security => Application password.

Next, in the Select Application section => select Other.
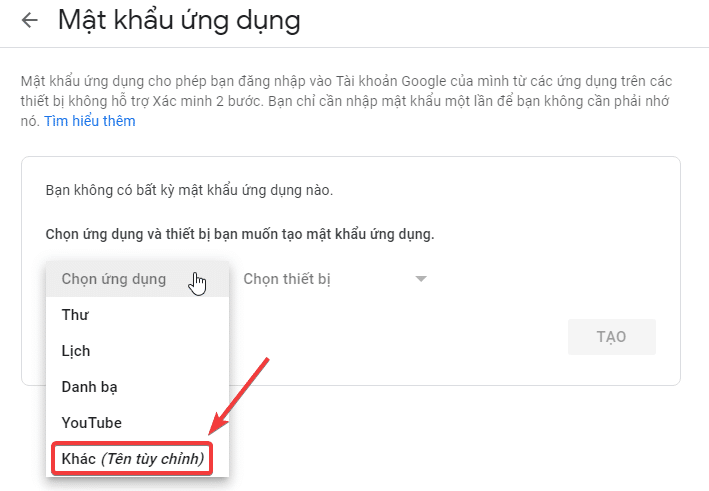
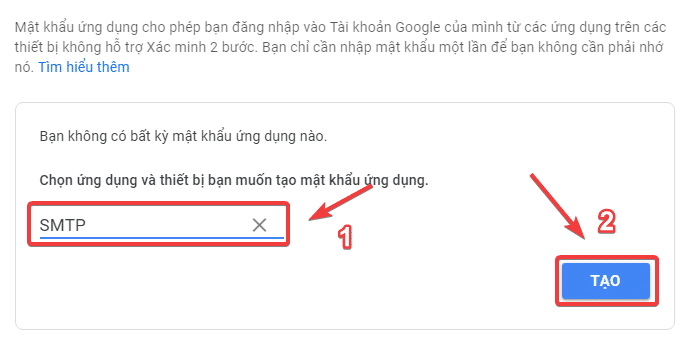
Please enter SMTP and click Create.
You will receive information like the image below.
You will receive information like the image below. In the yellow box, you will see characters, this is your application password. Please save this password.
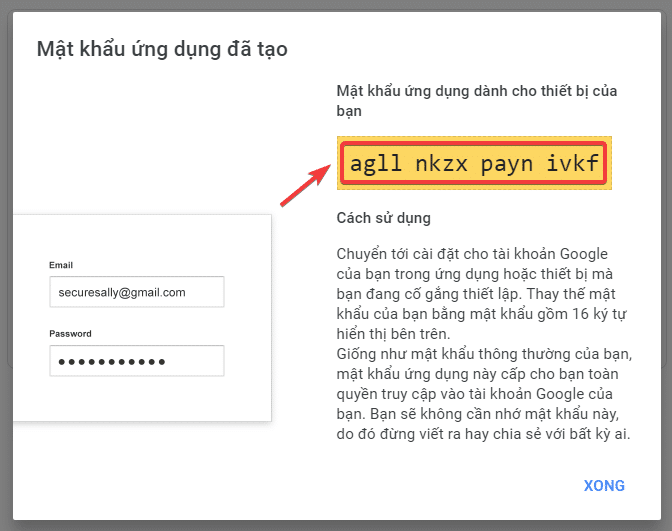
You have completed the process of getting the application password on G Suite.
Step 2: Connect SMTP
To connect SMTP, you can refer to some plugins such as WP Mail SMTP by WPForms, WP SMTP, Easy WP SMTP. AZDIGI will configure with the Easy WP SMTP plugin.
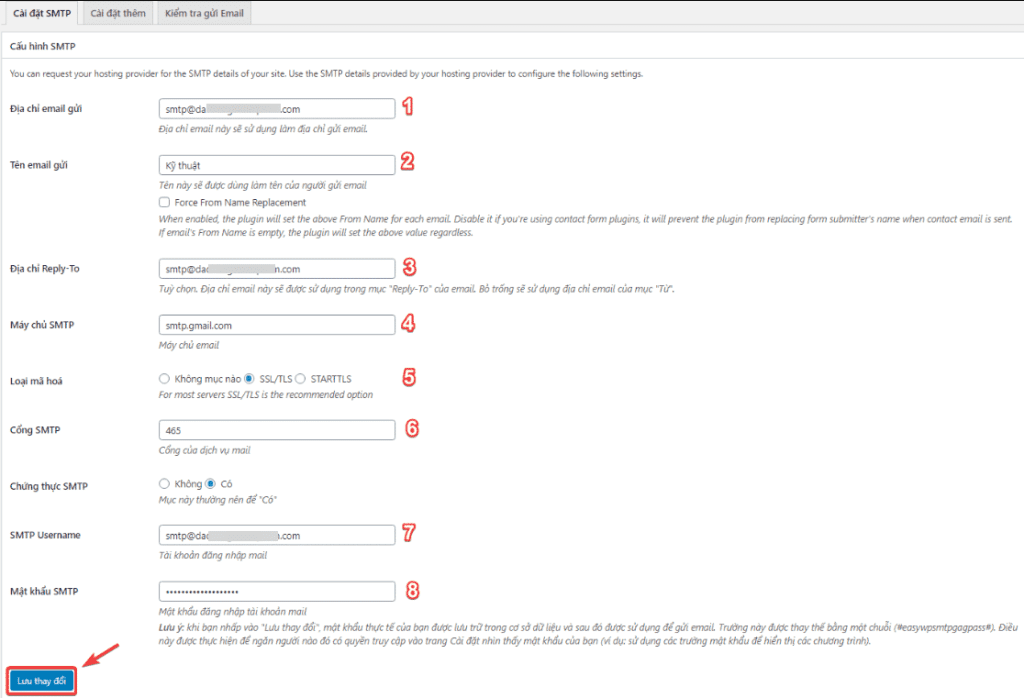
Please fill in the following configuration information:
- Sending email address: The email address used to send
- Sending email name: Display name when sending Email
- Reply-To Address: Email address to reply to
- Máy chủ SMTP: Enter smtp.gmail.com
- Encryption type: You can choose your own encryption type depending on your needs.
- SMTP port: I use SSL/TLS, so it will be port 465.
- SMTP Username: This username is the same as the sending email address.
- SMTP Password: The application password you created in step 1.
After filling in all the information, click Save Changes.
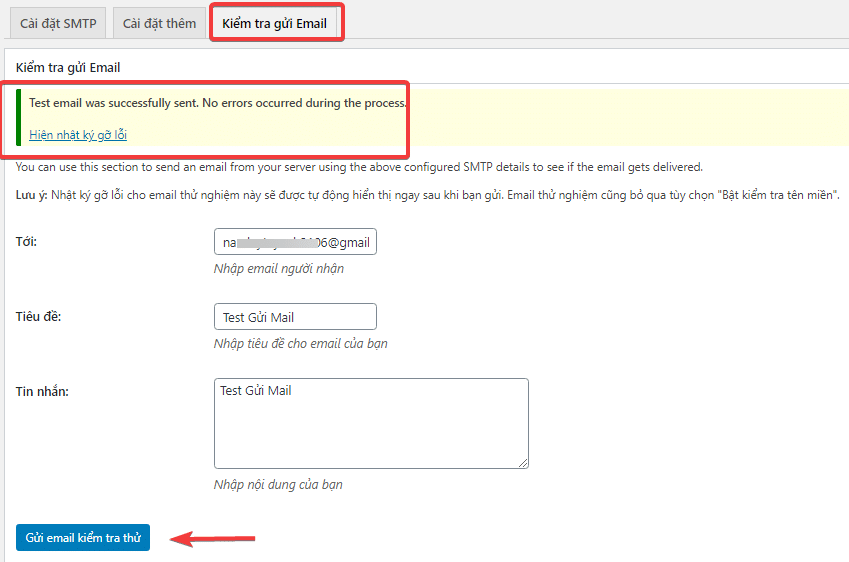
After the configuration is complete, go to the Test send mail tab to test it, if you receive the message as shown, it is successful.
Possible Errors When Configuring SMTP with G Suite
There will be some cases where you have correctly configured email and full SMTP information, but when test mail still cannot be sent and the error log is similar to the image below:
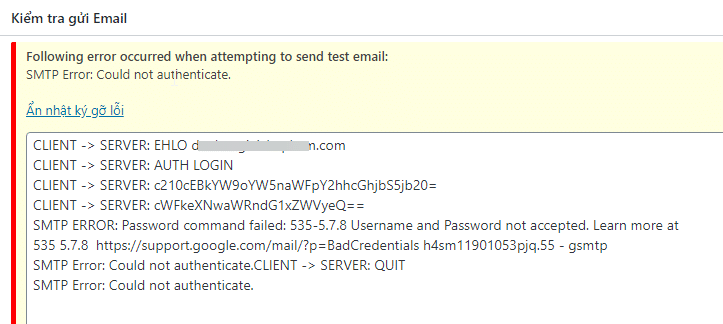
In this case, it is highly likely that your G Suite account has not been granted permission to use less secure applications (because G Suite is a paid service from Google, they will probably have many limitations to increase security confidentiality on their mail services).
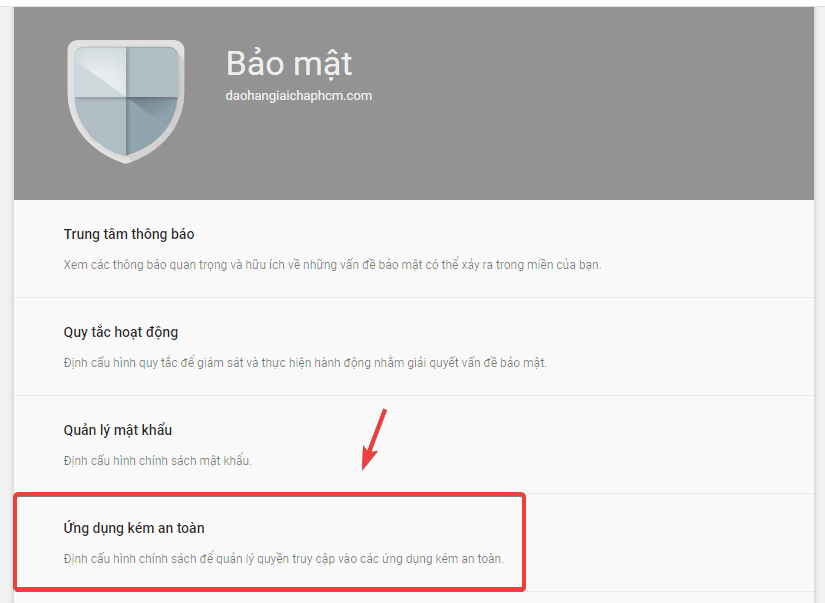
To handle the above problem, you need to go to the G Suite Admin account according to the link here and allow the child accounts to use less secure applications. At the G Suite admin interface, you access > Security => Less secure applications.
Next, select “Allow users to manage their access to less secure apps” and click Save.
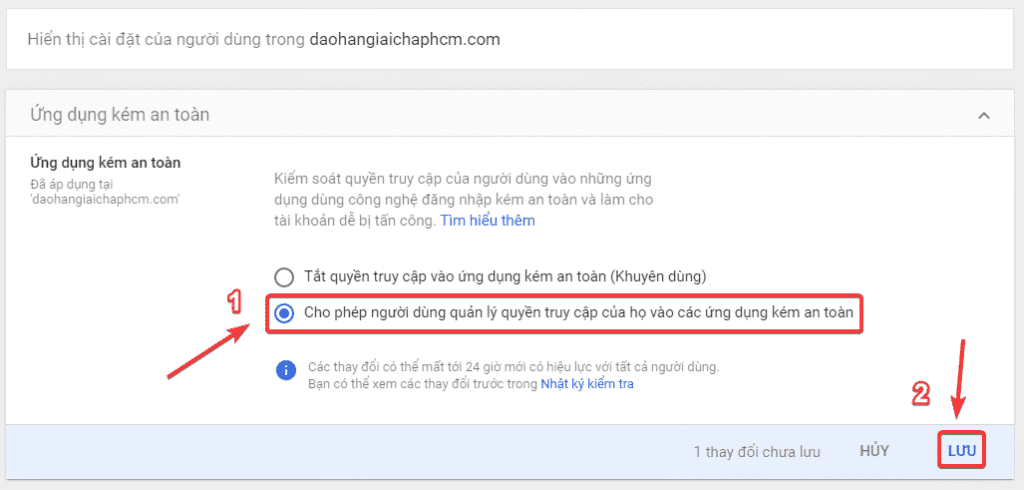
After adjusting this section, you can check to send SMTP email again.
So in this article, AZDIGI showed you how to configure SMTP with G Suite and handle errors on Gsuite accounts in the simplest way. If you have questions or encounter problems during the configuration process, you can send a support ticket to AZDIGI’s Technical Department for assistance.
- Hotline 247: 028 888 24768 (Ext 0)
- Ticket/Email: You can use your email to register for the service and send it directly to: support@azdigi.com
Wishing you success!
