
Nội dung
AZDIGI will show you how to use the tools to Export/Import data in WordPress with 2 elementary steps.
Introduction
You may not know that WordPress supports a very useful tool that allows users to export/import website data by each component (Page, Post, Product, Variation…) very simply and quickly.
This helps you to transfer this website data to another website. Or if unfortunately your website is infected with malware and you need to rebuild a new website, you can use this tool to export the data you need to be able to restore it.
Implementation Guide
Step 1: How to export data in WordPress
In WordPress, you can use the Export/Import tool to export data such as posts, pages, comments, custom fields, terms, navigation menus, and custom posts.
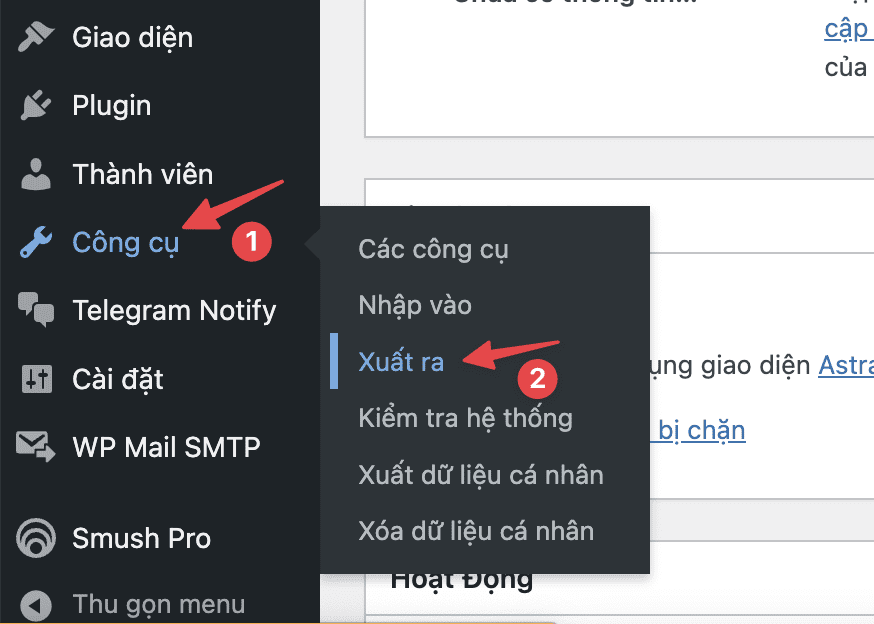
To do that, you log in to the website administration and access: Admin -> Tools -> Export
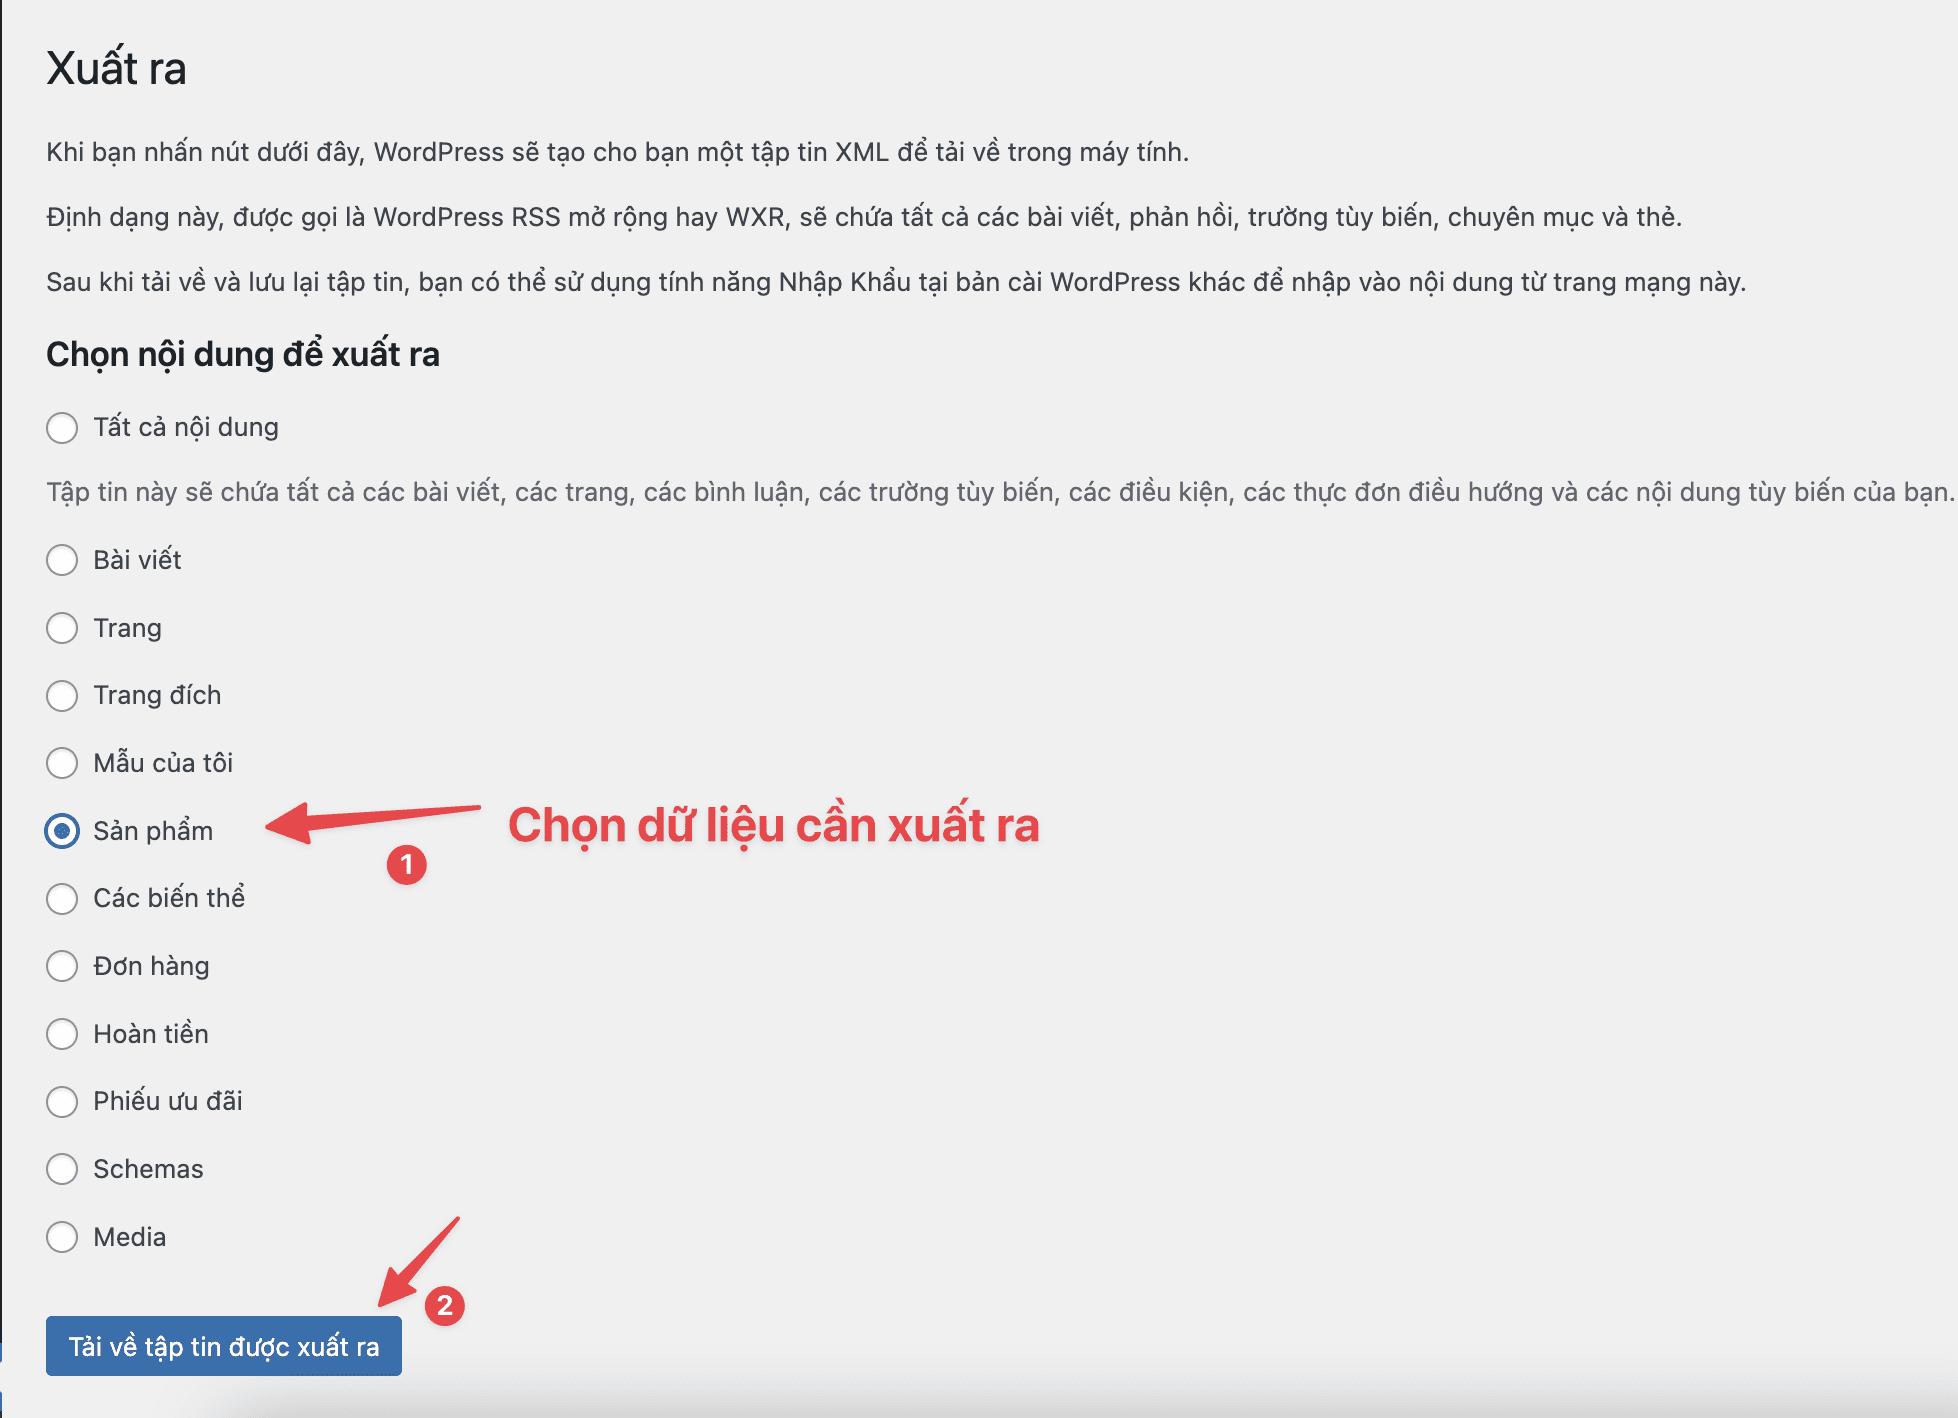
Next, in the export data selection section, select the data that you need to export and click on Download the exported file. If you want to export all data, tick on All content.
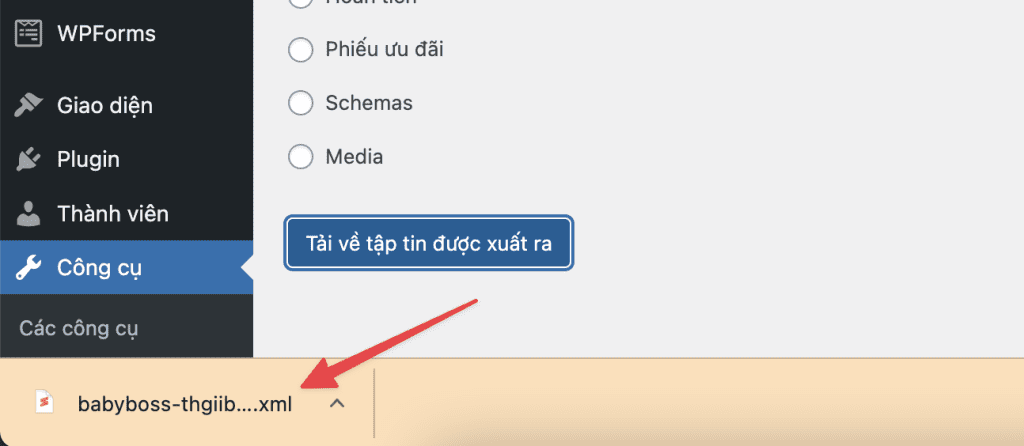
Then after a few minutes, WordPress exported us a file in *.xml format as shown below. The remaining task is that you need to store this file for use when needed. The file size and the speed of exporting files may depend on the amount of data you have.
Step 2: How to import data into WordPress
To import data, WordPress supports importing from many different formats. And in this article, I will guide you to import data into WordPress according to the *.xml format file that we made in Step 1.
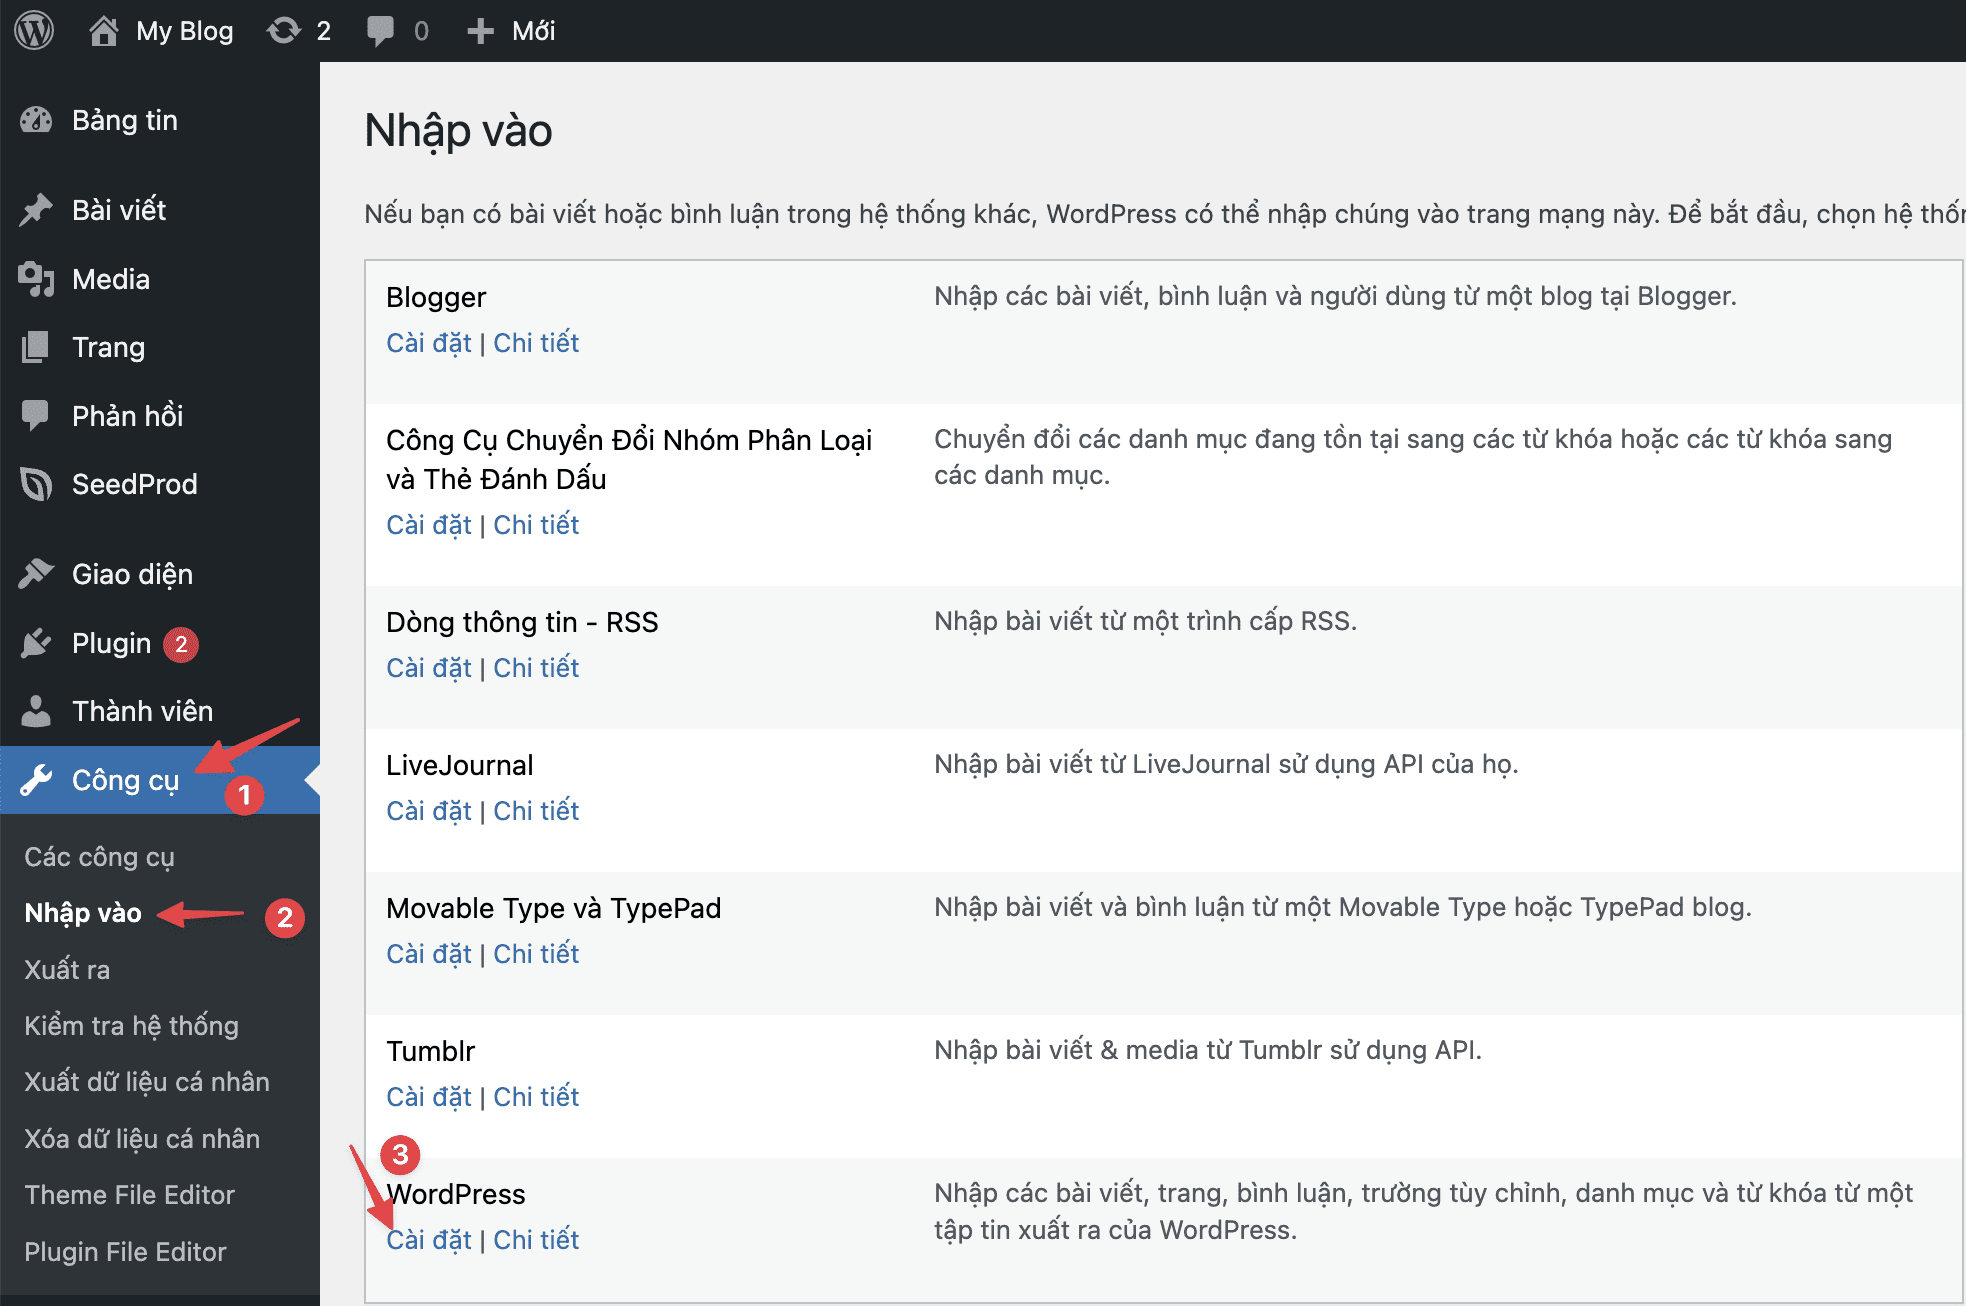
To import data into WordPress, on the new website, you access Tools -> Import and select Setting for WordPress.
When the setup is complete, you click on Run Importer.
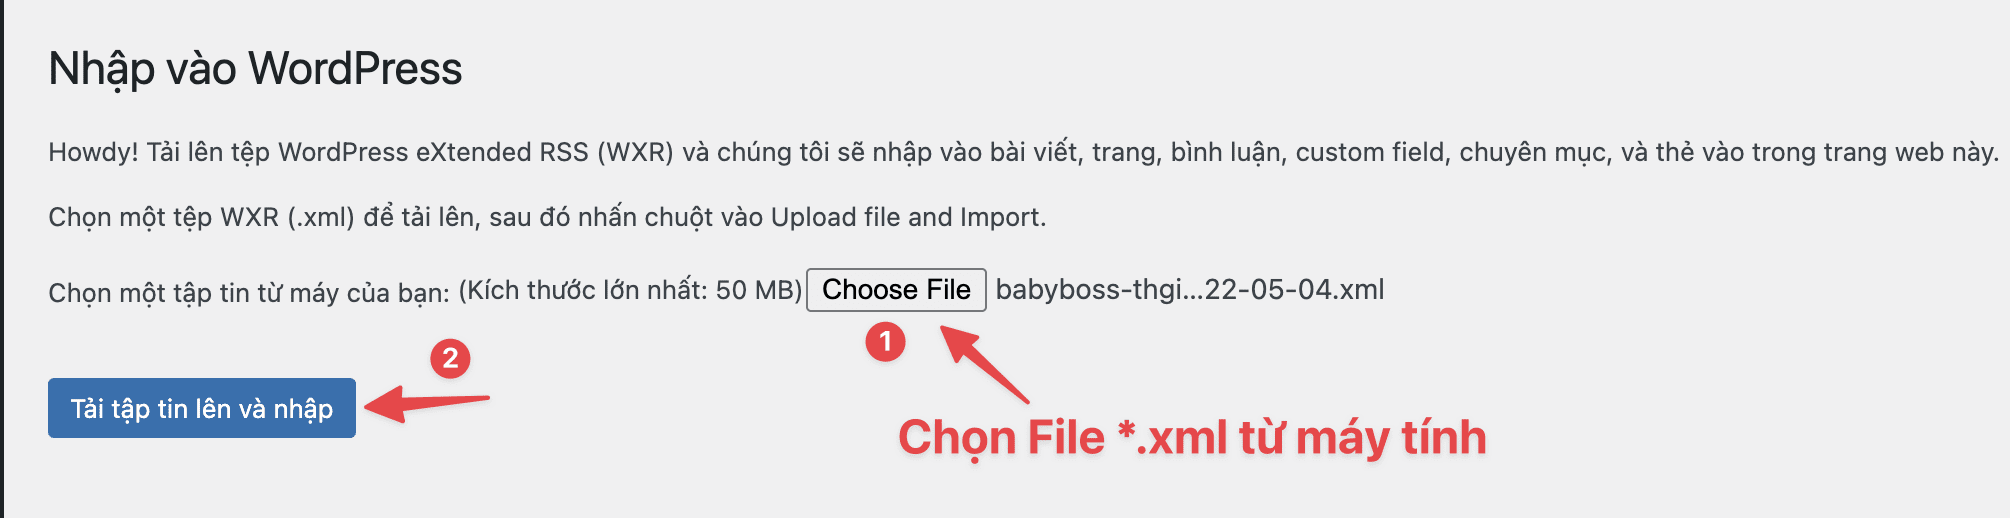
Here you click on Choose file and find the *.xml file to import, then click Upload file and import.
Next, you need to select the author’s name and click on the Download and import file attachments option to download the attachments and images from the exported website to the new website. Finally, click Submit to proceed with the data import.
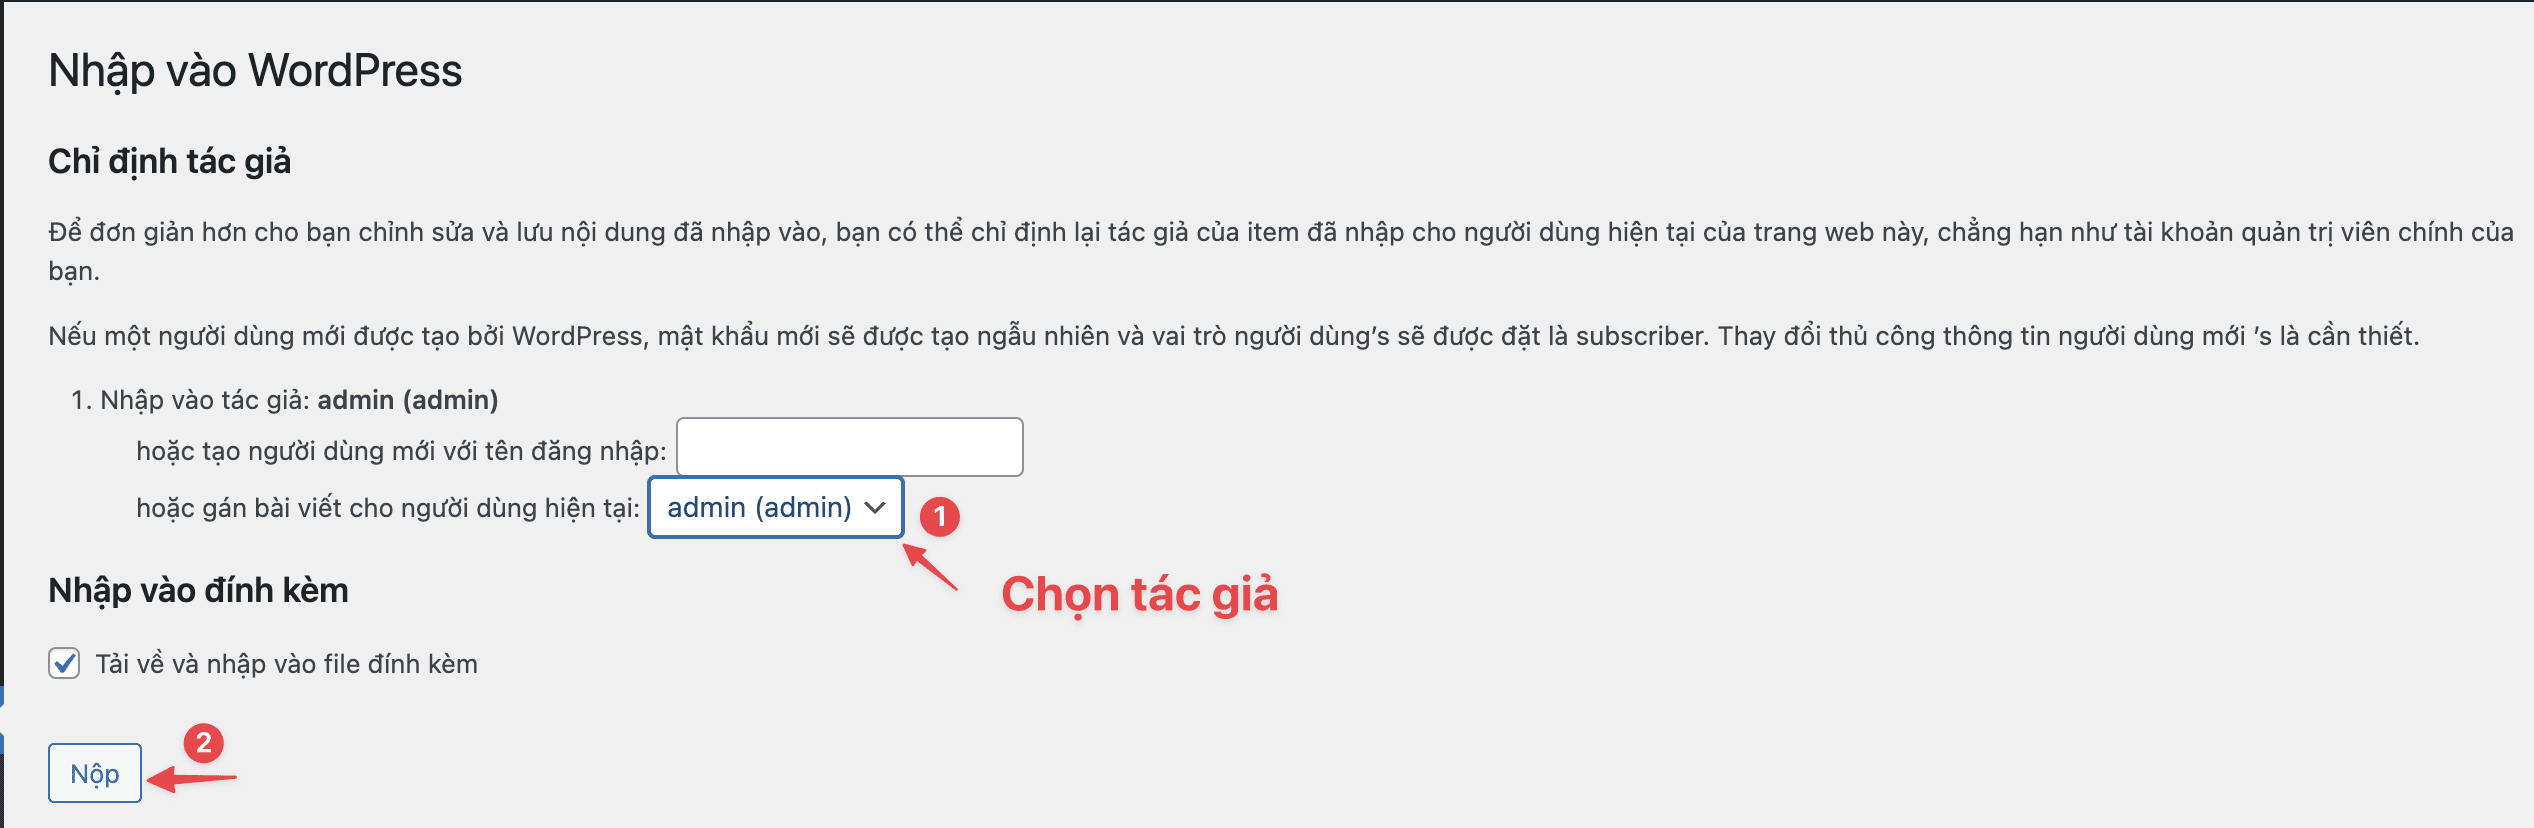
Now the tool will automatically import the content into the new website, and the process can be fast or slow depending on the size of your data file. After the import is complete, the data on the new website will be 100% identical to the data on the website you exported from.
So AZDIGI has shown you how to use WordPress’s Export/Import tool to transfer your data from one website to another or to back up your data effectively. Hopefully, this article will be helpful to you, wish you success!
You can refer to other instructions at the link below:
If you need assistance, you can contact support in the ways below:
- Hotline 247: 028 888 24768 (Ext 0)
- Ticket/Email: You use the email to register for the service and send it directly to: support@azdigi.com .
