

Nội dung
aaPanel is a new control Panel that is being developed and trusted by many people recently, aaPanel supports server management through the GUI and with just a simple operation you can install a running web server LNMP/LAMP model through a mouse click.
To install aaPanel on VPS, you can refer to the instructions below to do it.
However, in aaPanel there is a problem after installation, the control panel access information that aaPanel provides is relatively difficult to remember and is not convenient for most users. In this article, AZDIGI will guide you to change that admin information on aaPanel.
The default information after the installation of aaPanel is completed will look similar to the following:
aaPanel Internet Address: https://45.252.xxx.xxx:8888/bf0f58d1 aaPanel Internal Address: https://45.252.xxx.xxx:8888/bf0f58d1 username: fbrygyqi password: 96d72ef7Change user/password/port information
Method 1: Change via the Terminal window.
You log in to the aaPanel admin page through the link/user/password provided during the installation process.
At the admin interface => you access Terminal, to display information related to aaPanel, enterbt 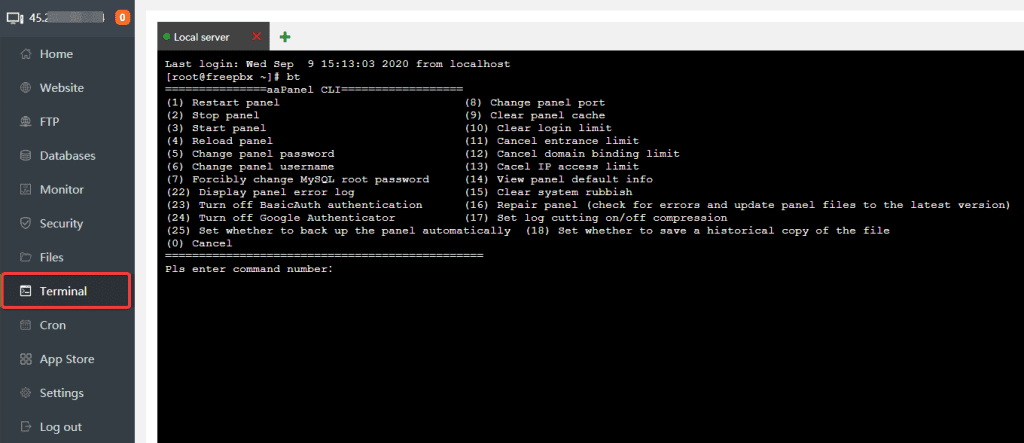
[root@freepbx ~]# bt
===============aaPanel CLI==================
(1) Restart panel                           (8) Change panel port
(2) Stop panel                              (9) Clear panel cache
(3) Start panel                             (10) Clear login limit
(4) Reload panel                            (11) Cancel entrance limit
(5) Change panel password                   (12) Cancel domain binding limit
(6) Change panel username                   (13) Cacel IP access limit
(7) Forcibly change MySQL root password     (14) View panel default info
(22) Display panel error log                (15) Clear system rubbish
(23) Turn off BasicAuth authentication      (16) Repair panel (check for errors and update panel files to the latest version)
(24) Turn off Google Authenticator          (17) Set log cutting on/off compression
(25) Set whether to back up the panel automatically  (18) Set whether to save a historical copy of the file
(0) Cancel
===============================================
Pls enter command number:
Change user information, press 6 (Change panel username) => press Enter, enter new user information and continue to press Enter
Pls enter command number:6
===============================================
EXECUTING
===============================================
Pls enter new username(>5 characters): azdigi
|-New username: azdigi
[root@freepbx ~]#
- To change password information, press 5 (Change panel password) => press Enter => Enter new password => and press Enter
Pls enter command number:5
===============================================
EXECUTING
===============================================
Pls enter new password: azdigi@2020
|-Username: azdigi
|-New password: azdigi@2020
[root@freepbx ~]#
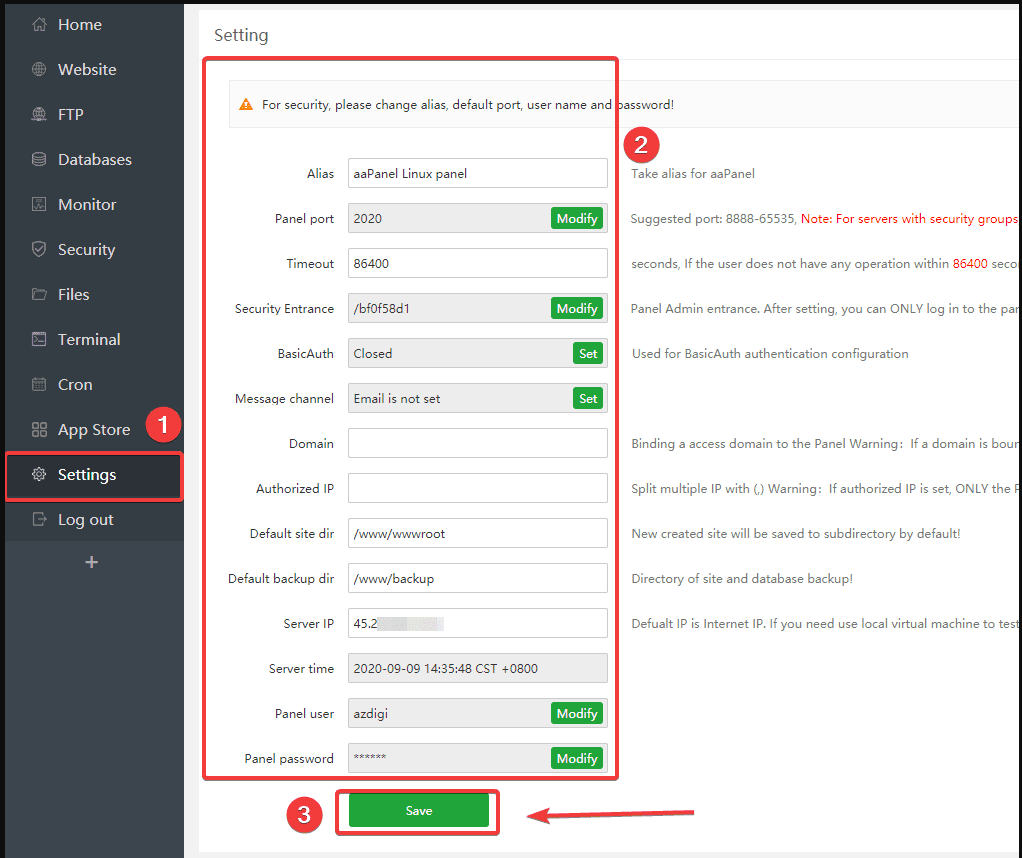
Method 2: Change through the admin page aaPanel
You log in to the default admin page of aaPanel through the link/user/password provided during the installation process.
At the admin interface, go to Settings and you will see the information of aaPanel. To change the user/password/port information, click on the corresponding Modify button to edit => click Save.
Change access link
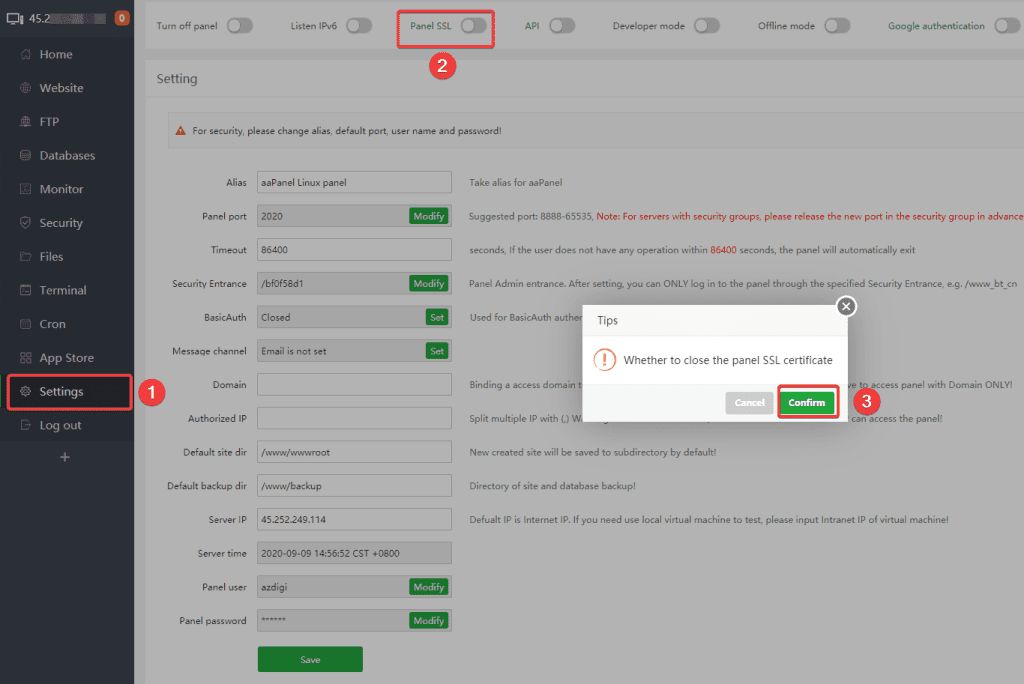
If you select Y in the enable SSL panel when installing, by default when accessing aaPanel, it will use the HTTPS protocol, which causes users to encounter security warnings when accessing browsers.

To turn off HTTPS access, at the aaPanel admin interface, go to Settings (1) => untick Panel SSL => Confirms.
You continue to access Terminal and paste the command line below is completed.
rm -f /www/server/panel/data/admin_path.pl
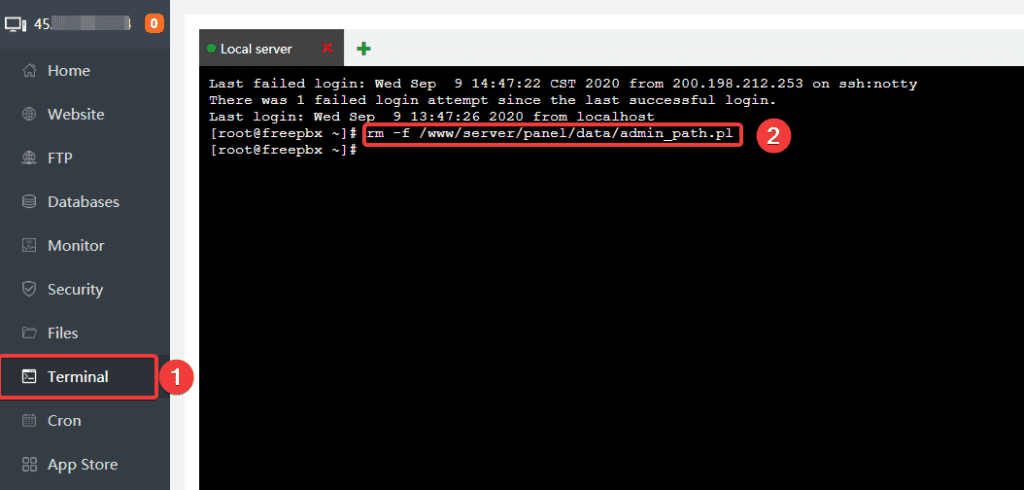
So now you can access the link in the form: http://45.252.xxx.xxx:8888.
Summary
So AZDIGI has shown you how to change the default information of aaPanel with just a few simple steps, changing the information makes it easier for you to remember and store. If you found this article useful, please share it widely!
If you need assistance, you can contact support in the ways below:
- Hotline 247: 028 888 24768 (Ext 0)
- Ticket/Email: You use the email to register for the service and send it directly to: support@azdigi.com
