In today’s tutorial, AZDIGI will show you how to add an email account to the Mail MacOS application, from which it will be extremely convenient to check mail on devices using MacOS.
I. Introduction
In the previous article, AZDIGI showed you how to add an Email account to the Gmail application for easy management on mobile devices. However, AZDIGI’s readers need one more tutorial on how to add an Email account to the Mail MacOS application.
Some advantages of using email on the MacOS Mail app:
- Built-in on MacOS operating system.
- Easy to use interface.
- The interface does not change too much through each version like Outlook.
- Light capacity, takes up few resources of the device.
- Receiving mail is fast, almost at the same time as webmail.
Below is the version of Mail on MacOS I will use in this article:

And in this article, I will use the account of the Pro Mail Hosting service registered at AZDIGI to do it.
Note: Your email account is still active, sending/receiving emails is normal.
If you need a professional email service with your domain extension like support@azdigi.com, please refer to the Pro Mail Hosting service at AZDIGI.
II. Add an Email Account to the Mail MacOS App
To add an email account to the Mail MacOS application, follow these 3 steps.
Step 1: Open the Mail app on your Macbook
To open the Mail application on your device, press the Command + Space key combination as shown below and find Mail.

When searching with the keyword Mail, the Mail application will stand at the top.
Below is the Mail application interface on my MacOS.
So that’s the first step, we continue to the second step to get Pro Mail Hosting account access information.
Step 2: Get Pro Mail Hosting account access information
To get your Pro Mail Hosting account access information, please log in to https://my.azdigi.com => select your Pro Mail Hosting service
=> One Click Login > cPanel as shown below:
Next, you need to access the Email Accounts feature to see the list of email accounts.
I only have one Email account, cskh@binhduongfordvn.vn, and I add an Email account to my Gmail application, so I will click CONNECT DEVICES in this email.
After selecting CONNECT DEVICES, you will receive two information panels as shown below: Note:
- If you want to send and receive mail encrypted and secure, select the configuration in the left pane. (Recommended)
- If you don’t need encryption, all data exchanged is in text format, then select the configuration in the right pane. Sending and receiving mail will also be a bit faster. (NOT Recommended)
Because this is an important email account, I will choose the configuration on the left to secure data transmitted on the Internet.
After having all the information, we continue to step 3 to configure more Email accounts into the Mail MacOS application.
Step 3: Configure adding an email account to the MacOS Mail app
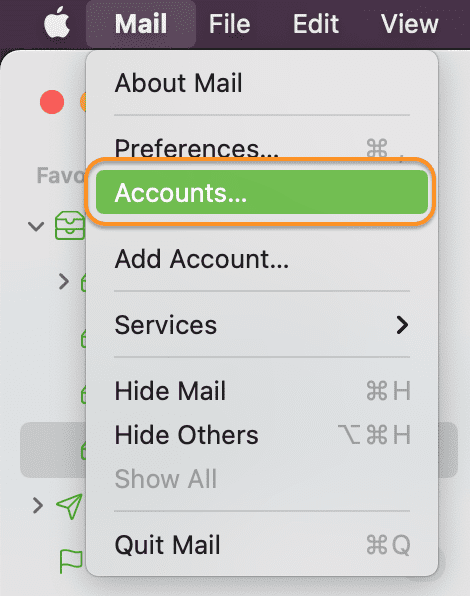
At this step, open the Mail application. On the menu, select Mail => Accounts as shown below:
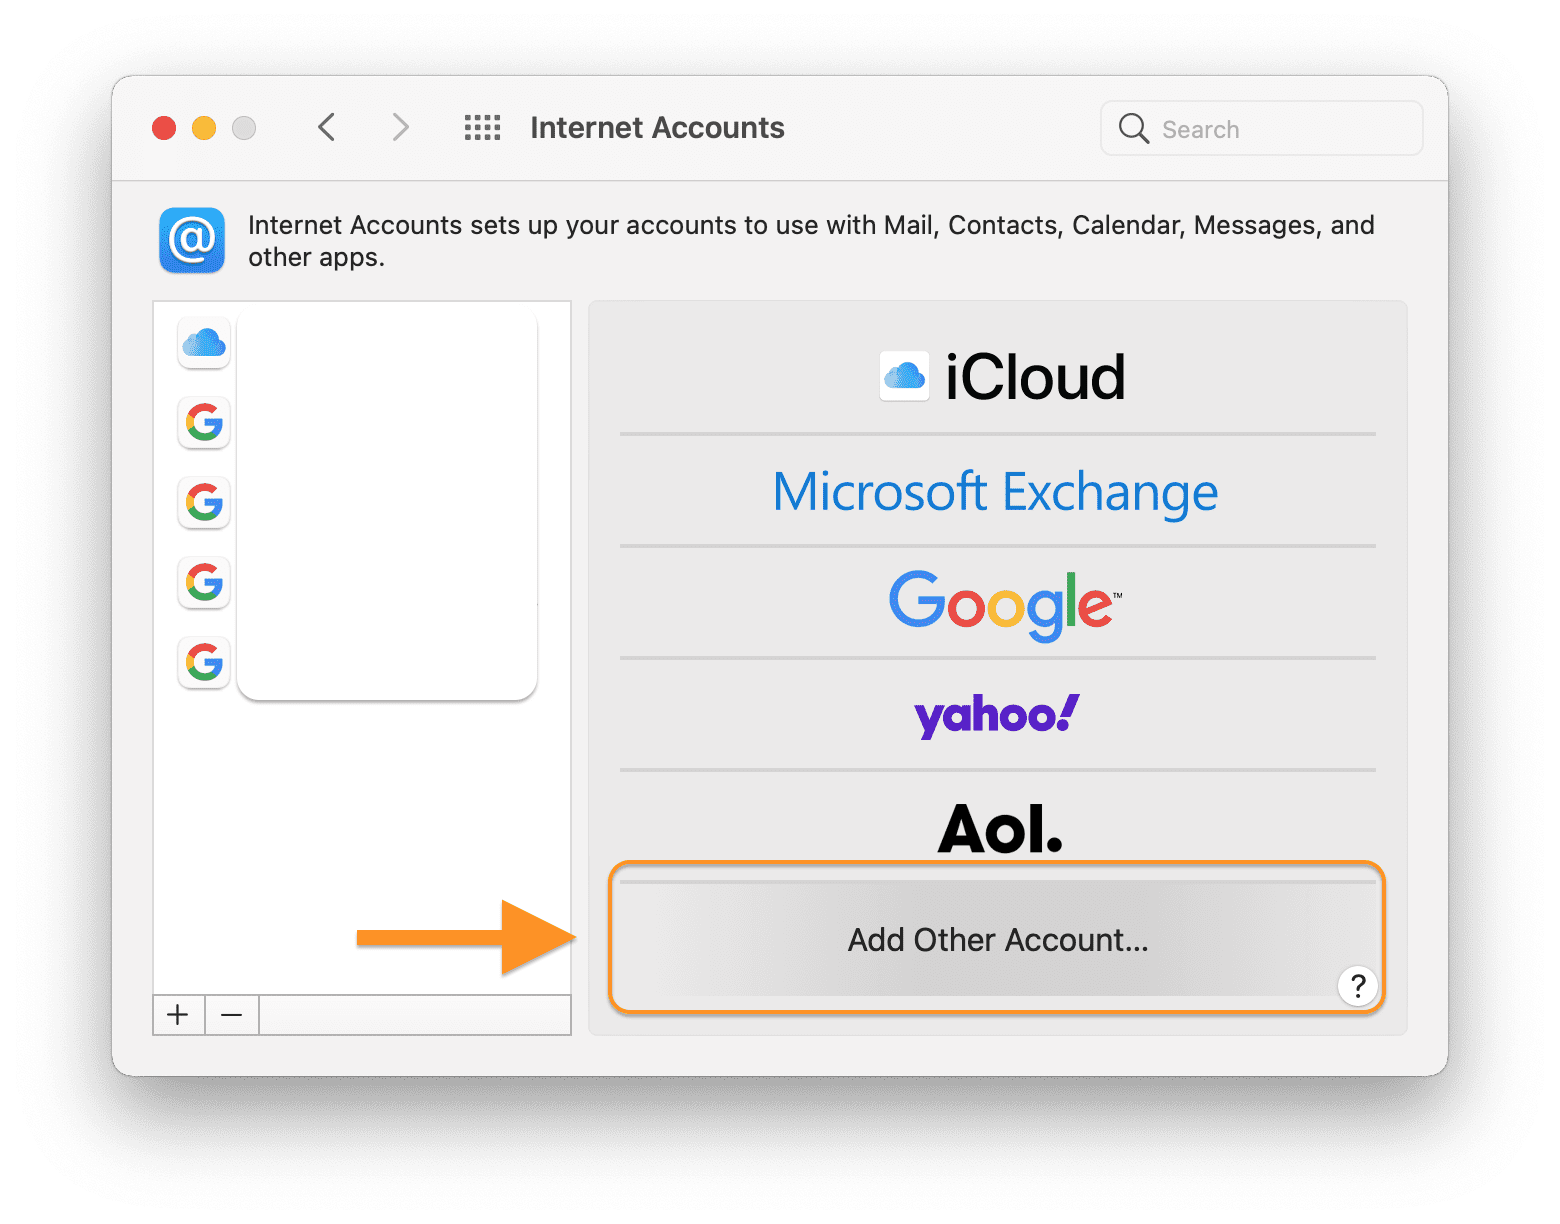
At the next interface, you will see some email services from well-known providers. However, I will use another Mail service, Add Other Account.
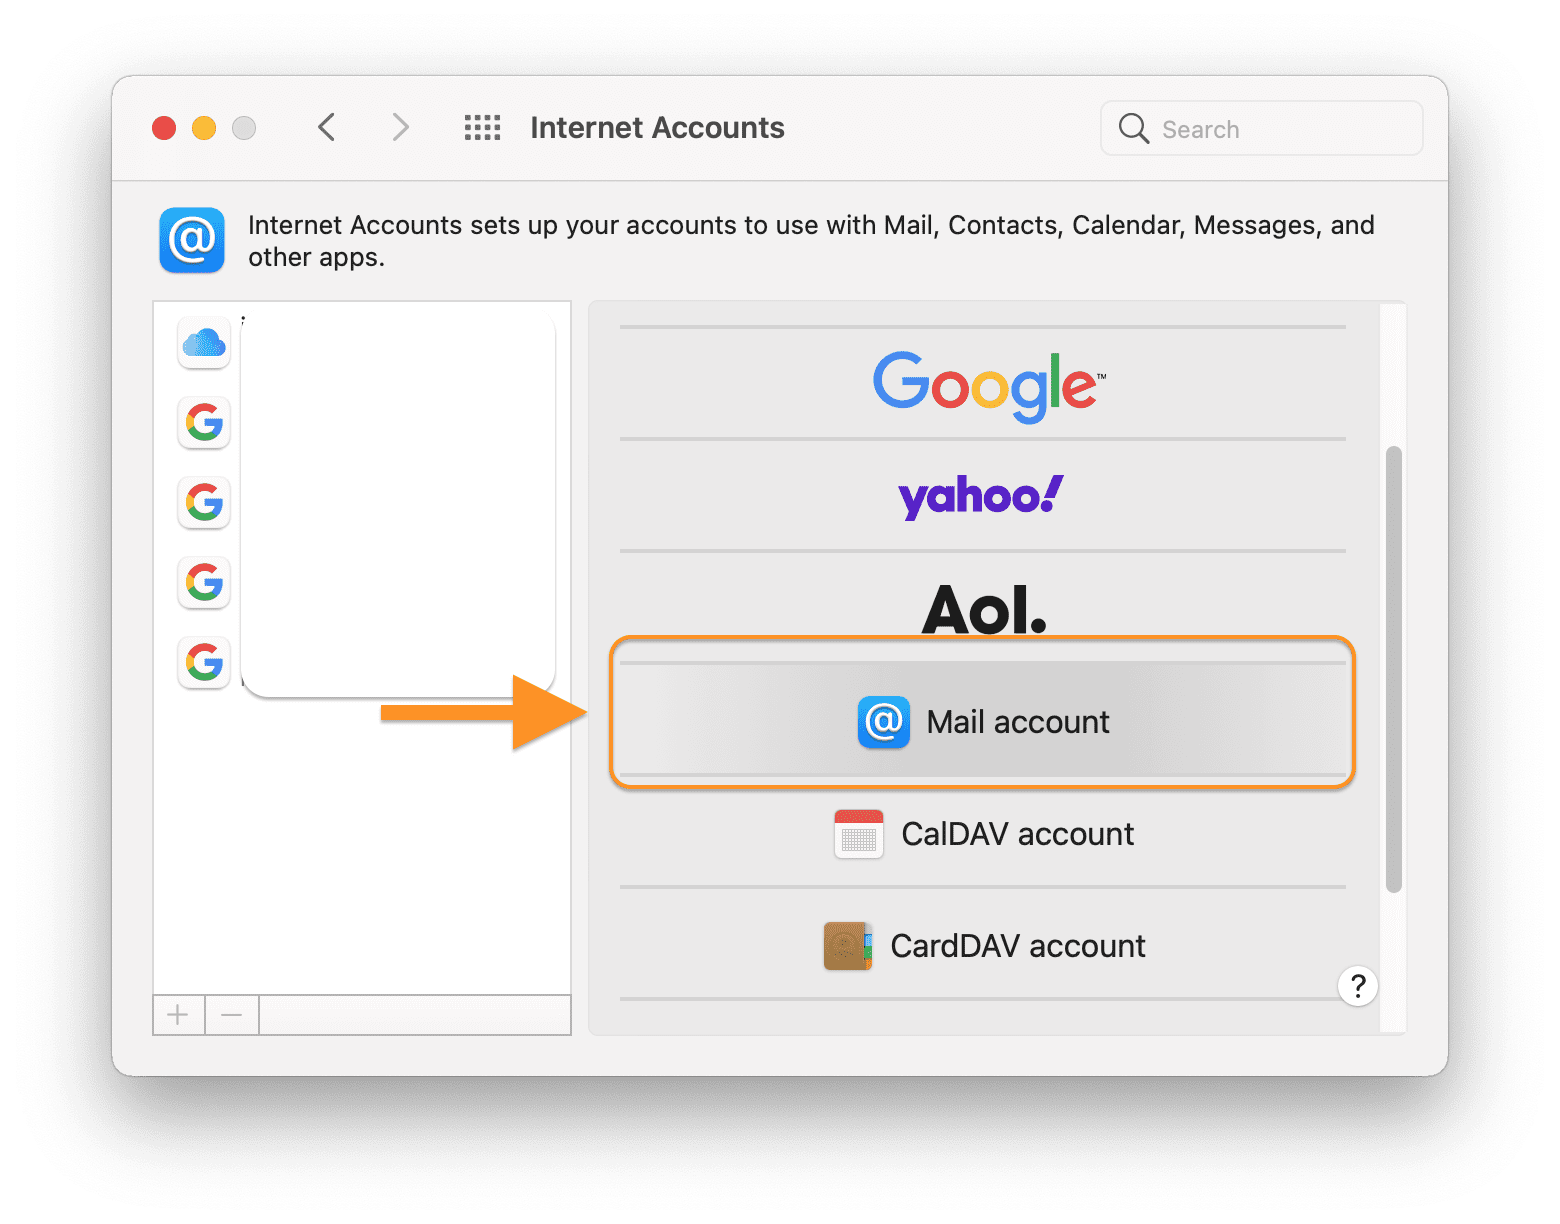
Next, the screen will show a list of other Mail services and we will choose Mail Account.
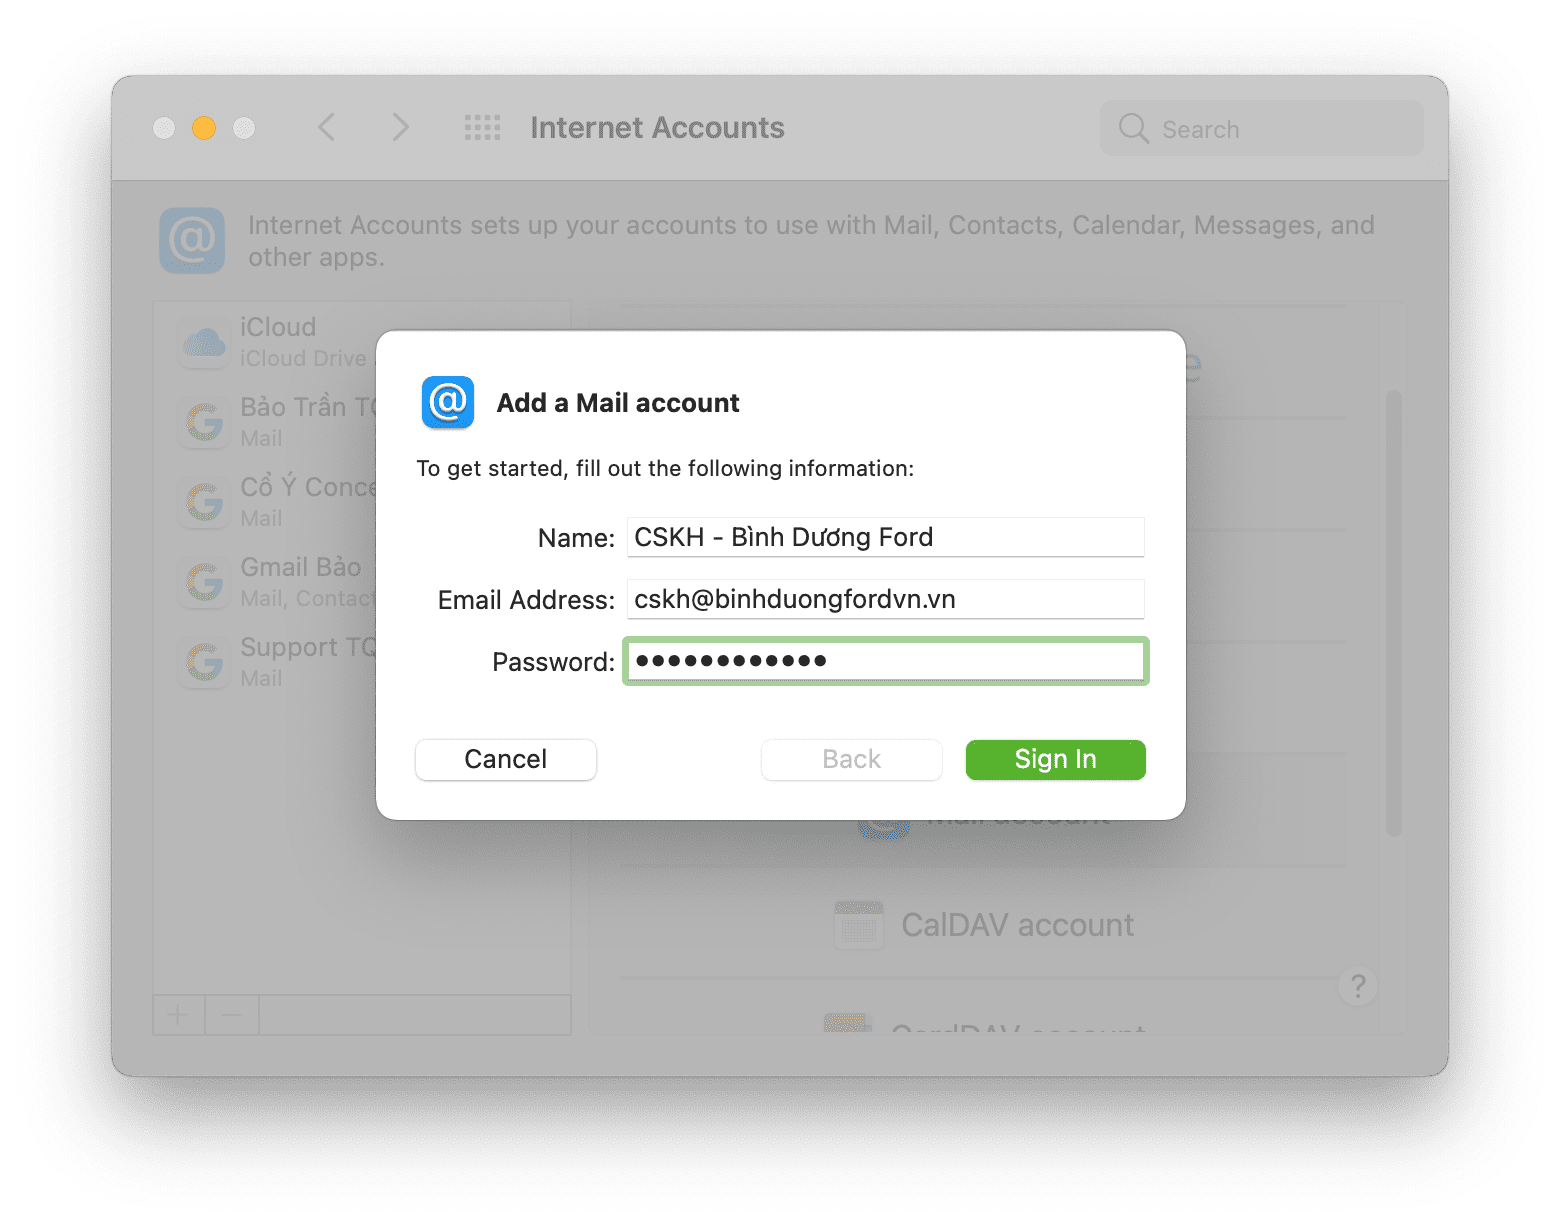
The Add a Mail account window will appear on the screen, enter your email information.
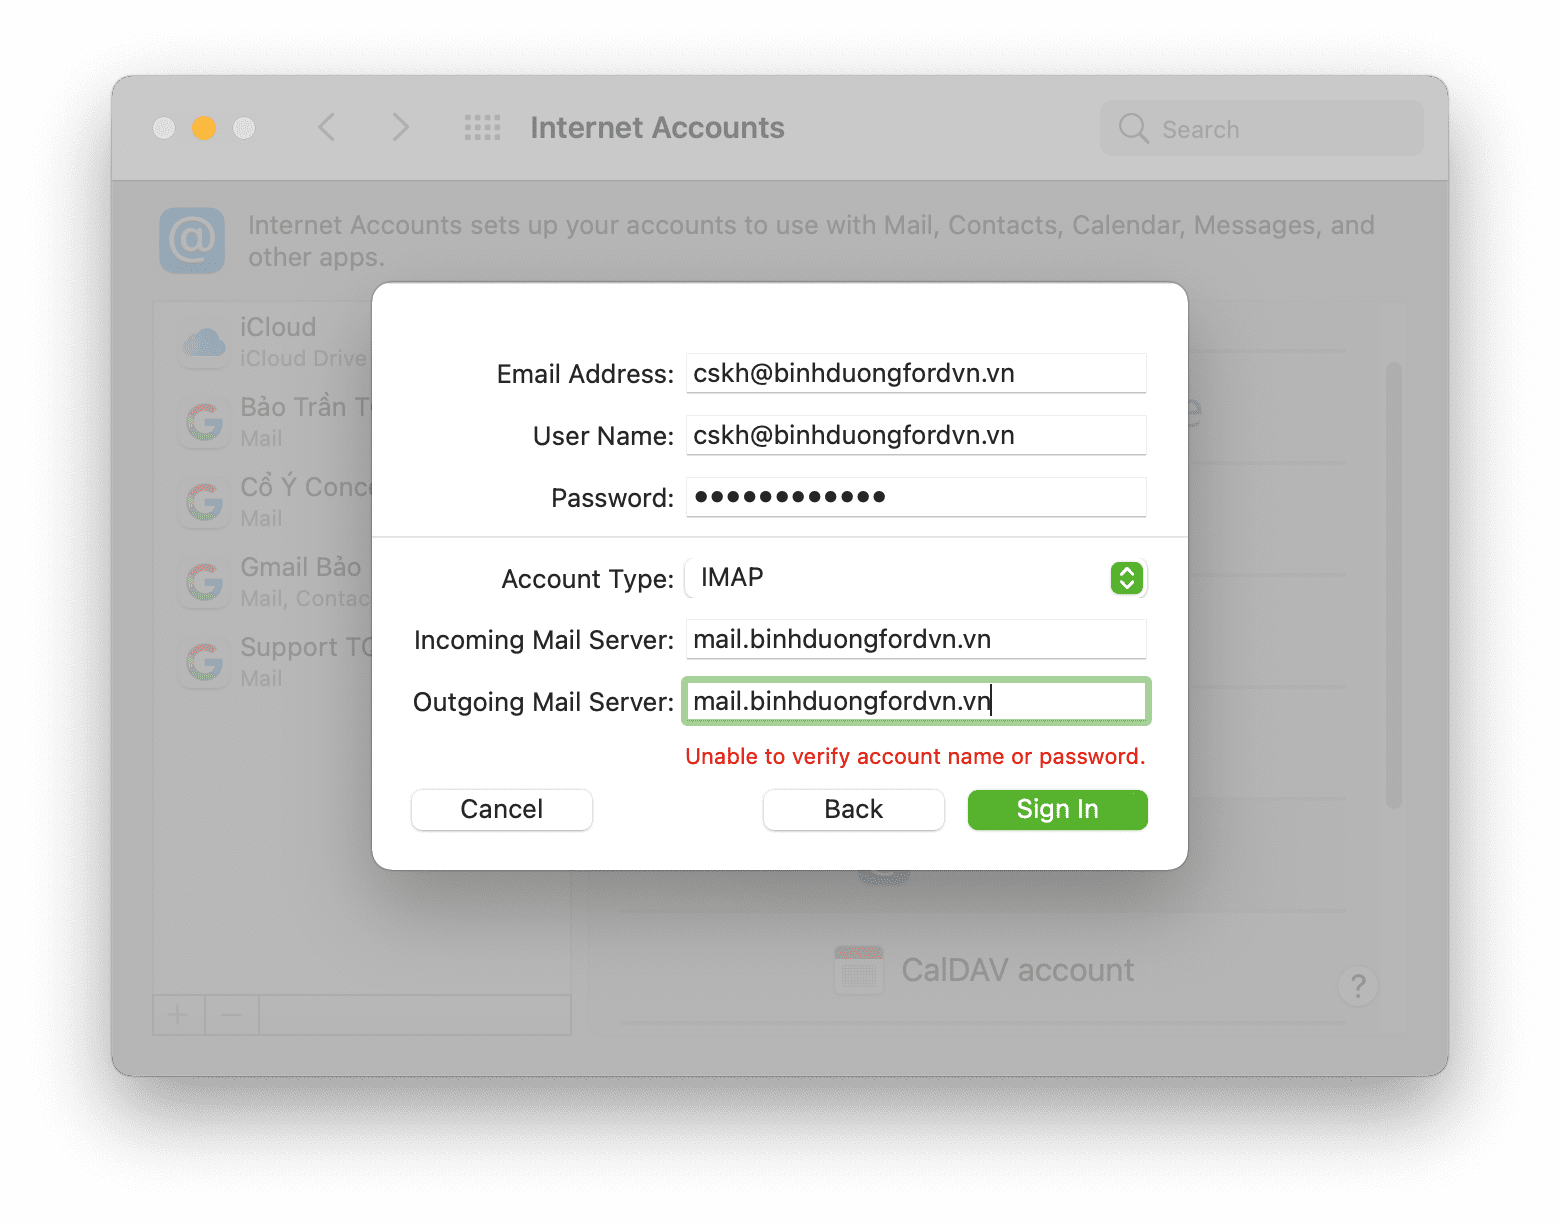
And certainly, in the first login, you will not be able to log in, but Mail will ask you to enter additional information regarding the Incoming Mail Server and Outgoing Mail Server as shown below. This information you will get in step 2.
Please note, you should leave the Email Address and User Name the same => select Sign in to continue logging in.
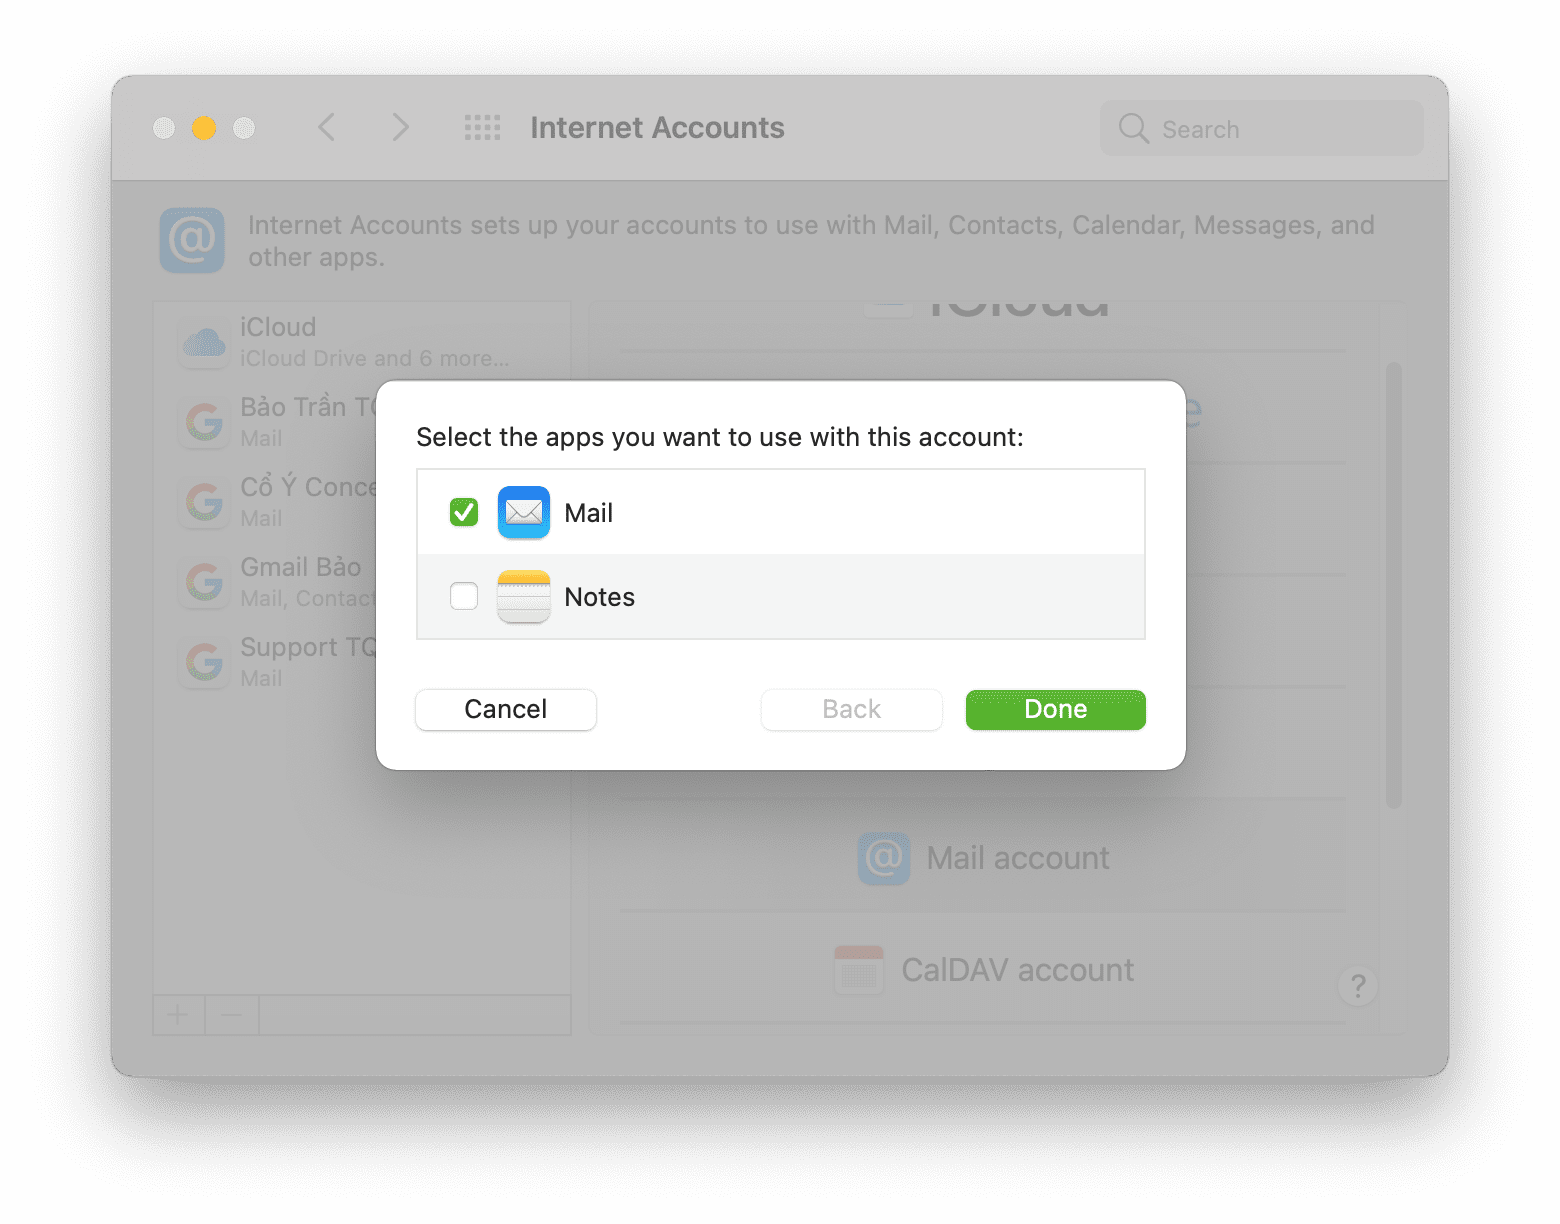
After successfully logging in, you will have the following information because I only need to sync Mail, so I just choose Mail => click Done to finish.
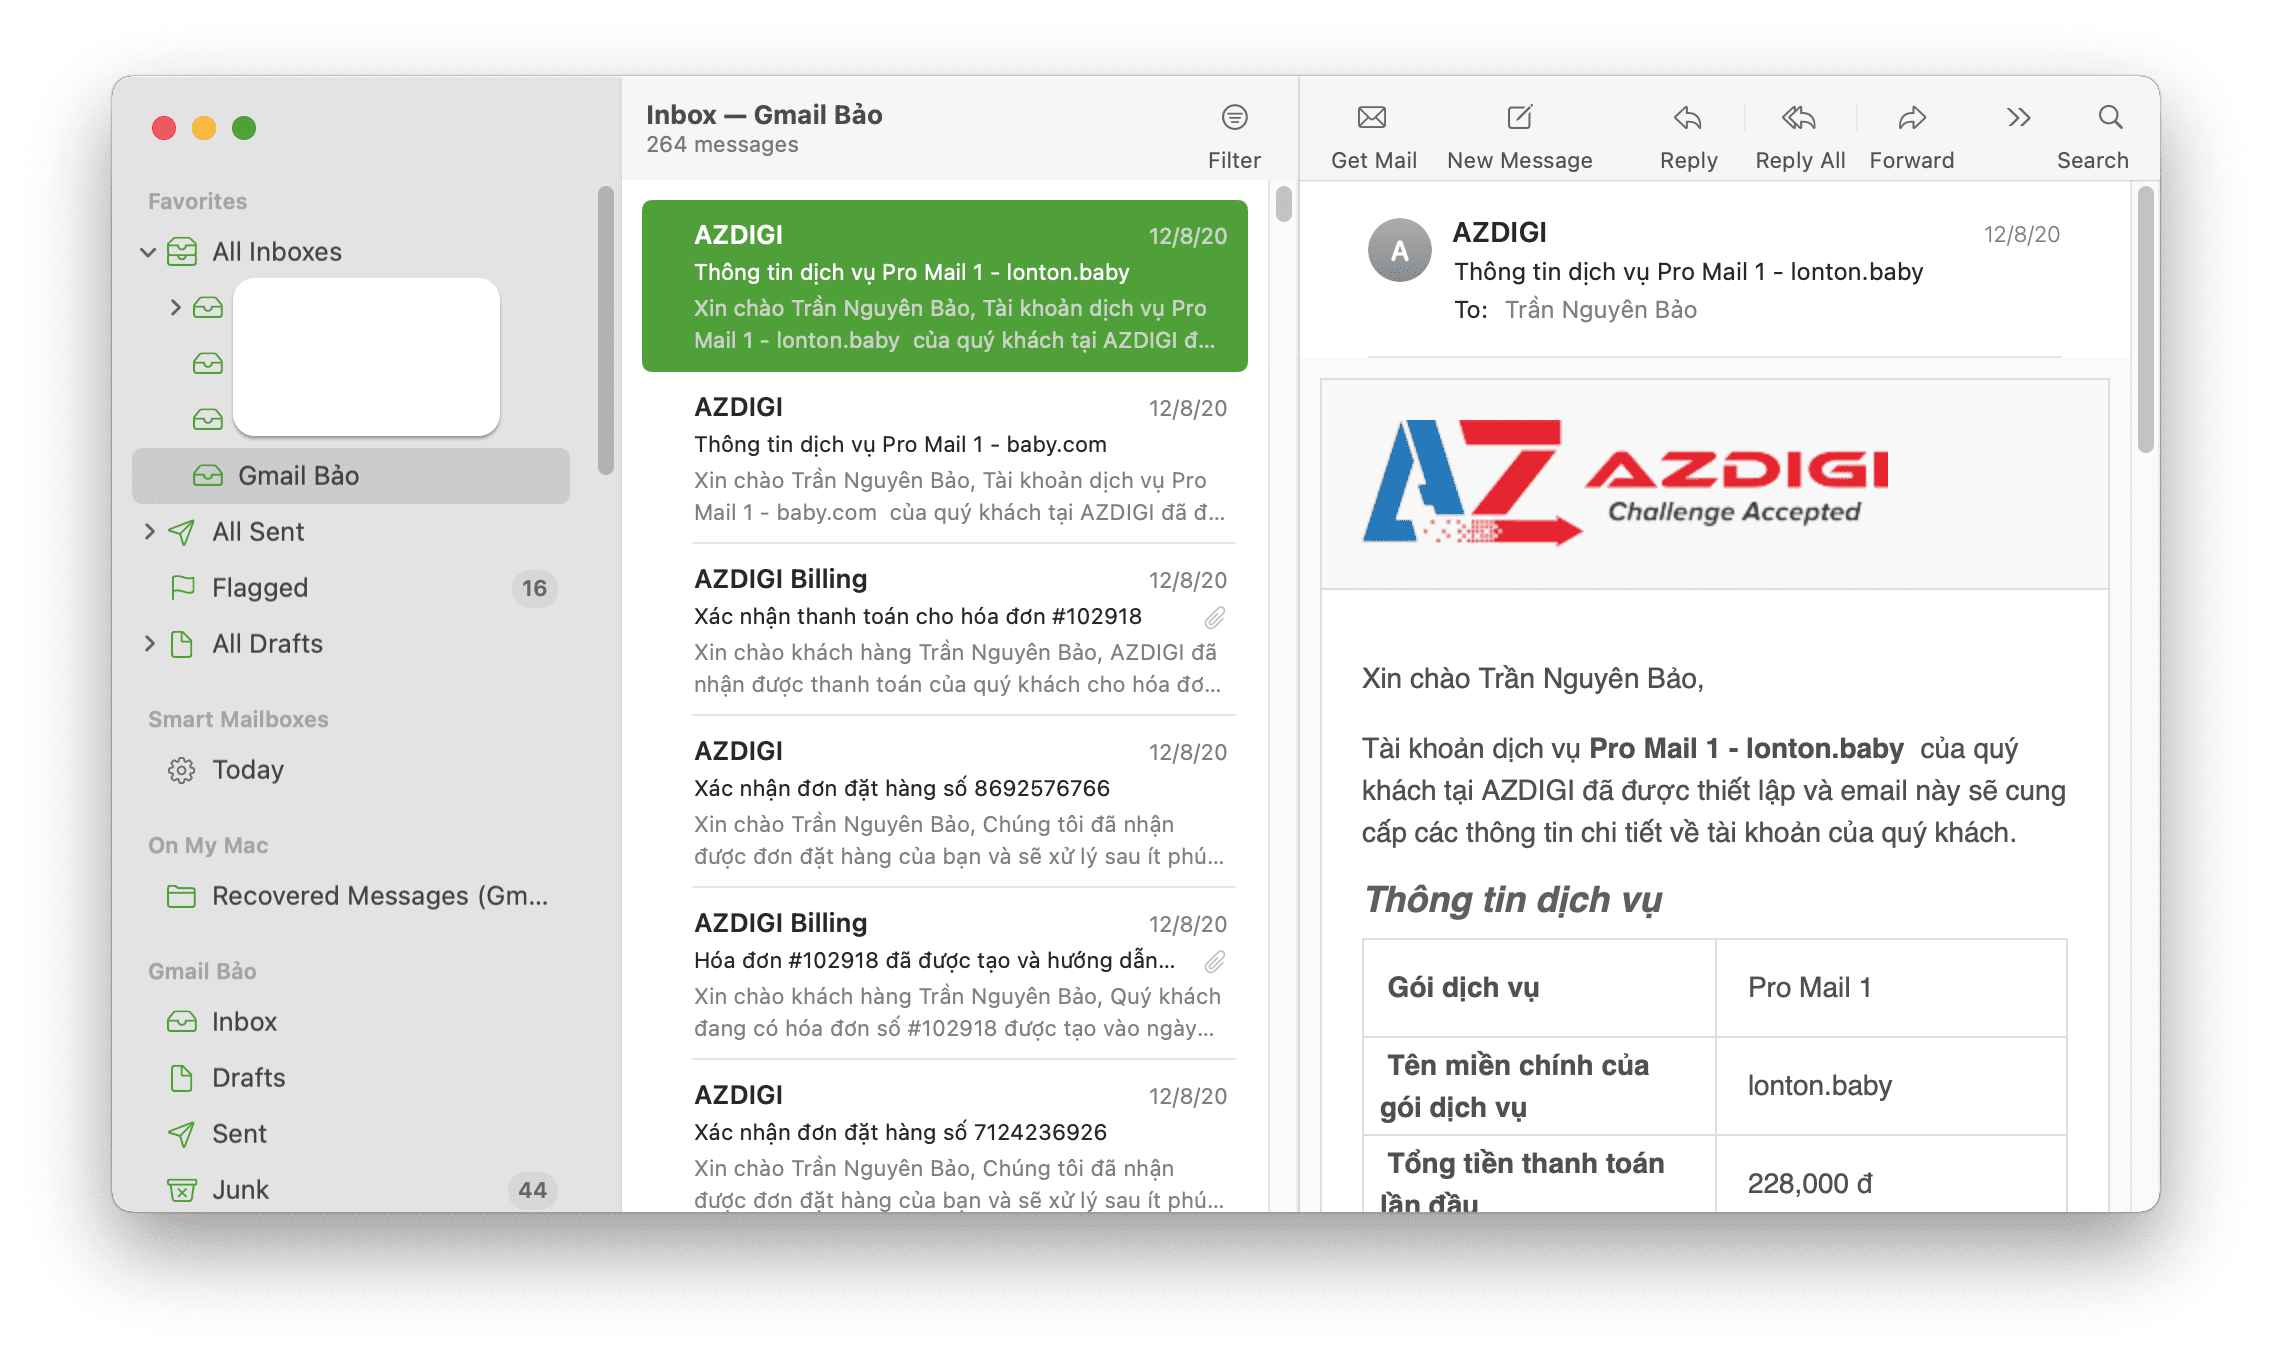
If your screen shows below, you have successfully added an email account to the Mail MacOS application.
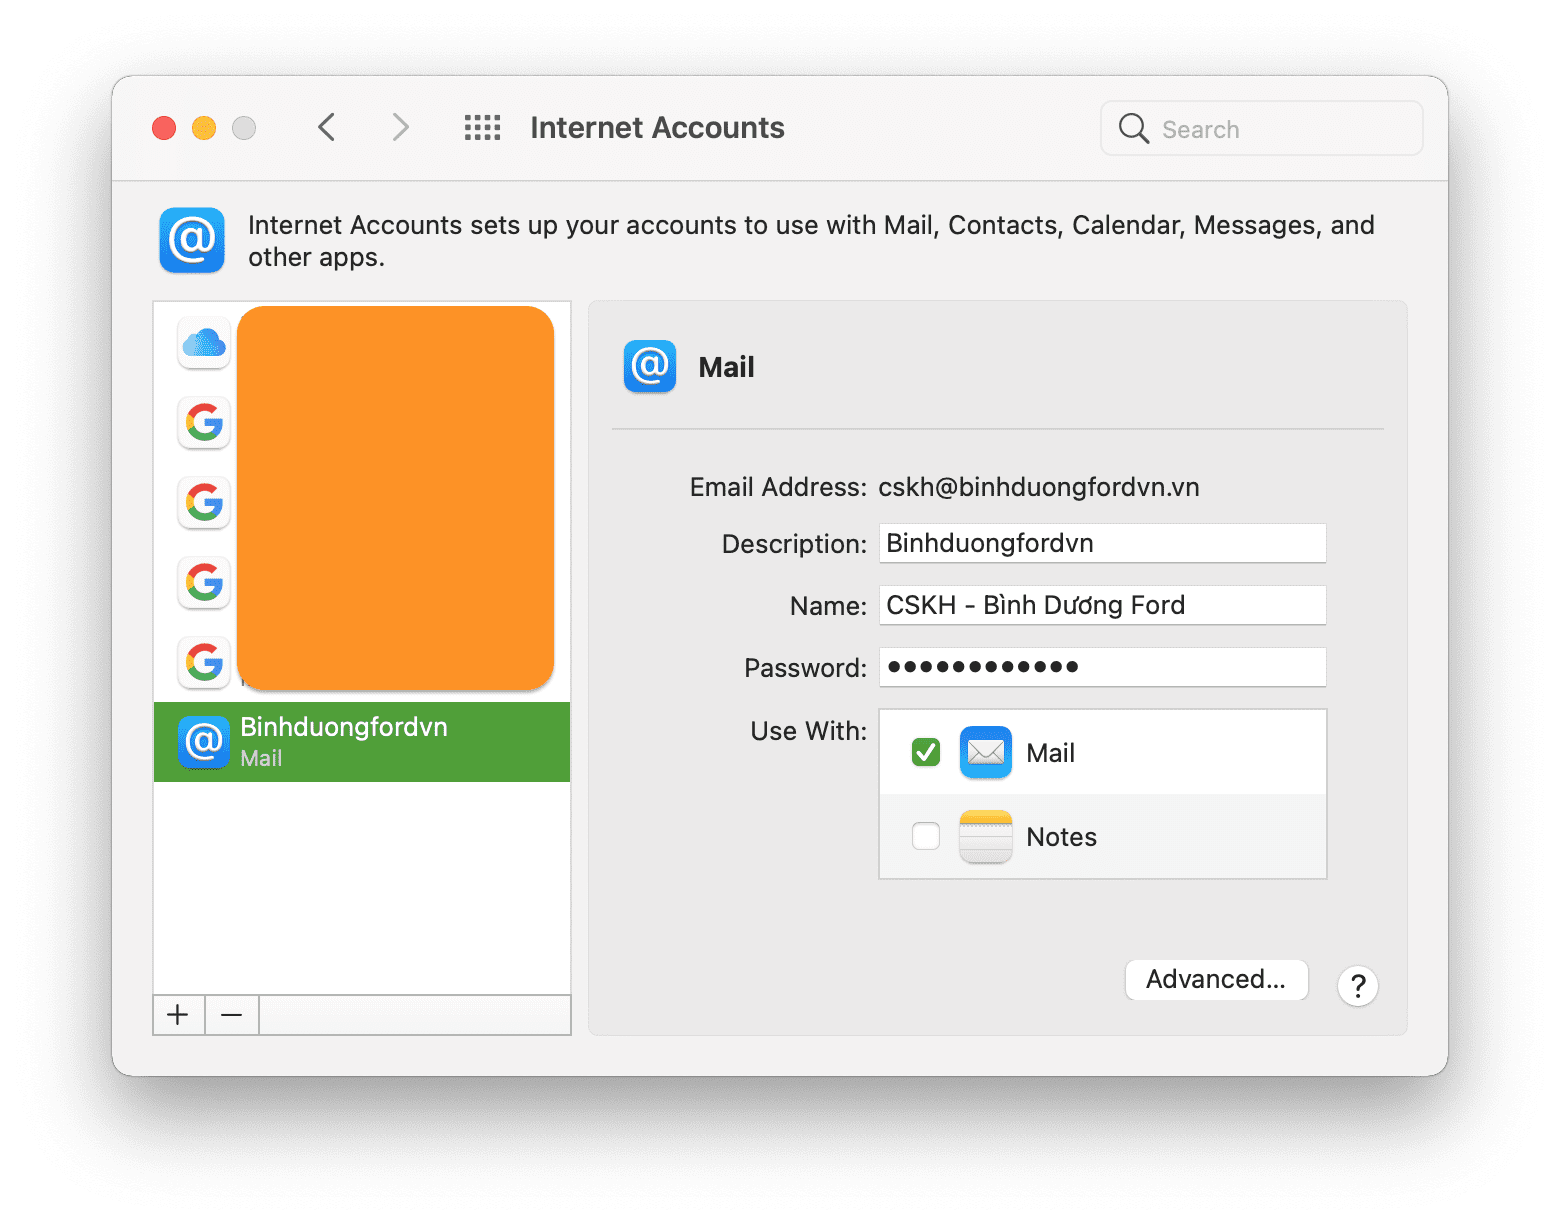
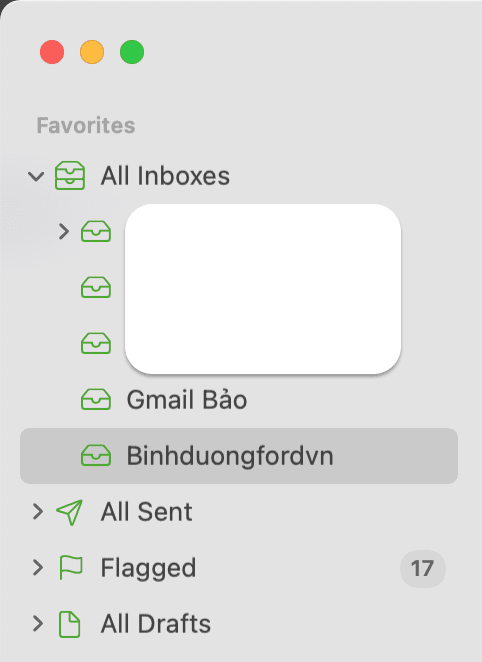
And in my Mail app, an email has just been added.
III. Summary
With just 3 simple steps, we can add email accounts to the Mail MacOS application.
Hope this article will be of help to you. Wishing you success!
If you find the article useful, don’t forget to rate it 5 stars!
To refer to the documentation for using mail, you can access the Pro Mail Hosting Guide at the link below:
If you need assistance, you can contact support in the ways below:
- Hotline 247: 028 888 24768 (Ext 0)
- Ticket/Email: You use the email to register for the service and send it directly to: support@azdigi.com.
You might also like
- Add an Email Account to the Gmail Application
- Pro Mail Hosting: How to add a domain email account to Gmail
- Pro Mail Hosting: How to create a mail account
- Pro Mail Hosting: How to configure email into Outlook
- How to remove an email account on Outlook
- Pro Mail Hosting: How to login mail on Outlook IOS
About the author

Thạch Phạm
Đồng sáng lập và Giám đốc điều hành của AZDIGI. Có hơn 15 năm kinh nghiệm trong phổ biến kiến thức liên quan đến WordPress tại thachpham.com, phát triển website và phát triển hệ thống.