Backup/Restore website data with UpdraftPlus with 3 simple steps.
Introduction
Nowadays, the internet environment is always full of potential dangers. Suddenly, your website is attacked by hackers, malicious code is inserted or more seriously, your data is deleted by Hackers. It will be very numb if you do not have a backup, so to ensure data safety, regular website data backup is necessary that you should do.
With a WordPress platform website, backing up data becomes more manageable when many plugins support this problem. You can backup your data with just a few simple steps, from free to paid.
And in this article, AZDIGI will introduce to you a WordPress plugin to support backup called UpdraftPlus, this is a Plugin that supports both free and paid versions that are well appreciated and trusted by many users. So we will go to find out more differences between the paid and free versions of this plugin:
UpdraftPlus free version
- Backup/Restore unlimited storage.
- Set up automatic backup according to schedule.
- Backup/Restore File directly on Hosting or Google Drive, Dropbox, Amazon S3, FTP, Email.
- Backup/Restore File/Folder individually arbitrarily.
- Fast Backup/Restore, low server resource usage.
- Activity notifications by email.
The drawback of the free version is that it cannot Backup the entire WordPress source code, only the folders inside wp-content.
UpdraftPlus paid version
- Support Backup to more storage services such as OneDrive, Google Cloud, Microsoft Azure,…
- Backup to multiple storage services at the same time.
- Allow cloning and cloning websites to many other domains.
- Support Incremental backups – Only Backup files and folders change to save time and server resources.
- Support Backup Multisite.
- Support Restore Backups created by other plugins such as BackupBuddy, All in One Migration, Duplicator, etc.
- Direct support from the vendor.
The drawback of the paid version is the high cost.
Steps to install and use
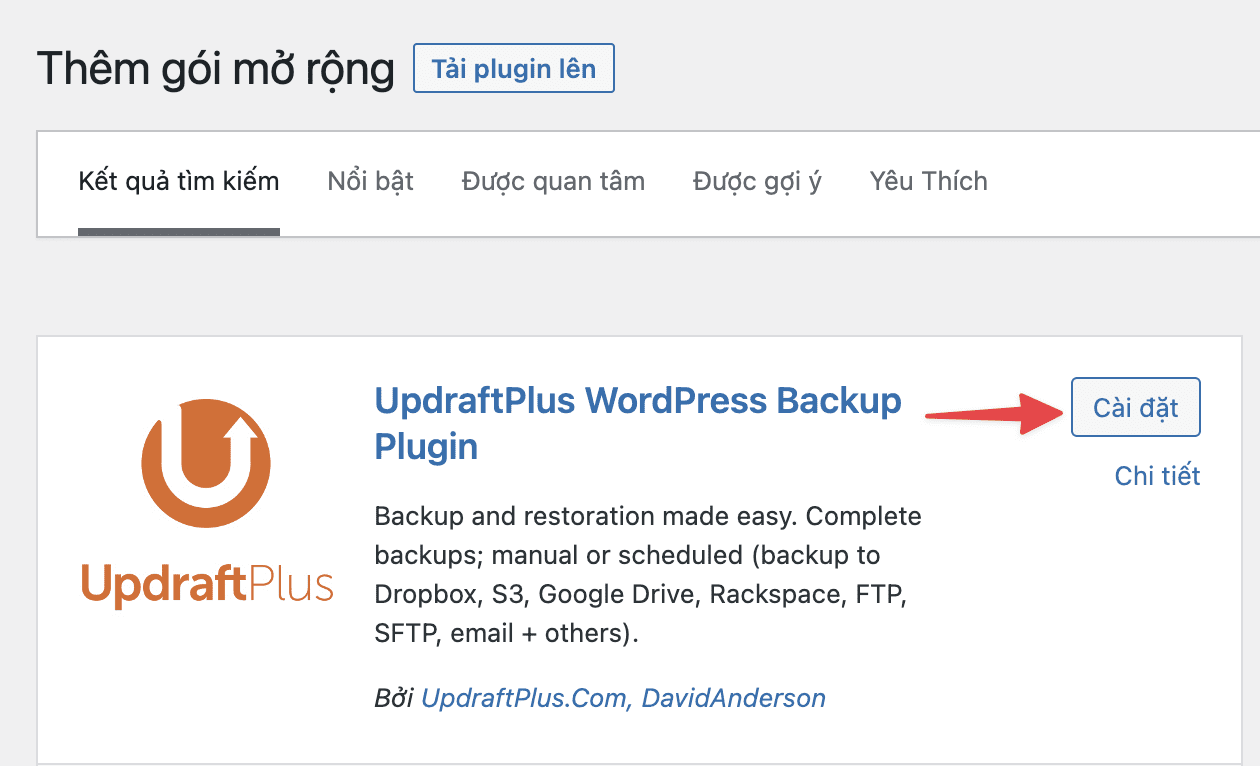
Step 1: Install Plugin
You access the WordPress admin dashboard and choose to install a new Plugin, find and install the Plugin named UpdraftPlus WordPress Backup
Step 2: Backup data
You access Settings >> UpdraftPlus >> Backup/Restore to proceed with backup setup. Here I will show you to Backup data and save it directly on the host => click Backup Now.

In the Take a new backup section, select Include your database in the backup and Include your files in the backup , and tick the last line (it means only allow to delete the backup file manually when you give permission, it will be deleted). After selecting, click Backup Now to start the backup process.

After the backup is complete, you will see a specific time and components backed up below.

If you need to Download the above components, you can click on each corresponding component and click Download. Or if you need to delete the backup, you need to click the Delete button in the backup you need.
Step 3: Restore data
Go to Settings >> UpdraftPlus >> Backup/Restore to restore data.
In the Existing backups section, you will see existing backups on the website. Next, click the Restore button corresponding to the backup you need to restore.
Or if you have previously downloaded to your computer and deleted the file on the website, you need to re-upload those backup files and restore them.
After clicking restore, Plugin will ask you which components you need to restore, if you need to restore all, tick all and then click Next.

=> continue to press Restore.
The restore process is done quickly or slowly, depending on your data, and when completed, you will receive the message Restore successful!.
So in this article, AZDIGI has guided you on how to Backup/Restore website data through the UpdraftPlus plugin, which is extremely simple. Regularly backing up your website is a necessary and important task that helps ensure your data is secure in urgent situations. In the next article, AZDIGI will guide you on how to Backup website data to some cloud storage services through the UpdraftPlus plugin, so stay tuned.
You can refer to other instructions at the link below:
If you need assistance, you can contact support in the ways below:
- Hotline 247: 028 888 24768 (Ext 0)
- Ticket/Email: You use the email to register for the service and send it directly to: support@azdigi.com .
You might also like
About the author

Thạch Phạm
Đồng sáng lập và Giám đốc điều hành của AZDIGI. Có hơn 15 năm kinh nghiệm trong phổ biến kiến thức liên quan đến WordPress tại thachpham.com, phát triển website và phát triển hệ thống.