Currently, many tools are available to help you log in and manage your email. Among them cannot be ignored Gmail, a powerful tool that is not strange to anyone. In this article, AZDIGI will show you how to use Gmail for domain email account login. So let’s follow and do it with AZDIGI!
Note: To use mail, your domain name must be updated with DNS records connected to the mail server, then the created and used mail will take effect. If you have not pointed, please refer to the documentation at the link below:
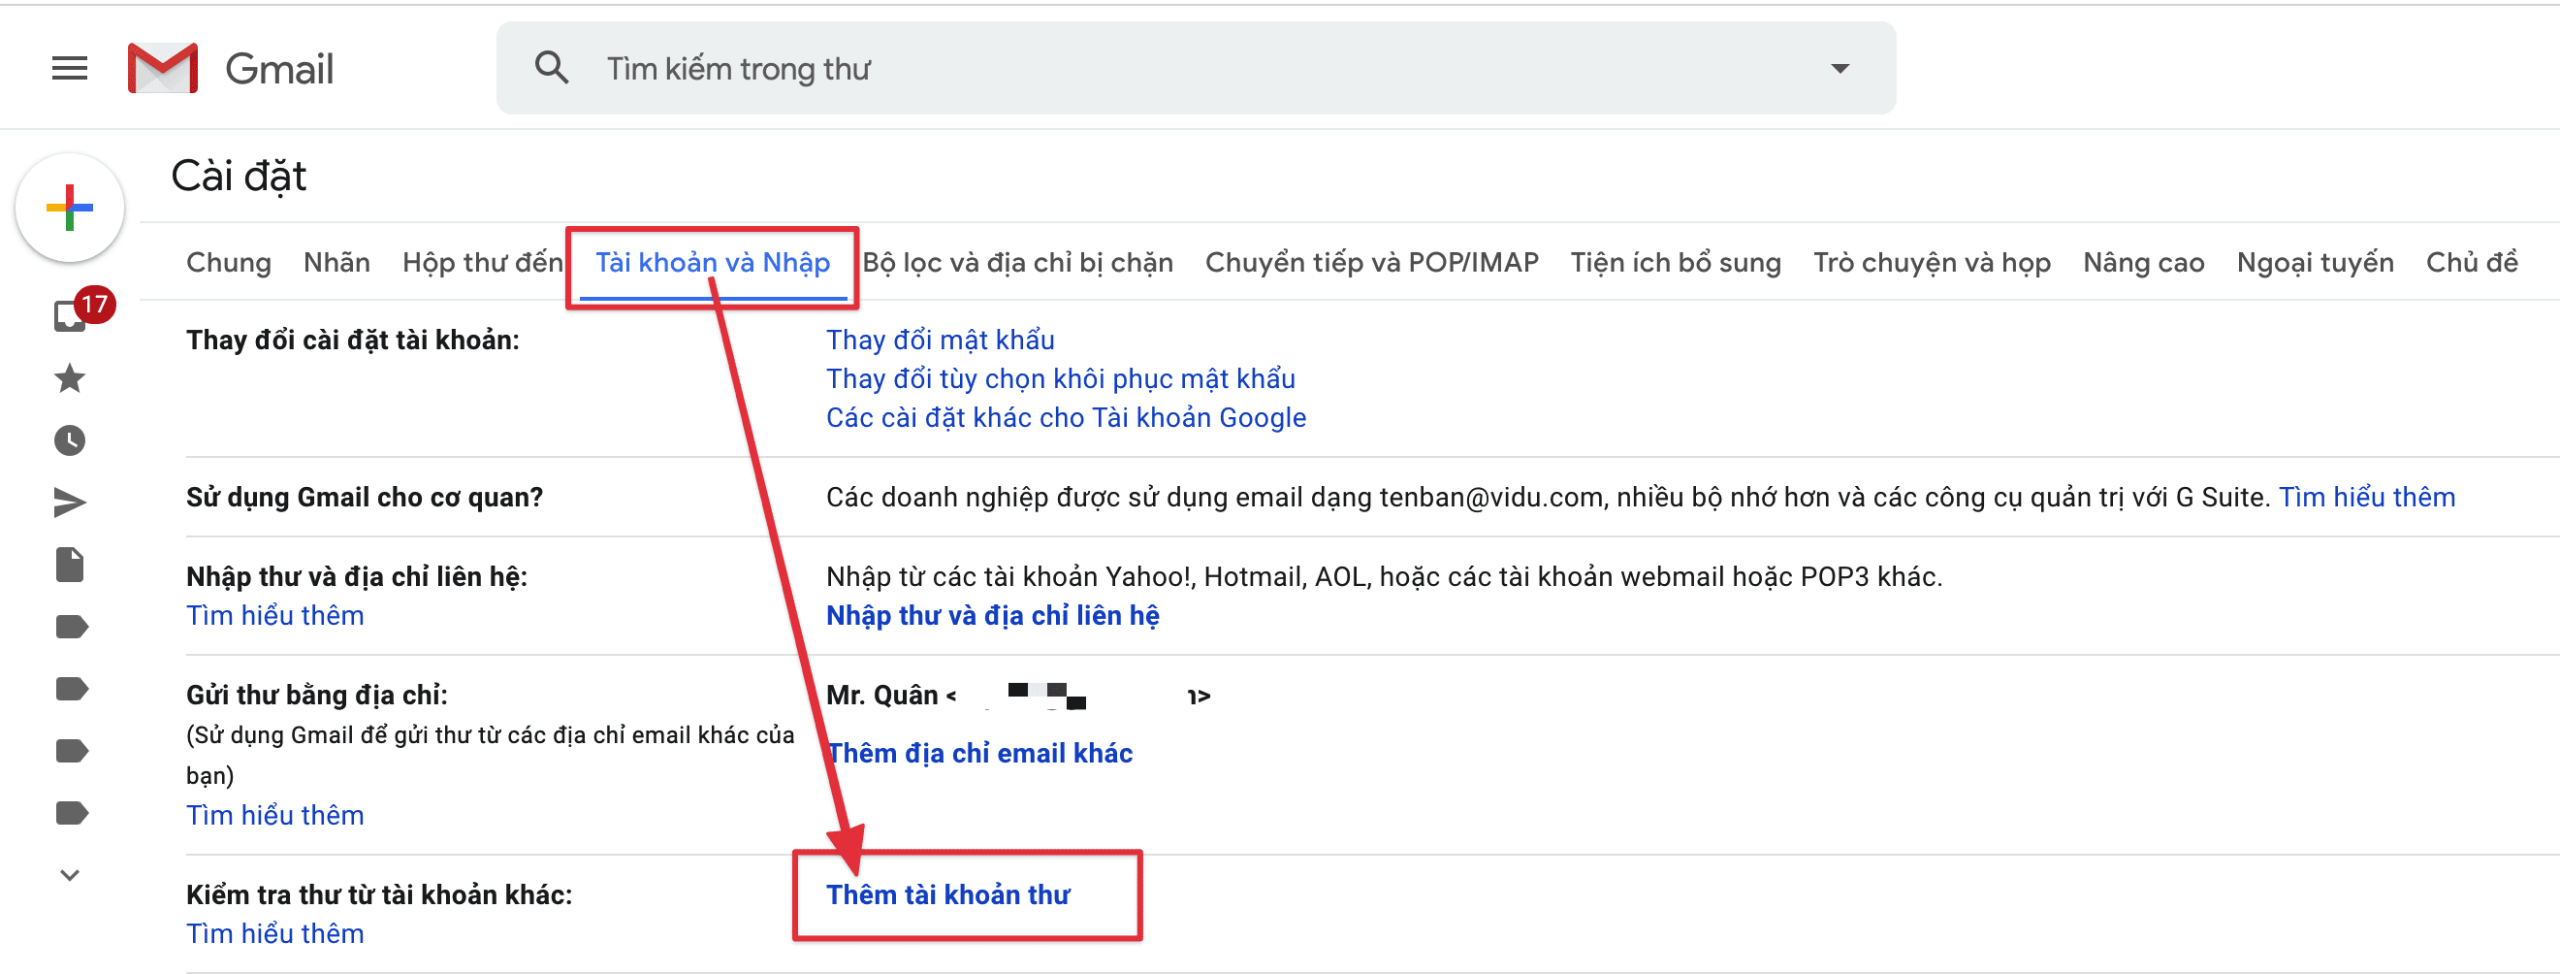
Step 1: Open Gmail settings
You access Gmail’s Settings, select Accounts & Import => click Add mail account as shown below:

Step 2: Add an email account and log in
In the window below, enter the email account you need to log in.

Then you choose POP3 => Next.

Next, enter your account information, password and POP server. I will annotate some information below for you to log in when using Email Hosting at AZDIGI.
- Địa chỉ mail: Enter your email account
- Password: Enter the password of the email account
- Máy chủ POP: h01.azdigimail.com (Default parameter when you use AZDIGI Mail Hosting)
- Port: 995

Then click Next as shown below:

Enter the name to display when sending mail and click Next step to set up.

In this step, enter the following information:
- Máy chủ SMTP: h01.azdigimail.com (Default parameter when using AZDIGI Email Hosting)
- Port: 587 (if you choose TLS) and 465 (if you choose SSL)
- Username: Enter email account
- Password: Enter the password of the email account

When you click Add Account, a verification email is sent to your mail@domain with a verification link and a Verification Code. You can click on the verification link or use the Verification Code as shown below. After the information is successfully verified, you can use it right away.

Thus, AZDIGI has completed the steps to log in email domain on Gmail. Hopefully, this article will help you to log in and manage your email successfully.
To refer to the documentation for using mail, you can access the Pro Mail Hosting Guide at the link below:
Email Hosting Guide https://azdigi.com/blog/email-hosting/
- Hotline 247: 028 888 24768 (Ext 0)
- Ticket/Email: You can use your email to register for the service and send it directly to: support@azdigi.com
You might also like
- Pro Mail Hosting: How to configure email into Outlook
- Pro Mail Hosting - Configuration Guide on Mail iOS Application
- Pro Mail Hosting: How to login mail on Outlook IOS
- Pro Mail Hosting: How to create a mail account
- Pro Mail Hosting: Create the HTML Signature in RoundCube
- Add an Email Account to the Gmail Application
About the author

Thạch Phạm
Đồng sáng lập và Giám đốc điều hành của AZDIGI. Có hơn 15 năm kinh nghiệm trong phổ biến kiến thức liên quan đến WordPress tại thachpham.com, phát triển website và phát triển hệ thống.