What is a Database?
A database is an organized collection of data, the main purpose is to organize large amounts of information by storing, collecting, and managing. Today, many Dynamic Websites in the world are being processed through Databases and now there are many types of Databases available such as MySQL, Oracle, Mongo DB and SQL Server…
How to create and import the database on SEO Hosting
Step 1: Create a Database
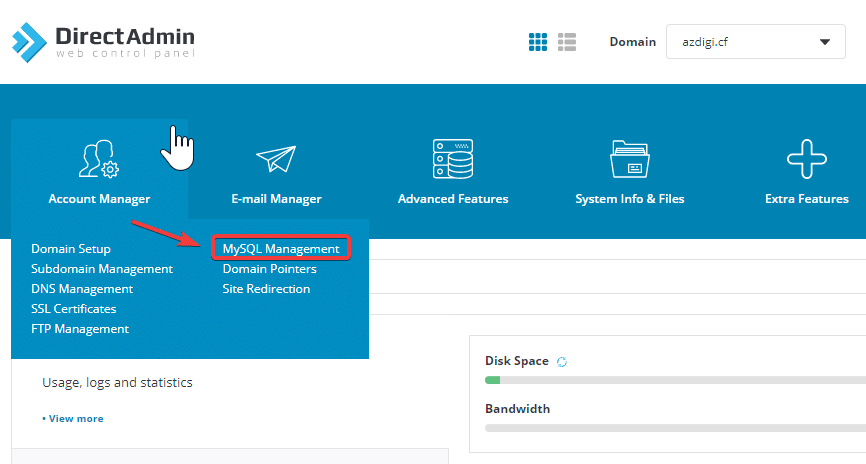
At the user interface, go to Account Manager => MySQL Management.

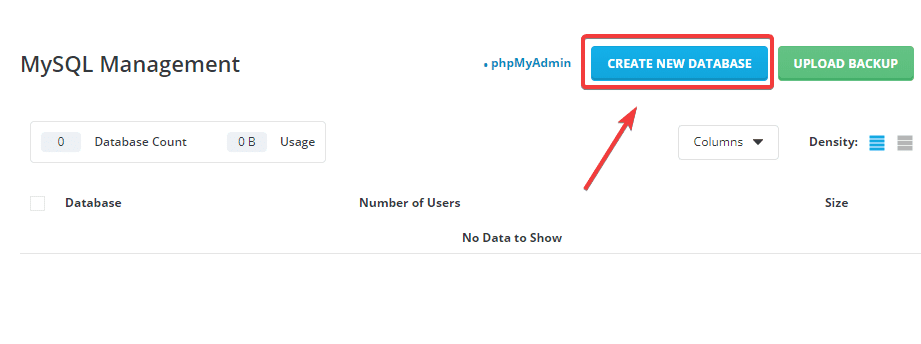
Next, click CREATE NEW DATABASE.
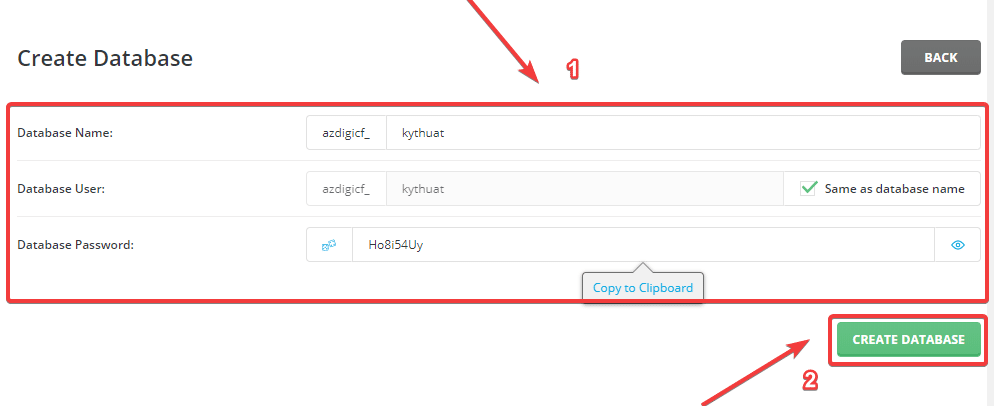
In this section, you fill in the following information:
- Database inforrmation:
- Database Name: The name of the database to be created.
- Database User: User database to create.
- Database Password: The name of the database to be created.
In this step, by default, the system will create a user name similar to the name of the database, if you need to edit the user name, untick the box Same as database name and enter another name.
2. Click CREATE DATABASE to start the creation process.
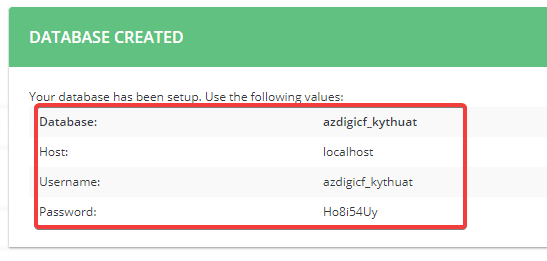
After creating the database, if you receive the message as shown below, it’s successful. You need to save this information.
Step 2: Import the database with phpMyadmin
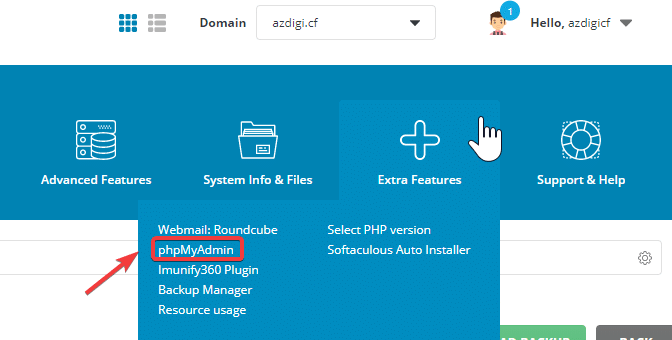
At the main user’s interface, go to Extra Features => click phpMyadmin.
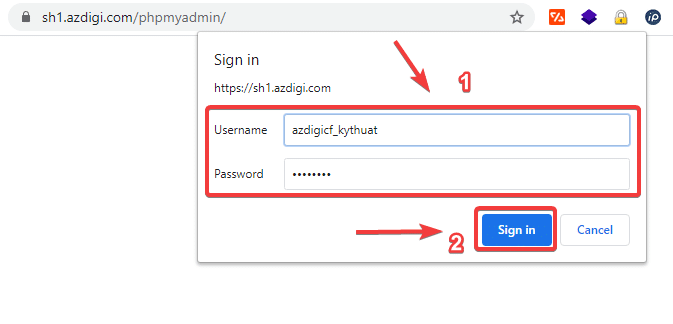
The interface of phpMyadmin will be as shown below, you proceed to fill in the user and password database information created earlier in step 1.
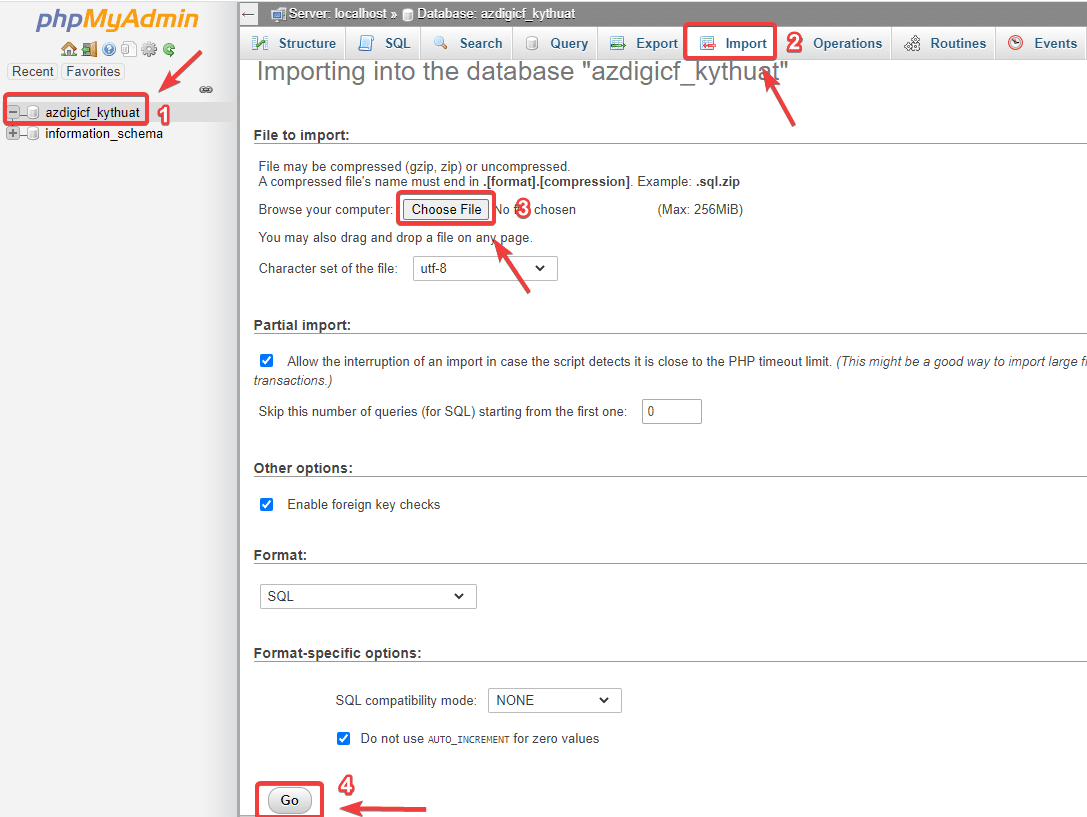
After successful login, the phpMyadmin interface will show as shown below, now you can proceed to import your database file of the form (*.sql) into the database name created in step 1 as follows:
- Select the database name to import.
- Click Import.
- Click on Choose File and select the path where your database (*.sql) file is located on your computer.
- Click Go to start the import process (the import process is fast or long depending on the size of your database)
In this step, there will be some cases where the database file (*.sql) you need to upload is larger than the allowed hosting size, you can customize to increase the upload_max_filesize and post_max_size parameters higher.
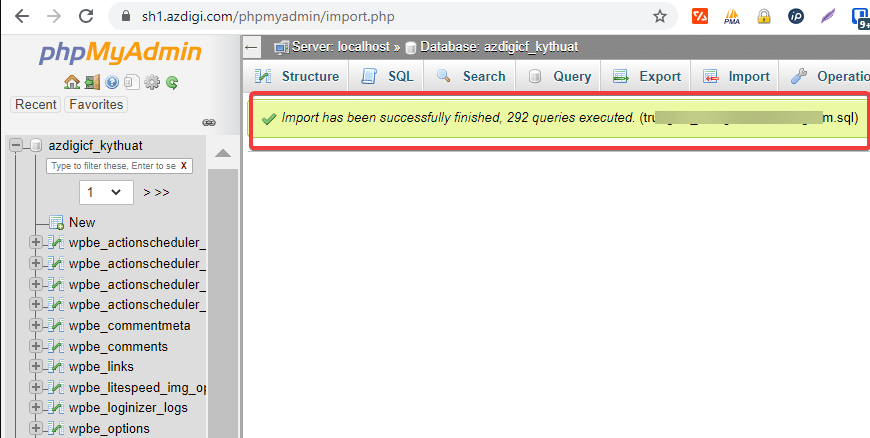
If the import is successful, you will receive a message as shown below. And finally, you need to connect the information, including the user/name/pass of the database created in step 1, with the database config file on the source code to complete (if using the WordPress source code, the database config file will name wp-config.php).
So in this article, AZDIGI showed you how to create a new database and import the database file (*.sql) available on SEO Hosting most simply. If you have any questions or encounter problems during the operation, you can send a support ticket to the Technical Department for assistance in checking and handling:
- Hotline 247: 028 888 24768 (Ext 0)
- Ticket/Email: You use the email to register for the service and send it directly to: support@azdigi.com.
Wishing you success!
You might also like
About the author

Thạch Phạm
Đồng sáng lập và Giám đốc điều hành của AZDIGI. Có hơn 15 năm kinh nghiệm trong phổ biến kiến thức liên quan đến WordPress tại thachpham.com, phát triển website và phát triển hệ thống.