Nội dung
I. What is FASTPANEL?
FASTPANEL is an outstanding free web control panel with a lot of features such as:
- Create a website with just a few clicks.
- Email management.
- Database management.
- Manage backup/restore to the cloud.
- Website traffic analysis.
- Create user.
- Two-factor authentication is supported.
- SSL support.
- Firewall support.
- Support Cron.
- Supports multiple PHP versions.
- Integrated AI-BOLIT malware scanning.
- Integrated Spam Asasin.
- Supports command manipulation without SSH through the console.
- And many other features…
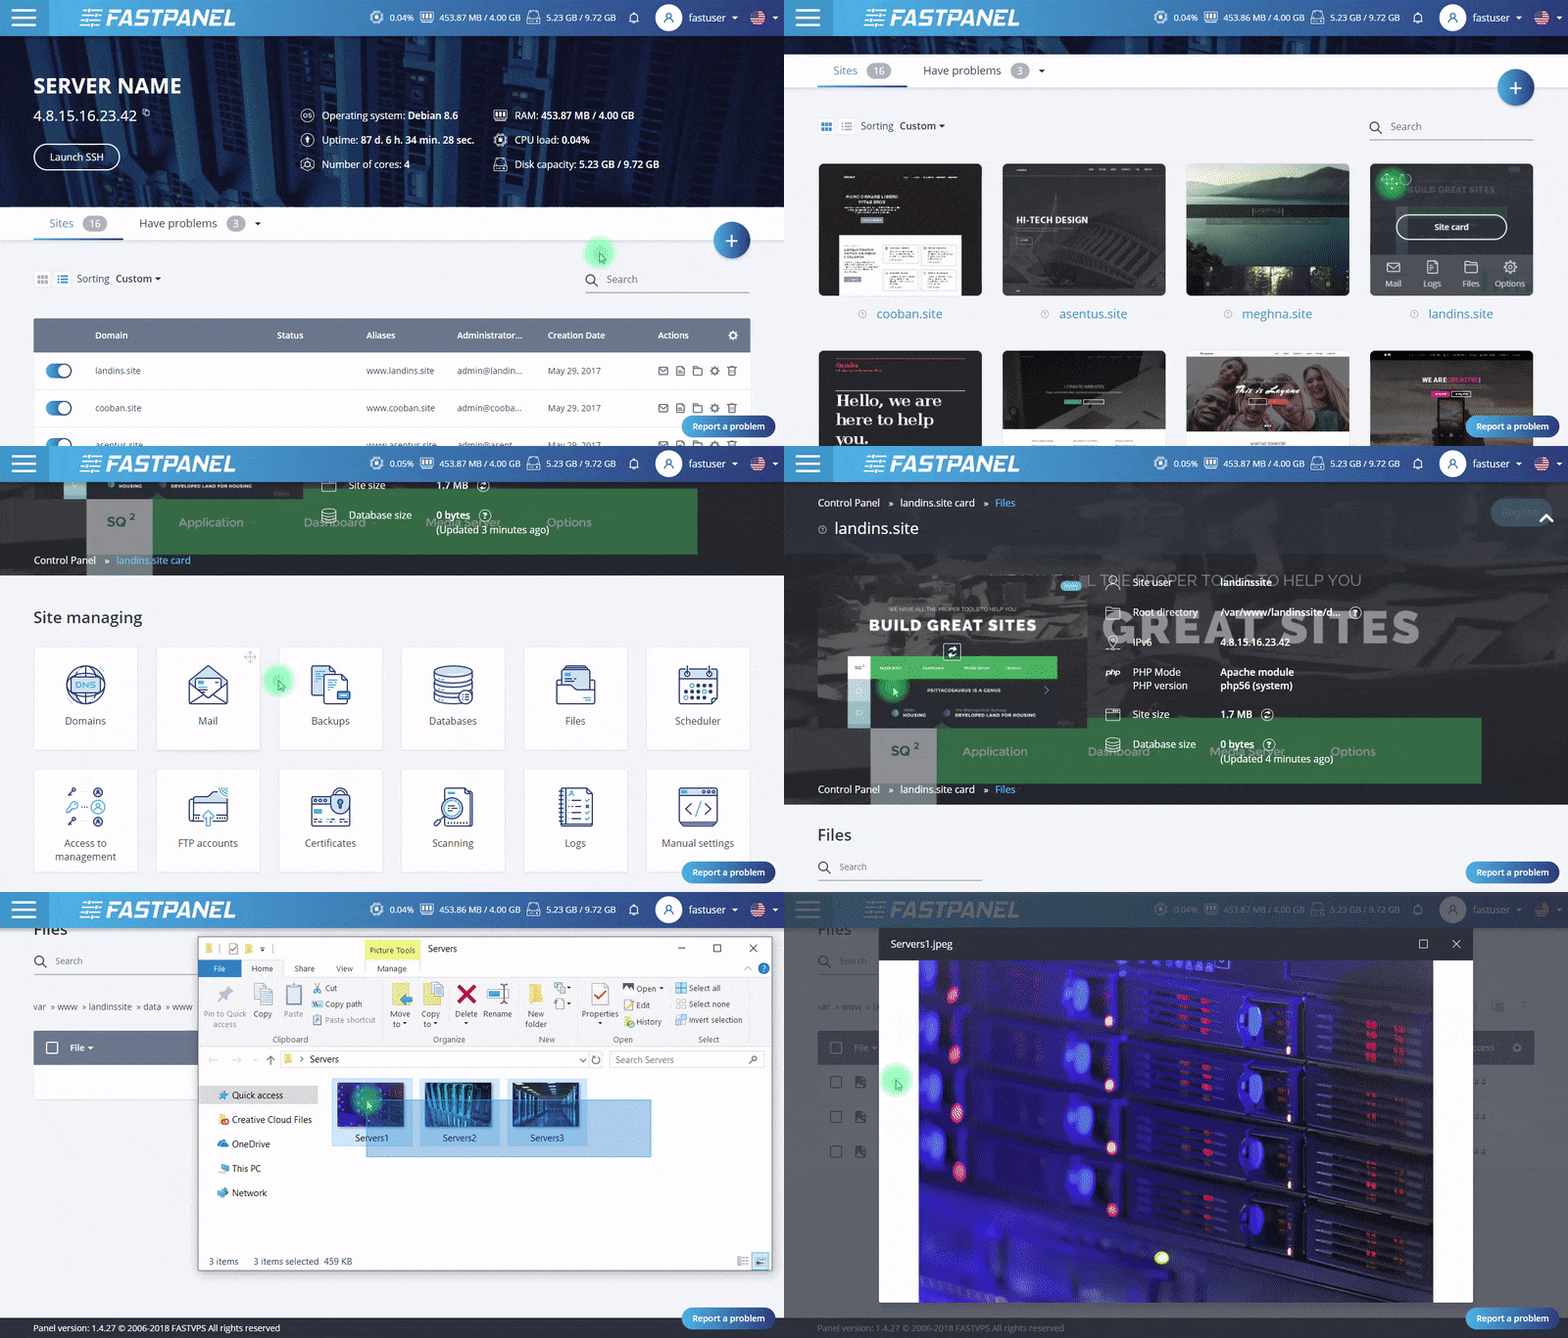
Below is the FASTPANEL interface:

II. How to install FASTPANEL into CentOS 7
To install FASTPANEL into CentOS 7, you need to follow these steps:
Step 1: SSH into your CentOS 7 system
To install FASTPANEL into CentOS 7, you first need to SSH or access your VPS/server as root. If you do not know how to SSH into your VPS/server, you can refer to the following tutorial:
After successfully SSH, we continue with step 2 to start executing the FASTPANEL installation commands into CentOS 7.
Step 2: Commands to install FASTPANEL into CentOS 7
To install FASTPANEL into CentOS 7, you run the following 2 commands:
yum makecache; yum install wget -y
wget http://repo.fastpanel.direct/install_fastpanel.sh -O - | bash -
Explanation of the above commands:
- Command 1: Install two support packages
makecacheandwget. - Command 2: Download the installer and install FASTPANEL.
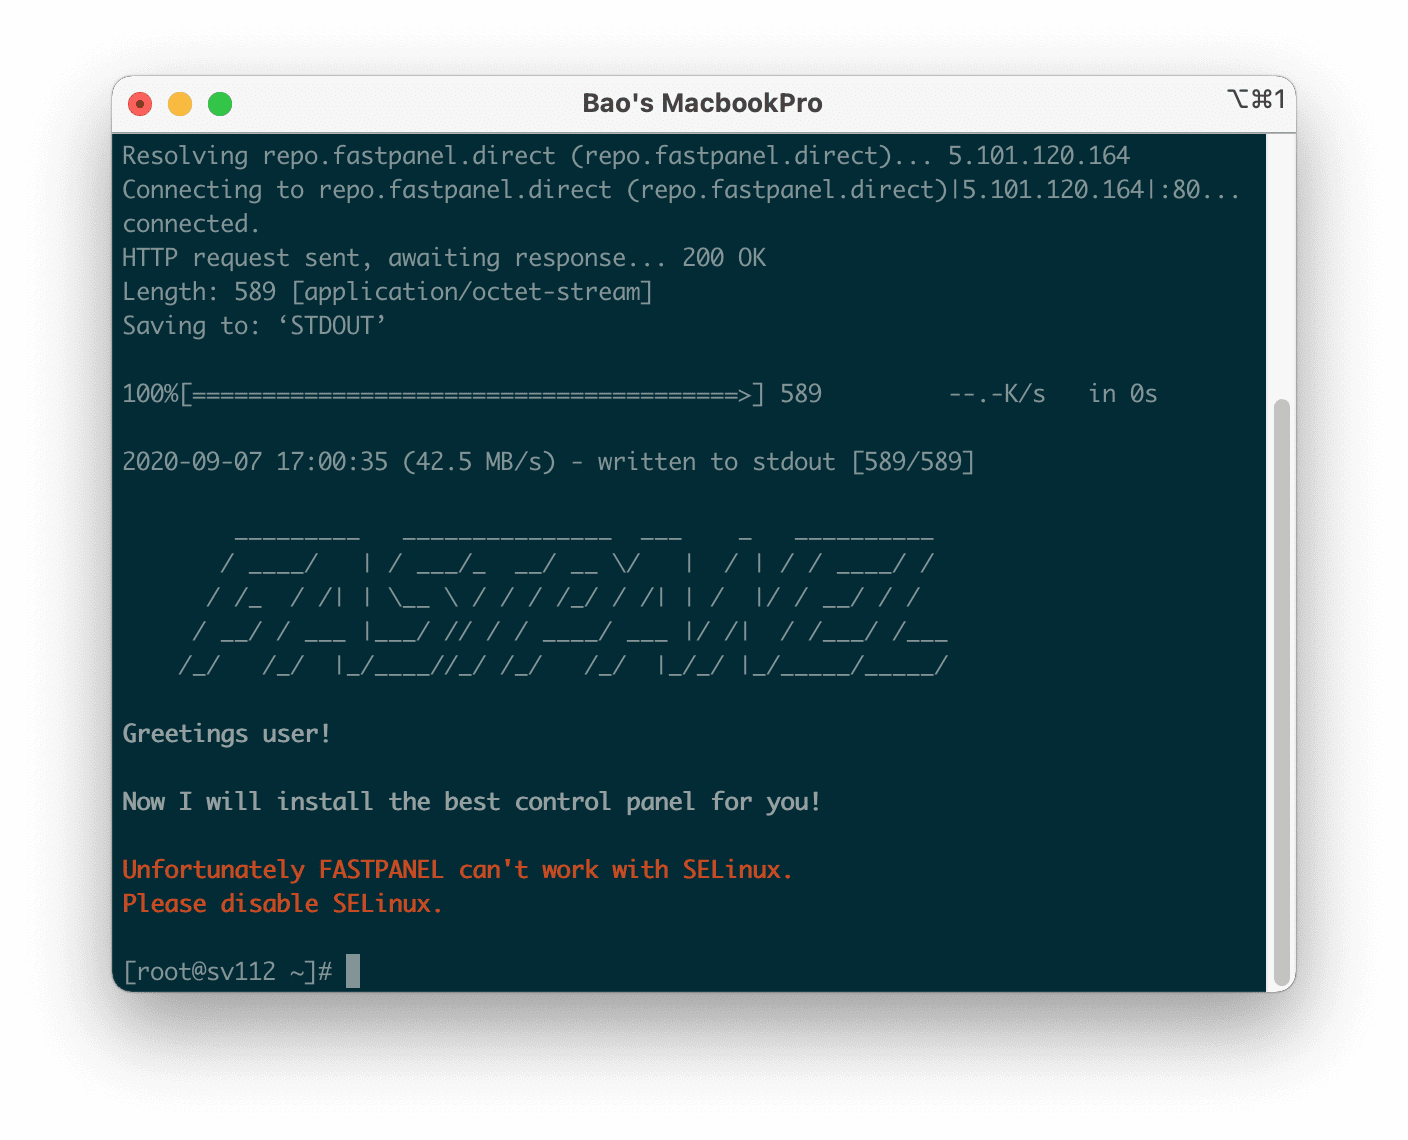
Note: In some cases, you will encounter a message that cannot be installed because SELinux has not been disabled, as shown below:

When you encounter this message, you can disable SELinux according to the following article:
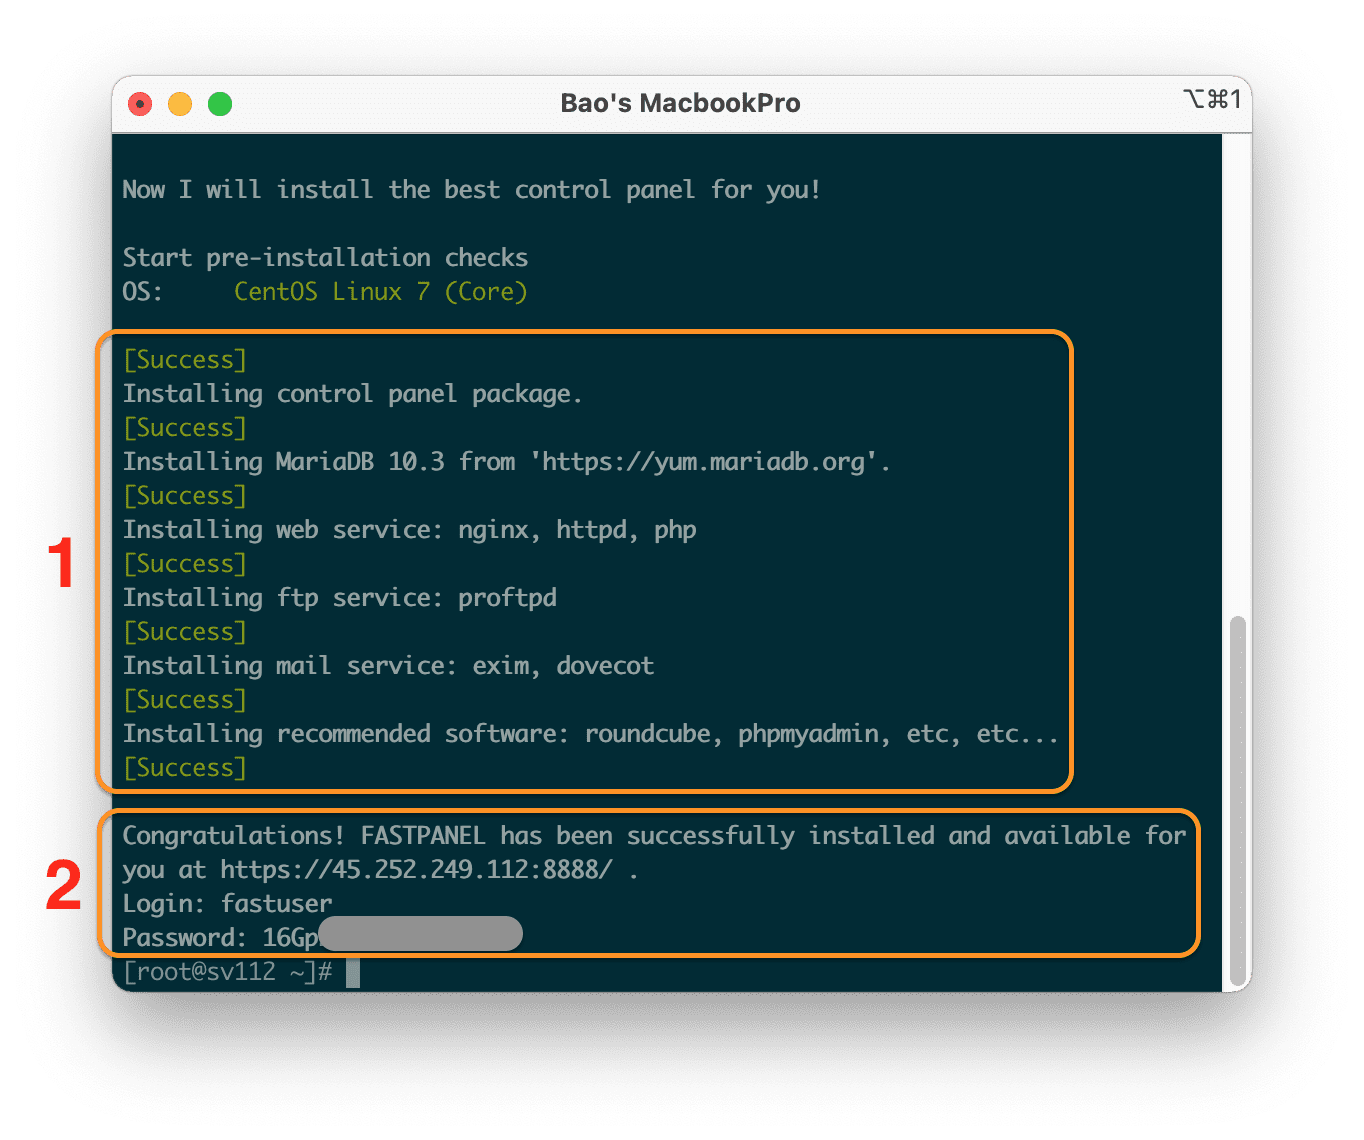
The installation process is relatively quick. Below is the image after the installation is complete:

In the image above, we will have information about installed add-on services (1) and login information to FASTPANEL (2) on the browser.
Step 3: Activate the FASTPANEL license
At the first interface when accessing, you will be asked to activate the FASTPANEL license, you just need to enter your email and wait a moment to receive full license information.
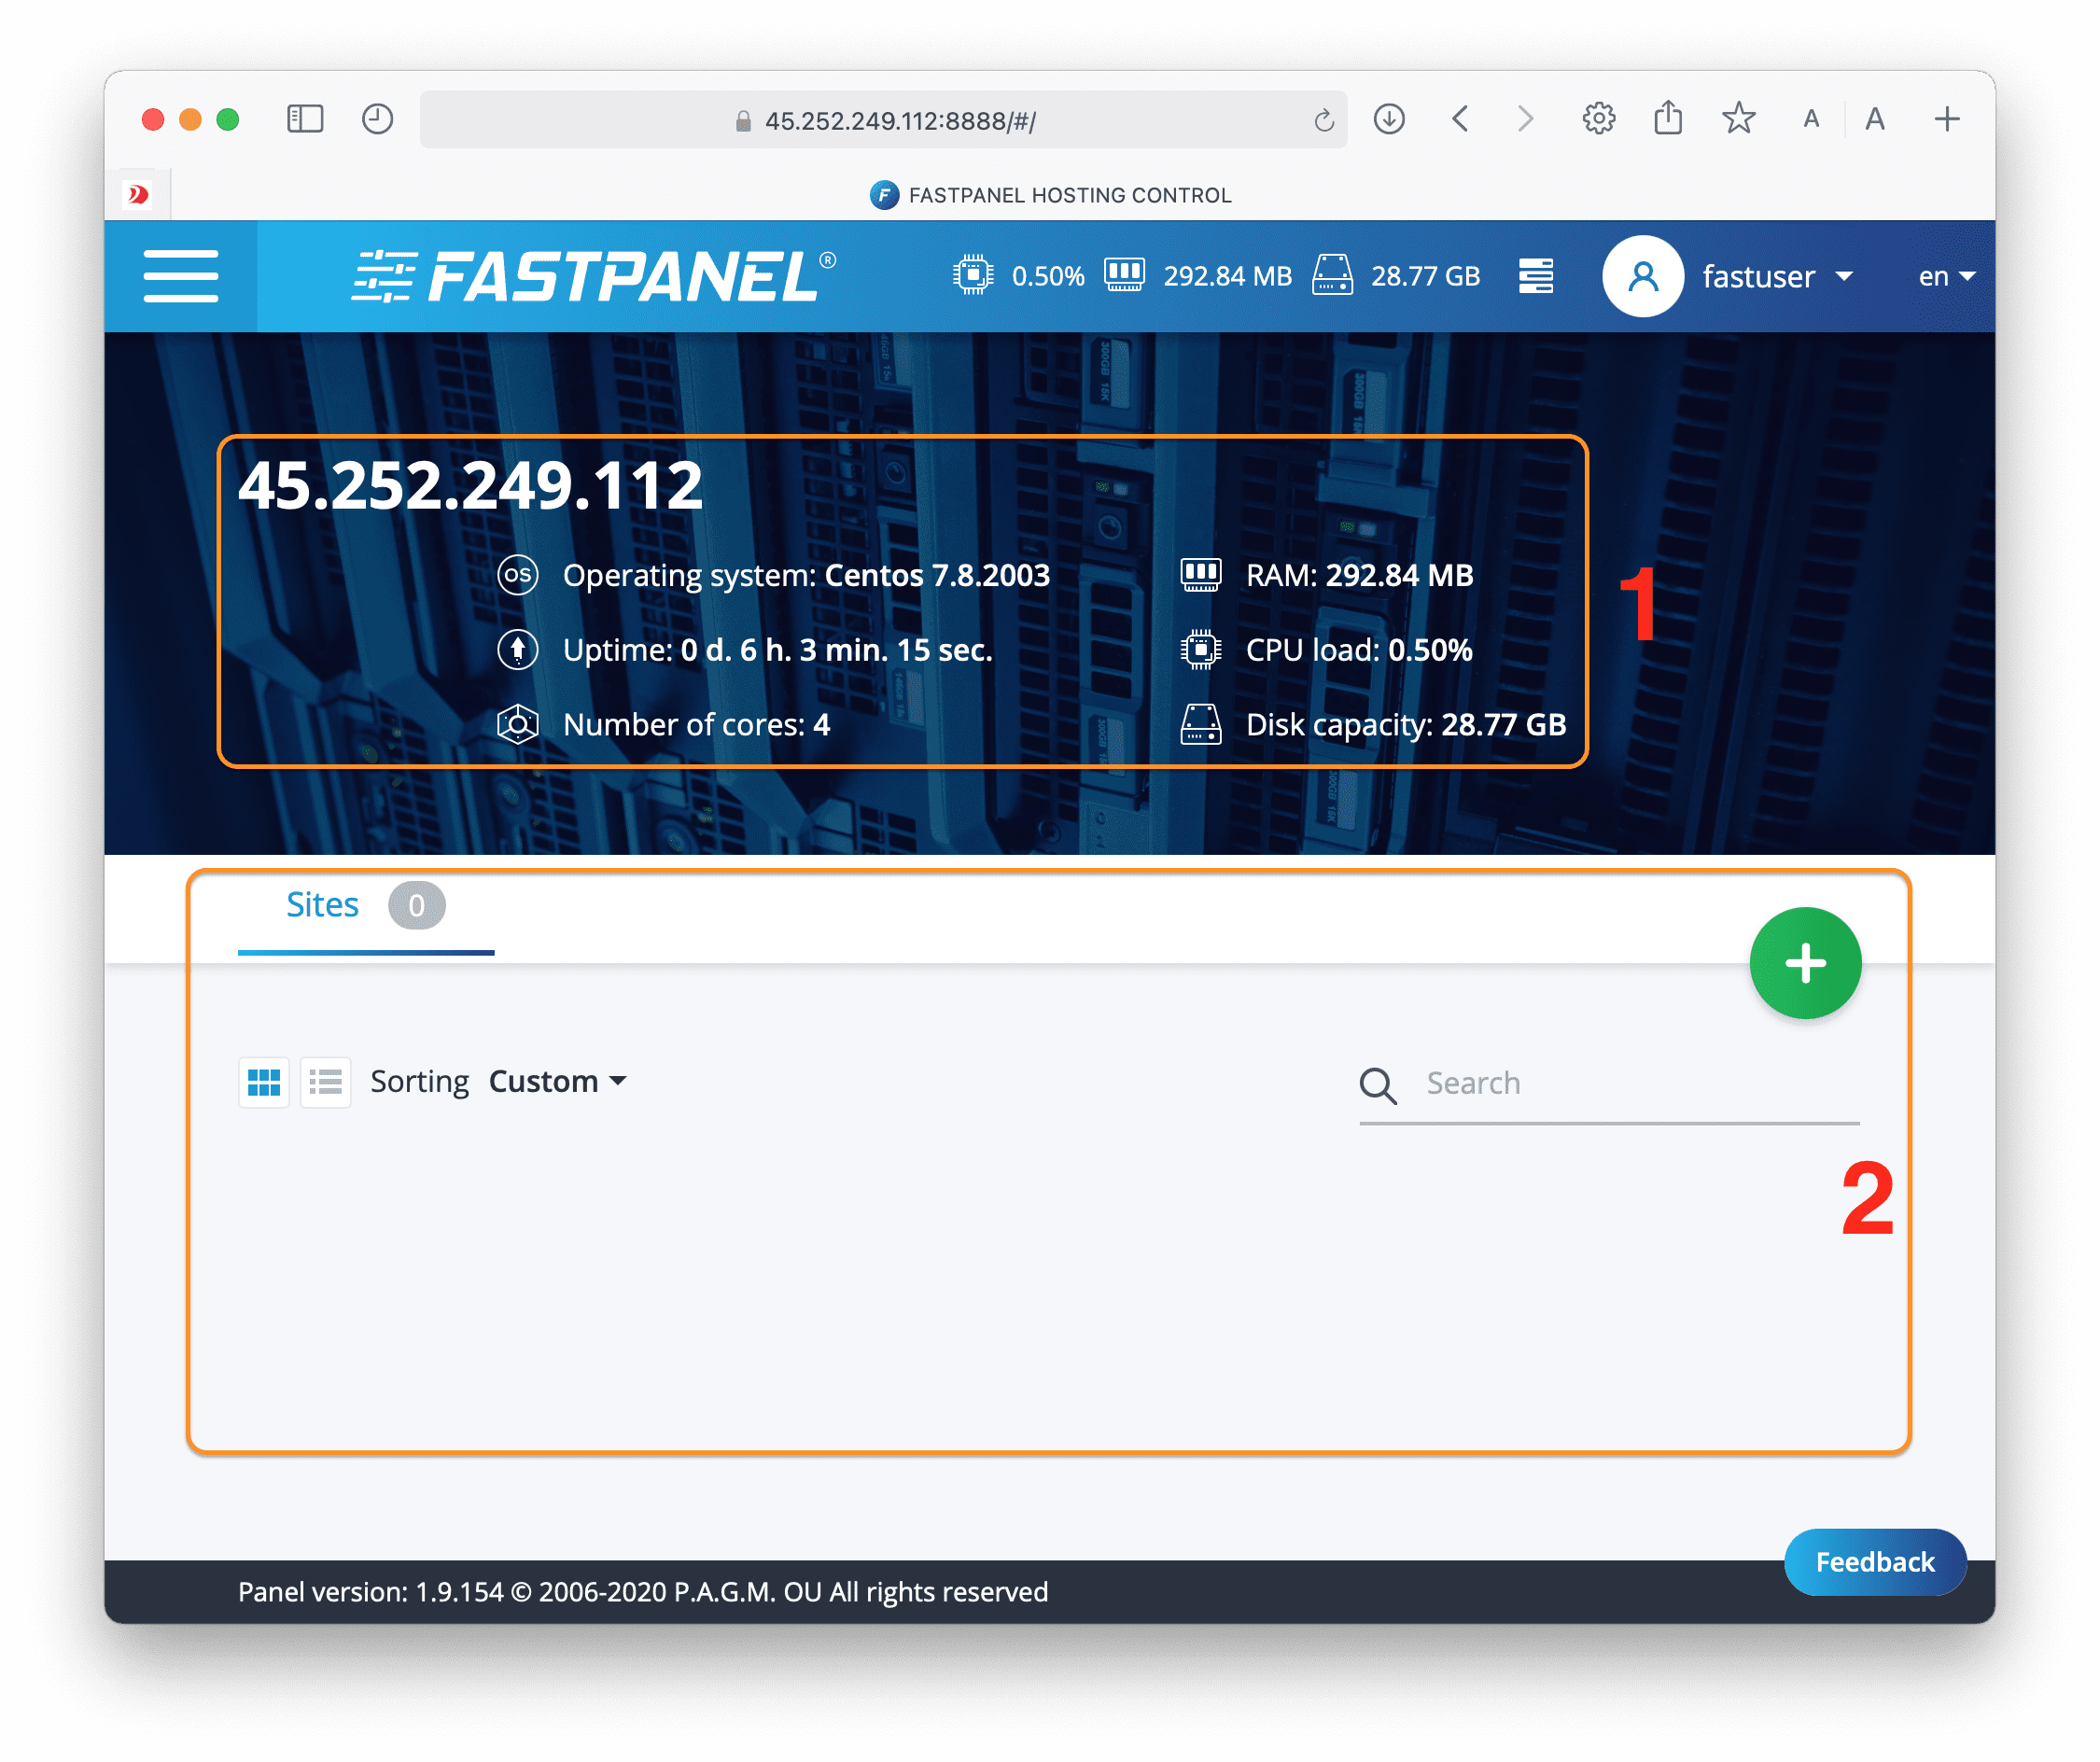
Then you will be entered the FASTPANEL administration interface as shown below:

In the above interface, you will see the basic information of your VPS/Server (1) and below is a list of added websites (2).
Summary
So with just 3 simple steps, you can install FASTPANEL into CentOS 7.
If you find the article useful, don’t forget to rate 5 stars.
Wishing you success.
In addition, you can check out some other articles about FASTPANEL at the link below:
If you need assistance, you can contact support in the ways below:
- Hotline 247: 028 888 24768 (Ext 0)
- Ticket/Email: You use the email to register for the service and send it directly to: support@azdigi.com

