Introduction
Fail2ban is an intrusion prevention software many Linux System Administrators use to protect Linux servers from brute force and other automated attacks.
In this tutorial, AZDIGI will show you how to install and configure Fail2ban on Ubuntu 22.04. Installing and configuring Fail2ban is easy, and you don’t need years of experience in Linux administration to do it.
Implementation Guide
Step 1: Install Fail2ban
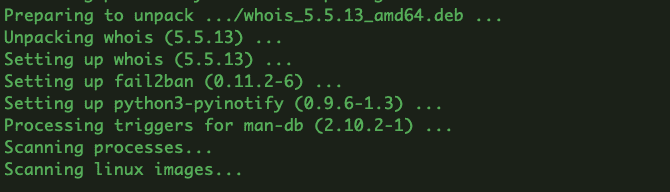
- First, update your system and install Fail2ban with the following command:
sudo apt update
sudo apt install fail2ban -y

- Check the status and enable boot with the system.
sudo systemctl status fail2ban
sudo systemctl enable fail2ban
Step 2: Configure Fail2ban
The path of Fail2ban will be at /etc/fail2ban, and the configuration file is jail.conf. The default configuration of Fail2Ban is quite good, so we do not need to edit anything further. However, if you need to change the configuration, you can refer to the instructions below:
- Open and edit the content of the configuration file jail.conf
sudo cp /etc/fail2ban/jail.conf /etc/fail2ban/jail.local
In this file, you can change the following configurations:
- ignoreip: Here, you will add the IP you allow access, but usually, the IP address in Vietnam is a dynamic IP, so we cannot use this option.
- bantime: The duration (seconds) of the IP block.
- findtime: The duration (seconds) an IP must login successfully.
- maxretry: Maximum number of incorrect login attempts.

Step 3: Protect SSH
If you need to configure Fail2ban to protect SSH, you can do the following:
- Create the jail.local file with the command below:
sudo nano /etc/fail2ban/jail.local
- Add the following content to the jail.local file and edit the configuration as needed:
[sshd]
# To use more aggressive sshd modes set filter parameter "mode" in jail.local:
# normal (default), ddos, extra or aggressive (combines all).
# See "tests/files/logs/sshd" or "filter.d/sshd.conf" for usage example and details.
#mode   = normal
port    = ssh
logpath = %(sshd_log)s
backend = %(sshd_backend)s
maxretry  = 3
bantime   = 3600
Note:
- port: If you use port 22, leave it as is; if you changed the port, you should replace ssh with your port, for example, port = 2210
- logpath: The default fail2ban log file path is /var/log/auth.log
- maxretry: Maximum number of incorrect login attempts.
- bantime: IP ban time 3600 seconds = 1 hour, you can adjust it again if you want.
- Restart the Fail2Ban service
sudo systemctl restart fail2ban
- You can review the history of the list of failed SSH sessions to the Ubuntu server with the following command:
cat /var/log/auth.log | grep 'Failed password' | sort | uniq -c

Step 4: Use Fail2ban client
Fail2ban has its command line tool called fail2ban-client, which you can use to interact with the fail2ban service. And some basic commands you need to note:
- See supported options on Fail2ban
fail2ban-client -h
- Check the list of blocked IPs.
sudo fail2ban-client status sshd
- To block an IP from accessing.
sudo fail2ban-client set sshd banip 103.221.222.223 ## Thay 103.221.222.223 bằng IP cần chặn
- To unblock an IP.
sudo fail2ban-client set sshd unbanip 103.221.222.223 ## Thay 103.221.222.223 bằng IP cần bỏ chặn
Above is the entire guide to configuring Fail2ban on Ubuntu 22.04, using Fail2ban will help you enhance the security of your Linux server, thereby limiting the risks of attacks from hackers. Hopefully, this article will be helpful to you, wish you success!
You can refer to other instructions at the link below:
If you need support, you can contact support in the ways below:
- Hotline 247: 028 888 24768 (Ext 0)
- Ticket/Email: You use the email to register for the service and send it directly to: support@azdigi.com .
You might also like
- CrowdSec on Linux VPS - Next-Generation IDS to Replace Fail2ban
- How to configure SSH Two Factor Authentication on Ubuntu 22.04
- Troubleshooting Linux VPS - How to Handle Common VPS Issues
- How to install LAMP Stack on Ubuntu 22.04
- How to install Zabbix Agent on Ubuntu 20.04
- How to install LEMP Stack on Ubuntu 22.04
About the author

Thạch Phạm
Đồng sáng lập và Giám đốc điều hành của AZDIGI. Có hơn 15 năm kinh nghiệm trong phổ biến kiến thức liên quan đến WordPress tại thachpham.com, phát triển website và phát triển hệ thống.