Create a script to backup data on the Linux server with 4 steps.
Introduction
Surely in the process of operating a server or website, the problem of data backup is always the top issue that should be noted. Backing up your website data regularly helps you always have the best backup plan in case something bad can happen to your website.
In the process of using, your wrong manipulation of data deletion or error or passive error from the service provider can cause your data to be lost and cannot be restored. Not to mention if you use a VPS service, you will be limited in terms of Backup support from the provider because often providers only support weekly data backup and that backup is a full backup of VPS. So if in the case that you update your data daily and unfortunately have an error or lose your website data that needs to be restored, then it is a difficult problem.
So how can you proactively backup your data quickly or, moreover, set up the server to automatically run backups according to the schedule you want, this must be a question that many people are looking for a solution to this problem.
In this article, AZDIGI will guide you on how to backup data automatically through Shell Script, please follow the next step.
Implementation Guide
Step 1: SSH into your Linux server
To create a script to backup data on Linux, we first need to SSH or access your VPS/server as root. If you don’t know how to SSH into your VPS/Server, you can refer to the following tutorial:
After successfully SSH, we continue with step 2 to continue the configuration.
Step 2: Create a data backup script (Source + Database)
Please follow the commands below to create a file and add script content (you can replace the path, file/folder name as you like).
- Create a file containing the script
vi /bin/auto-backup
Explanation of commands:
– Command 1: Create the auto-backup file at /bin directory
- Add the below content to the created file
#!/bin/bash
echo "Backup website Sitewp.tk"
 mkdir /home/backup/$(date +"%Y-%m-%d")/                         ## Tạo đường dẫn chứa File Backup
 mkdir /home/backup/$(date +"%Y-%m-%d")/sitewp.tk/
echo "Starting backup database for sitewp.tk..."                ## Backup Database
 mysqldump --single-transaction --routines --triggers --add-drop-table --extended-insert -u sql_sitewp_tk  -p'EjWyP5fJmYSzSHZf' sql_sitewp_tk | gzip -9 > /home/backup/$(date +"%Y-%m-%d")/sitewp.tk/Database_$(date +"%Y-%m-%d").sql.gz
echo "Starting backup files for sitewp.tk..."                   ## Backup Source
 zip -r /home/backup/$(date +"%Y-%m-%d")/sitewp.tk/Source_$(date +"%Y-%m-%d").zip /www/wwwroot/sitewp.tk/ -q
echo "BACKUP Database & Source thanh cong vao luc $(date +"%Y-%m-%d")!"
echo "File backup da duoc luu tai: /home/backup/sitewp.tk"
Note:
- Website name to backup: sitewp.tk
- User Database: sql_sitewp_tk
- Password: EjWyP5fJmYSzSHZf
- Database Name: sql_sitewp_tk
- Backup path: /home/backup/sitewp.tk/
- Website path to backup: /www/wwwroot/sitewp.tk
- Path to save backup file Source + Database: /home/backup
- Backup Source file name: Source.zip
- Backup Database file name:: Database.sql.gz
Note: You only edit the bolded part with your information, the rest you should keep.
- Permissions for the file auto-backup
chmod +x /bin/auto-backup
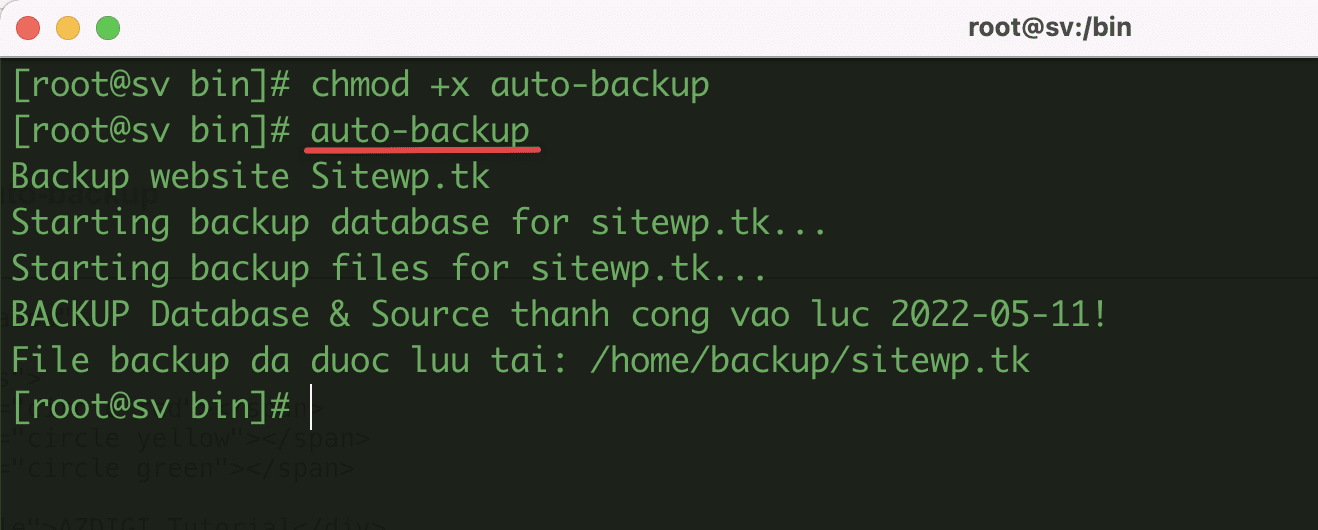
After the permission is complete, try typing the file name you just created to see if the backup script works or not. If it works as shown below, the configuration is successful.
Here are my daily backups:

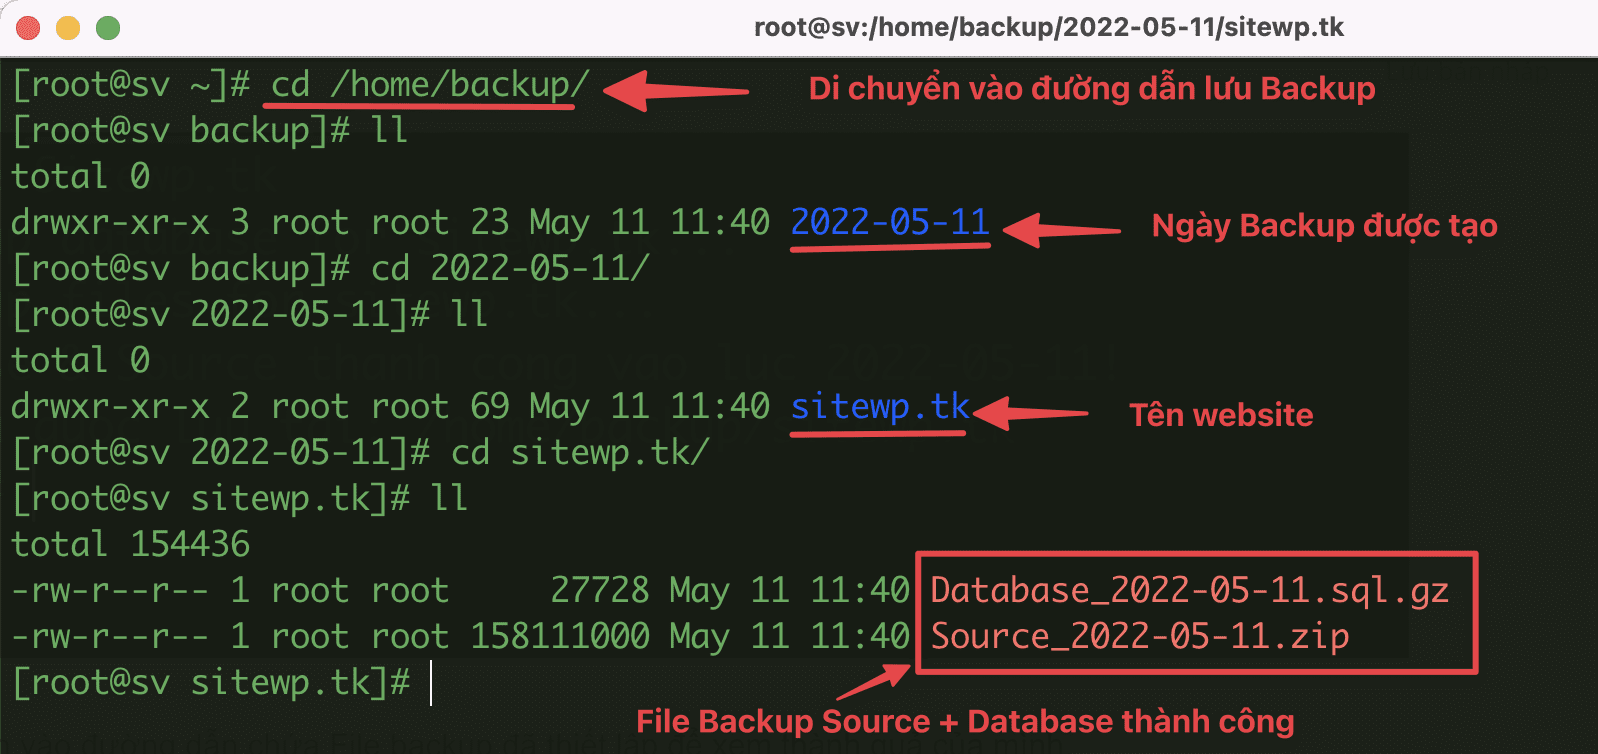
To view the data of each backup date, you just need to execute the cd command to the correct directory you need.
Step 3: Create Cron to set script runtime
For example, I will set the backup run time to once a day, then the way to set up Cron will have the following structure:
(crontab -u root -l ; echo "0 2 * * * auto-backup >> /home/backup/log-backup.txt") | crontab -u root -
systemctl restart crond
Explanation of the above command:
– Command 1: Set Cron Backup to run at 02:00 am every day, and the log will be recorded at /home/backup/log-backup.txt
– Command 2: Restart the Crond service
After adding Cron, run the command below to check if the Cron has been added successfully.
cat /var/spool/cron/root
If the output is as shown below, you have successfully added Cron.

Step 4: Create Cron to delete backup periodically
Because this script will store the backup file directly on the VPS, it will take up VPS space in the long run. So we will need to set up Cron to delete old backup files periodically, for example, I will create Cron to delete old backup files and keep only the last 7 backups. Cron time runs at 02:00 am daily.
(crontab -u root -l ; echo "0 2 * * * find /home/backup -type d -mtime +7 -exec rm -rf {} +") | crontab -u root -
systemctl restart crond
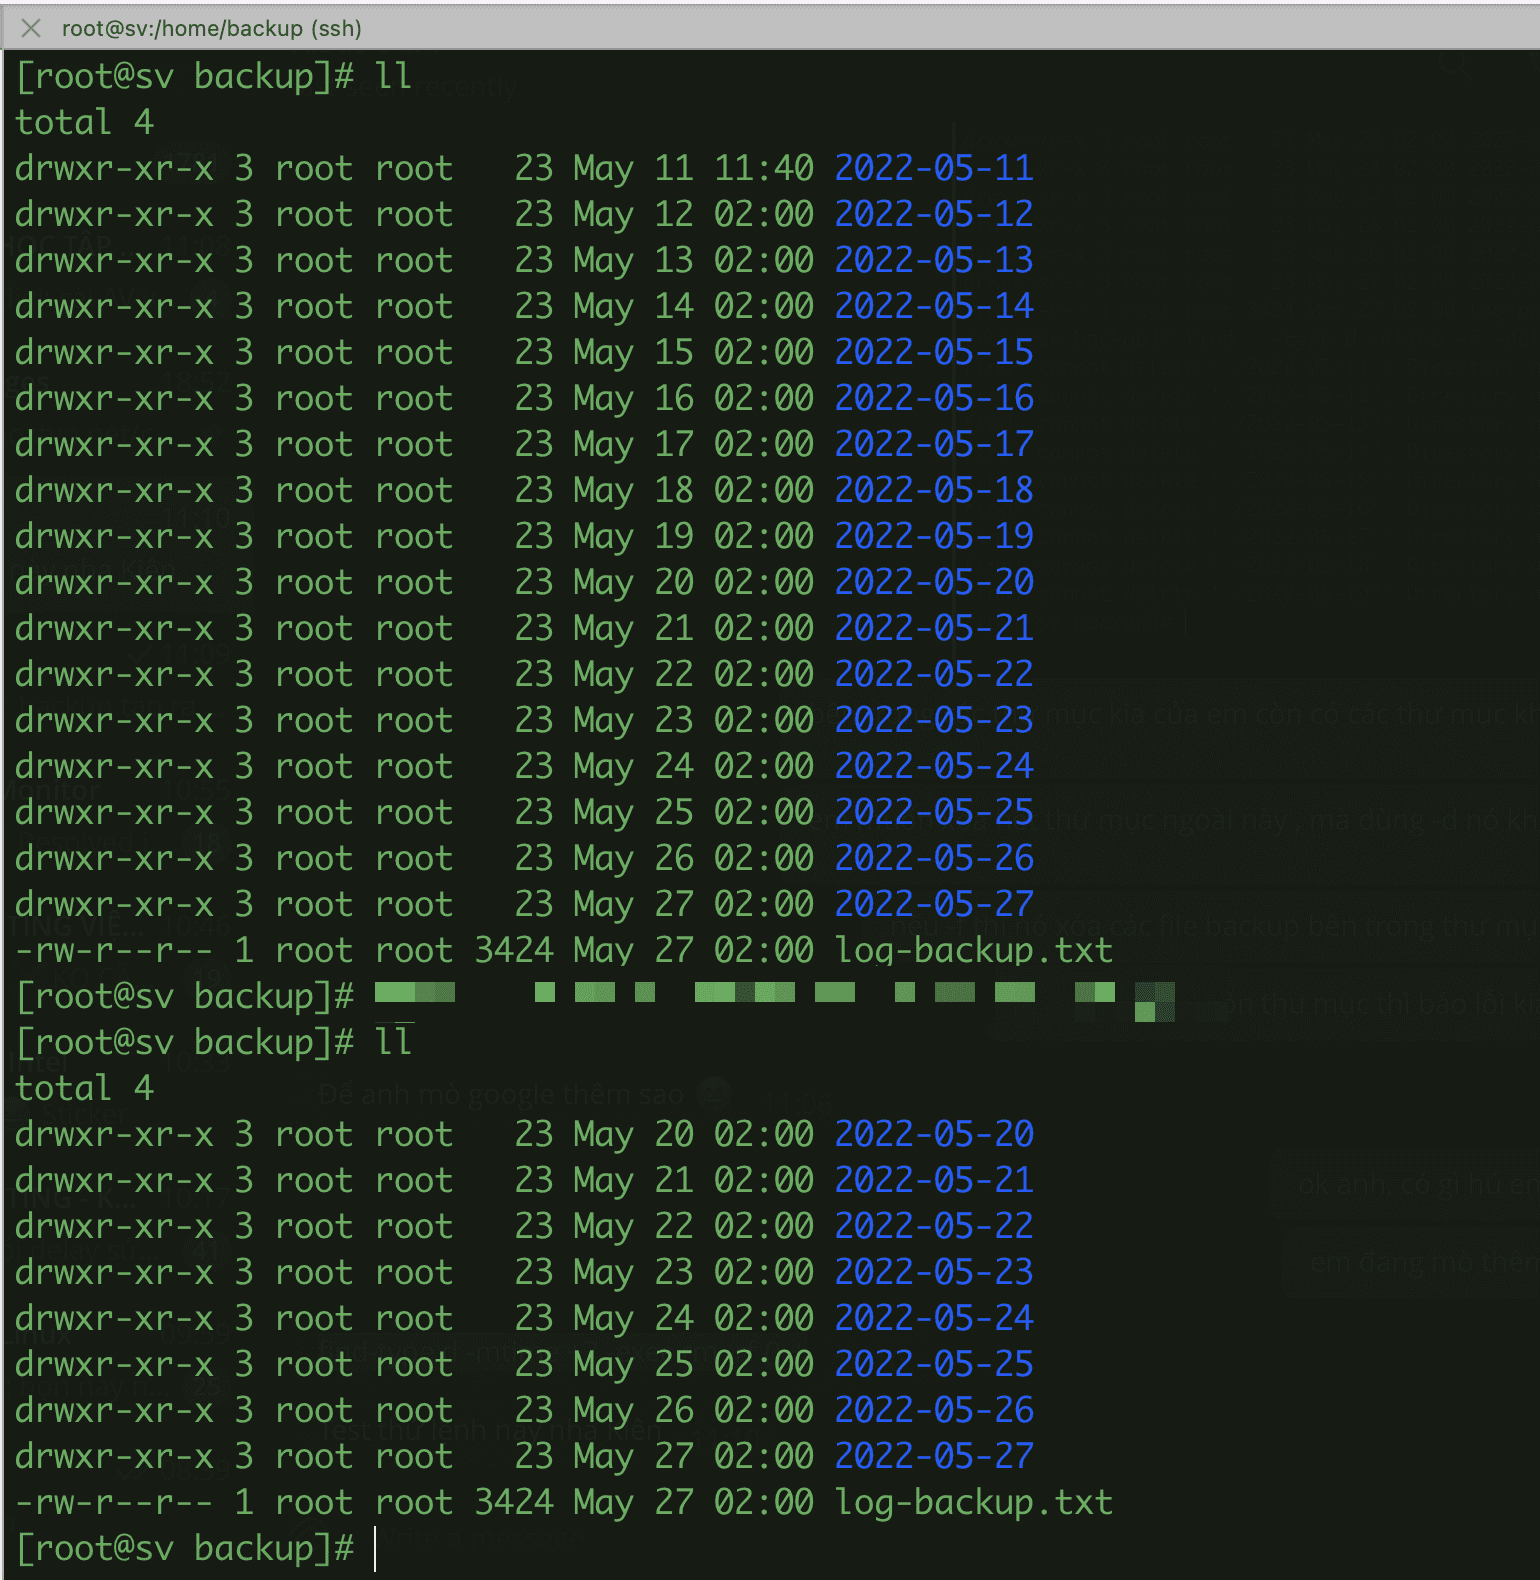
Below are the results of old backups deleted and kept only for the last 7 days.
Thus, AZDIGI has shown you how to create an automatic Cron Backup for your website on a Linux server. Thus, AZDIGI has shown you how to create an automatic Cron Backup for your website on a Linux server. Hope this article is helpful to you, wish you success!
You can refer to other instructions at the link below:
If you need support, you can contact support in the ways below:
- Hotline 247: 028 888 24768 (Ext 0)
- Ticket/Email: You use the email to register for the service and send it directly to: support@azdigi.com .
About the author

Thạch Phạm
Đồng sáng lập và Giám đốc điều hành của AZDIGI. Có hơn 15 năm kinh nghiệm trong phổ biến kiến thức liên quan đến WordPress tại thachpham.com, phát triển website và phát triển hệ thống.