
Instructions to install LAMP Stack on CentOS 7 simply with AZDIGI.
I. Introduction
What is LAMP?
LAMP is an abbreviation commonly used to refer to the use of Linux, Apache, MySQL software and the PHP or Perl or Python scripting language to create a Web server environment capable of hosting and delivering dynamic websites.
The specific functions you can quickly understand are that LAMP works from Linux software, with the web server Apache, the database server MariaDB or MySQL and the dynamic file content handled by PHP.
LAMP is an open-source form with the advantage of being free, so in recent years, LAMP has always been trusted by the community because of its stability, ease of installation and ease of operation.
You can learn more about LAMP here.
II. Implementation Guide
You can install LAMP with the following 5 steps.
Step 1: Install Apache Web Server
The Apache web server is one of the most popular web servers in the world. It has been well-documented and widely used for a long time, which makes Apache a great default choice for hosting a website.
Since Apache is available in CentOS repositories, you can simply install it using the following command:
yum install -y httpd
After the installation is complete, you can use the following commands to manage Apache:
systemctl start httpd (Khởi động dịch vụ Apache)
systemctl stop httpd (Dừng dịch vụ Apache)
systemctl reload httpd (Tải lại dịch vụ Apache)
systemctl restart httpd (Khởi động lại dịch vụ Apache:)
systemctl enable httpd (Thiết lập Apache khởi động cùng hệ thống)
systemctl disable httpd (Vô hiệu hoá Apache khởi động cùng hệ thống )
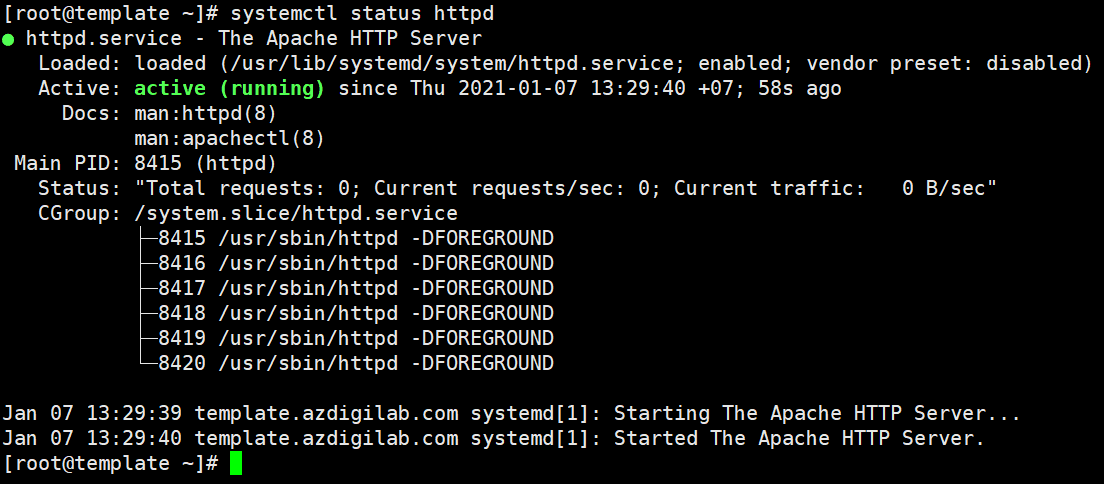
systemctl status httpd (Xem trạng thái dịch vụ Apache)
By default CentOS 7 will use Firewall, so you need to open the port of Apache with Firewall service as follow:
firewall-cmd --zone=public --add-port=80/tcp
firewall-cmd --reload      (Reload lại Firewalld)
Step 2: Install MariaDB
To install MariaDB, run the following command:
yum install -y mariadb mariadb-server
After the installation is complete, you can use the following commands to manage MariaDB:
systemctl start mariadb (Khởi động dịch vụ mariadb)
systemctl stop mariadb (Dừng dịch vụ mariadb)
systemctl restart mariadb (Khởi động lại dịch vụ mariadb)
systemctl enable mariadb (Thiết lập mariadb khởi động cùng hệ thống)
systemctl disable mariadb (Vô hiệu hoá mariadb khởi động cùng hệ thống )
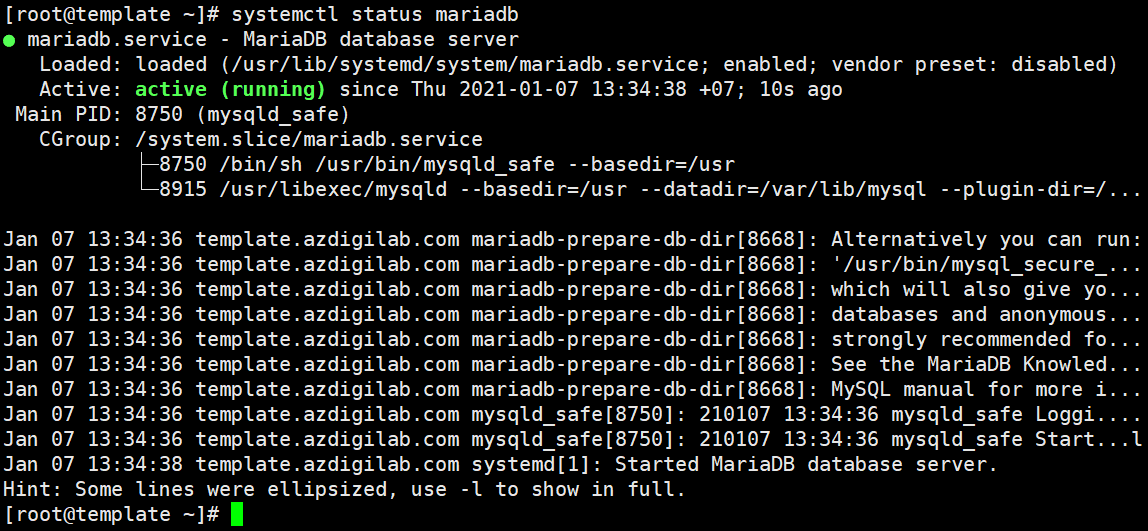
systemctl status mariadb (Xem trạng thái dịch vụ mariadb)
Note: The main MariaDB configuration file is /etc/my.conf
MariaDB Server Security Setup
So we have successfully installed MariaDB Server. MariaDB Server includes a security script to change less secure default options like Remote Connect and user test. You use the following command to run the security script:
mysql_secure_installation
[root@template ~]# mysql_secure_installationNOTE: RUNNING ALL PARTS OF THIS SCRIPT IS RECOMMENDED FOR ALL MariaDB SERVERS IN PRODUCTION USE! PLEASE READ EACH STEP CAREFULLY!
In order to log into MariaDB to secure it, we'll need the current password for the root user. If you've just installed MariaDB, and you haven't set the root password yet, the password will be blank, so you should just press enter here.
Enter current password for root (enter for none): (Press Enter) OK, successfully used password, moving on...
Setting the root password ensures that nobody can log into the MariaDB root user without the proper authorisation.
Set root password? [Y/n] Y New password: (Enter the new password root mysql) Re-enter new password: (re-enter password) Password updated successfully! Reloading privilege tables.. ... Success!
By default, a MariaDB installation has an anonymous user, allowing anyone to log into MariaDB without having to have a user account created for them. This is intended only for testing, and to make the installation go a bit smoother. You should remove them before moving into a production environment.
Remove anonymous users? [Y/n] Y ... Success!
Normally, root should only be allowed to connect from 'localhost'. This ensures that someone cannot guess at the root password from the network.
Disallow root login remotely? [Y/n] Y ... Success!
By default, MariaDB comes with a database named 'test' that anyone can access. This is also intended only for testing, and should be removed before moving into a production environment.
Remove test database and access to it? [Y/n] Y - Dropping test database... ... Success! - Removing privileges on test database... ... Success!
Reloading the privilege tables will ensure that all changes made so far will take effect immediately.
Reload privilege tables now? [Y/n] Y ... Success!
Cleaning up...
All done! If you've completed all of the above steps, your MariaDB installation should now be secure.
Thanks for using MariaDB!
Step 3: Install PHP
The PHP versions available on CentOS 7 are old and outdated, so it is recommended that you install third-party package repositories to use the latest PHP versions. And Remi is a popular package repository that provides the latest PHP releases for CentOS servers.
- To install the Remi repository, run the following command:
yum install -y yum-utils http://rpms.remirepo.net/enterprise/remi-release-7.rpm
- After installing the Remi package, you need to select the PHP version you need to install and activate the package containing that PHP version. In this tutorial, I will install PHP 8.0, so I will activate the package with the following command:
yum-config-manager --enable remi-php80
Note: At number 80 (corresponding to PHP 8.0), you can replace it with the version of PHP you want (Example: 72 – 73 –74 corresponds to 7.2 –7.3 – 7.4)
- Once the PHP remi-80 module has been enabled, you can proceed with the installation of PHP and the necessary PHP Extensions with the command below:
yum install -y php php-ldap php-zip php-embedded php-cli php-mysql php-common php-gd php-xml php-mbstring php-mcrypt php-pdo php-soap php-json php-simplexml php-process php-curl php-bcmath php-snmp php-pspell php-gmp php-intl php-imap perl-LWP-Protocol-https php-pear-Net-SMTP php-enchant php-pear php-devel php-zlib php-xmlrpc php-tidy php-opcache php-cli php-pecl-zip unzip gcc
- Check the installed PHP version
php -v
If the result is shown below, then you successfully installed PHP 8.0.
PHP 8.0.1 (cli) (built: Jan  5 2021 13:54:54) ( NTS gcc x86_64 )
Copyright (c) The PHP Group
Zend Engine v4.0.1, Copyright (c) Zend Technologies
    with Zend OPcache v8.0.1, Copyright (c), by Zend Technologies
Step 4: Configure Virtual Host (Apache)
Virtual Host is a configuration file in Apache to allow multiple domains to run on the same server. All vhost files will be located in the directory at /etc/httpd/conf.d/. For easy management, each website should have its own vhost, for example: azdigi.cf.conf
In this tutorial, I will create a website as azdigi.cf and its corresponding vhost will be /etc/httpd/conf.d/azdigi.cf.conf
touch /etc/httpd/conf.d/azdigi.cf.conf  (Tạo file azdigi.cf.conf)
vi /etc/httpd/conf.d/azdigi.cf.conf     (Chỉnh sửa file azdigi.cf.conf)
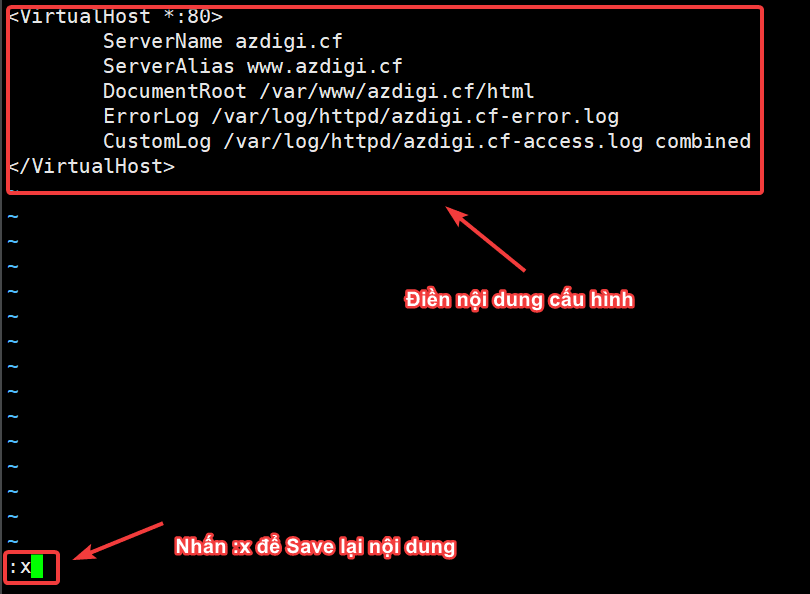
After opening the azdigi.cf.conf file, copy the content below and paste it into the azdigi.cf.conf file => Save.
VirtualHost *:80
        ServerName azdigi.cf
        ServerAlias www.azdigi.cf
        DocumentRoot /var/www/azdigi.cf/html
        ErrorLog /var/log/httpd/azdigi.cf_error.log
        CustomLog /var/log/httpd/azdigi.cf_access.log combined
/VirtualHost
Next, you need to create a folder containing the website source code with the following command:
mkdir -p /var/www/azdigi.cf/html           (Tạo folder azdigi.cf và html chứa dữ liệu website)
chown -R apache:apache /var/www/azdigi.cf  (Phân quyền thực thi cho thư mục)
Now we restart the Apache service with the command:
systemctl restart httpd
Step 5: Check website activity
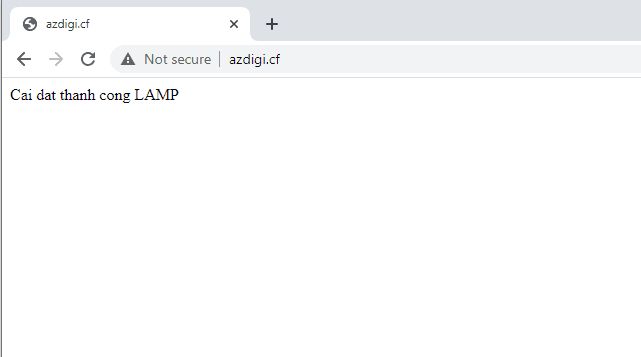
After the Virtual Host configuration is complete and the website folder creation is complete, you can quickly check whether your website is working or not by creating an index file with the following command:
Note: You need to point the Domain to the server IP first to be able to access it. And remember to change the correct path in your VPS.
touch /var/www/azdigi.cf/html/index.html | echo "Cai dat thanh cong LAMP" > /var/www/azdigi.cf/html/index.html
III. Summary
So in this article, AZDIGI has shown you how to install LAMP on a server using Centos 7 in the most detail. Installing LAMP will help you have a server to operate your website most stably and smoothly. Since LAMP only installs the necessary services to use the website, meaning it will eliminate unnecessary services so that VPS resources can be fully focused on operating the website. Hopefully, this article will help you to install Let’s Encrypt SSL successfully!
If you find the article helpful, please share it widely. In addition, you can refer to some other articles on Linux knowledge at the link below:
If you need assistance, you can contact support in the ways below:
- Hotline 247: 028 888 24768 (Ext 0)
- Ticket/Email: You use the email to register for the service and send it directly to: support@azdigi.com
About the author

Thạch Phạm
Đồng sáng lập và Giám đốc điều hành của AZDIGI. Có hơn 15 năm kinh nghiệm trong phổ biến kiến thức liên quan đến WordPress tại thachpham.com, phát triển website và phát triển hệ thống.