In this article, AZDIGI will guide you to installing LEMP Stack on Ubuntu 22.04 with the most commonly used parts of LEMP Stack.
I. What is LEMP Stack?
LEMP is an acronym for Linux, Nginx, MySQL, PHP (or Perl or Python) to create a web server environment capable of hosting and delivering dynamic web pages. The above 4 software form a LEMP package.
LEMP installation components:
- NGINX as the webserver
- MariaDB
- PHP (using version 8.1 in this article)
- phpMyAdmin
II. Install LEMP Stack.
1. Login SSH to server/VPS
To install LEMP, you first need to SSH or access your VPS/server as root. If you don’t know how to SSH into your VPS/Server, you can refer to the following tutorial:
2. Update the system
You should update the packages on your system to the latest version before installing. And to update, you use the following command:
root@ubuntu-2204:~# apt-get update && apt-get upgrade -y
3. LEMP installation operation
3.1. Install NGINX
There are many ways to install NGINX and in this article, I will install it directly with the command apt-get install
root@ubuntu-2204:~# apt-get install nginx -y
Next, you use the following 3 commands to enable and start nginx.
root@ubuntu-2204:~# systemctl enable nginx     #Bật khởi động cùng hệ thống
root@ubuntu-2204:~# systemctl start nginx      #Khởi động nginx
root@ubuntu-2204:~# systemctl status nginx      #Kiểm tra trạng thái
● nginx.service - A high performance web server and a reverse proxy server
     Loaded: loaded (/lib/systemd/system/nginx.service; enabled; vendor preset: enabled)
     Active: active (running) since Fri 2022-05-13 14:44:01 +07; 4min 22s ago
       Docs: man:nginx(8)
   Main PID: 2300 (nginx)
      Tasks: 2 (limit: 1034)
     Memory: 4.5M
        CPU: 33ms
     CGroup: /system.slice/nginx.service
To check what version of nginx is installed, you can use the nginx -v command.
root@ubuntu-2204:~# nginx -v
nginx version: nginx/1.18.0 (Ubuntu)
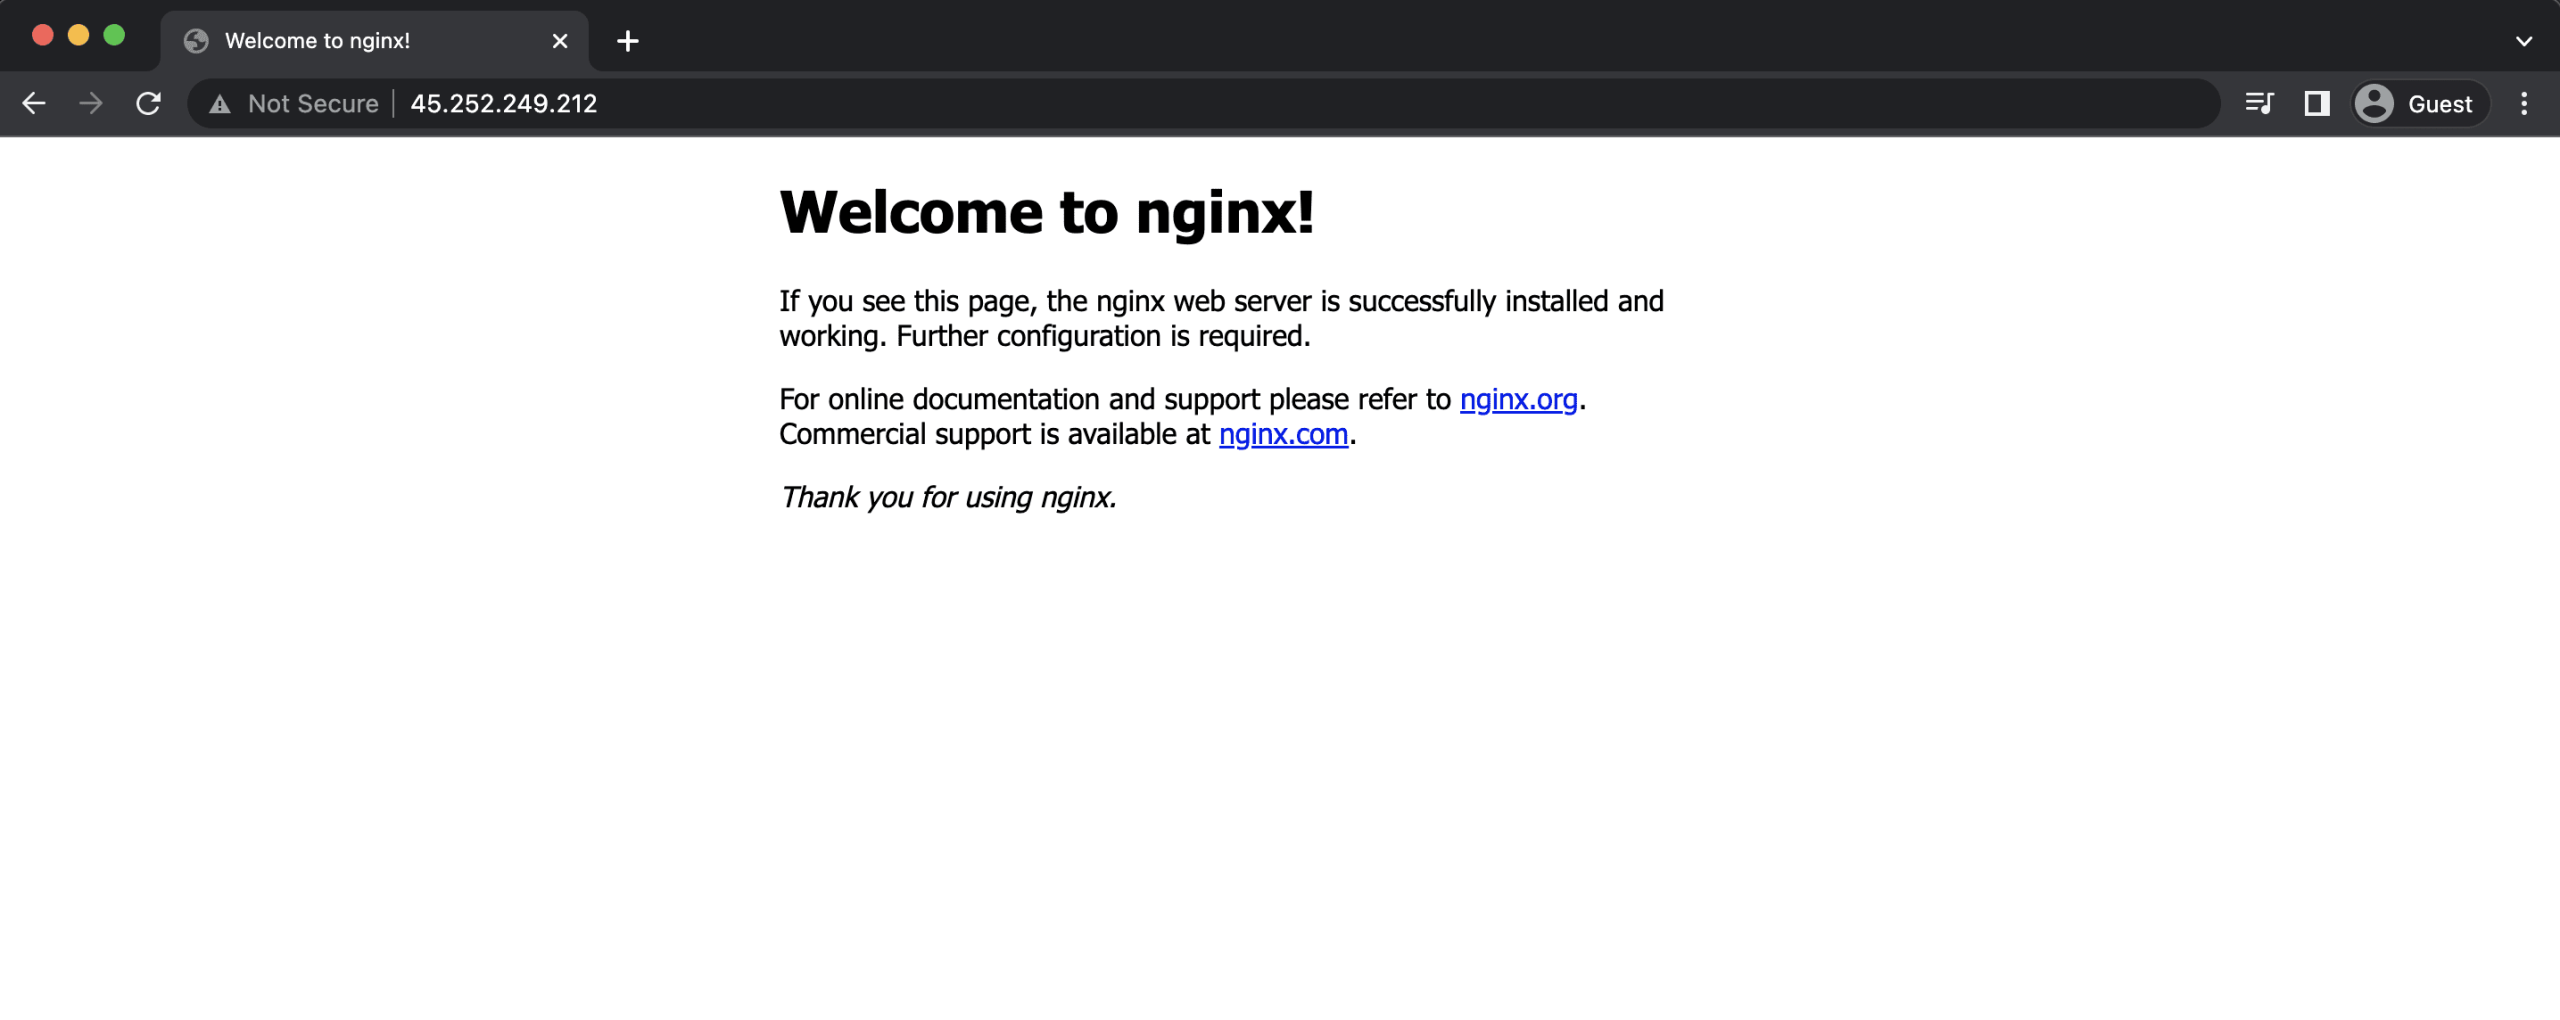
Now access the IP on the browser. If the screen displays as shown below, NGINX has been installed successfully.

If your system has a firewall installed, please open port 80 on the firewall to access.
- For iptables
root@ubuntu-2204:~# iptables -I INPUT -p tcp --dport 80 -j ACCEPT
- For UFW firewall
root@ubuntu-2204:~# ufw allow http
Hoặc
ufw allow 80/tcp
3.2. Install the database server
I will be using MariaDB as the database server. To install, you use the following command:
root@ubuntu-2204:~# apt-get install mariadb-server mariadb-client -y
After the installation is complete, check the service and enable it to start with the system.
root@ubuntu-2204:~# systemctl enable mariadb    #Bật khởi động
root@ubuntu-2204:~# systemctl start mariadb     #Khởi động dịch vụ
root@ubuntu-2204:~# systemctl status mariadb    #Kiểm tra dịch vụ
● mariadb.service - MariaDB 10.6.7 database server
     Loaded: loaded (/lib/systemd/system/mariadb.service; enabled; vendor preset: enabled)
     Active: active (running) since Fri 2022-05-13 15:09:50 +07; 4min 28s ago
       Docs: man:mariadbd(8)
             https://mariadb.com/kb/en/library/systemd/
   Main PID: 3220 (mariadbd)
     Status: "Taking your SQL requests now..."
      Tasks: 8 (limit: 1034)
     Memory: 60.1M
        CPU: 575ms
     CGroup: /system.slice/mariadb.service
└─3220 /usr/sbin/mariadbd- Configure MariaDB
root@ubuntu-2204:~# mysql_secure_installation
NOTE: RUNNING ALL PARTS OF THIS SCRIPT IS RECOMMENDED FOR ALL MariaDB
      SERVERS IN PRODUCTION USE!  PLEASE READ EACH STEP CAREFULLY!
In order to log into MariaDB to secure it, we'll need the current
password for the root user. If you've just installed MariaDB, and
haven't set the root password yet, you should just press enter here.
Enter current password for root (enter for none):
OK, successfully used password, moving on...
Setting the root password or using the unix_socket ensures that nobody
can log into the MariaDB root user without the proper authorisation.
You already have your root account protected, so you can safely answer 'n'.
Switch to unix_socket authentication [Y/n] n
 ... skipping.
You already have your root account protected, so you can safely answer 'n'.
Change the root password? [Y/n] y       #Thay đổi mật khẩu root mariaDB
New password:
Re-enter new password:
Password updated successfully!
Reloading privilege tables..
 ... Success!
By default, a MariaDB installation has an anonymous user, allowing anyone
to log into MariaDB without having to have a user account created for
them.  This is intended only for testing, and to make the installation
go a bit smoother.  You should remove them before moving into a
production environment.
Remove anonymous users? [Y/n] y
 ... Success!
Normally, root should only be allowed to connect from 'localhost'.  This
ensures that someone cannot guess at the root password from the network.
Disallow root login remotely? [Y/n] y
 ... Success!
By default, MariaDB comes with a database named 'test' that anyone can
access.  This is also intended only for testing, and should be removed
before moving into a production environment.
Remove test database and access to it? [Y/n] y
 - Dropping test database...
 ... Success!
 - Removing privileges on test database...
 ... Success!
Reloading the privilege tables will ensure that all changes made so far
will take effect immediately.
Reload privilege tables now? [Y/n] y
 ... Success!
Cleaning up...
All done!  If you've completed all of the above steps, your MariaDB
installation should now be secure.
Thanks for using MariaDB!- Check the MariaDB version
root@ubuntu-2204:~# mariadb --version
mariadb  Ver 15.1 Distrib 10.6.7-MariaDB, for debian-linux-gnu (x86_64) using  EditLine wrapper
3.3. Install PHP
As described at the beginning of the article, I will install PHP 8.1, the latest version. In addition, I will install some important extensions included.
root@ubuntu-2204:~# apt-get install php8.1 php8.1-fpm php8.1-mysql php-common php8.1-cli php8.1-common php8.1-opcache php8.1-readline php8.1-mbstring php8.1-xml php8.1-gd php8.1-curl php8.1-soap php8.1-mbstring -y
root@ubuntu-2204:~# systemctl enable php8.1-fpm    #Bật khởi động cùng hệ thống
root@ubuntu-2204:~# systemctl start php8.1-fpm     #Khởi động PHP
root@ubuntu-2204:~# systemctl status php8.1-fpm    #Kiểm tra PHP
● php8.1-fpm.service - The PHP 8.1 FastCGI Process Manager
     Loaded: loaded (/lib/systemd/system/php8.1-fpm.service; enabled; vendor preset: enabled)
     Active: active (running) since Fri 2022-05-13 15:42:31 +07; 4min 22s ago
       Docs: man:php-fpm8.1(8)
   Main PID: 13862 (php-fpm8.1)
     Status: "Processes active: 0, idle: 2, Requests: 0, slow: 0, Traffic: 0req/sec"
      Tasks: 3 (limit: 1034)
     Memory: 9.5M
        CPU: 92ms
     CGroup: /system.slice/php8.1-fpm.service
             ├─13862 "php-fpm: master process (/etc/php/8.1/fpm/php-fpm.conf)
3.4. Install phpMyAdmin
phpMyAdmin is an application used to manage databases as an interface. Through phpMyAdmin will help you manage databases more intuitively. To install it, please do the following:
root@ubuntu-2204:~# apt-get install phpmyadmin -y
After running the command, the system will appear in a dialog box asking you to choose which web server to install. If your webserver is not here, do not tick and press the Tab key to scroll down and click OK to install.
Then the installation will continue and an additional dialog box with user information will appear with the name phpmyadmin => select Yes.

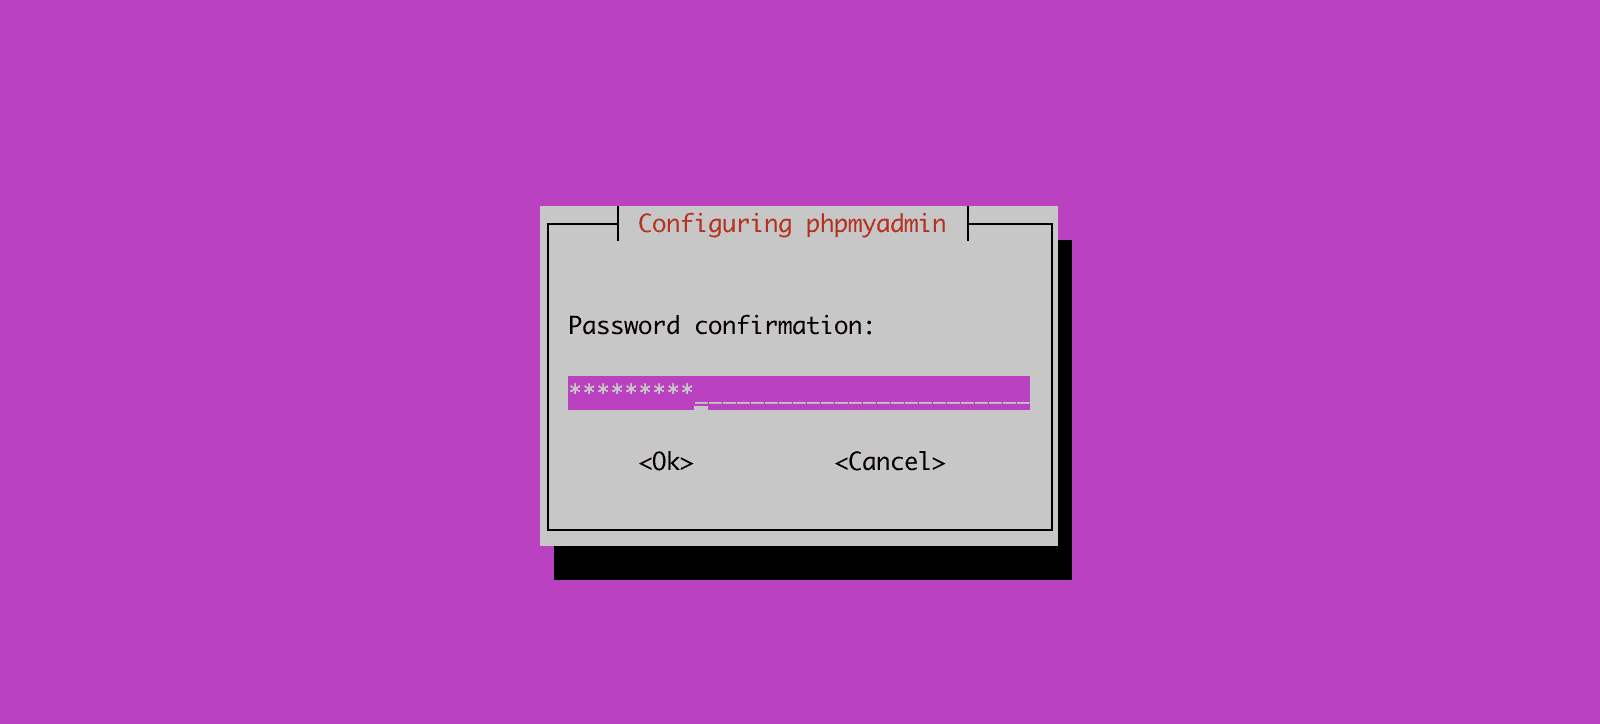
Then you need to set password for phpmyadmin. After entering the password, press the tab key to move to the OK button.
Re-enter the password to confirm.
Once the installation is complete, a new database named phpmyadmin will be created and the phpmyadmin database user will have the necessary privileges to manage this database. You can log in to MariaDB and check what privileges the phpmyadmin user has been granted.
root@ubuntu-2204:~# mysql -u root
MariaDB [(none)]> show grants for phpmyadmin@localhost;
+-------------------------------------------------------------------------------------------------------+
| Grants for phpmyadmin@localhost                                                                                   |
+-------------------------------------------------------------------------------------------------------+
| GRANT USAGE ON *.* TO `phpmyadmin`@`localhost` IDENTIFIED BY PASSWORD '*C2D9A6C499D*************517E31E6FA1ED006' |
| GRANT ALL PRIVILEGES ON `phpmyadmin`.* TO `phpmyadmin`@`localhost`                                                |
+-------------------------------------------------------------------------------------------------------+- Configure to login phpMyAdmin
You create a configuration file like this:
root@ubuntu-2204:~# vi /etc/nginx/conf.d/phpmyadmin.conf
Then you add the below configuration content and change example.com with your domain name.
server {
  listen 80;
  listen [::]:80;
  server_name example.com;
  root /usr/share/phpmyadmin/;
  index index.php index.html index.htm index.nginx-debian.html;
access_log /var/log/nginx/phpmyadmin_access.log;
  error_log /var/log/nginx/phpmyadmin_error.log;
location / {
    try_files $uri $uri/ /index.php;
  }
location ~ ^/(doc|sql|setup)/ {
    deny all;
  }
location ~ .php$ {
    fastcgi_pass unix:/run/php/php8.1-fpm.sock;
    fastcgi_param SCRIPT_FILENAME $document_root$fastcgi_script_name;
    include fastcgi_params;
    include snippets/fastcgi-php.conf;
  }
location ~ /.ht {
    deny all;
  }
}
Note: To access the domain name, you need to point the domain name to the server IP.
root@ubuntu-2204:~# nginx -t
nginx: the configuration file /etc/nginx/nginx.conf syntax is ok
nginx: configuration file /etc/nginx/nginx.conf test is successful
Next, restart nginx.
root@ubuntu-2204:~# systemctl restart nginx
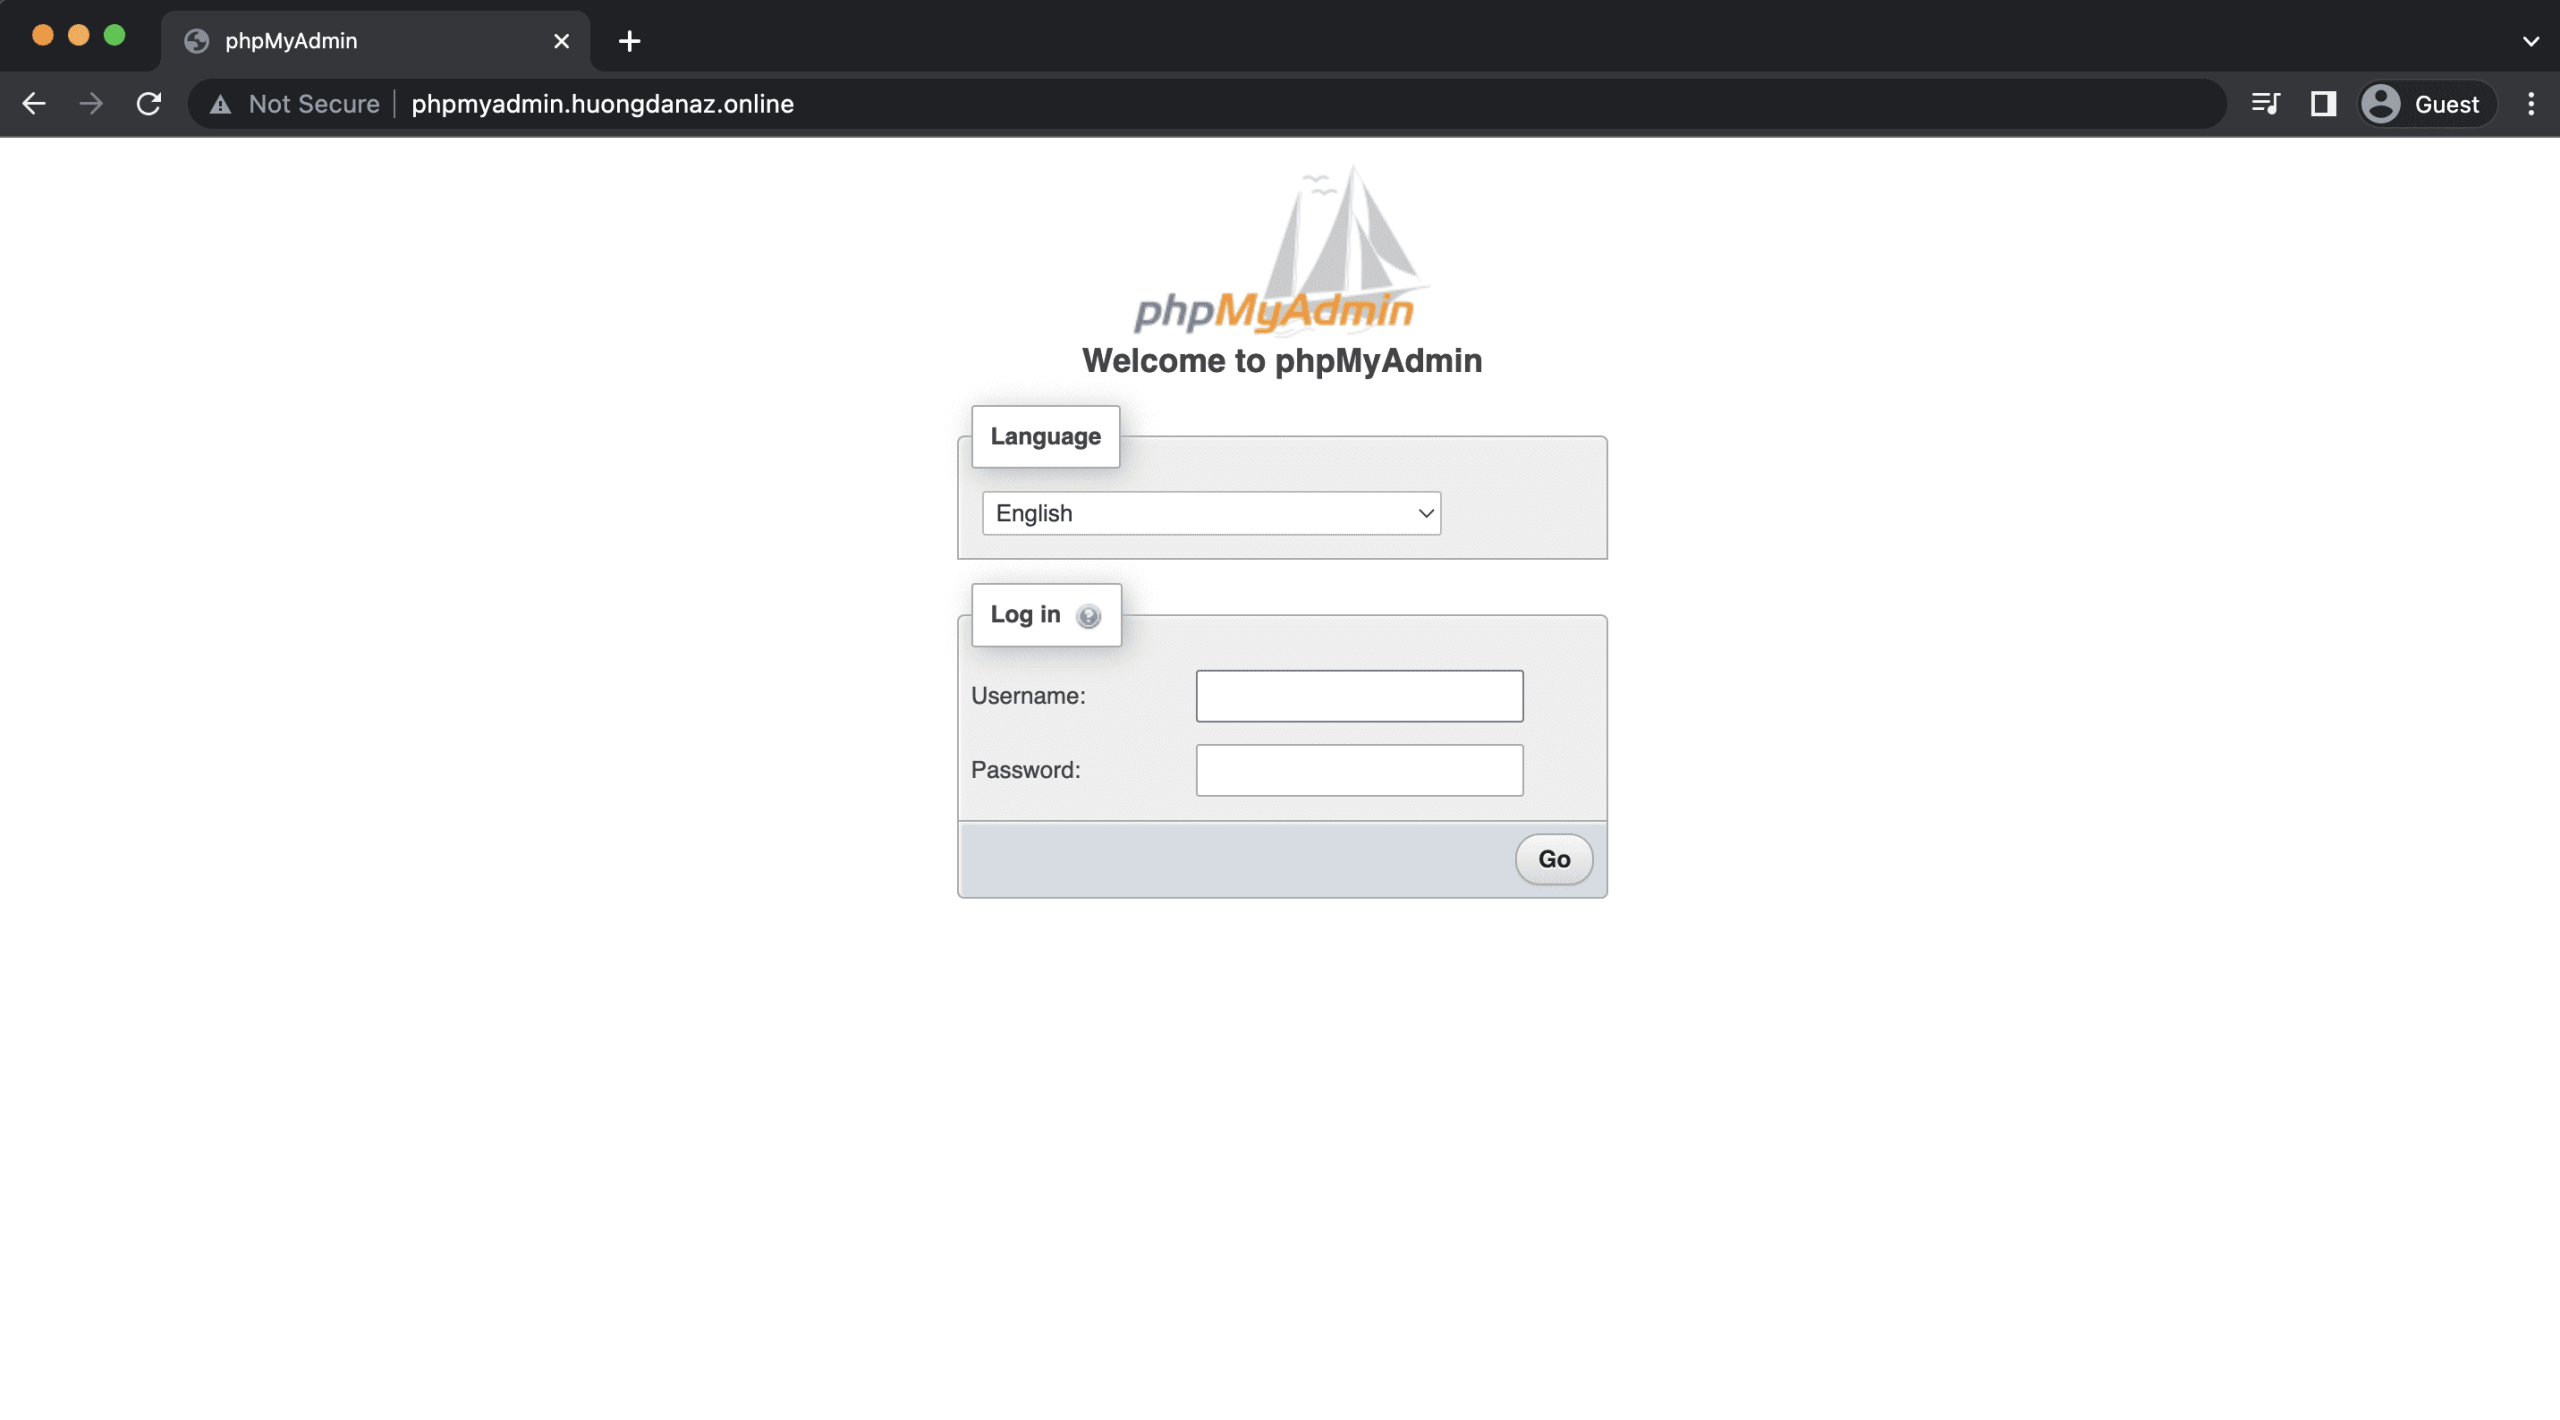
Then access the browser to check phpMyAdmin.
So we have completed the steps to install LEMP Stack on Ubuntu 22.04. In the next articles, AZDIGI will guide you through creating a vhost, installing WordPress, SSL and the accompanying cache applications.
If you need support, you can contact support in the ways below:
- Hotline 247: 028 888 24768 (Ext 0)
- Ticket/Email: You use the email to register for the service and send it directly to: support@azdigi.com .
About the author

Thạch Phạm
Đồng sáng lập và Giám đốc điều hành của AZDIGI. Có hơn 15 năm kinh nghiệm trong phổ biến kiến thức liên quan đến WordPress tại thachpham.com, phát triển website và phát triển hệ thống.