How to install WordPress on Webinoly for newbie.
I. OVERVIEW
Welcome back to AZDIGI’s documentation channel. In today’s article, AZDIGI will automatically guide you to install WordPress and SSL certificates on Webinoly. Let’s get started.
And if you have not installed Webinoly, please review our tutorial on how to install and use Webinoly.
II. INSTALL WORDPRESS ON WEBINOLY
Step 1: SSH into the server
To install WordPress on Webinoly, we first need to SSH into your VPS/server as root. If you don’t know how to SSH into your VPS/Server, you can refer to the following tutorial:
Step 2: Install WordPress on Webinoly
In this tutorial, I will use a subdomain of huongdan.dotrungquan.info to install WordPress and SSL. I pointed this subdomain to the server’s IP.
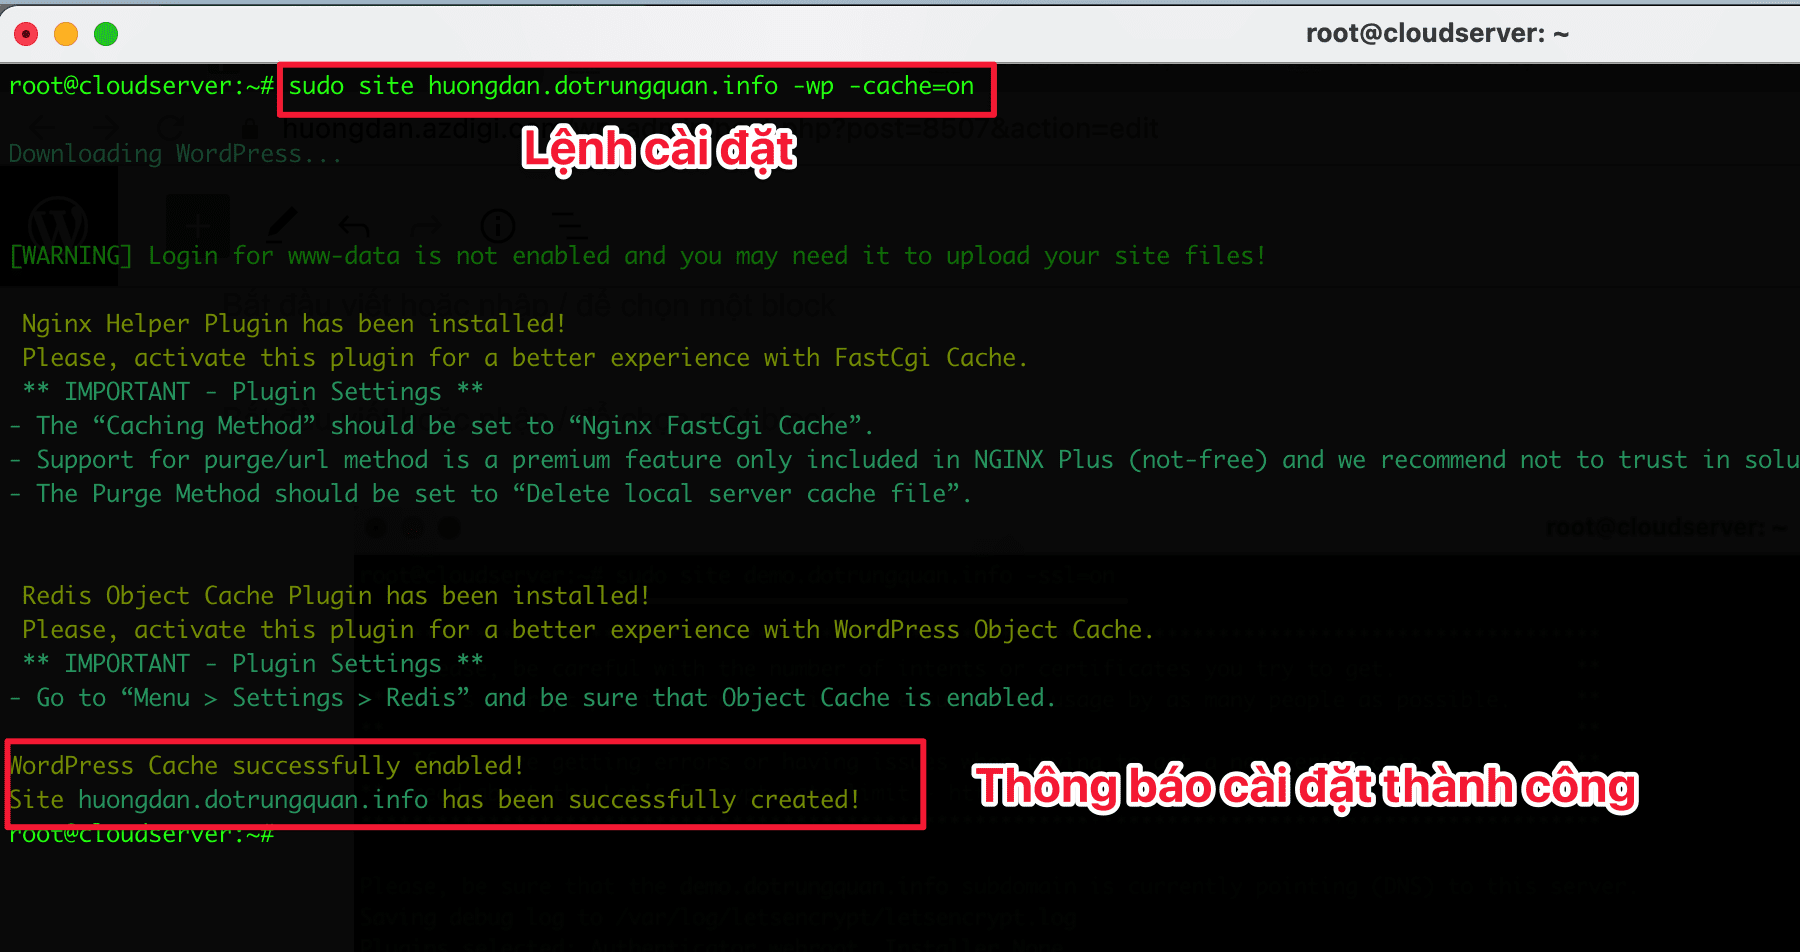
Next, to install WordPress, you use the following command syntax: As shown below, I have installed WordPress and enabled the cache feature.
sudo site huongdan.dotrungquan.info -wp -cache=on
Then please wait a few minutes for the system to automatically install WordPress and cache.

After receiving the successful WordPress installation notification, please visit the website to set up WordPress.
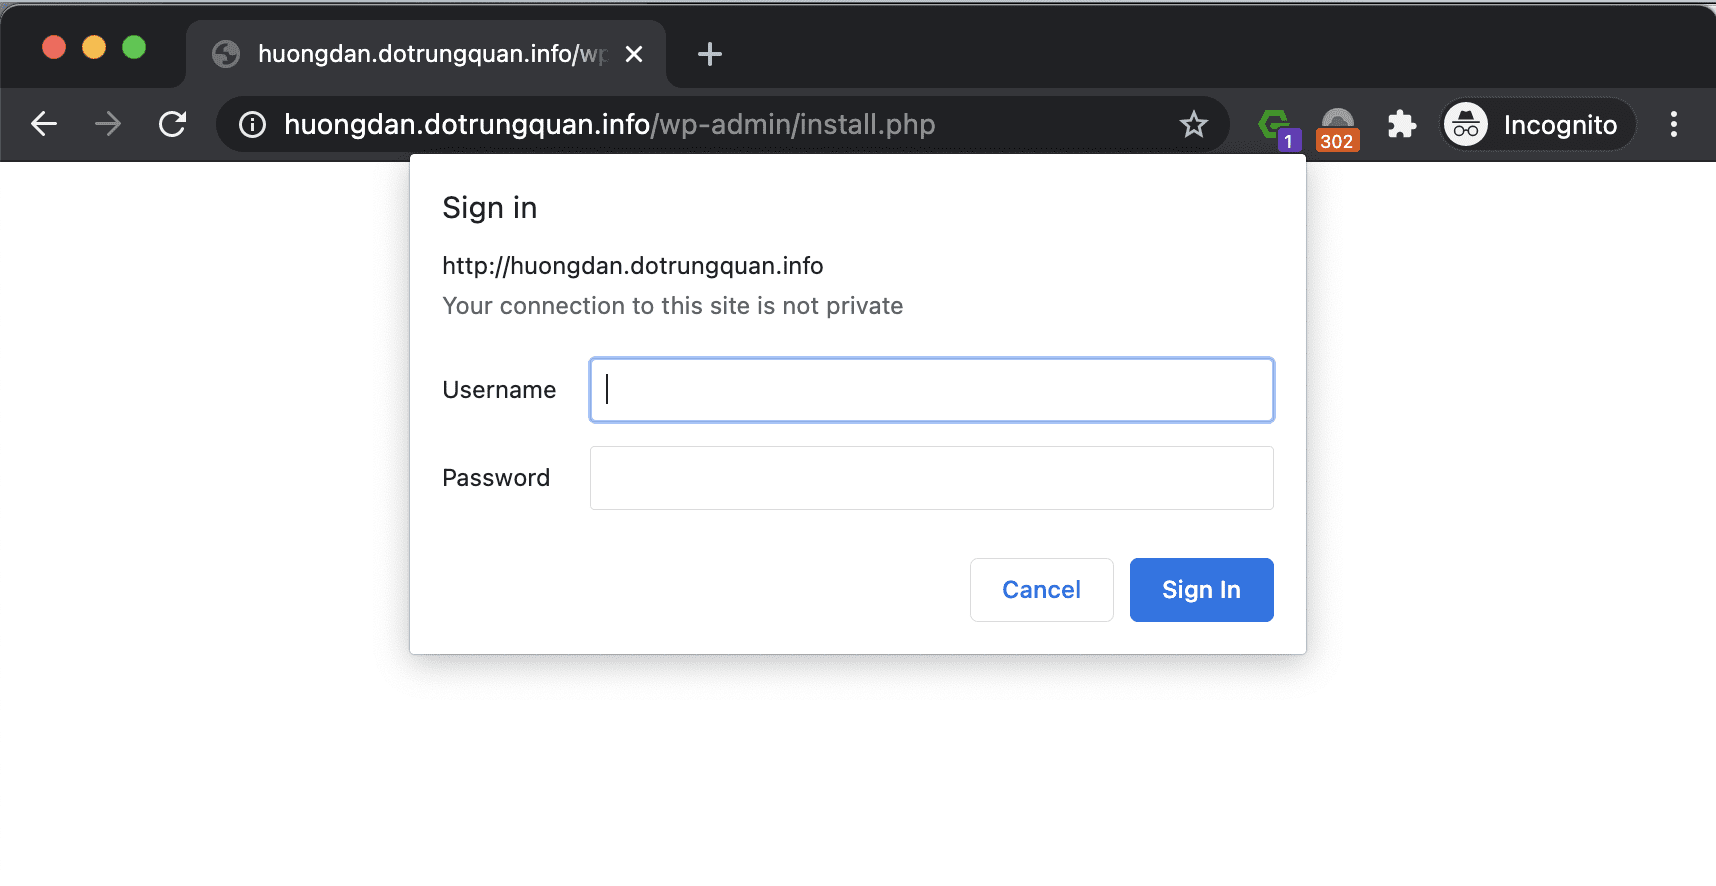
When I access the website, I receive a message with a user and password input box. As I mentioned in the previous post, By default, after installing WordPress, Webinoly will enable the wp-admin folder protection and you need HTTP authentication as follows:
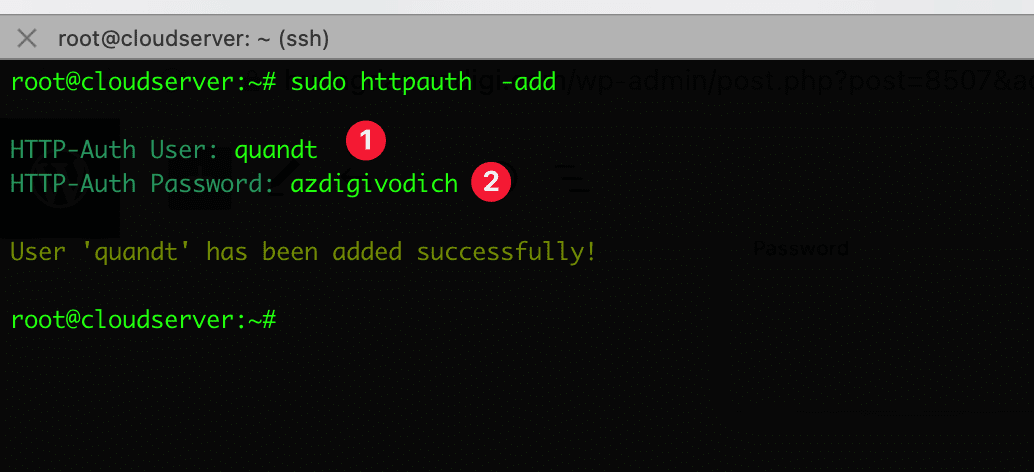
You need to create a new user with the following syntax:
sudo httpauth -add
After entering the command sudo httpauth -add, enter the information below:
HTTP-Auth User: Set login name
HTTP-Auth Password: Set password
After creating the authenticated user, go back and enter the information to continue setting up WordPress.
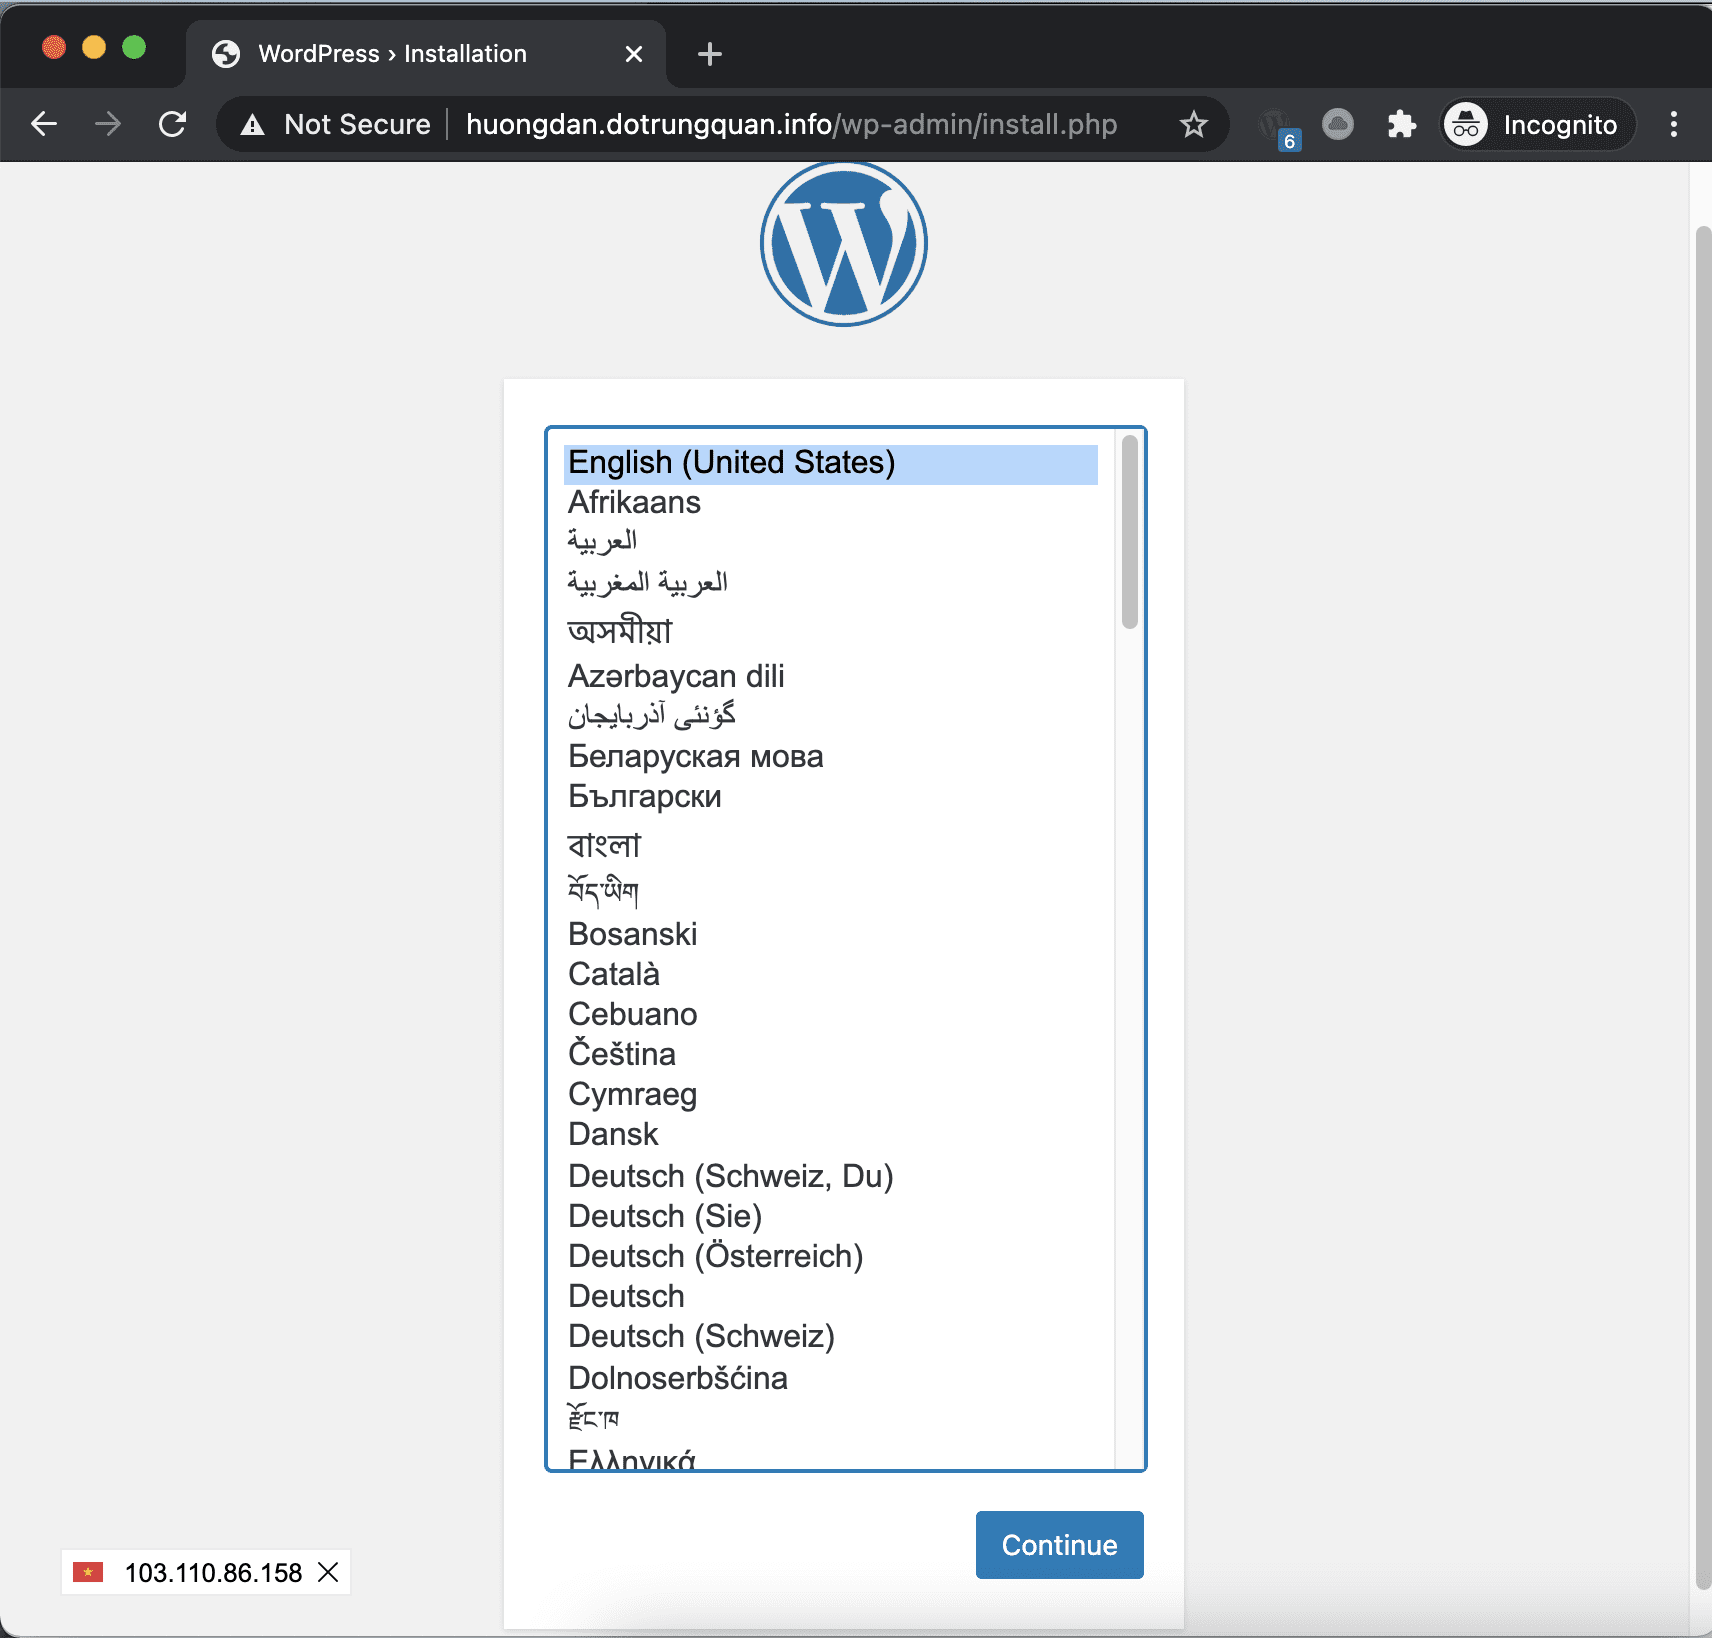
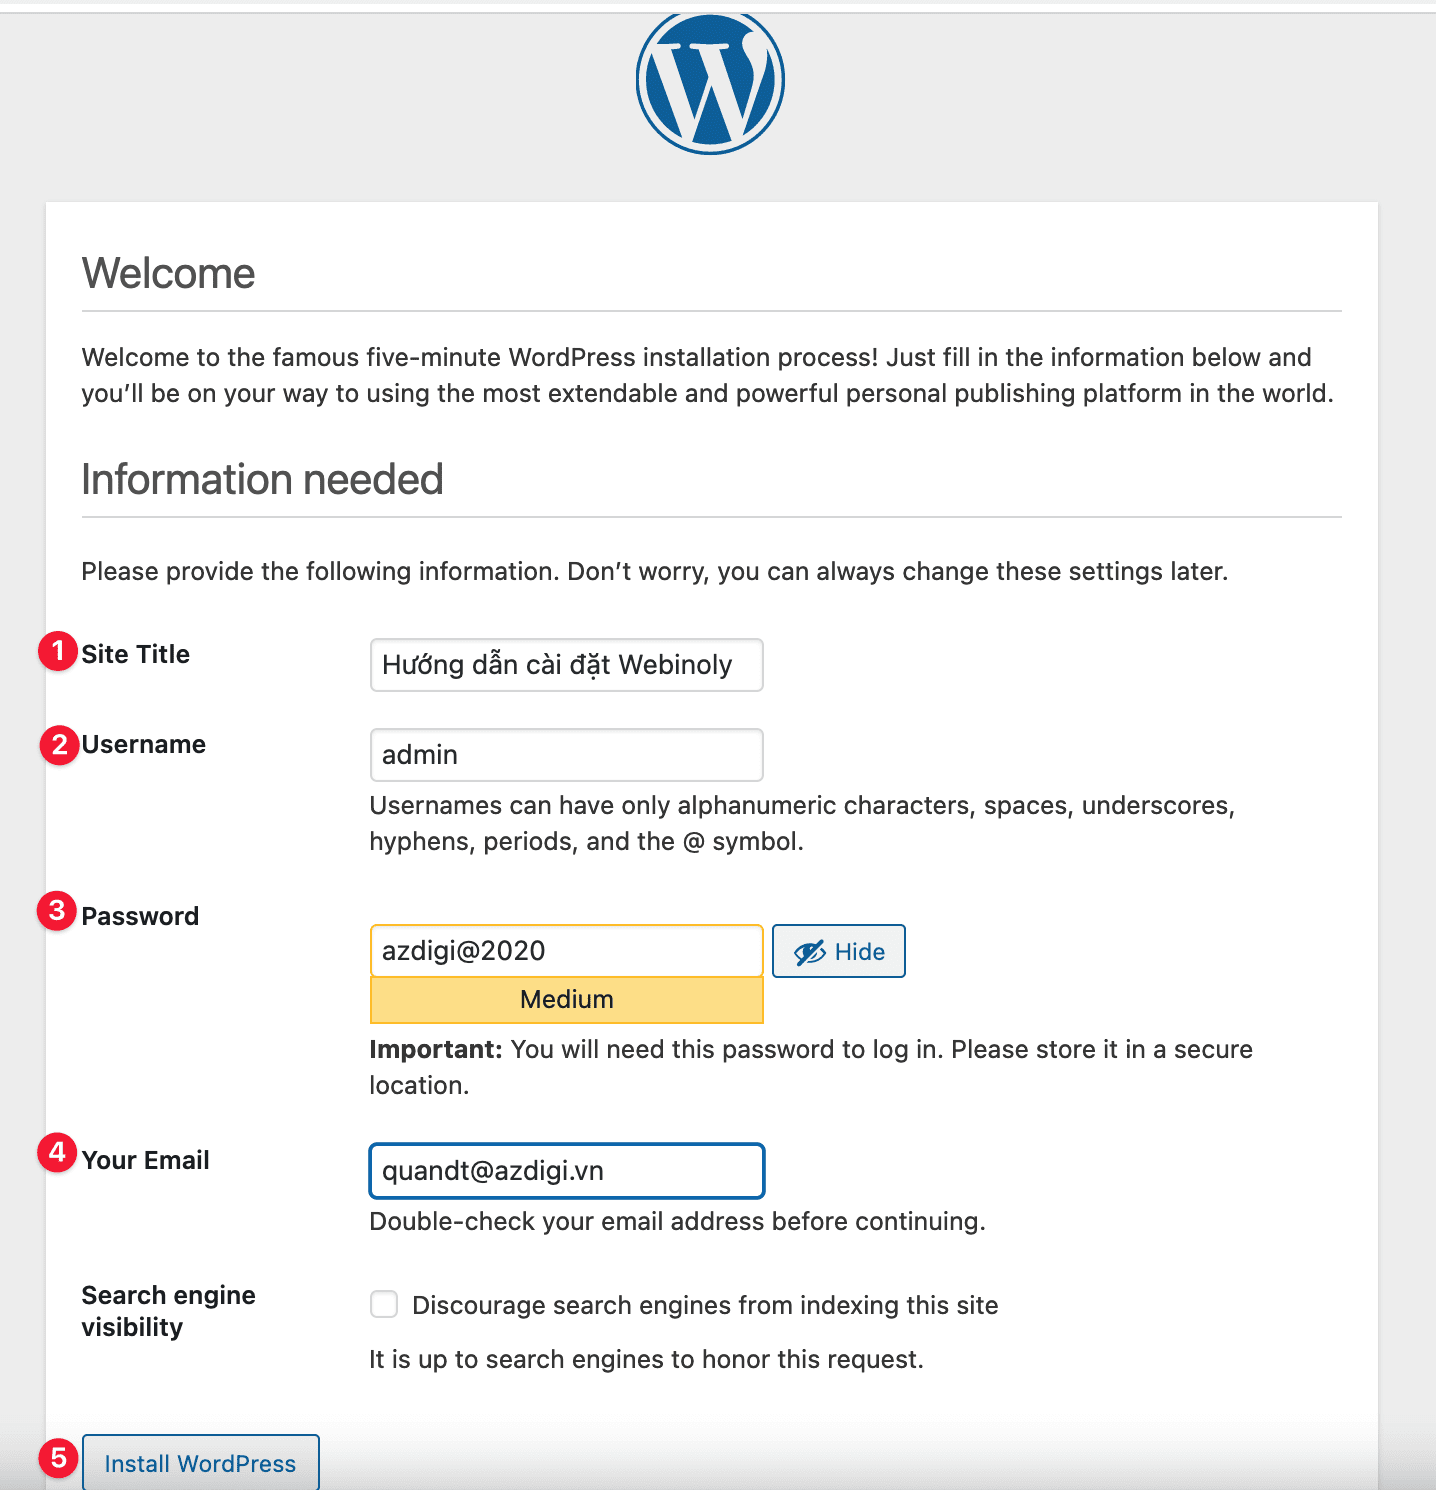
At the Welcome screen, please enter the information about your website:
- Site Title: Title for the website
- Username: Website admin login name
- Password: Website admin login password
- Email: Website admin email
- Click Install WordPress
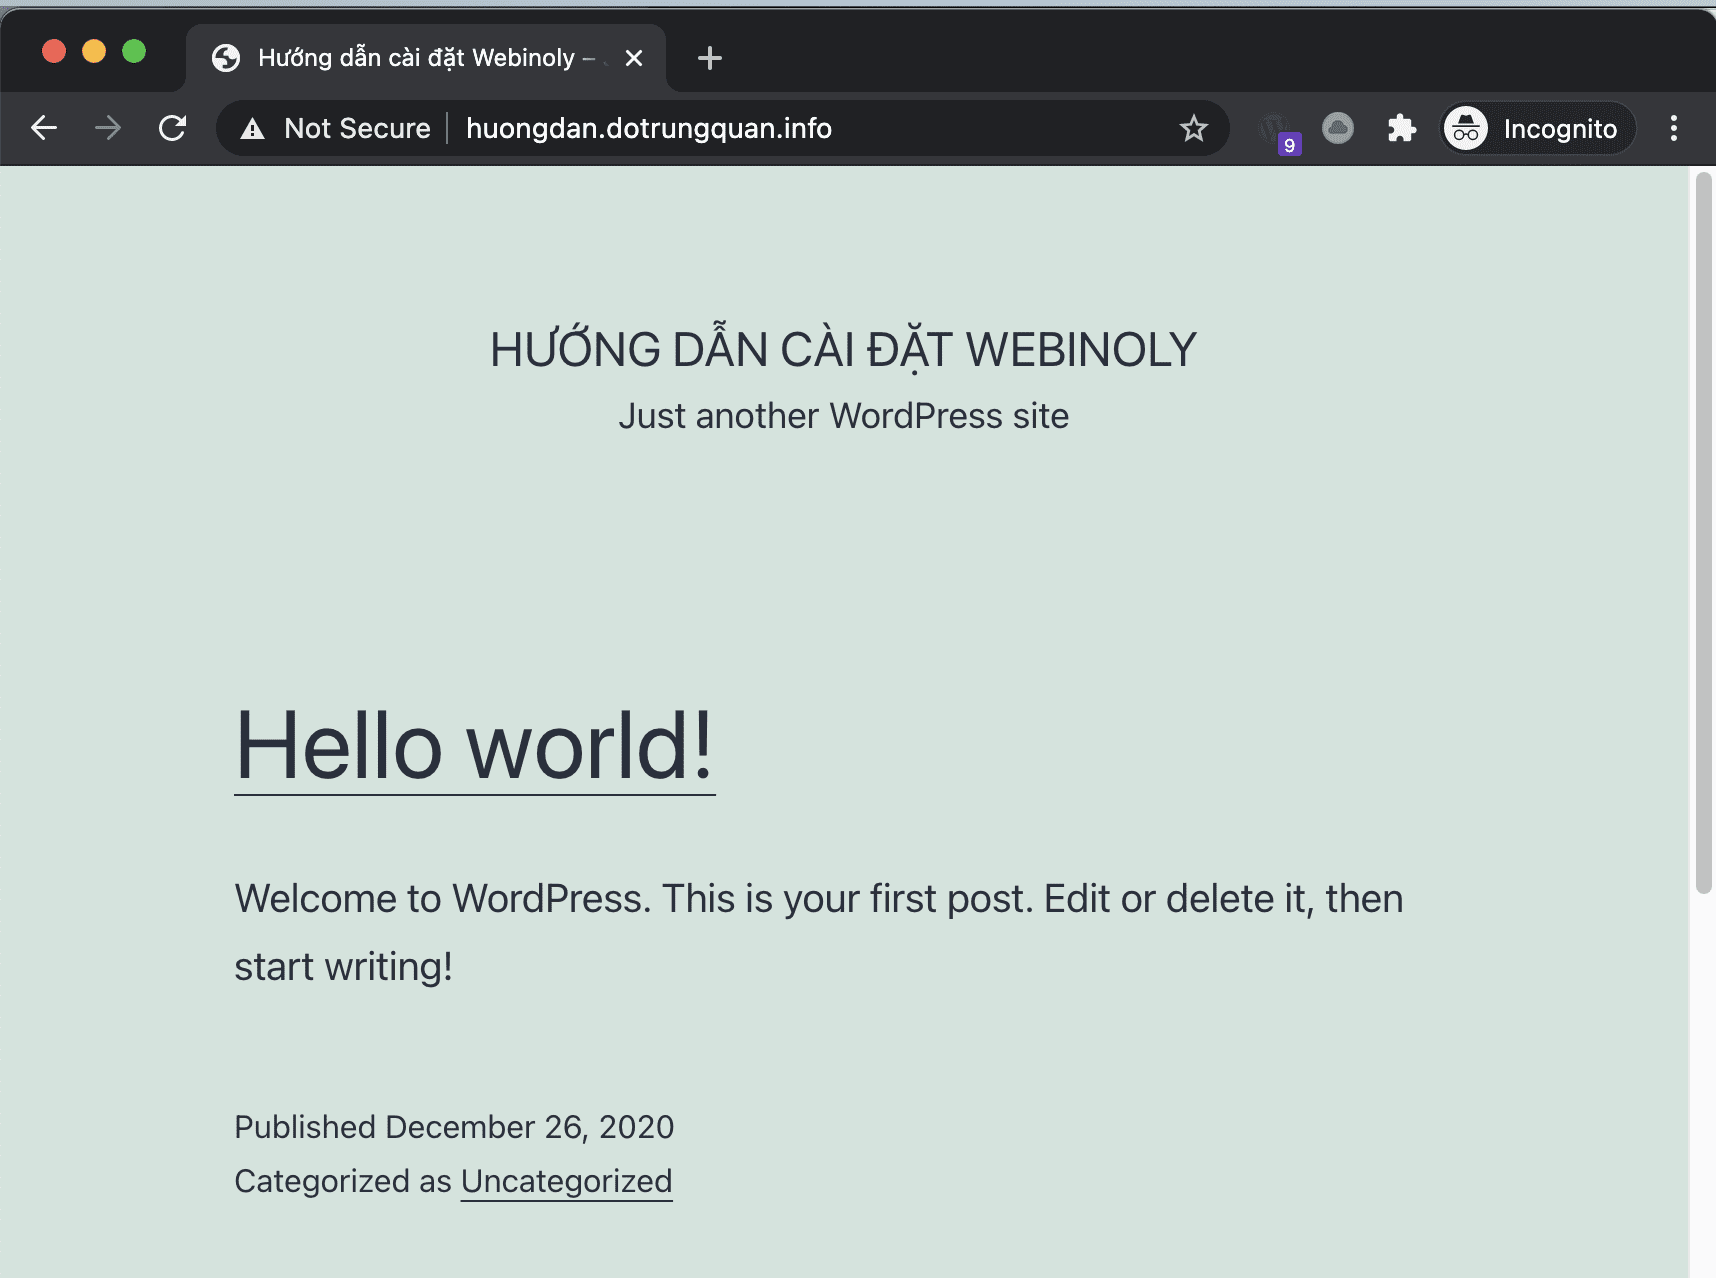
After clicking Insstall WordPress, the system will automatically install WordPress for you, usually, it only takes a few tens of seconds to complete. When finished, you access the domain name to receive the results. And this website does not have SSL; to install SSL, you follow the next step.
Step 3: Install SSL for the website
To install SSL, use the following command:
Note: If during the SSL installation process, the system shows a message to enter the email, please enter it, this email will manage SSL and receive SSL renewal information.
sudo site huongdan.dotrungquan.info -ssl=on
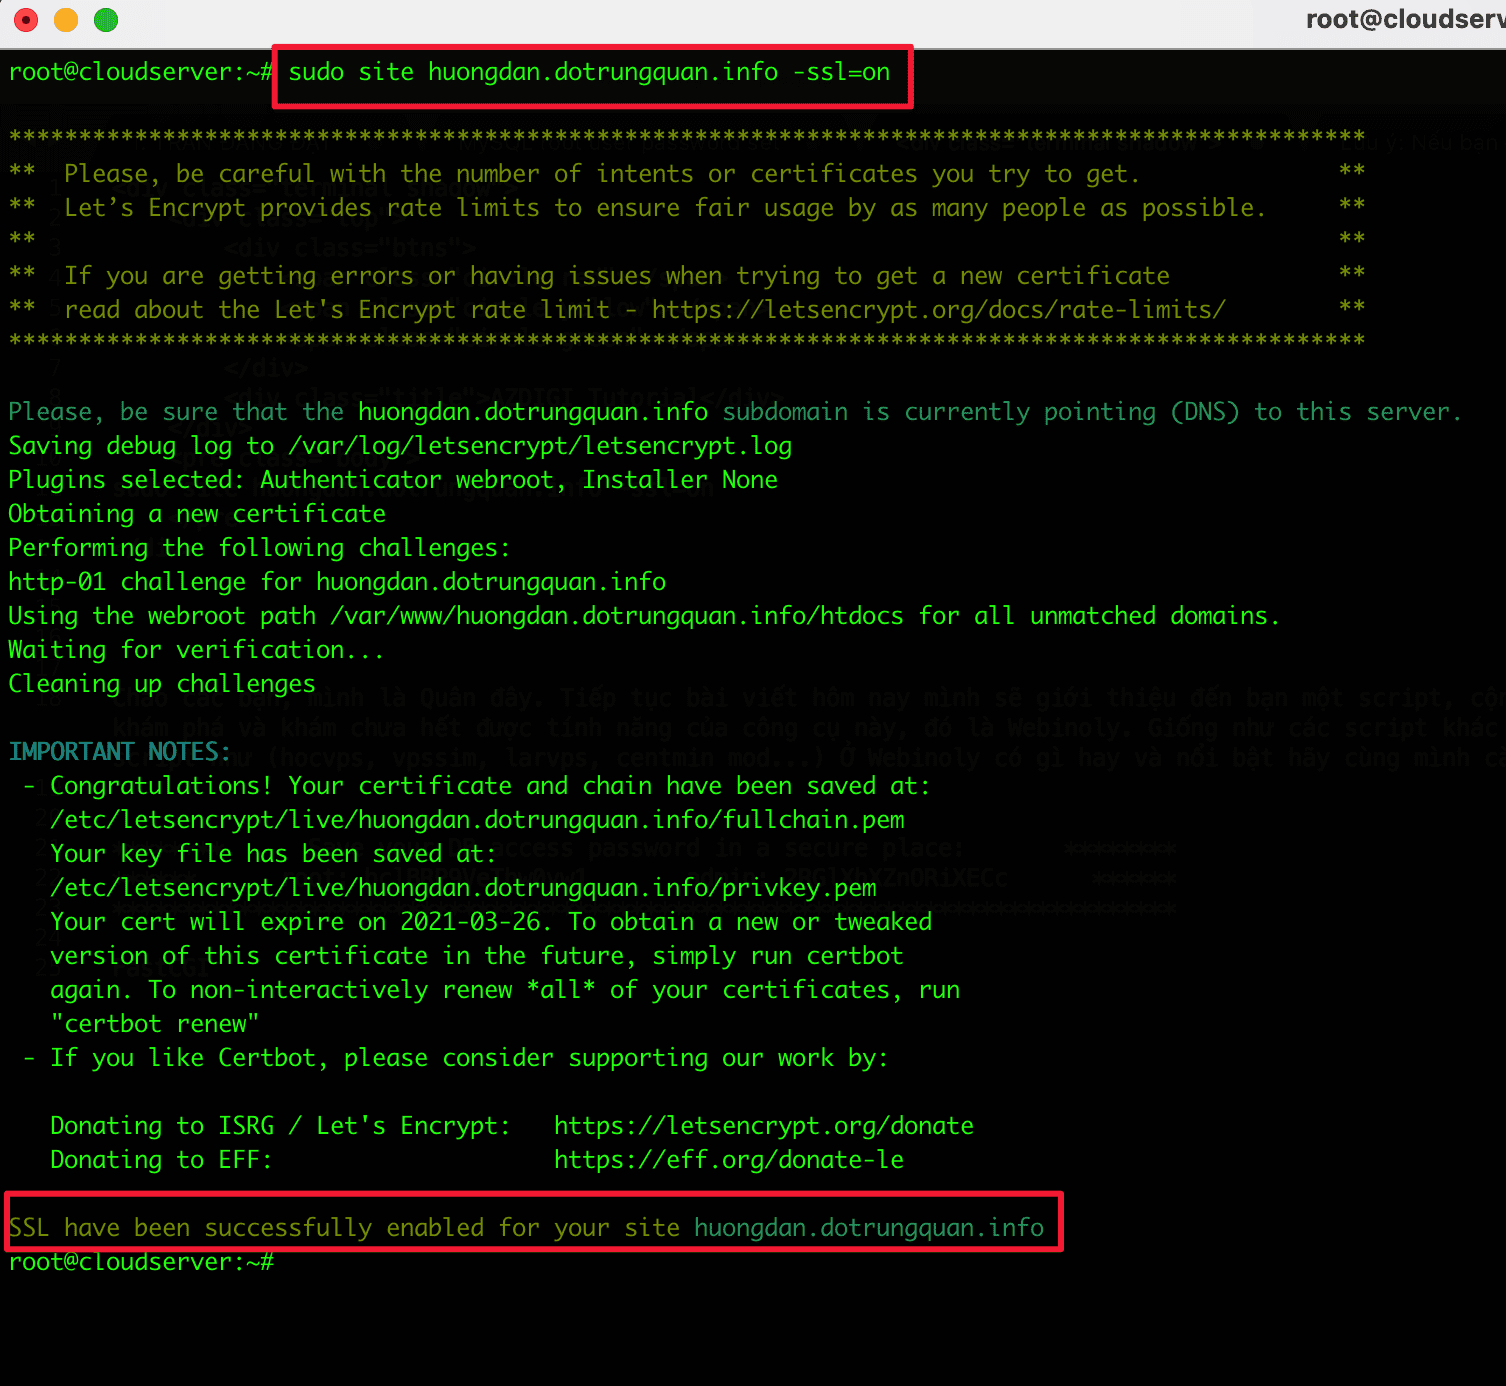
After the installation and activation notification is successful, please visit the website to check. If the padlock appears as shown below, you have done it successfully.

Step 4: Configure Cache
Cache configuration and very important step is almost indispensable for WordPress websites, when your website is cached, it not only helps reduce web server load but also helps your website have faster access and data access many times. In this article, I will use the Nginx Helper plugin and the Redis Object Cache plugin.
Note: Because Webinoly uses FastCGI, you use the Nginx Helper Plugin and cannot use other Plugins such as wp-rocket, w3total cache, swift performance…
If you don’t know how to install a plugin on your WordPress website, follow the instructions below:
After you have installed the above 2 plugins, you can configure Nginx Helper and Redis Object Cache:
Configure the Nginx Helper plugin
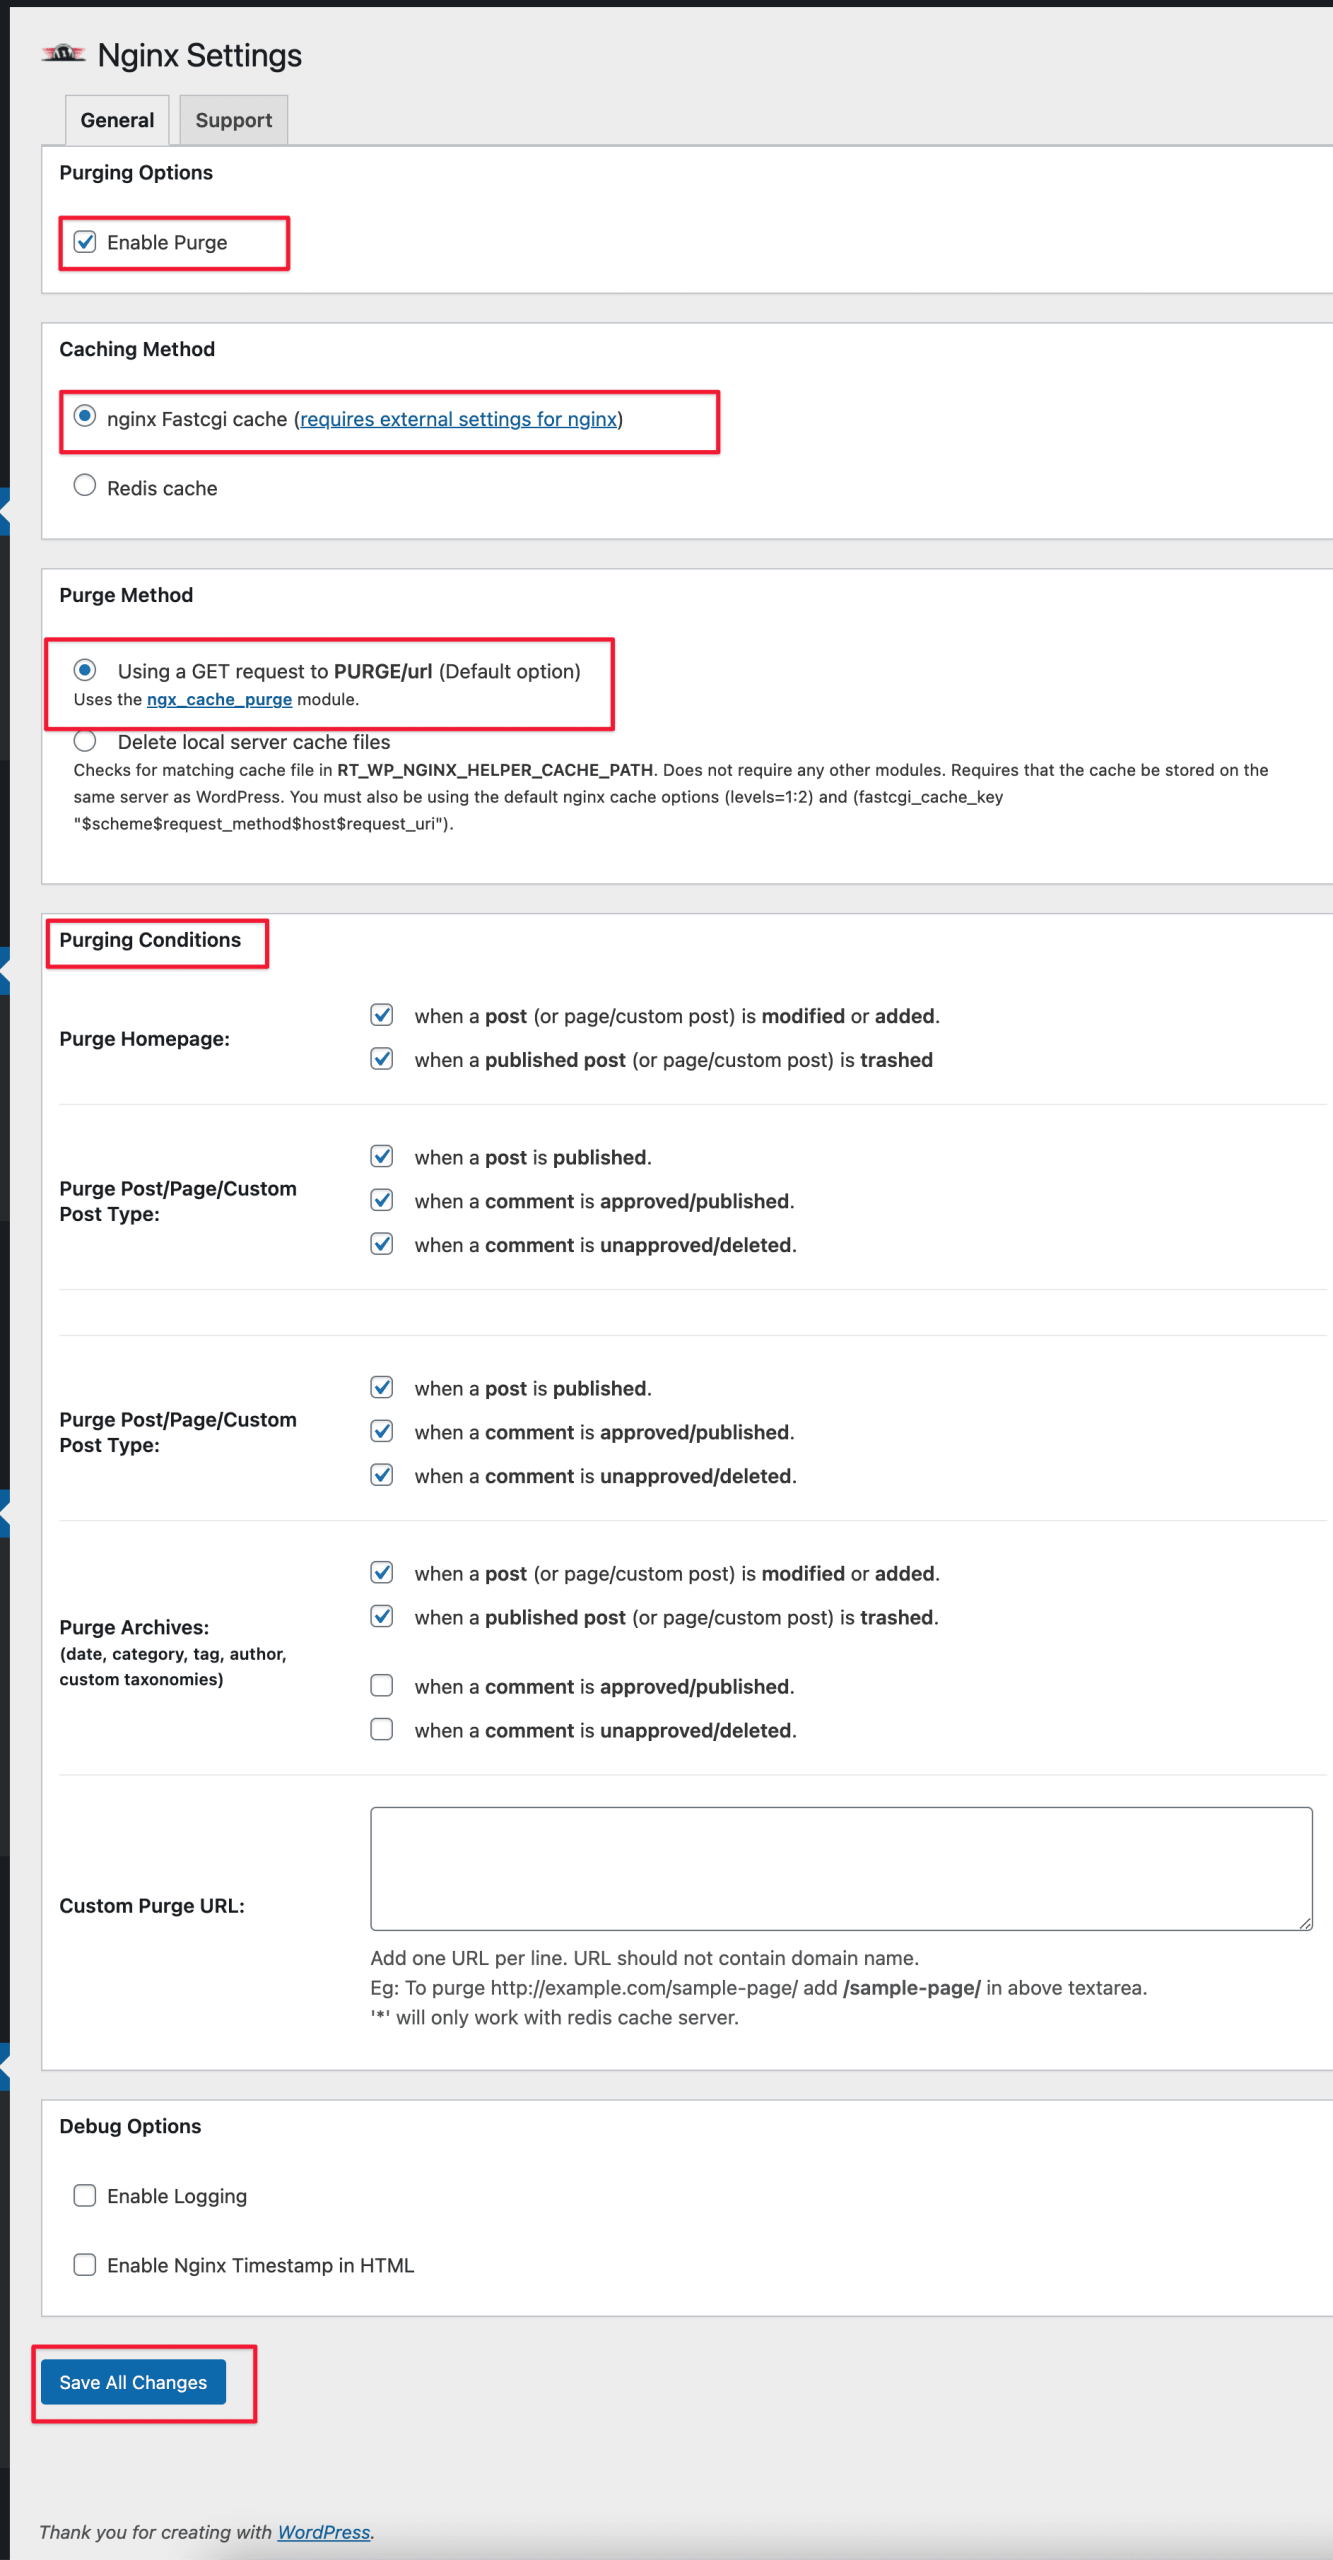
With the Nginx Helper plugin, you can enable the following options:
- Tab Purging Options: select Enable Purge
- Caching Method: select nginx Fastcgi cache (requires external settings for nginx)
- Pure Method: select Using a GET request to PURGE/url (Default option)
- Purging Conditions: Tick the corresponding options for you, here I leave the default.
After selecting, click Save all changes to apply the changes.
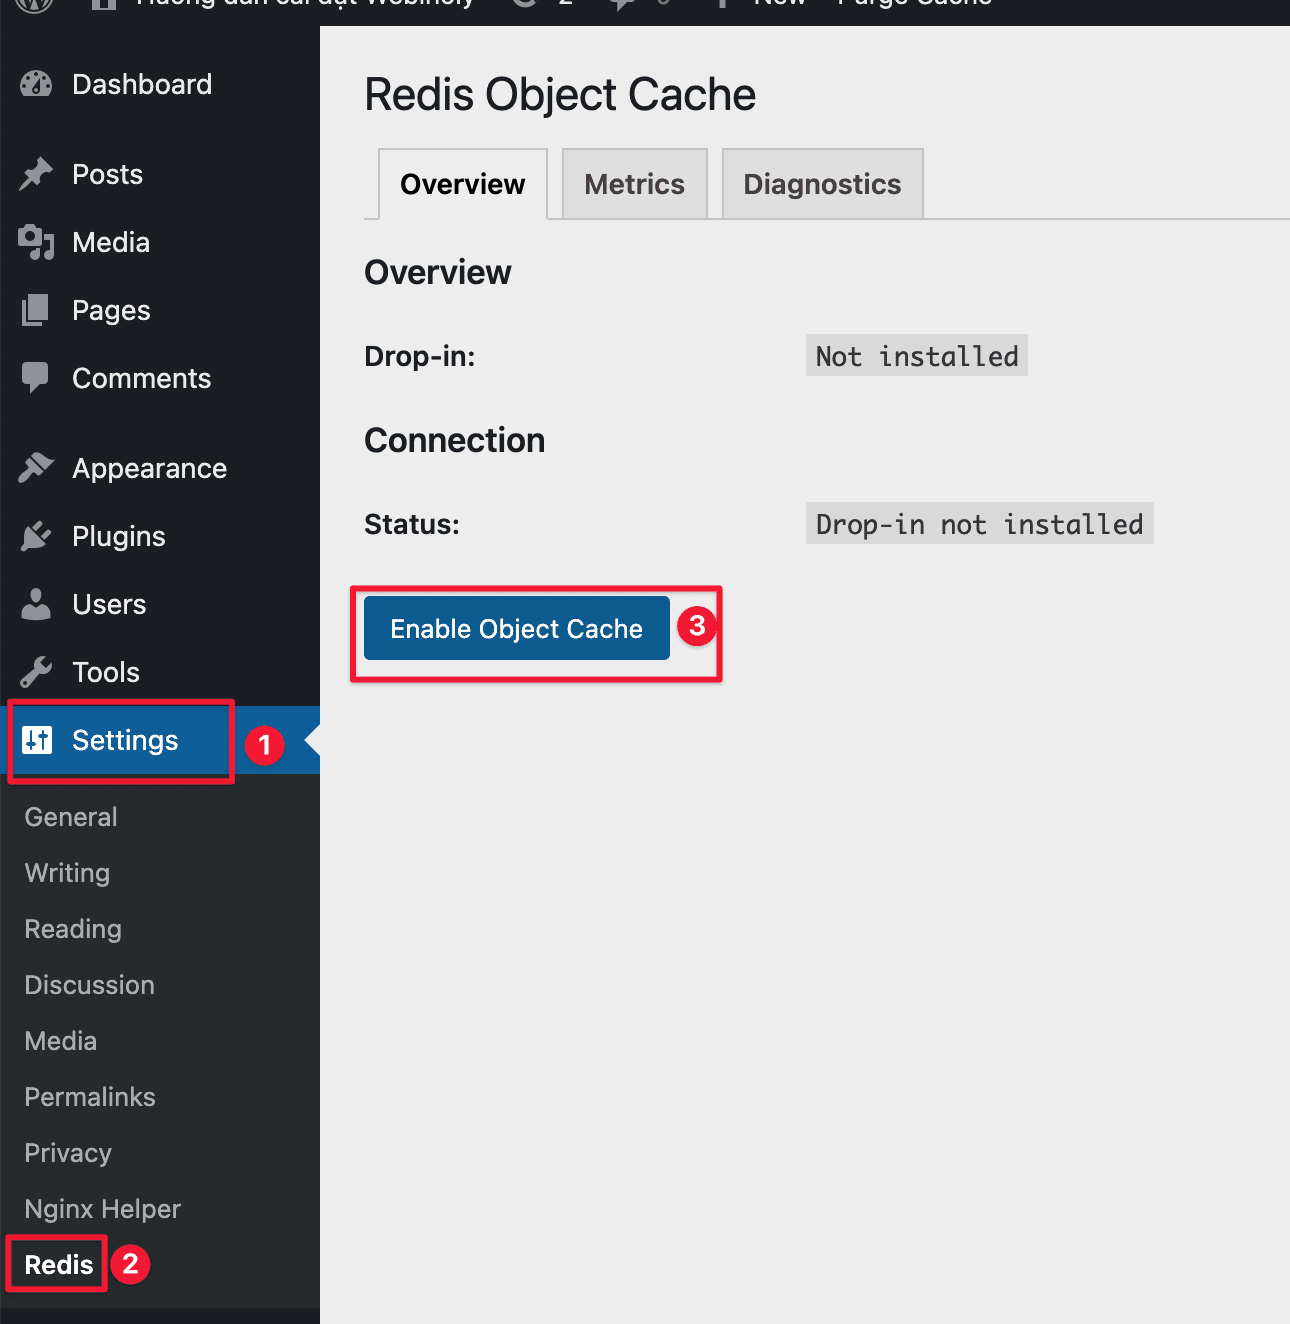
Configure Redis Object Cache
To enable Redis Object Cache, go to Settings => Redis and click Enable Object Cache to activate.
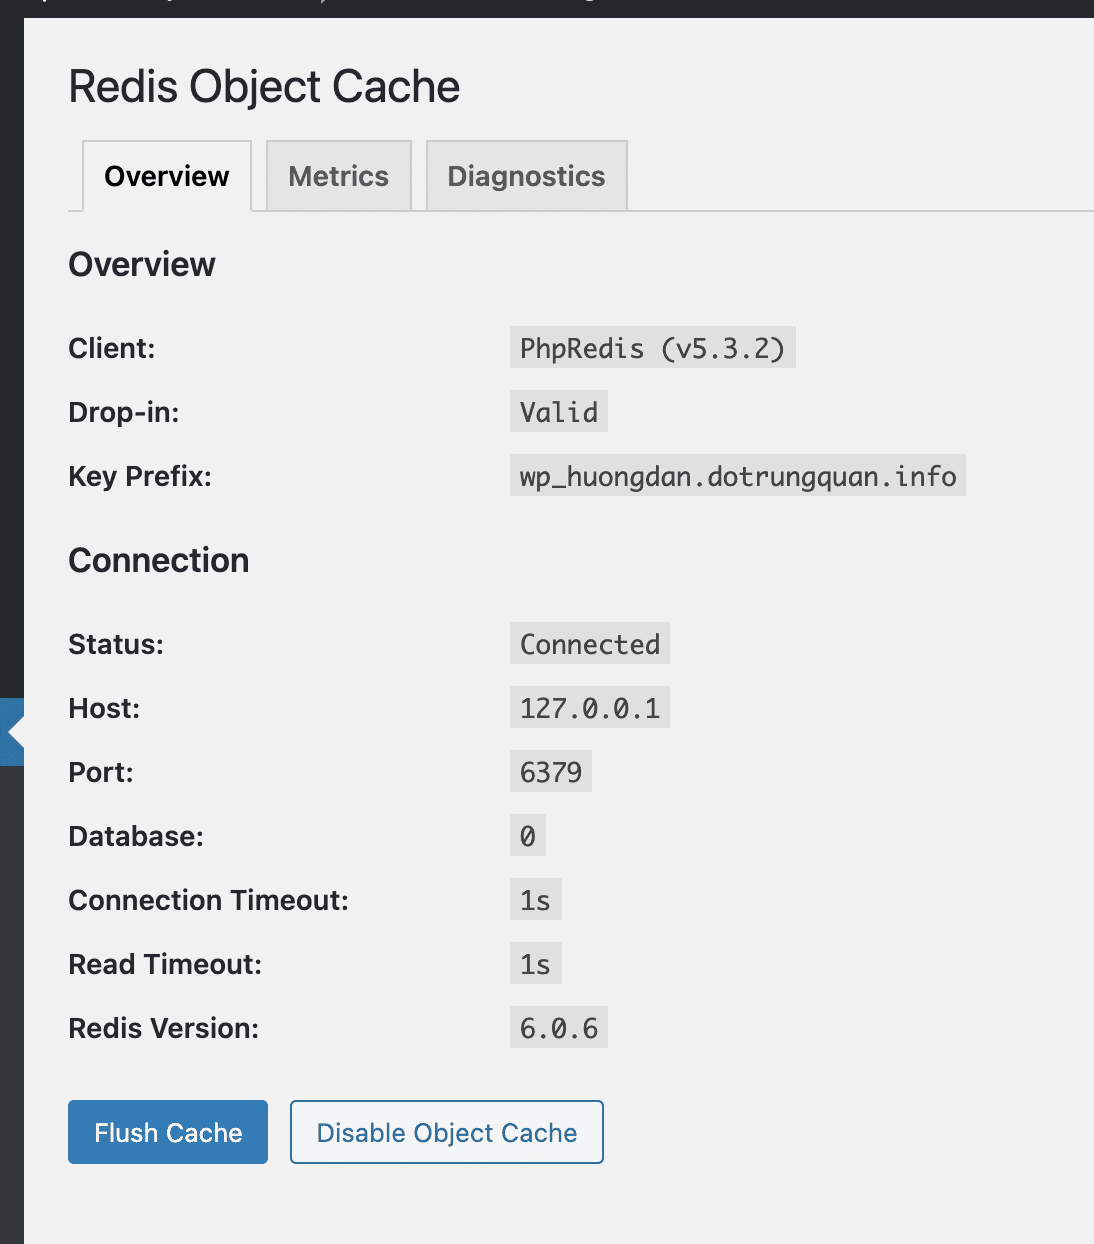
After activating Redis Object Cache successfully, you will receive a message like below with the line Status: Connected.
III. Summary
So AZDIGI has completed the tutorial on installing WordPress on Webinoly with the cache and SSL plugin. Now you can log in and install the theme, plugin to build your website.
Wishing you success!
If you need assistance, you can contact support in the ways below:
- Hotline 247: 028 888 24768 (Ext 0)
- Ticket/Email: You use the email to register for the service and send it directly to: support@azdigi.com .
About the author

Thạch Phạm
Đồng sáng lập và Giám đốc điều hành của AZDIGI. Có hơn 15 năm kinh nghiệm trong phổ biến kiến thức liên quan đến WordPress tại thachpham.com, phát triển website và phát triển hệ thống.