Let’s install phpMyAdmin on OpenLiteSpeed with simple steps.
I. Overview
Continuing with the OpenLiteSpeed Series, in this article, AZDIGI will guide you on how to install phpMyAdmin on the OpenLiteSpeed server so that you can easily edit and manage your database more easily and professionally.
Specifically, how to install and configure, please come to part II.
II. Implementation Guide
To install phpMyAdmin on OpenLiteSpeed, you can follow the following 3 steps.
Step 1: SSH into your server
To install phpMyAdmin on OpenLiteSpeed, we first need to SSH or access your VPS/server as root. If you don’t know how to SSH into your VPS/Server, you can refer to the following tutorial:
After successfully SSH, we continue with step 2 to install some necessary PHP modules.
Step 2: Install the necessary PHP Module
With the necessary PHP modules already available in the CentOS repositories, you can easily install them. I use PHP 7.4, so I will use the command below. (you can replace 74 with your PHP version, e.g., 71 -72 -73)
yum install lsphp74 lsphp74-mysqlnd lsphp74-common lsphp74-gd lsphp74-pdo lsphp74-process lsphp74-mbstring lsphp74-mcrypt lsphp74-opcache lsphp74-bcmath lsphp74-xml lsphp74-soap lsphp74-json -y
Step 3: Setup PHP with Webadmin
To establish a PHP connection with Webadmin, access Webadmin with the path http://your_server_IP:7080 and use admin credentials to log in. You can see the instructions below to reset your password if you forget this information:
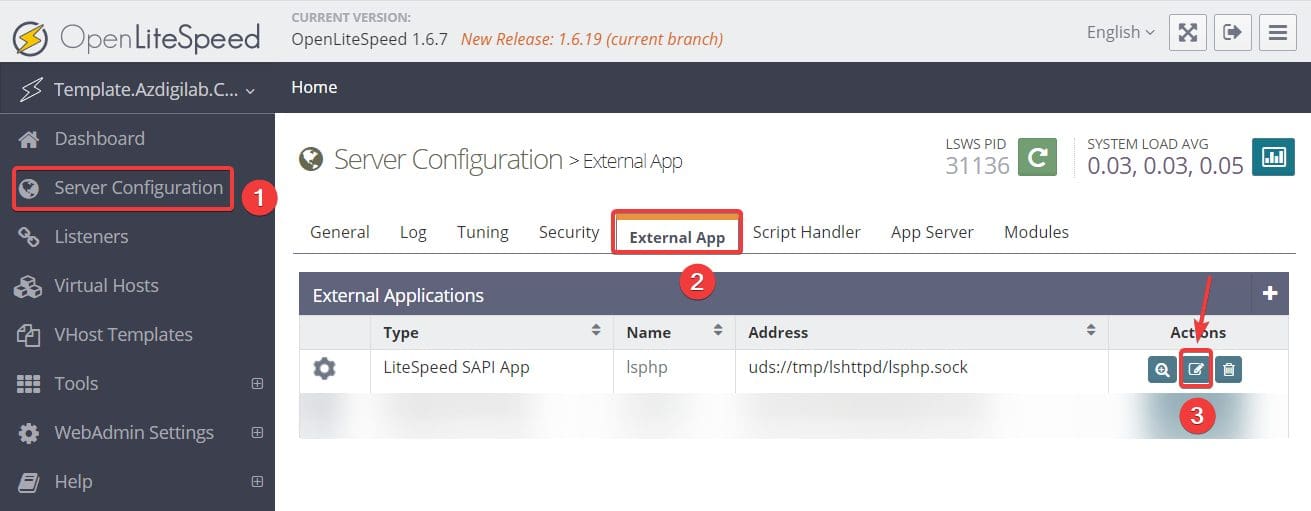
After successfully logging in, you proceed to set up by accessing Server Configuration (1) => External app (2) => Edit (3).

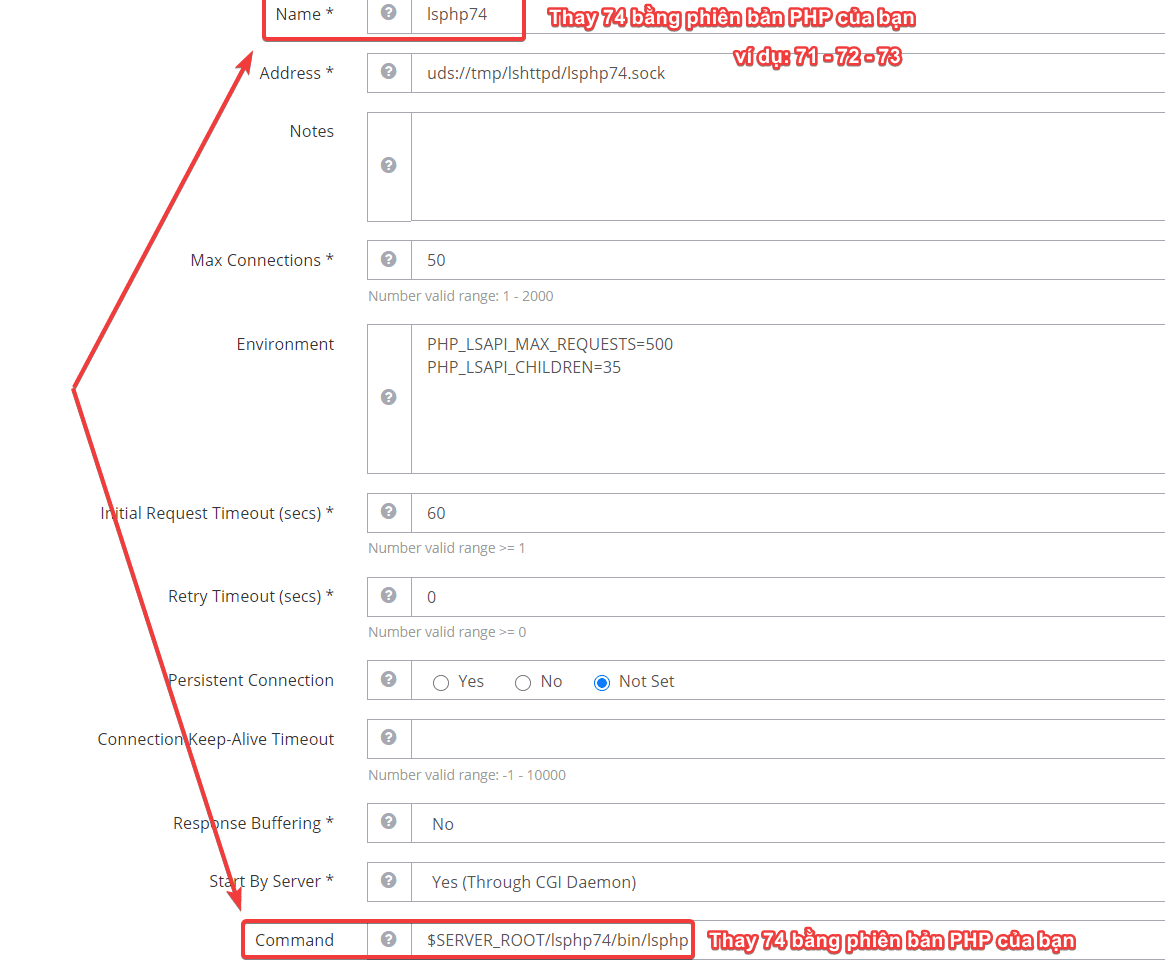
Next, you find and edit the content of the following 2 items:
- Name: lsphp74
- Command: $SERVER_ROOT/lsphp74/bin/lsphp
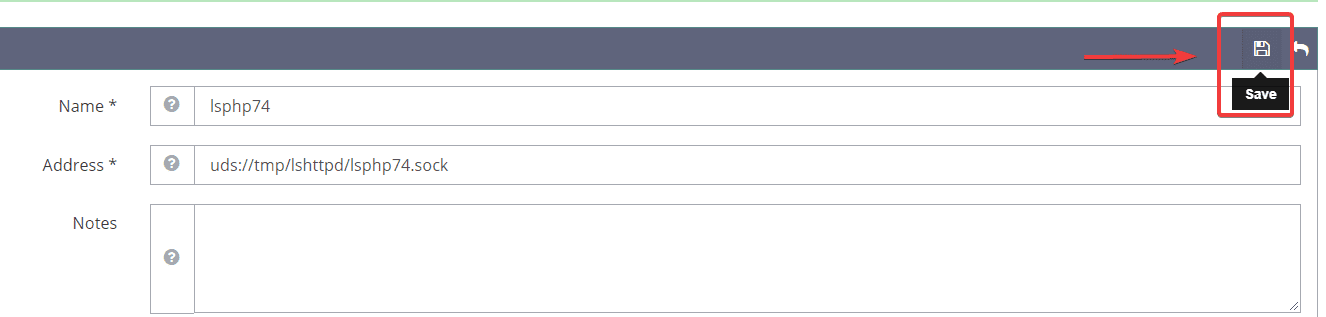
After editing, click Save it as shown below:
Step 4: Download and install phpMyAdmin
There are many different phpMyAdmin versions, you can see the latest versions at the link below:
To quickly install phpMyAdmin, you need to run the commands below; in this article, I will do it with phpMyAdmin version 4.7.
cd /usr/local/lsws/azdigi.cf/html
wget https://files.phpmyadmin.net/phpMyAdmin/4.7.4/phpMyAdmin-4.7.4-all-languages.zip
unzip phpMyAdmin-4.7.4-all-languages.zip
mv phpMyAdmin-4.7.4-all-languages phpmyadmin
Explanation of the above commands:
- Command 1: Navigate to the path to install phpMyAdmin (I will install phpMyAdmin directly into the website path for easy remembering and easy access. Remember to change this to your website’s path)
- Command 2: Download the phpMyAdmin source code from the homepage.
- Command 3: Extract the downloaded source file
- Command 4: Rename the folder phpMyAdmin-4.7.4-all-languages to phpmyadmin.
Step 5: Check the operation of phpMyAdmin
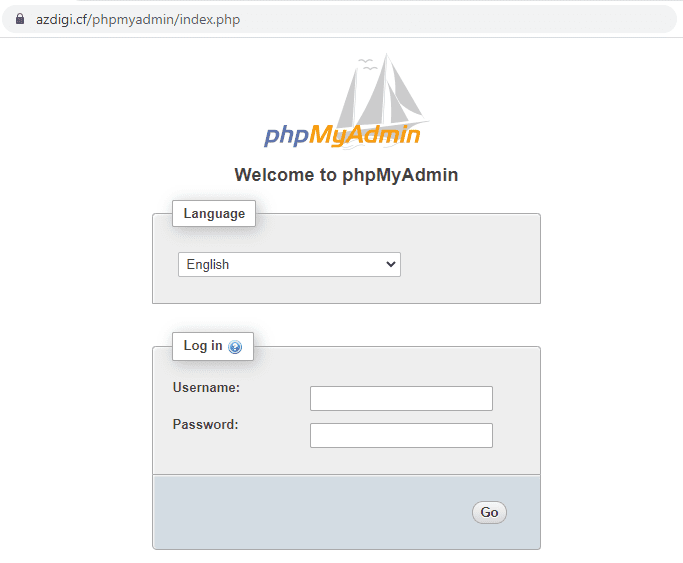
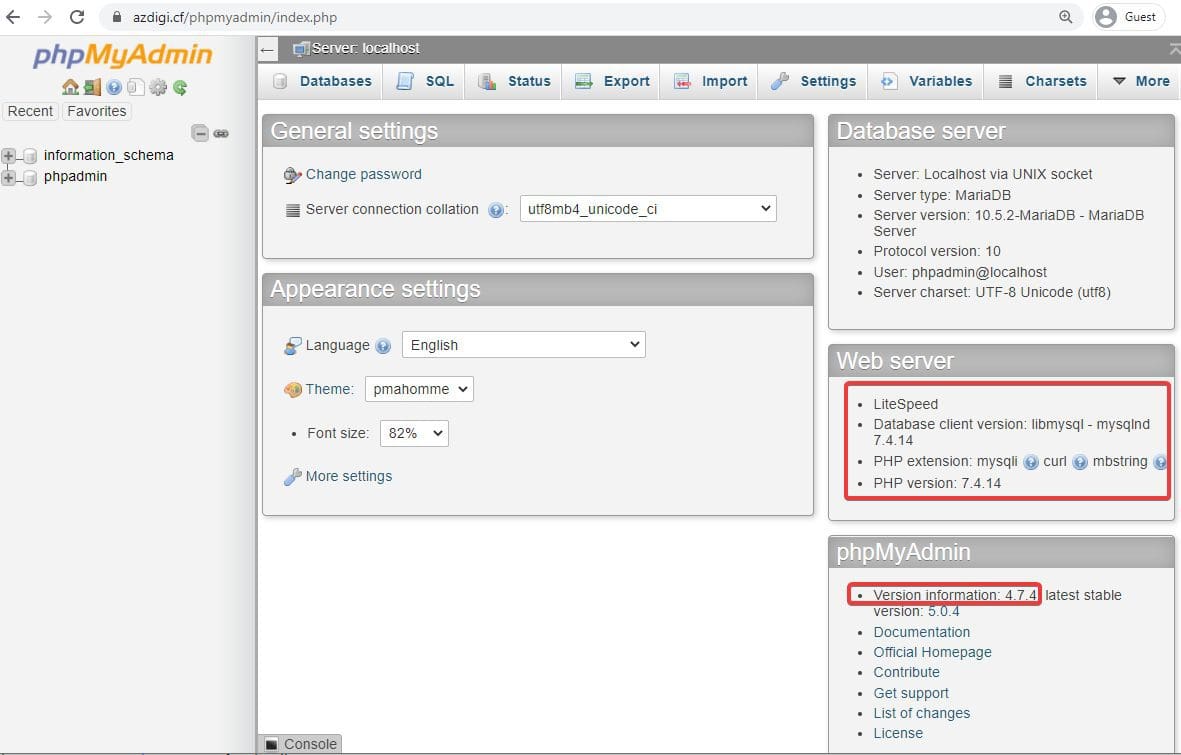
After the installation is complete, you can check the operation of phpMyAdmin by accessing the link http://domain.com/phpmyadmin. If the interface displays as shown below, you are successful.
Next, you can create a database to test login. If you do not know how to create a database, you can see the following instructions:
As shown below, I have created the database and successfully logged in to phpMyAdmin. There will be specific information about the services installed on your OpenLiteSpeed server.
III. Summary
Thus, AZDIGI showed you how to install phpMyAdmin on OpenLiteSpeed quickly and simply. Because basically using OpenLiteSpeed manually, most of us need to work with the command line, but managing the database with the command is not simple because it requires in-depth knowledge, so integrating more phpMyAdmin will make it easier in editing and managing the database on your server.
Hope this article will be of help to you. If you find this article useful, don’t forget to share it widely. Wishing you success.
You might also like
- Install OpenLiteSpeed, MariaDB and PHP on Centos 7
- Install WordPress with OpenLiteSpeed using Docker Compose on Ubuntu 22.04
- How to optimize OpenLiteSpeed WebAdmin GUI
- How to install eXtplorer on OpenLitespeed
- How to change php.ini parameters on OpenLiteSpeed using Docker Compose
- Install WordPress on Openlitespeed
About the author

Thạch Phạm
Đồng sáng lập và Giám đốc điều hành của AZDIGI. Có hơn 15 năm kinh nghiệm trong phổ biến kiến thức liên quan đến WordPress tại thachpham.com, phát triển website và phát triển hệ thống.