
Install FFMPEG on Centos Web Panel. In this article, AZDIGI will show you how to install FFMPEG on a server using Centos Web Panel (CWP) with just a few clicks. Please take a look at the article below to better understand what FFMPEG is and how to install them.
I. Overview
FFMPEG is a leading free framework for multimedia (audio, video processing). It can decode, encode, transcode, mux (multiplex), demux (multiplex, split channel), stream (live stream on youtube, facebook,…), filter and play video… a lot of things that humans or machines create.
FFMPEG supports most formats and is quite flexible. It can compile, run and run on many platforms such as Linux, Mac OS X, Microsoft Windows, BSD, Solaris, etc., and architectures difference in many environments.
It contains the libraries: libavcodec, libavutil, libavformat, libavfilter, libavdevice, libswscale and libswresample. They can be used by the application. Like ffmpeg, ffserver, ffplay and ffprobe are used for transcoding, streaming and playing.
FFMPEG is a simple, free, and effective audio and video processing software. Whether you are a programmer or an ordinary user, you can use FFMPEG for your purposes.
II. Implementation Guide
To install FFMPEG on CWP, follow these 2 steps:
Step 1: Install FFMPEG at the admin interface
To access the CWP interface as root, you can access the following link: https://45.252.249.104:2087/ (Remember to replace the IP with your IP) and use the root information of the VPS to login.
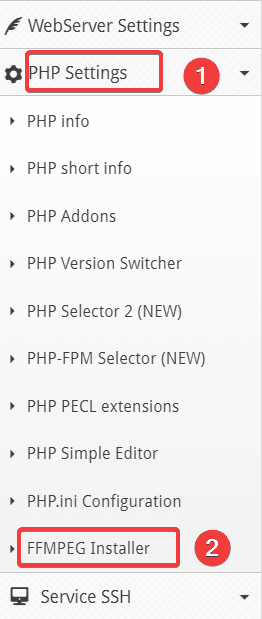
After successful login, you access PHP Settings => FFMPEG Installer
Next, select Start Installer in the Background to start the installation.
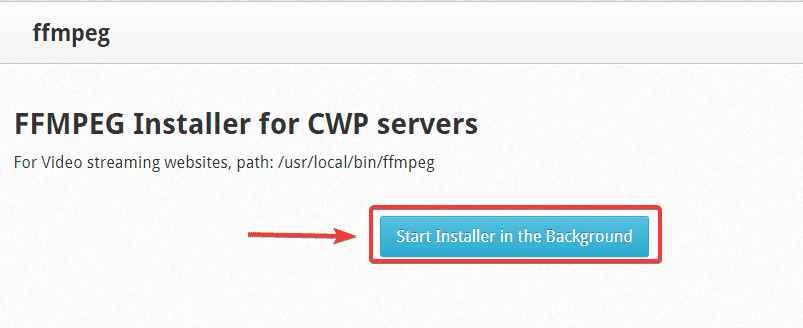
At this point, the installation process will be executed and the screen will display the content below:

This content means that the system has started to install and is running in the background. Now you can exit the CWP interface and continue to step 2.
Step 2: Check the installation and operation of FFMPEG
After installing FFMPEG in the CWP interface, you can monitor the installation process by SSHing into the VPS and running the following command:
tail -f /var/log/ffmpeg-installer.log
And I will SSH into the VPS to check the installation is going on as shown, the installation process takes about 10-20 minutes. If you receive the message Installation Completed! is a success.

Now you can recheck if FFMPEG is successfully installed by using the command:
ffmpeg
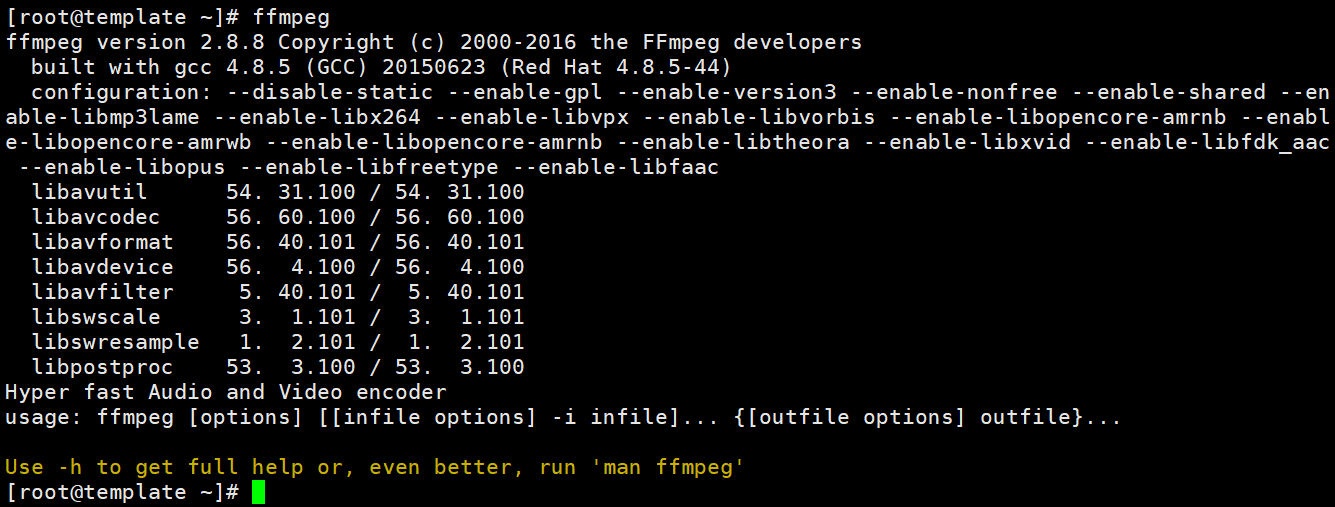
As shown above, the information about the supported version and features of FFMPEG has been shown.
III. Summary
So in this article, AZDIGI has shown you how to quickly and easily install FFMPEG into Centos Web Panel (CWP), the operation just needs to do from the CWP admin page with a few clicks. Hope this article will help you to have a successful installation so that you have a leading free framework for multimedia processing.
If you find the article helpful, please share it widely! You can refer to other articles about CWP at the link below:
If you need assistance, you can contact support in the ways below:
- Hotline 247: 028 888 24768 (Ext 0)
- Ticket/Email: You use the email to register for the service and send it directly to: support@azdigi.com
You might also like
- Install NetData into Centos Web Panel (CWP)
- How to install Let's Encrypt SSL on Centos Web Panel (CWP)
- How to change the PHP version CentOS Web Panel (CWP)
- How to install Softaculous on Centos Web Panel (CWP)
- How to upgrade Apache on Centos Web Panel (CWP)
- How to install WordPress on Centos Web Panel (CWP)
About the author

Thạch Phạm
Đồng sáng lập và Giám đốc điều hành của AZDIGI. Có hơn 15 năm kinh nghiệm trong phổ biến kiến thức liên quan đến WordPress tại thachpham.com, phát triển website và phát triển hệ thống.