
Two-factor authentication on CloudPanel brings more safety and security to your VPS and data administration. In this article, AZDIGI will show you how to enable 2-factor authentication on CloudPanel in the simplest way.
I. Overview
What is 2-factor security?
Two-Factor Security, or 2FA for short, is an extra step in your regular login activity. Without 2FA, you will only enter your username and password to log into the system, your account. The password section will be the only layer of protection for the account. Meanwhile, the added second layer of security will help you better protect your account.
Why should you use 2-factor security?
Two-factor security is the best way to protect yourself from attacks that steal sensitive user account information, spoof login pages, and other account-hijacking methods. With 2-factor security, you can be more assured if your account information is accidentally exposed In addition, it will be difficult for others to access your accounts because there will be obstacles in the 2-factor security step.
So for CloudPanel, how to enable this feature? In this article, AZDIGI will guide you in detail, follow the steps below.
In addition, you can refer to some other features of CloudPanel at the link below:
II. Implementation guide
To use 2-factor authentication on CloudPanel, follow these 3 steps.
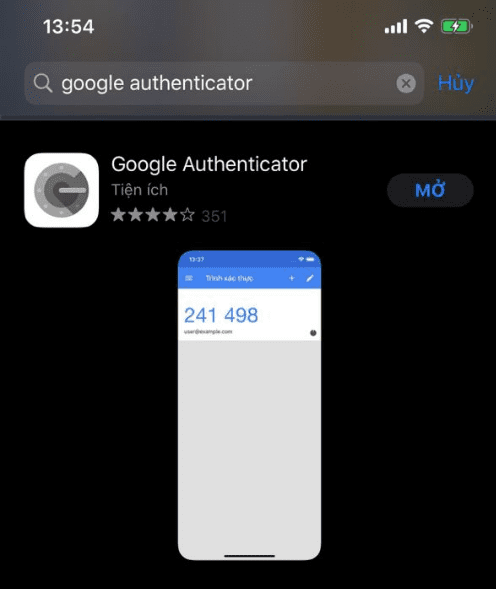
Step 1: Install the Google Authenticator Application
To use the 2-factor authentication feature, you first need to install it on your mobile device or computer software that can scan QR codes. I will use the most popular app, Google Authenticator.
Or if you want to install it directly on the Google Chrome browser, you can install this extension here.
Step 2: Set up 2-factor authentication on CloudPanel
To enable 2-factor authentication (2FA) on CloudPanel, you access CloudPanel under the link: https://IP:8443/ and login with the account you need to set up 2-factor authentication.
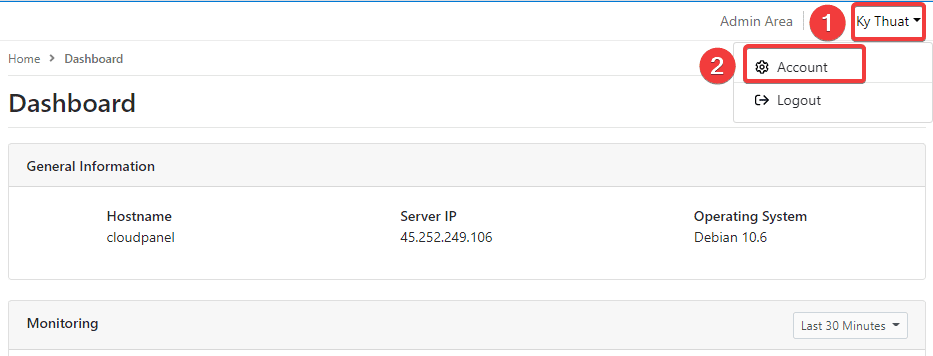
After login successfully, at the Dashboard interface, you access the user name of the account (1) => click Account (2).
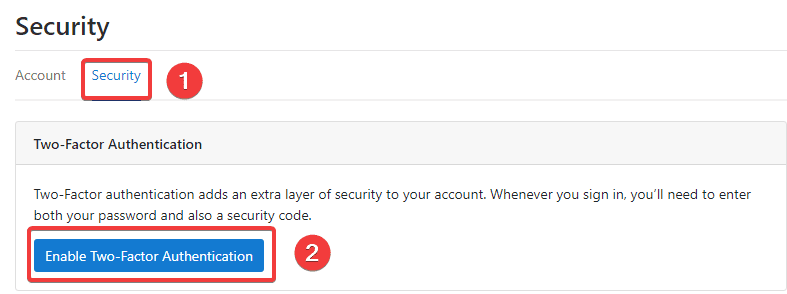
Next, click on the Security tab (1) => click Enable Two-Factor Authentication (2).
At this time, the system will show a QR code (1), now you need to use the Google Authenticator app previously installed in Step 1 to scan this QR code.
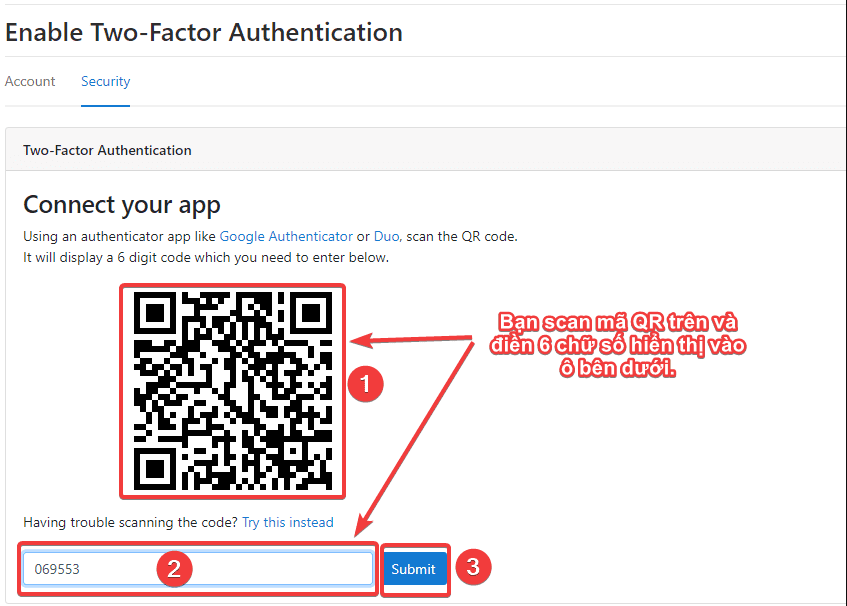
The Google Authenticator app will display 6 digits as shown, you proceed to enter these 6 digits in the box (2) => click Submit (3) to complete the setup.

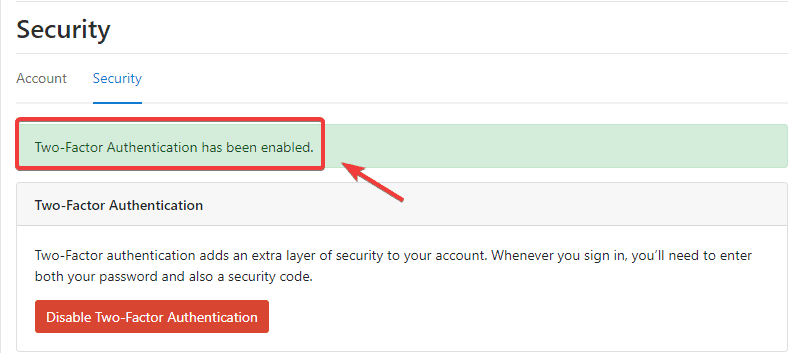
Thus, the activation step is completed. If the activation is successful, you will receive the following message::
Step 3: Check the operation of 2-factor authentication
After the configuration is complete, exit the CloudPanel admin page and log in to check if 2FA is working or not.
As I checked, after logging back in, when I just logged in with User information, the 2FA popup immediately appeared as shown below:
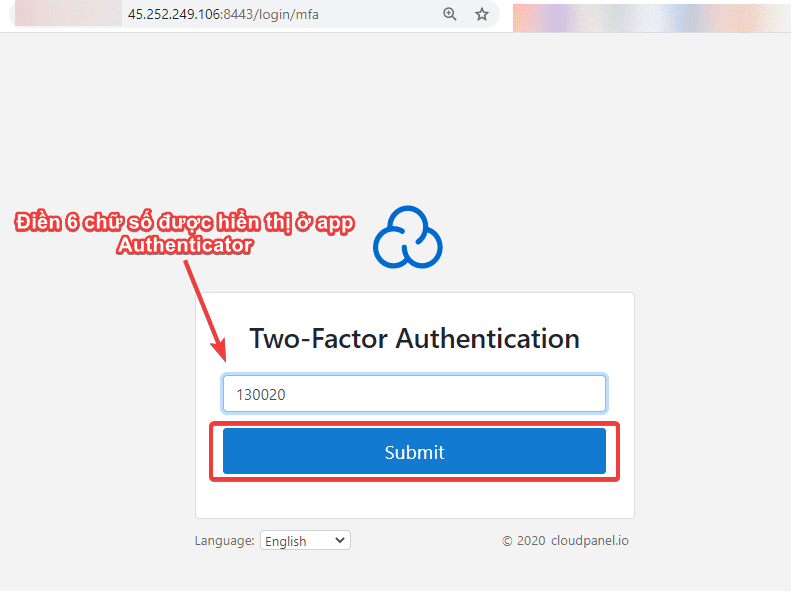
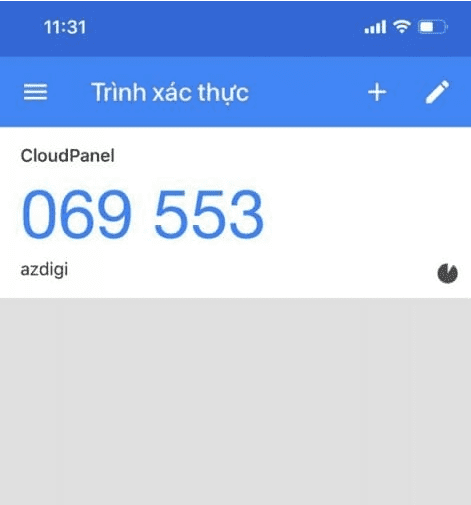
Now you check the Google Authenticator app to get the authentication code, the code will be in the form of 6 digits as shown below: The above digits will be changed continuously after 15-30 seconds. So when you see the number showing blue, you can use it.
And after filling in the 2FA authentication code, I successfully logged in to the CloudPanel admin page.

III. Summary
So in this article, AZDIGI showed you how to install 2-factor authentication for CloudPanel login accounts to increase security and reduce the risk of password detection attacks. With 2-factor authentication, you can rest assured that even if your information is accidentally exposed, others will not be able to log in to the CloudPanel admin page without the 2-factor authentication code. If you find this article interesting and useful, you can share it widely.
To refer to some other useful articles about CloudPanel, please visit the link below:
If you need assistance, you can contact support in the ways below:
- Hotline 247: 028 888 24768 (Ext 0)
- Ticket/Email: You use the email to register for the service and send it directly to: support@azdigi.com .
You might also like
- How to enable 2-factor authentication on CyberPanel
- How to enable 2-factor security on cPanel
- Configure Google Authenticator SSH on CentOS 7
- EnableTwo-factor authentication on FASTPANEL
- How to configure SSH Two Factor Authentication on Ubuntu 22.04
- Enable 2-factor authentication to protect your AZDIGI account
About the author

Thạch Phạm
Đồng sáng lập và Giám đốc điều hành của AZDIGI. Có hơn 15 năm kinh nghiệm trong phổ biến kiến thức liên quan đến WordPress tại thachpham.com, phát triển website và phát triển hệ thống.