How to install WordPess on CloudPanel?
In the previous post, AZDIGI showed you how to complete CloudPanel installation, now you need to add your website to CloudPanel.
I. Overview
Continuing with the great features available on CloudPanel, AZDIGI will guide you to quickly install popular source codes such as WordPress/Joomla/Laravel quickly and simply. And today, AZDIGI will guide you to install the WordPress source code on your website, please follow along.
II. Implementation guide
Note: Before installing the website, you need to ensure that your Domain has been successfully pointed to the server IP.
To install a WordPress website on CloudPanel, you can follow these 3 steps:
Step 1: Add website to CloudPanel
First, you need to access the user containing the website to be installed by following the link: https://45.252.249.106:8443/, you can use the User Admin created in the CloudPanel installation step or the child-user to add the website.
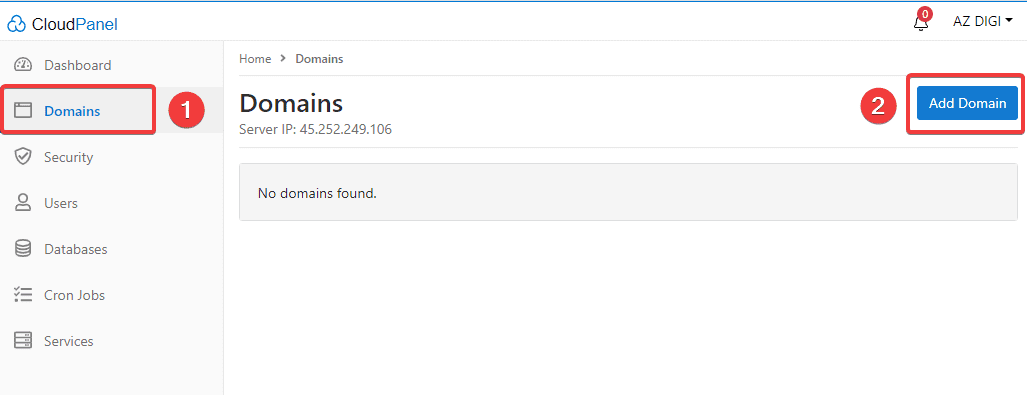
After successful login, you can add your website by going to Domains (1) => Add Domain (2).

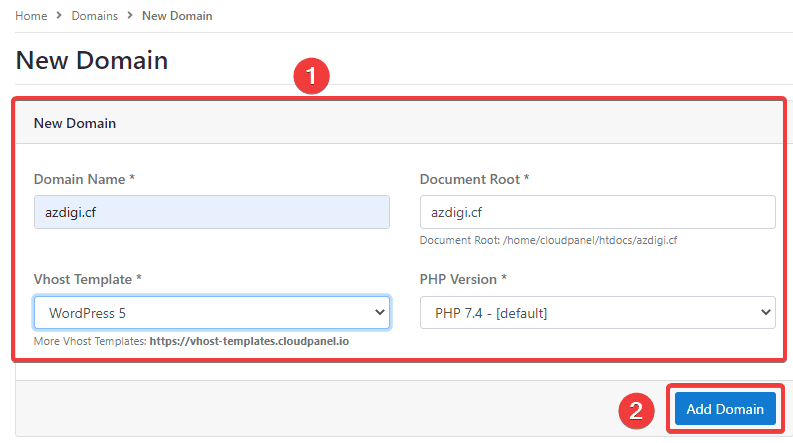
Next, in the New Domain section, you need to fill in the website information as follows:
In there:
- Domain Name: Enter the website name to add
- Document Root: The path containing the website source code
- Vhost Template: You can choose the source code to install (WordPress, Jomla, Laravel…)
- PHP Version: You choose the PHP version for the website (7.1 => 7.4)
- Once completed, click Add Domain to add a website.
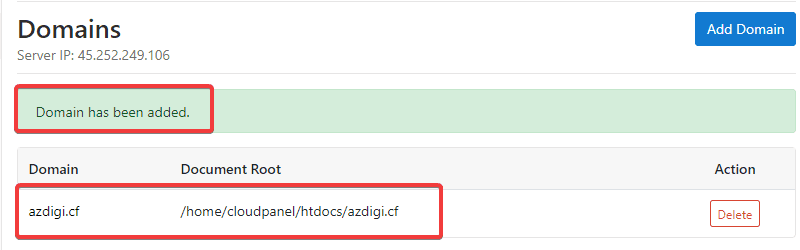
After adding the website successfully, you will receive the message Domain has been added and at the same time, display the website in the list as shown below:
Step 2: Install WordPress on the added website
With CloudPanel, currently, you cannot install the source code directly from the admin page, but you need to SSH into the VPS to install it. If you do not know how to SSH, you can check out the instructions below:
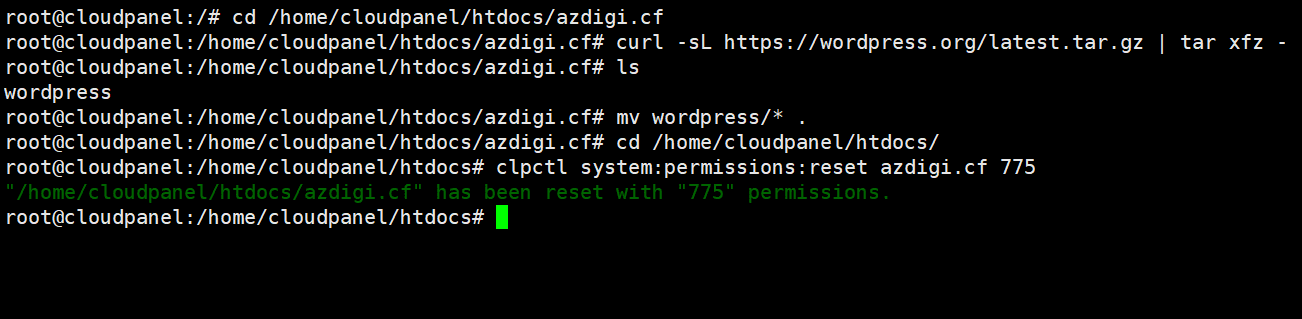
After SSH is successful, you need to run the following commands:
cd /home/cloudpanel/htdocs/azdigi.cf
curl -sL https://wordpress.org/latest.tar.gz | tar xfz -
ls
mv wordpress/* .
cd /home/cloudpanel/htdocs/ && clpctl system:permissions:reset azdigi.cf 775
Command annotation:
- Command 1: Move to the folder containing your source code (you replace azdigi.cf = your website name).
- Command 2: Download the WordPress source code from the homepage & extract the file.
- Command 3: Check if the file has been downloaded and extracted successfully (If you see a folder named WordPress, it is successful).
- Command 4: Move the data inside the WordPress folder to the website folder.
- Command 5: Assign permissions to access the website folder (you replace azdigi.cf = your website name).
In addition to how to get the WordPress source code directly to VPS as above, you can also download the WordPress source code from the homepage to your computer, then upload the source code to VPS via Filezilla according to the instructions below:
Step 3: Create a database for the website
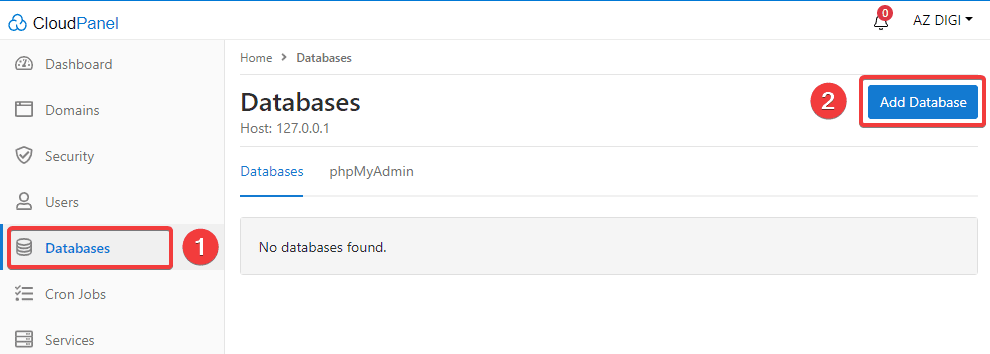
To create a database, you access Databases (1) => Add Database (2)
In this section, you fill in the following information:
In there:
- Database Name
- Database User Name
- Database User Password
After completing the information, click Add Database.

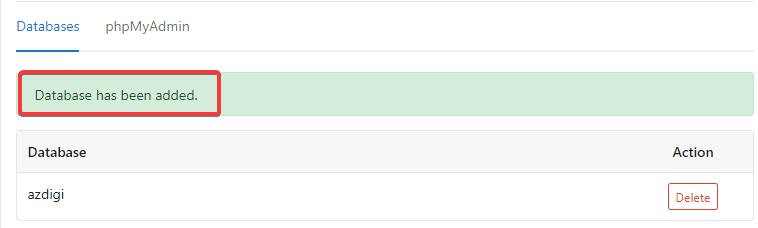
If the database creation is successful, you will receive a message as shown:
Step 4: Set up your WordPress website
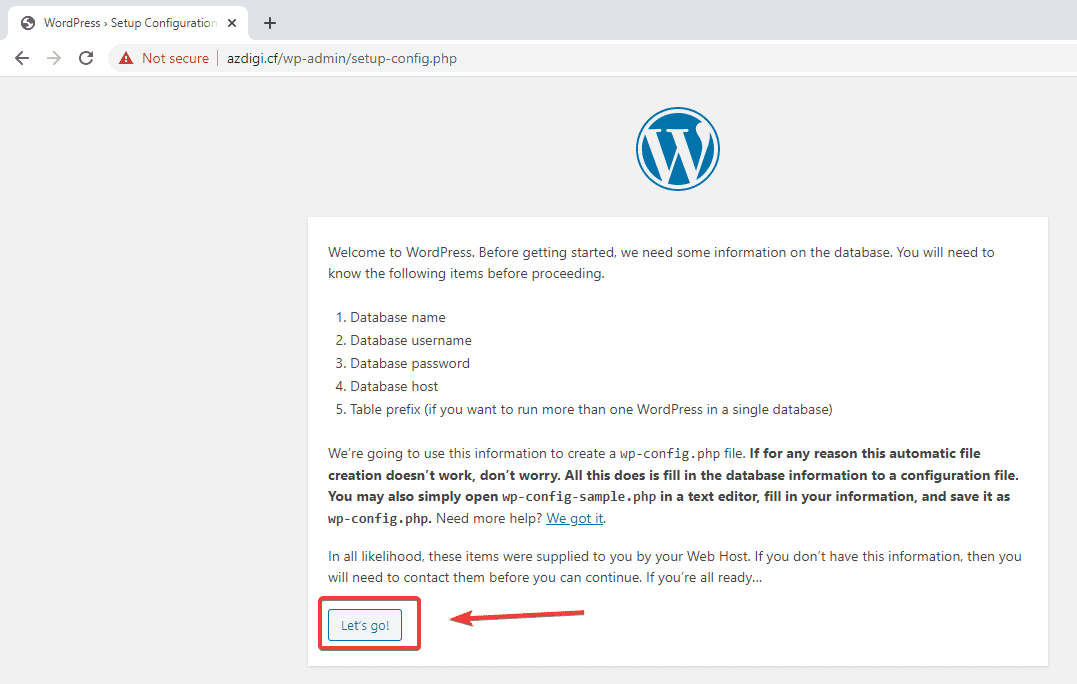
After you have downloaded the source code and created the database, now you set up your WordPress website by going to the browser and typing the name of your website =>the WordPress setup interface will display as shown below => click Let’s go!.
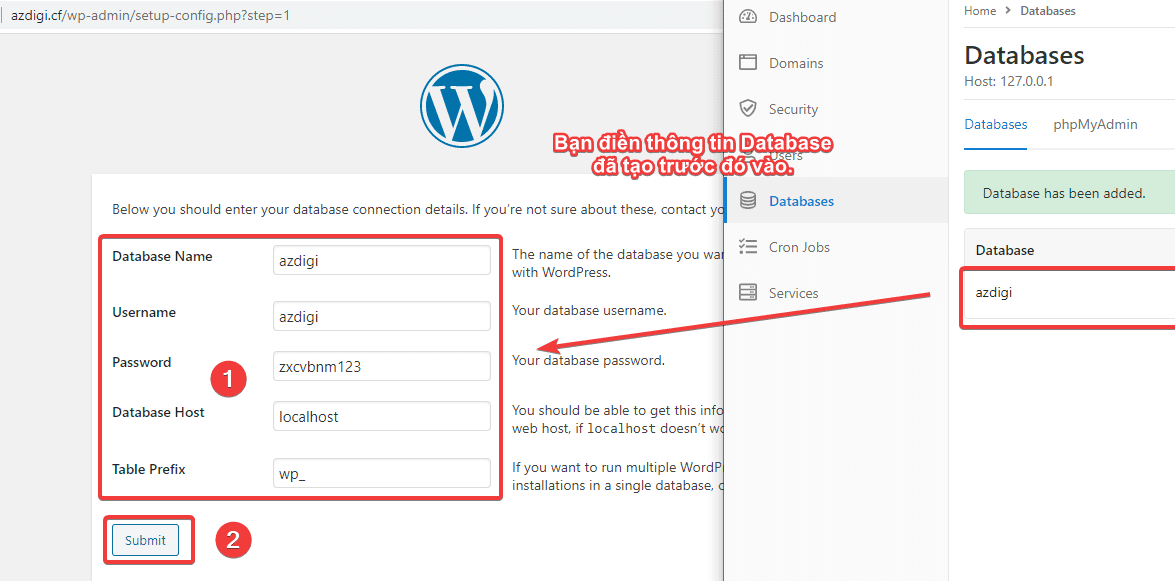
Next, in part (1), you fill in the database information created in Step 3 => Submit (2).
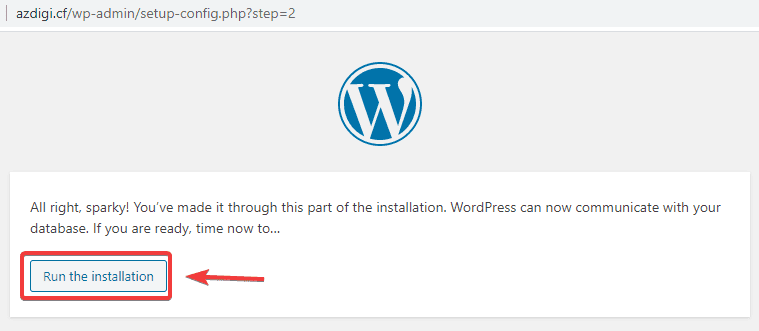
Next, click Run the installation
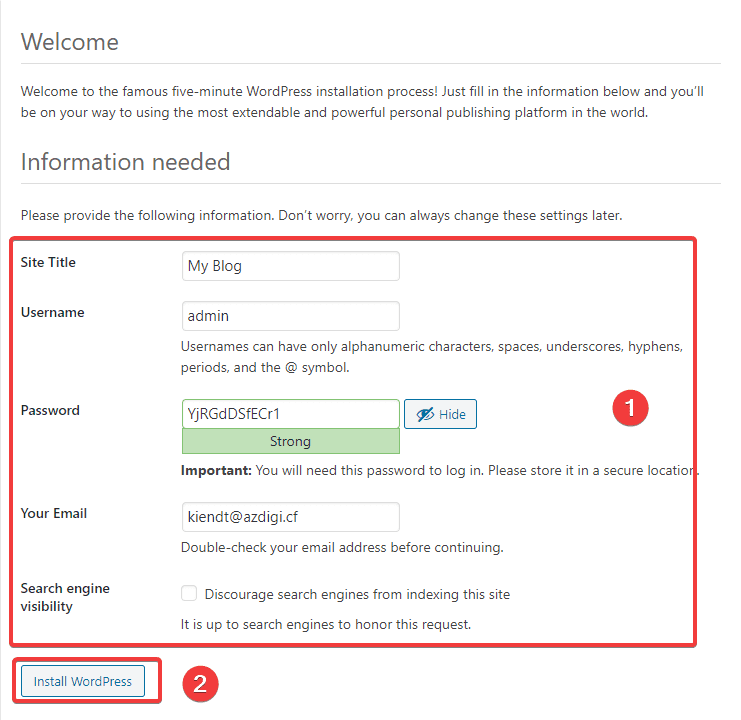
At the next interface, you fill in the website information as follows:
In there:
- Site Title
- Username
- Password
- Your Email
After filling in all the information, click Install WordPress to complete the installation process.
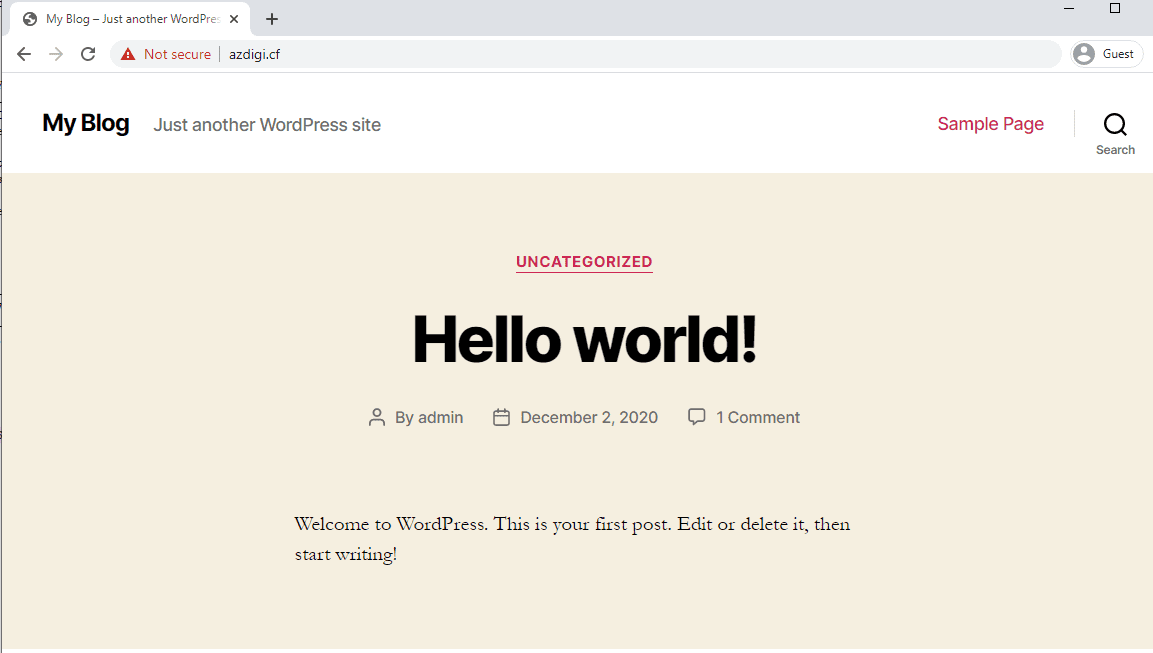
The website interface after installation will look as below:
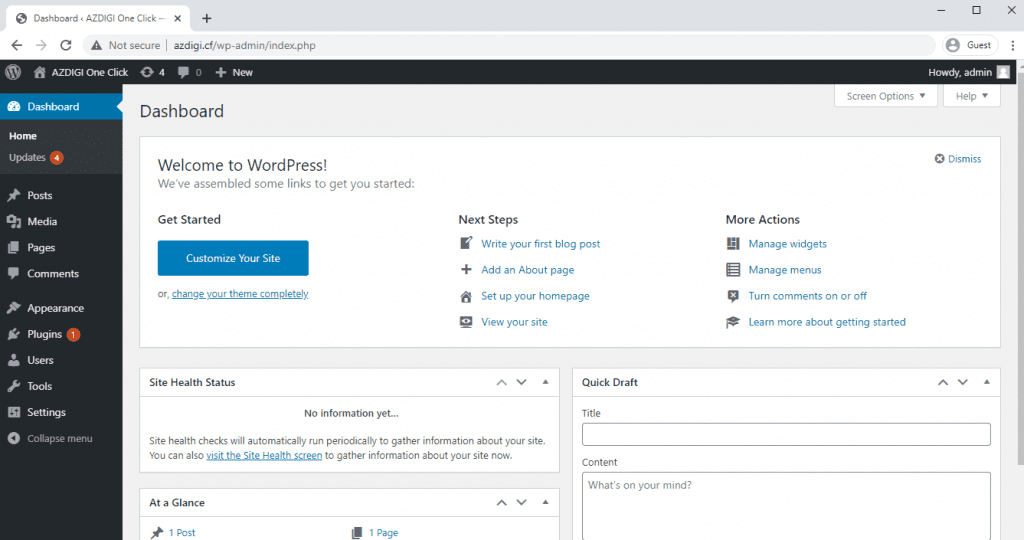
To access the Admin page, go to http://yourdomain.com/wp-admin and the interface will look like this:
III. Summary
Thus, AZDIGI has shown you how to install WordPress on CloudPanel in the fastest way. Installing WordPress this way will help you skip the cumbersome manual uploading of source code, making the installation easier & quicker than ever. If you find the article helpful, please share it with everyone!
Wishing you success!
You can follow AZDIGI’s CloudPanel Series at the link below:
If you need assistance, you can contact support in the ways below:
- Hotline 247: 028 888 24768 (Ext 0)
- Ticket/Email: You use the email to register for the service and send it directly to: support@azdigi.com .
About the author

Thạch Phạm
Đồng sáng lập và Giám đốc điều hành của AZDIGI. Có hơn 15 năm kinh nghiệm trong phổ biến kiến thức liên quan đến WordPress tại thachpham.com, phát triển website và phát triển hệ thống.