Continuing with the great features available on aaPanel, AZDIGI will show you to install and use a built-in Plugin on aaPanel to help install popular source codes like WordPress/Joomla/ Laravel in the fastest and simplest way. Specifically, what this feature is and how to install it, please follow the steps below.
Implementation Guide
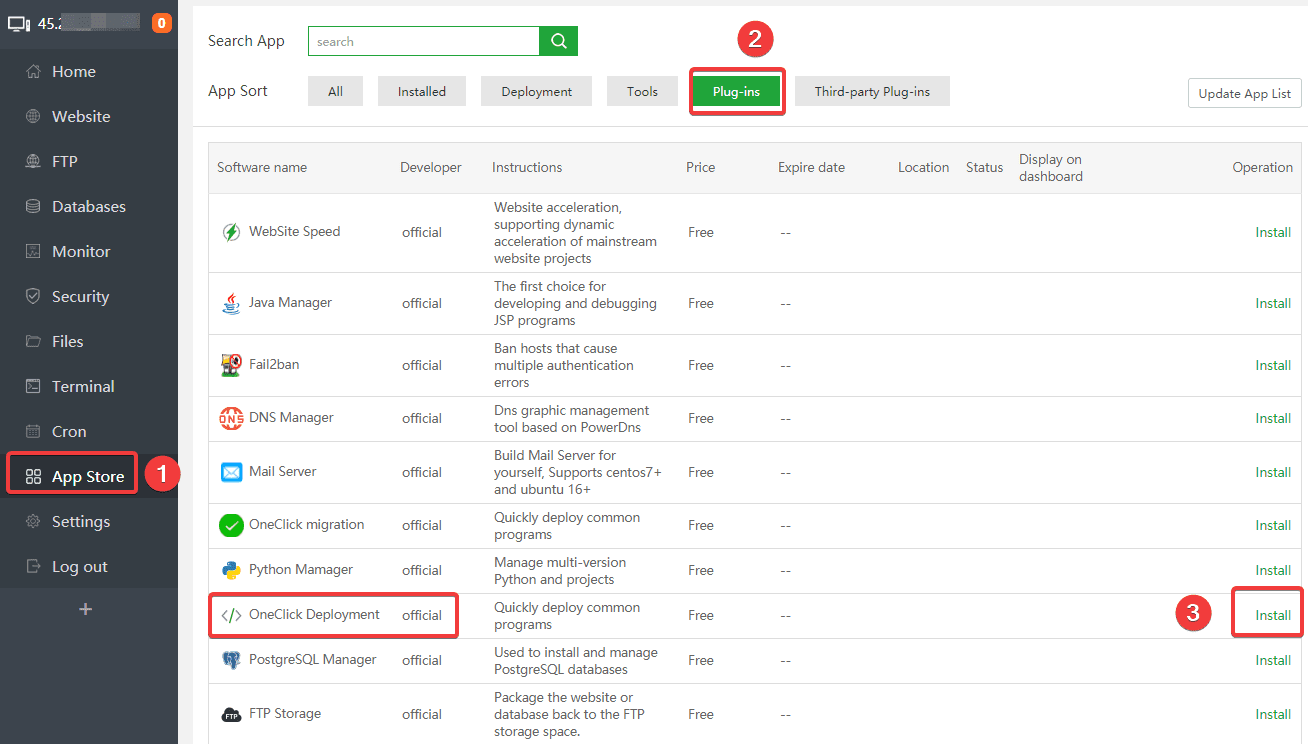
Step 1: Install OneClick Deployment Plugin
At the aaPanel admin interface, go to App Store (1) => Plug-ins (2) => click Install (3) to install OneClick.

=> click Confirm.

Step 2: Download the WordPress source code and create the database
After the OneClick installation is complete, click One-click in the WordPress section to proceed with the installation.

You need to fill out the information below:
In which (1):
- Domain & Remark: Enter the name of your website.
- Root directory: This is the path containing the source code of your website (if you are not familiar with editing, you should leave it as default).
- Database: The website’s database (you can change this information if you want).
- Source code: WordPress (default).
- PHP Version: You choose the PHP version for the website.

Once you have filled in all the information in part (1), click Submit (2) to download the source code and create the database. After successful creation, you will receive database information as shown below:

Note: You need to save this database information to continue the configuration in Step 3. .
Step 3: Set up a WordPress website
After downloading the source code and creating the database completed in Step 2, you proceed to visit the website in the browser to complete the next setup steps.
When accessing, WordPress will ask to set the language for the website, select the language to use and click Continue.

Continue clicking Let’s go!

Next, at (1) you fill in the database information created in Step 2 => Submit (2).

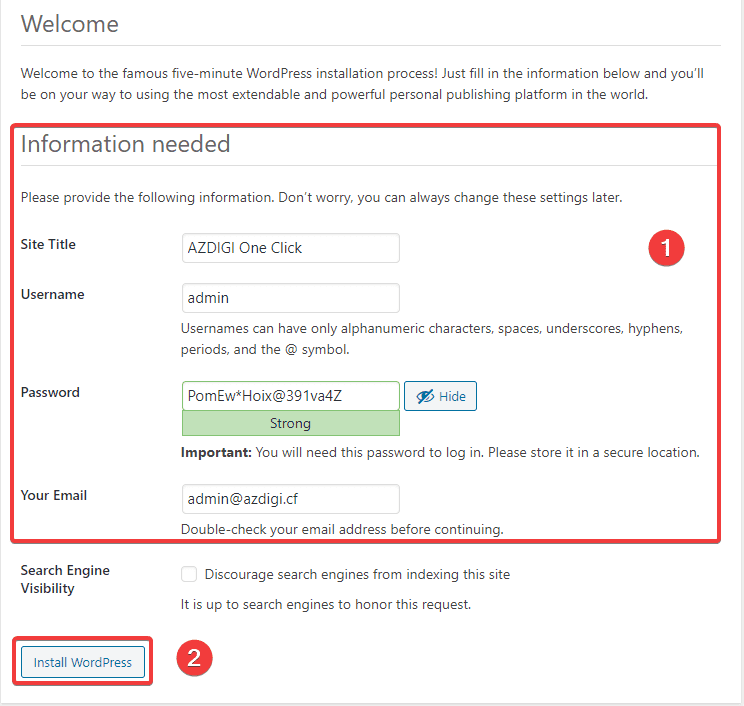
At the next interface, you fill in the website information as follows:
In there:
- Site Title
- Username
- Password
- Your Email
After filling in all the information, click Install WordPress to complete the installation process.
The website interface after installation will look as below:

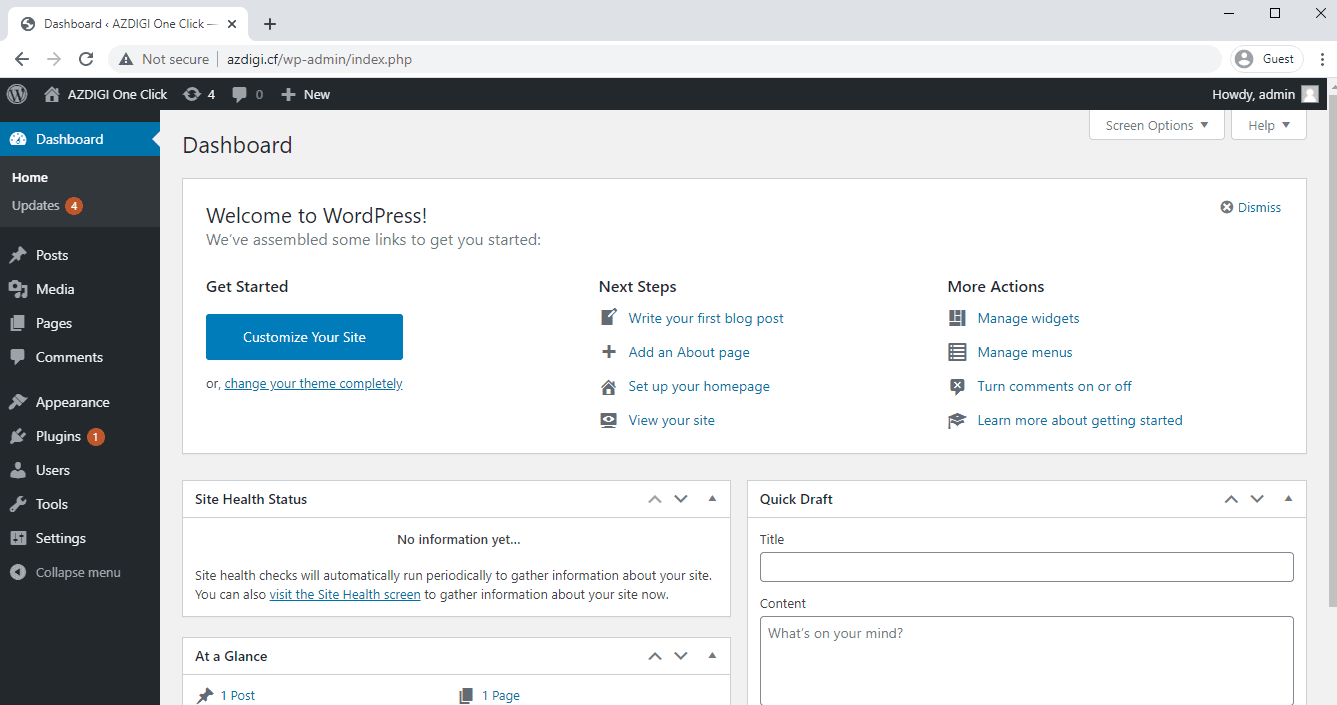
To access the website admin page, you use the User information you just created and log in under the path: http://yourdomain.com/wp-admin, and the interface will be as follows:
Summary
Thus, in this article, AZDIGI has shown you how to install WordPress with OneClick Plugin on aaPanel in the simplest way, installing WordPress in this way will help you skip the cumbersome manual uploading of source code, helping installation faster and simpler than ever. If you find the article helpful, please share it with everyone!
About the author

Thạch Phạm
Đồng sáng lập và Giám đốc điều hành của AZDIGI. Có hơn 15 năm kinh nghiệm trong phổ biến kiến thức liên quan đến WordPress tại thachpham.com, phát triển website và phát triển hệ thống.