
Surely you are no stranger to famous SSL organizations with free support for famous users such as Let’s Encrypt, CloudFlare SSL, Open SSLTheir support of free SSL certificates has helped users greatly improve the website’s security, optimize SEO and make the search display on google more optimized. In this article, AZDIGI will introduce you to another organization that offers users free SSL support (90 days), ZeroSSL.
What is ZeroSSL?
You may have heard of ZeroSSL but have never used this provider’s SSL certificate. In this article, AZDIGI will show you how to authenticate and get a free SSL certificate from ZeroSSL. Installing SSL from ZeroSSL requires manual installation, as most Hosting/VPS service providers currently do not support automatic installation of ZeroSSL on their interfaces, so AZDIGI will guide you install through a site called SSL For Free.
What is SSL FOR FREE?
SSL For Free SSL For Free is a pretty good free SSL certificate and authentication affiliate site today, previously this site linked and provided free SSL certificates from Let’s Encrypt, and now it has affiliated with ZeroSSL to provide free SSL certificates, in addition, they provide other paid SSL services.
How to get a ZeroSSL SSL certificate
Step 1: Sign up for an account
First, you access the link: https://www.sslforfree.com/ and proceed to register for a user account.

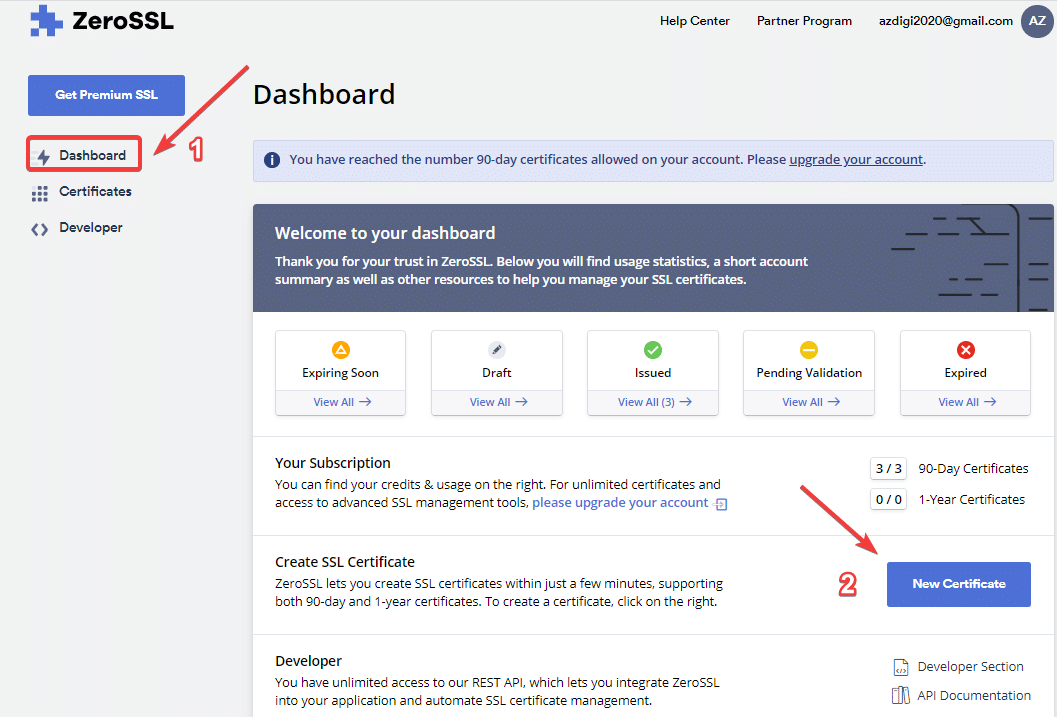
After successful account registration, you log in and enter the administration interface of SSL ZeroSSL as shown below.
Step 2: Generate CSR and choose SSL term
At the Dashboard tab, select New Certificate.
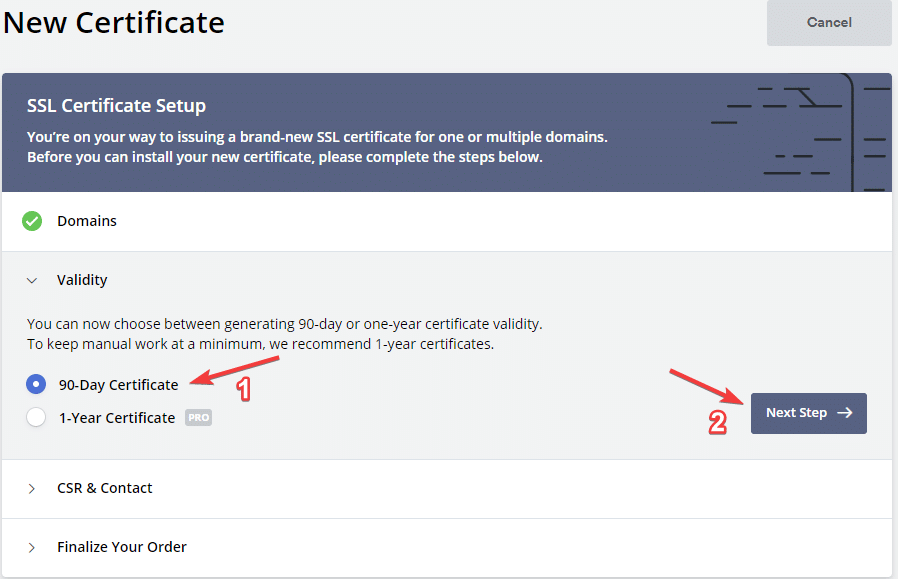
Choose to register for a 90-Day Certificate (the certificate is free to use for 90 days and for free accounts, we can only use a maximum of 3 certificates) Click Next Step to continue.
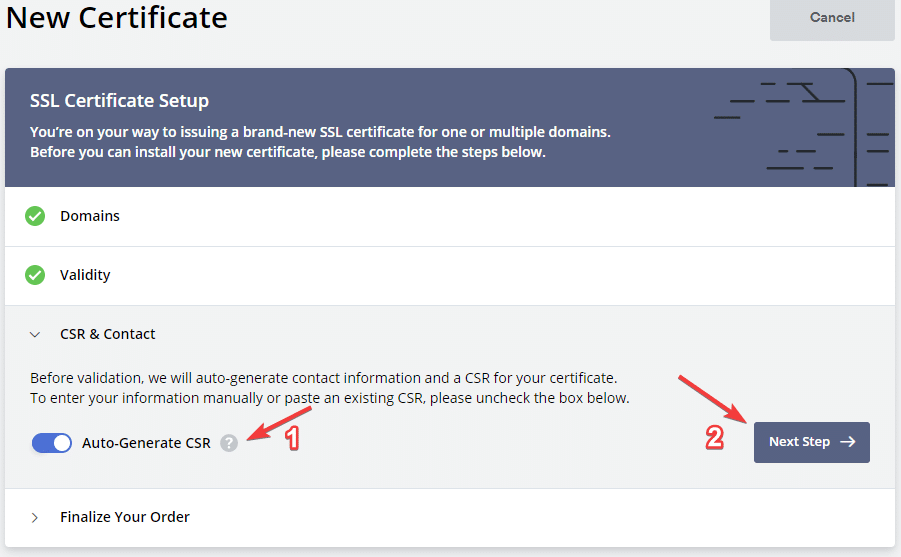
Please click on the Auto-Generate CSR box so that the system automatically generates the CSR. Click Next Step to continue.
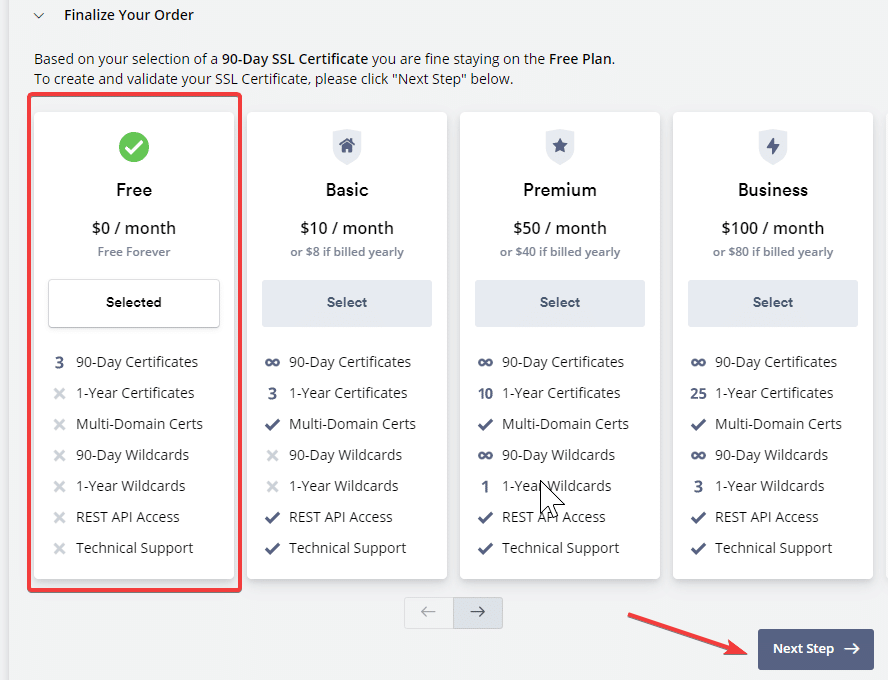
Select the Free package => click Next Step (you can refer to some premium packages and supported options).
Step 3: Verify the domain
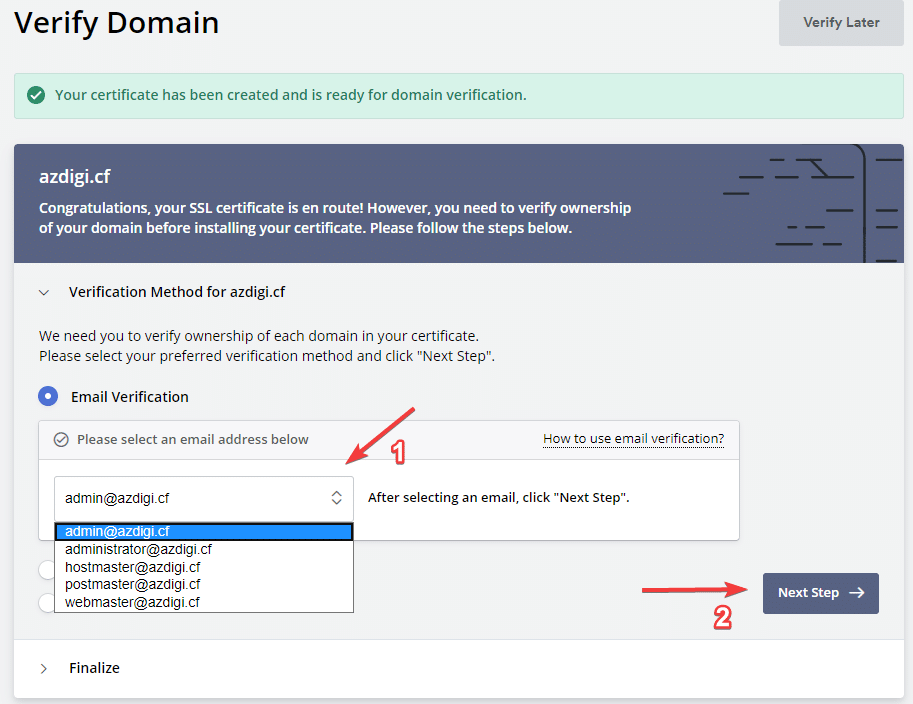
This is a pretty important step, there are 3 methods for SSL authentication and you need to choose the most suitable one.
- Authentication via Email domain: you can choose one of the emails below to be the email to receive authentication information from the company (you must ensure that the email you choose must be fully active in sending/receiving normally).
- Authentication via DNS
If you choose to authenticate with DNS, you need to access your domain administrator and add the CNAME version that the company sends.
I will add the CNAME value with the following content:
Name: _B015CAF788A777CE5EE7EE09FC726C4C.azdigi.cf
Type: CNAME
Value:F28902CCD93391DA3D9AA608EF57E0BF.9CBC795FC1E2752F1FB801FE5D778EDF.507cbfcd55a744d.comodoca.com

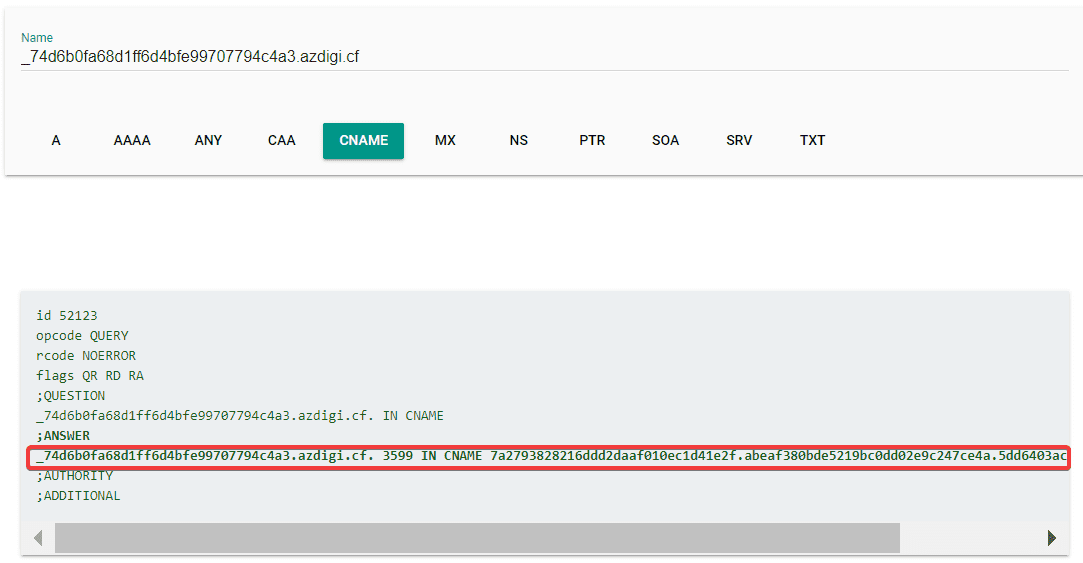
After pointing the record, you can check again at the link below to see if you have successfully pointed it out.
Link check DNS: https://toolbox.googleapps.com/apps/dig/#CNAME/
As shown below, the pointer is successful.
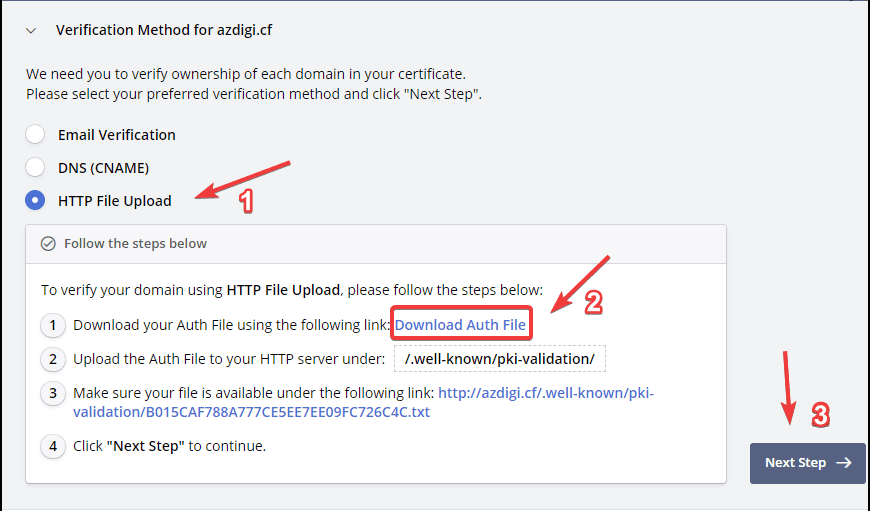
- Authentication via file upload (recommended)
The method of authentication via file upload is often more commonly used because usually, through file authentication, the company will authenticate and provide certificates faster than the above two methods.
First, you need to click Download Auth File (2) to download the file to your computer.
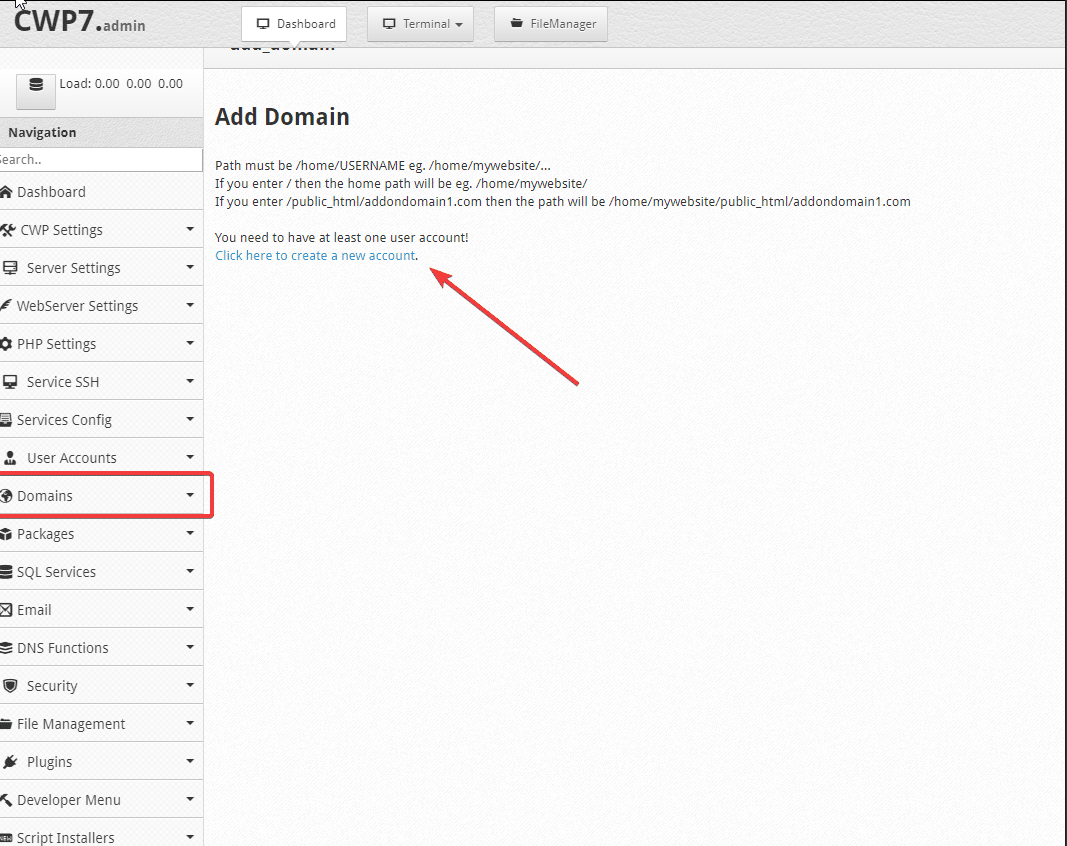
Next, you need to access VPS/Hosting, go to the folder containing the website source code, and proceed to create the path in turn, for example, http://azdigi.cf/.well-know/pki-validation. After creating, you upload the previously downloaded file to the pki-validation folder. pki-validation.
After successful upload, you can access the link created to see if the link works, if you can access it as shown below, it is successful.
After choosing an authentication method, click Verify Domain to proceed with the domain verification process. The verification process will take a few minutes.
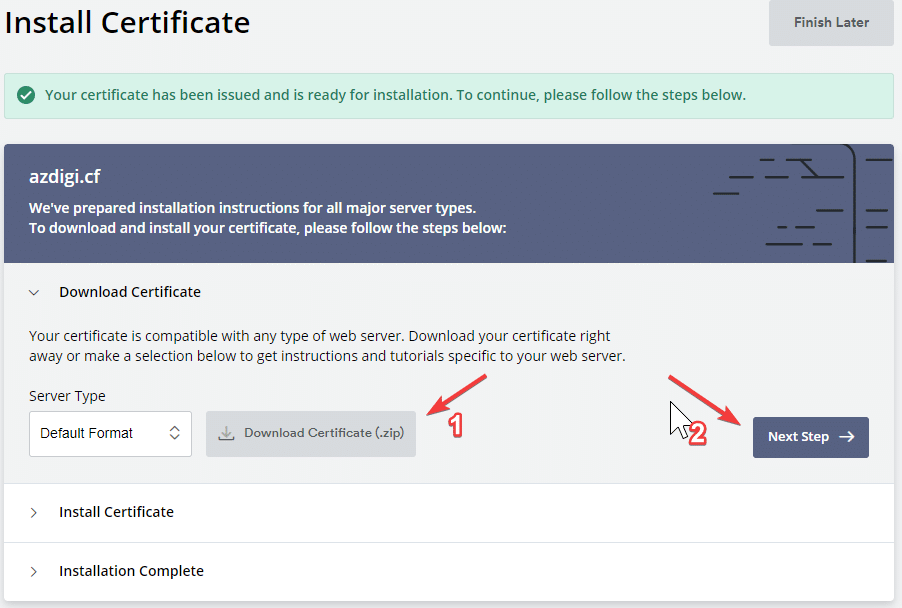
Step 4: Download the certificate
After successful domain verification, we will receive a certificate file, click Download Certificate (zip) (1) to download the certificate file to your computer. After downloading the file to your computer, the process of obtaining the certificate is completed, now you can exit the SSL For Free interface.
If you unzip the downloaded file, you will get 3 files as below:
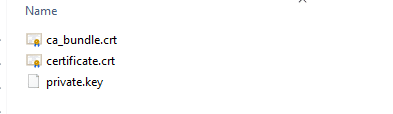
- ca_bundle.crt (CA root)
- certificate.crt (SSL certificate)
- private.key (Private key)
You proceed to add these certificates to your VPS/Hosting to complete the installation process.
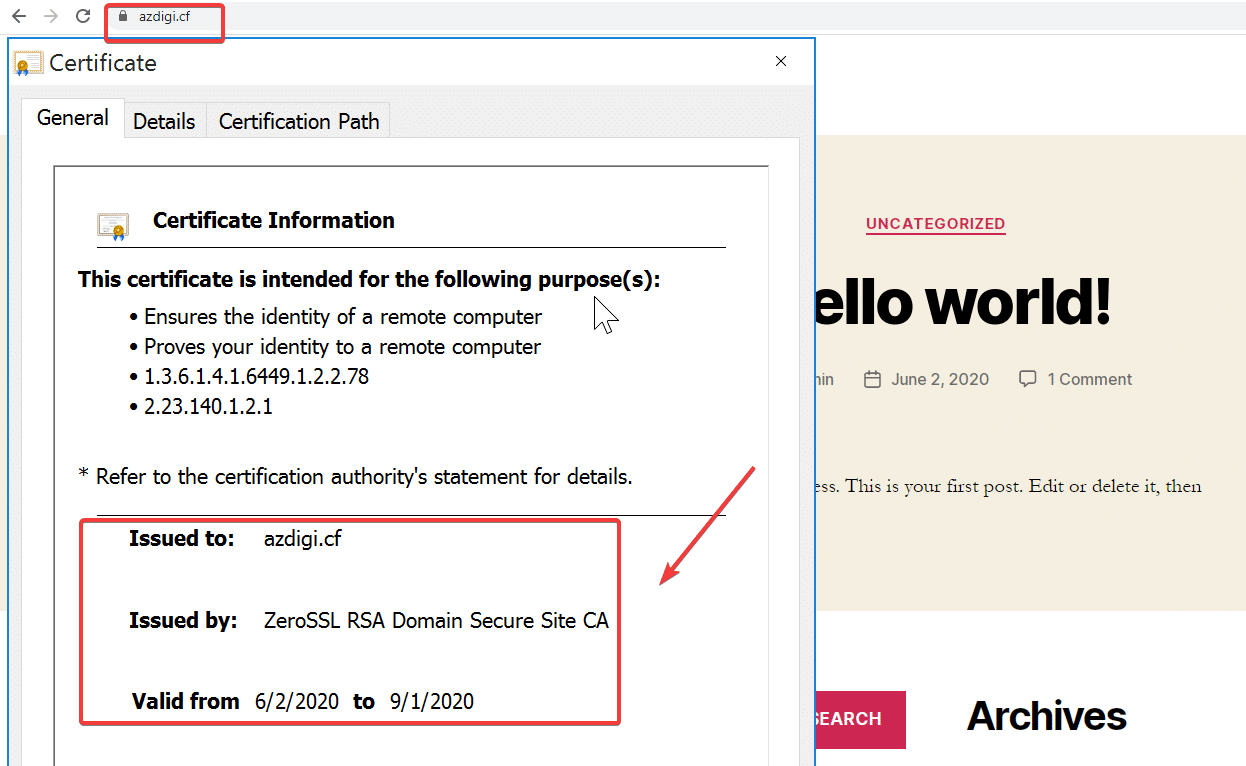
As shown below, I have successfully installed the SSL certificate on the website.
So AZDIGI has shown you how to easily authenticate and install SSL from ZeroSSL. Authentication and installation through sites similar to this SSL For Free will greatly help you if your VPS/Hosting server does not yet support it or has problems installing SSL automatically.
- Hotline 247: 028 888 24768 (Ext 0)
- Ticket/Email: You can use your email to register for the service and send it directly to: support@azdigi.com
Wishing you success!
About the author

Thạch Phạm
Đồng sáng lập và Giám đốc điều hành của AZDIGI. Có hơn 15 năm kinh nghiệm trong phổ biến kiến thức liên quan đến WordPress tại thachpham.com, phát triển website và phát triển hệ thống.