
In this tutorial, AZDIGI will show how you can customize the service on DirectAdmin.
I. Introduction
Comes with DirectAdmin, we will have an extremely powerful tool, CustomBuild. CustomBuild is an extremely progressive tool that helps manage software but provides a fairly simple way to customize everything.
Here is a list of services you can customize:
ap2
clamav
curl
custombuild
dovecot
fastcgi
fpm
libxml2
libxslt
litespeed
modsecurity
nginx
nginx_reverse
opcache
openlitespeed
php
phpmyadmin
proftpd
pureftpd
rspamd
spamassassin
suhosin
suphp
systemd
And here is where the default configuration files of these services are saved:
/usr/local/directadmin/custombuild/configure/
To custom configure a service, you will need to create a custom/ directory, then copy the default software’s configuration to this directory.
The parameters you have customized in this custom folder will be preserved even if you build the entire service.
In this tutorial, I will customize the configuration of the OPcache service so that you can visualize it. You can do the same with the rest of the services.
II. Custom service on DirectAdmin (with OPcache)
To customize the service on DirectAdmin, you need to follow these 3 steps.
Step 1: SSH into your server
Before going into customizing the service on DirectAdmin, we first need to SSH or access your VPS or server as root. Or at least log in to the server with a user with sudo privileges. If you don’t know how to SSH into your VPS/Server, you can refer to the following tutorial:
After successfully SSH, we continue with step 2 to perform service customization commands on DirectAdmin.
Step 2: Copy the service default configuration and edit it
In this article, I will take OPcache as an example, if you need to adjust another service, you should change the following commands accordingly:
cd /usr/local/directadmin/custombuild
mkdir -p custom/opcache/
cp -fp configure/opcache/* custom/opcache/
Here is the image when I have finished copying the default OPcache configuration file to the custom folder:
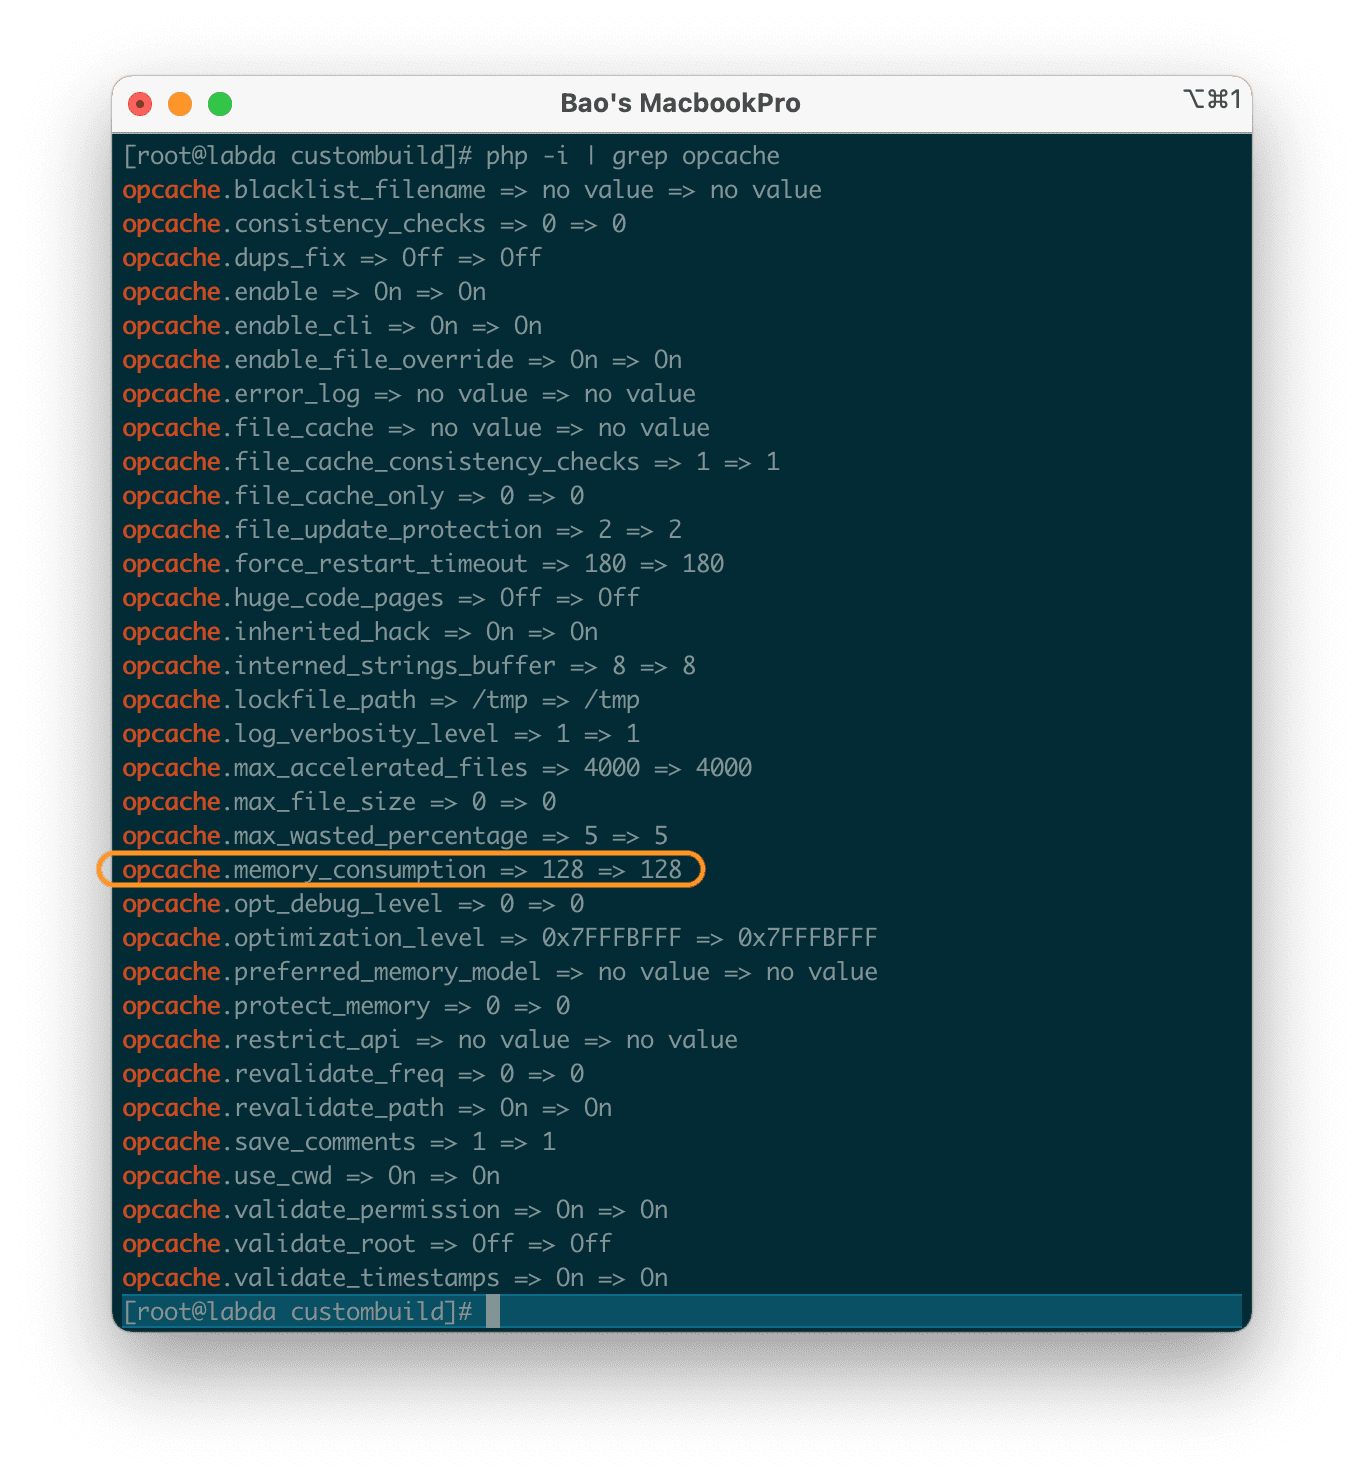
Before going into editing the custom configuration file, we check the default OPcache parameters with the following command:
php -i | grep opcache
Below is the default configuration of OPcache when using DirectAdmin. And in this article, I will change the parameters in the orange frame below:
We continue to edit the config file just copied with the following command:
vi /usr/local/directadmin/custombuild/custom/opcache/opcache.ini
I will change the parameter opcache.memory_consumption from 128 to 512 to increase the amount of physical RAM allocated to the OPcache service.
Note: Because I use OPcache as an example in this article, the path and configuration file will be different from customizing another service.
Step 3: Rebuild the service you just configured
The last step is rebuilding the service that we have just changed configuration. We will proceed to rebuild OPcache.
cd /usr/local/directadmin/custombuild
./build opcache
After rebuilding the OPcache service, I rechecked the parameters of OPcache and found that it had been changed.

So we have finished customizing the OPcache service on DirectAdmin. Depending on your needs, you can do with the remaining services.
If your configuration is incorrect, your service rebuild will not be completed. But your running service is still working with the old configuration normally.
If you want to return everything to default, just delete the custom folder and rebuild all services.
III. Summary
Hopefully, with the above steps, you can customize the configuration for the service you need to customize. You should only change configurations that you know well.
Wishing you success. See more useful articles about DirectAdmin at the following link:
If you need assistance, you can contact support in the ways below:
- Hotline 247: 028 888 24768 (Ext 0)
- Ticket/Email: You use the email to register for the service and send it directly to: support@azdigi.com .
- Website AZDIGI: https://azdigi.com/
About the author

Thạch Phạm
Đồng sáng lập và Giám đốc điều hành của AZDIGI. Có hơn 15 năm kinh nghiệm trong phổ biến kiến thức liên quan đến WordPress tại thachpham.com, phát triển website và phát triển hệ thống.