
To install OPcache DirectAdmin we first need to understand what OPcache is.
OPcache will save the content “precompile php code to the shared memory”. Thus, it helps to reduce the reading of PHP source code from the hard drive and recompile it every time a website is accessed.
Benefits OPcache brings:
- Helps reduce %CPU for the server.
- Reduce TTFB of all sites on the server.
- Increase website loading speed.
Note:
- Only install the OPcache module for PHP through CustomBuild 2.0, if you are still using Custombuild 1.x you should upgrade to CustomBuild 2.0 before doing OPcache installation.
- OPcache does not work with suphp.
To check the CustomBuild version, please see the article: Check the version of CustomBuild in use (check custombuild version)
To upgrade CustomBuild 1.x to 2.0, please see the article: Upgrading CustomBuild version from 1.x to 2.0
Step 1. Install OPCache DirectAdmin with CustomBuild 2.0 (install OPcache DirectAdmin with CustomBuild 2.0)
To install OPCache DirectAdmin you just need to manipulate a few commands below to be successful. But only with CustomBuild 2.0.
Move to DirectAdmin’s build directory and change OPcache value to Yes
cd /usr/local/directadmin/custombuild
./build set opcache yes
You will receive the following information:
Changed opcache option from no to yes
Continue compiling OPcache module with CustomBuild 2.0
./build opcache
Depending on the PHP version you are using on the server, the following log will be different. Here my server uses 3 versions of PHP 5.6/7.2/7.3.
opCache 7.0.6 is now installed for PHP 5.6
opCache 7.0.6 is now installed for PHP 7.2
opCache 7.0.6 is now installed for PHP 7.3
opCache 7.0.6 PHP extension has been installed successfully.
In case your webserver is using Openlitespeed, you need to run the following command to get OPCache.
killall -9 lsphp
Step 2. Check OPcache module after installing OPcache successfully
We use the following command to check:
php -v
The results returned are as follows:
PHP 5.6.40 (cli) (built: Mar 27 2019 22:13:46)
Copyright (c) 1997-2016 The PHP Group
Zend Engine v2.6.0, Copyright (c) 1998-2016 Zend Technologies with Zend OPcache v7.0.6-dev, Copyright (c) 1999-2016, by Zend Technologies

Depending on the first PHP version your system returns, the results will be different.
If there is “Zend OPcache” it means success.
Or we can see it directly with the file phpinfo.php
In the user section, you change to the correct user of domaincuaban.com you want to see.
cd /home/user/domaincuaban.com/public_html/
vi phpinfo.php
Then insert the following php code into this file:
Save the file and access it with the corresponding domain: http://yourdomain/phpinfo.php
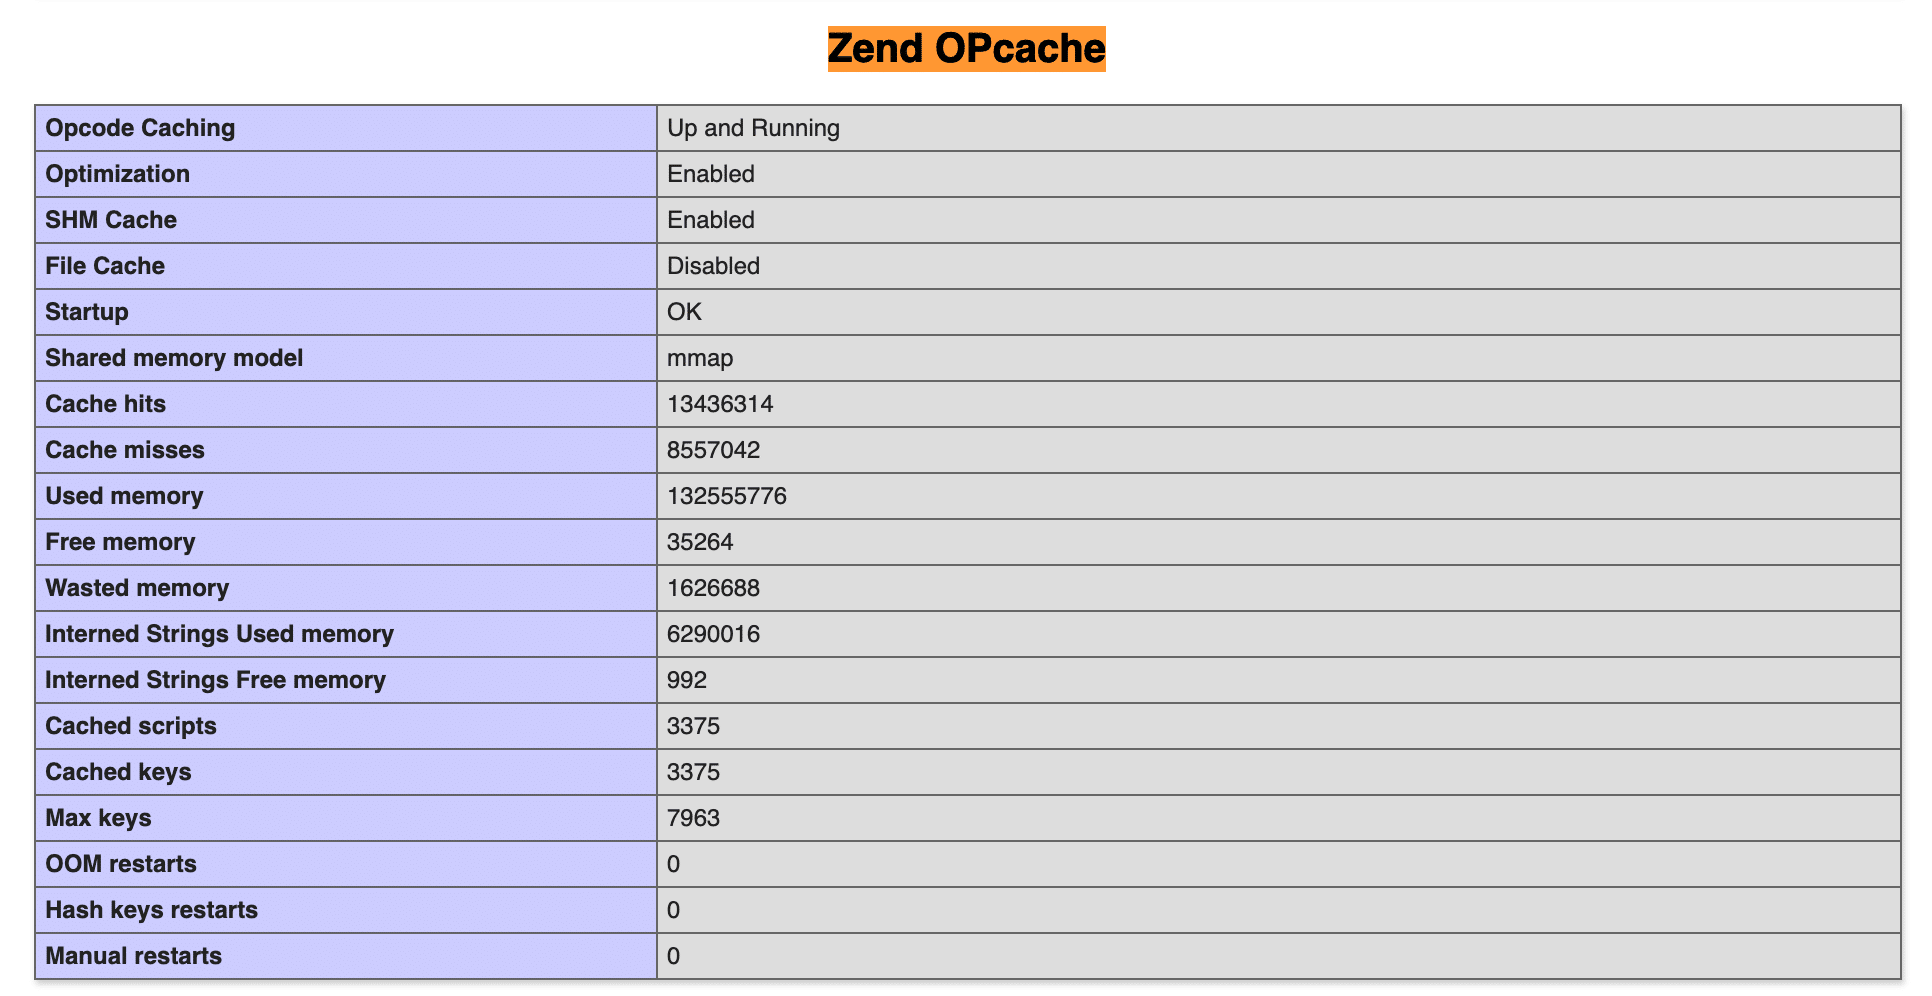
You Ctrl + F to search with “Zend OPcache” as the picture above is successful.
Your website speed will improve gradually over time. In the immediate future, ttfb will be reduced immediately. I checked with my website, the TTFB has decreased from over 500ms to ~200ms. Because I use WordPress WooCommerce theme, it is quite heavy.
Wishing you success!
Reference article: Installing php OpCache with CustomBuild 2.0
About the author

Thạch Phạm
Đồng sáng lập và Giám đốc điều hành của AZDIGI. Có hơn 15 năm kinh nghiệm trong phổ biến kiến thức liên quan đến WordPress tại thachpham.com, phát triển website và phát triển hệ thống.