Nội dung
What is NGINX FastCGI WordPress Cache? Referring to the Cache configuration, it is probably no stranger to anyone when deploying a website. The cache is considered the “backbone”, deciding the performance and speed of the website. Assuming your website serves hundreds and thousands of visits per day, not implementing a cache will make the system always in an overloaded state because it has to receive requests and respond to responses continuously. When you have implemented the cache, it will reduce the response load to help the server be idler.
NGINX is a popular, high-performance web server that can host WordPress websites. In addition to being a web server, it can also be used as a reverse proxy, mail proxy, load balancer, and HTTP cache.
According to W3Techs, 32.1% of websites are installed on NGINX servers (as of May 25, 2020)
Implementation Guide
Step 1: Create the fastcgi-cache directory
You need to create a fastcgi-cache directory to store cache, you use the following command to create it quickly.
mkdir /var/run/fastcgi-cache
Note:
- mkdir: command to create directory
- /var/run/fastcgi-cache: directory created
Step 2: Configure the domain.conf file
You access Website => Configuration to go to advanced settings.

You select Config and enter the code below on the server line as shown below:
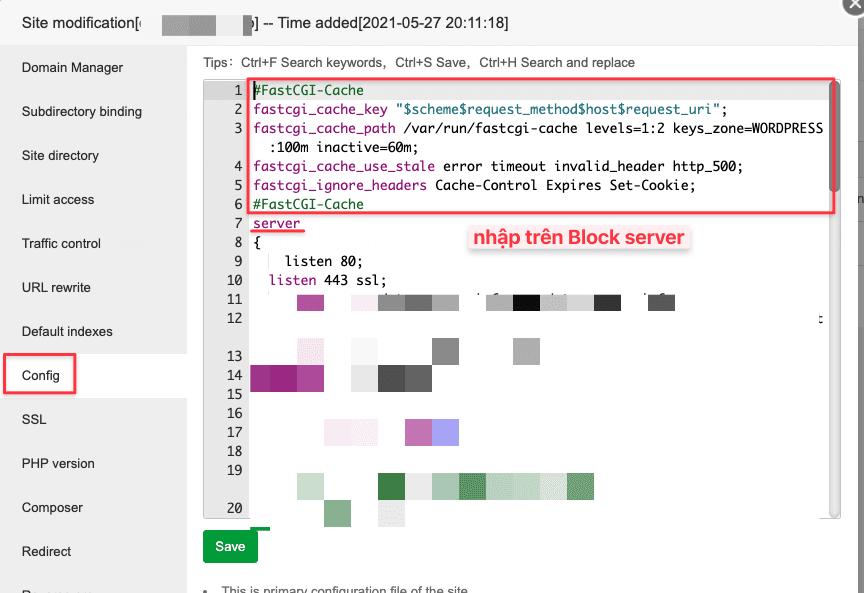
#FastCGI-Cache
fastcgi_cache_key "$scheme$request_method$host$request_uri";
fastcgi_cache_path /var/run/fastcgi-cache levels=1:2 keys_zone=WORDPRESS:100m inactive=60m;
fastcgi_cache_use_stale error timeout invalid_header http_500;
fastcgi_ignore_headers Cache-Control Expires Set-Cookie;
#FastCGI-Cache
Note:
fastcgi_cache_key: NGINX uses them to compute a request’s key (identifier) Importantly, to send a cached response to the client, the request must have the same key as a cached response.
- $scheme: Requires HTTP or HTTPS scheme
- $request_method: The request methods are usually POST or GET
- $host
- $request_uri: Request URL
fastcgi_cache_path: Specify the number of parameters.
- /var/cache/nginx: Directory path for cache.
- levels: Defines the cache hierarchy
- keys_zone (name:size): This allows the creation of a shared memory area where all active keys and data (meta) information are stored. Note that storing keys in memory speeds up the check by making it easier for NGINX to determine if it’s MISS or HIT without checking the disk state.
- inactive: Specifies the length of time after cached data that has not been accessed within the specified time is cleared from the cache. A value of 60m in the example configuration means that files that are not accessed after 60m will be removed from the cache.
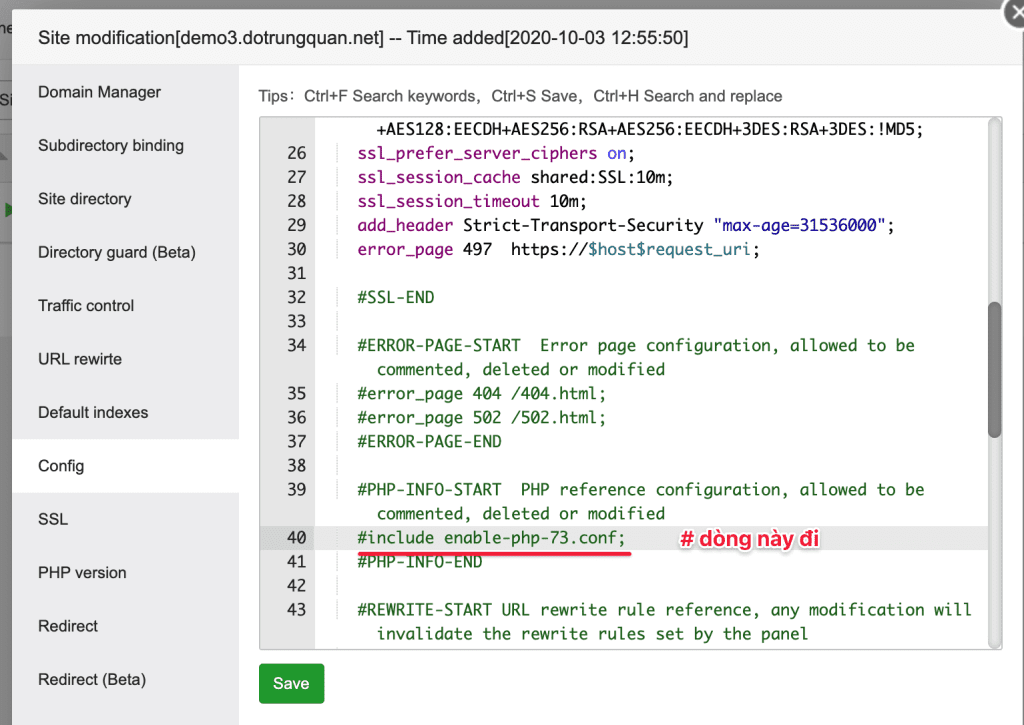
Then you move to # the include enable-php-73.conf line.
If your website has SSL (HTTPS) installed and enabled, add the following code after the # SSL-END line as shown below:
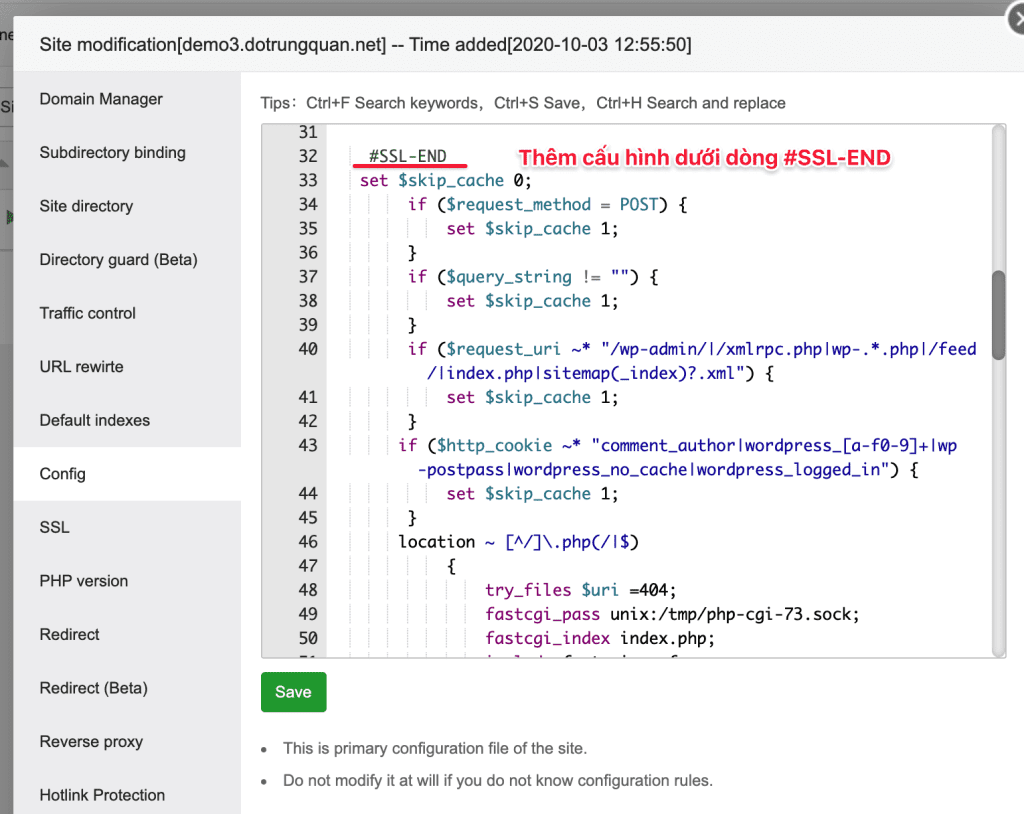
#FastCGI-Cache
set $skip_cache 0;
        if ($request_method = POST) {
            set $skip_cache 1;
        }
        if ($query_string != "") {
            set $skip_cache 1;
        }
        if ($request_uri ~* "/wp-admin/|/xmlrpc.php|wp-.*.php|/feed/|index.php|sitemap(_index)?.xml") {
            set $skip_cache 1;
        }
       if ($http_cookie ~* "comment_author|wordpress_[a-f0-9]+|wp-postpass|wordpress_no_cache|wordpress_logged_in") {
            set $skip_cache 1;
        }
       location ~ [^/]\.php(/|$)
            {
                try_files $uri =404;
                fastcgi_pass unix:/tmp/php-cgi-73.sock;
                fastcgi_index index.php;
                include fastcgi.conf;
                add_header Strict-Transport-Security "max-age=63072000; includeSubdomains; preload";
                fastcgi_cache_bypass $skip_cache;
                fastcgi_no_cache $skip_cache;
                add_header X-Cache "$upstream_cache_status From $host";
                fastcgi_cache WORDPRESS;
                add_header Cache-Control  max-age=0;
                add_header Nginx-Cache "$upstream_cache_status";
                add_header Last-Modified $date_gmt;
                add_header X-Frame-Options SAMEORIGIN;
                add_header X-Content-Type-Options nosniff;
                add_header X-XSS-Protection "1; mode=block";
                etag  on;
                fastcgi_cache_valid 200 301 302 1d;
        }


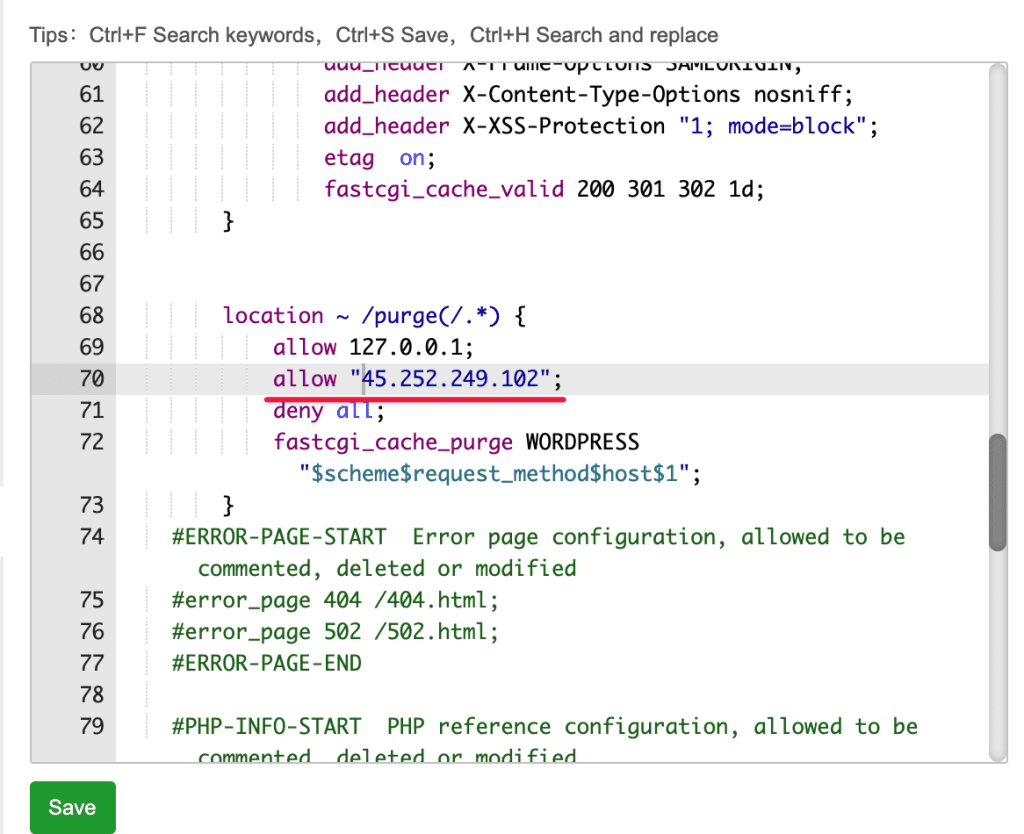
        location ~ /purge(/.*) {
            allow 127.0.0.1;
            allow "change_to_your_server_ip";
            deny all;
            fastcgi_cache_purge WORDPRESS "$scheme$request_method$host$1";
        }
#FastCGI-Cache
Note: The line has the allow “change_to_your_server_ip” paragraph; please replace it with the IP of the server you are using. If not, you will get the following error:
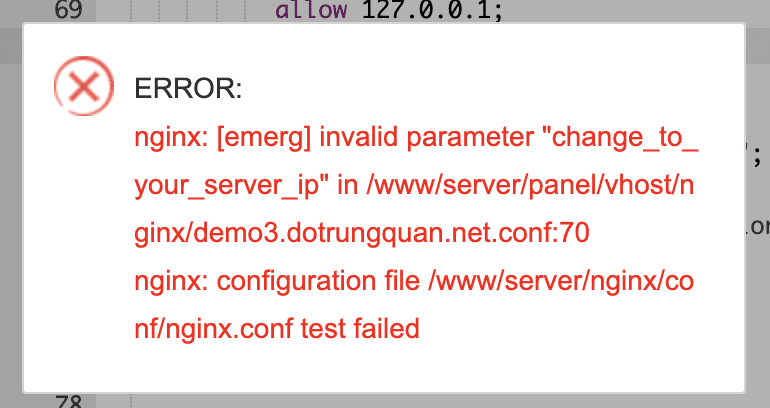
You allow IP and then save.
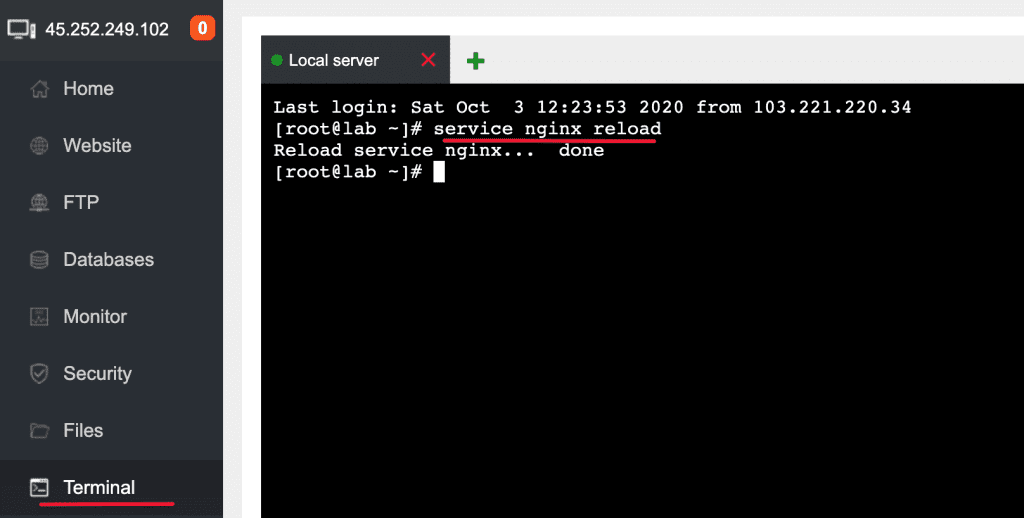
Next, reload nginx with the command:
service nginx reload
Step 3: Install and Configure NGINX FASTCGI with Nginx Helper
To combine the communication environment between the website and the web server, you will install a plugin for the combined installation. will use Nginx Helper Plugin to configure.
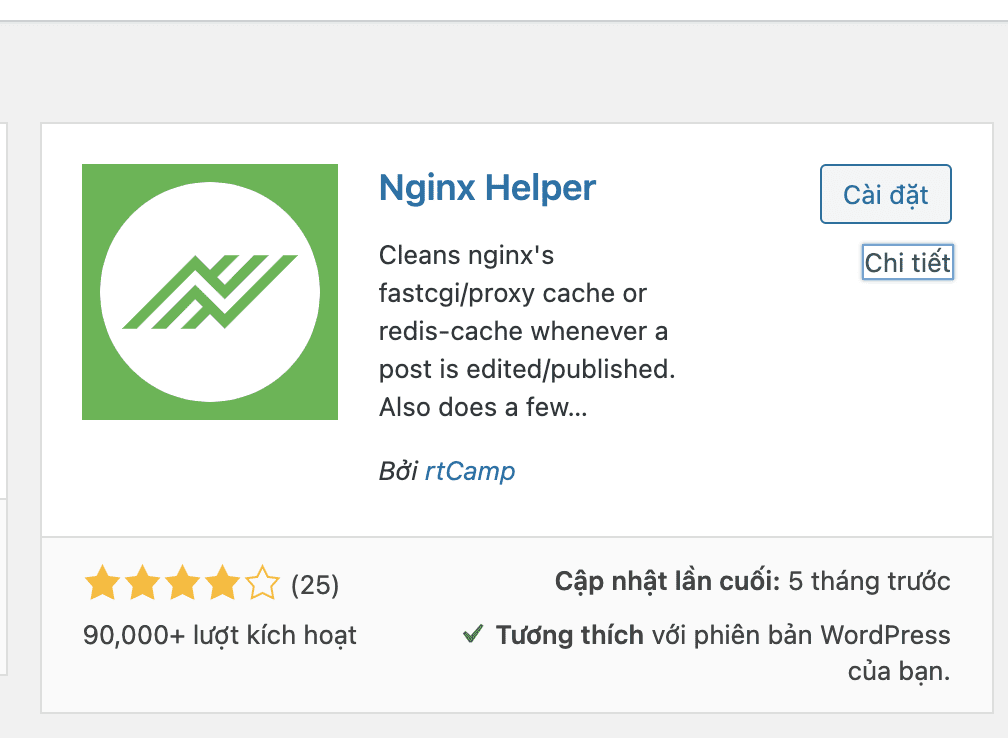
To add a configuration file to wp-config.php go to the open source file wp-config.php and add the following line:
define('RT_WP_NGINX_HELPER_CACHE_PATH', '/var/run/fastcgi-cache');
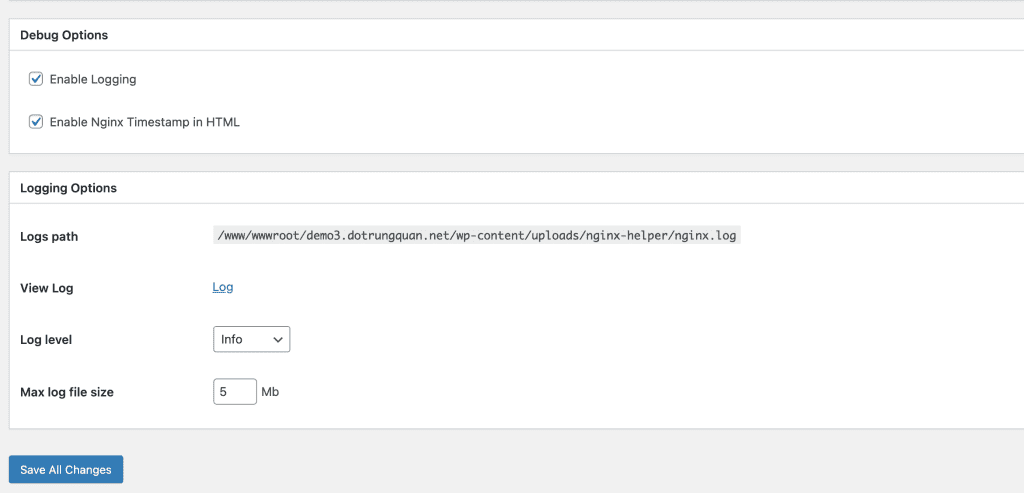
After adding the configuration file, go back to the WordPress admin and enable the options as shown in the image below:
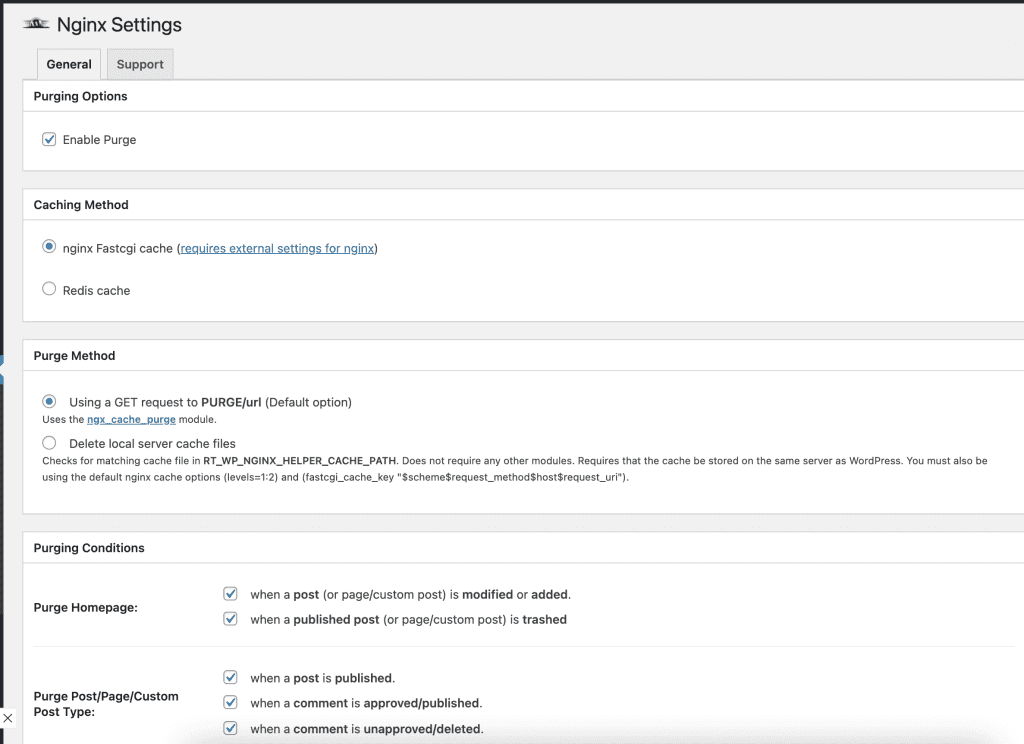
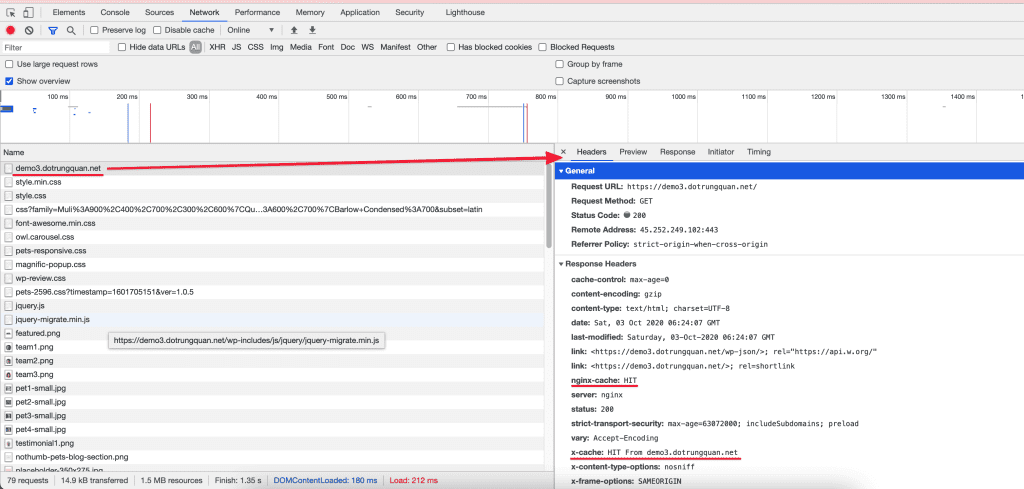
To start checking, save the settings and open the website in an incognito browser. Next, you open the browser debug, then move to the Network Tab to load. Finally, select the website and see if the Headers cache is HIT or MISS.
So AZDIGI has completed the steps to configure NGINX FASTCGI on aaPanel. Hopefully, this article will help you set up a website with high performance, web loading speed and TTFB to be improved more.
- Hotline 247: 028 888 24768 (Ext 0)
- Ticket/Email: You can use your email to register for the service and send it directly to: support@azdigi.com
- Website AZDIGI: https://azdigi.com/


