
How to install SSL on HestiaCP?
Continuing the series on the HestiaCP control, in today’s article, AZDIGI will guide you through installing Let’s Encrypt free SSL and importing an existing SSL certificate.
I. Overview
For a website that works on the Internet and needs to rank on Google, it is essential and indispensable to issue an SSL certificate for the website.
A website without SSL will lose points in front of visitors and leading search engines like Google because, since July 2018, Google has required websites running Google ads to have SSL. Similarly, websites with SSL will be favored by Google for higher rankings than websites without SSL certificates.
In this article, AZDIGI will guide you to install Let’s Encrypt free SSL and Import SSL certificates to HestiaCP, let’s do it with AZDIGI.
II. Install SSL on HestiaCP
I will install a free Let’s Encrypt and paid SSL certificates.
1. Install SSL Let’s Encrypt on HestiaCP
Step 1: Configure DNS records
To install SSL successfully, the first condition is that you must point the domain name to the Hosting/VPS server IP. For example, I have a subdomain hestiacp.azdigi.info and I pointed to the VPS IP installed HestiaCP. To check if the domain name has been pointed to the server, you can check it online at dnswatch.info
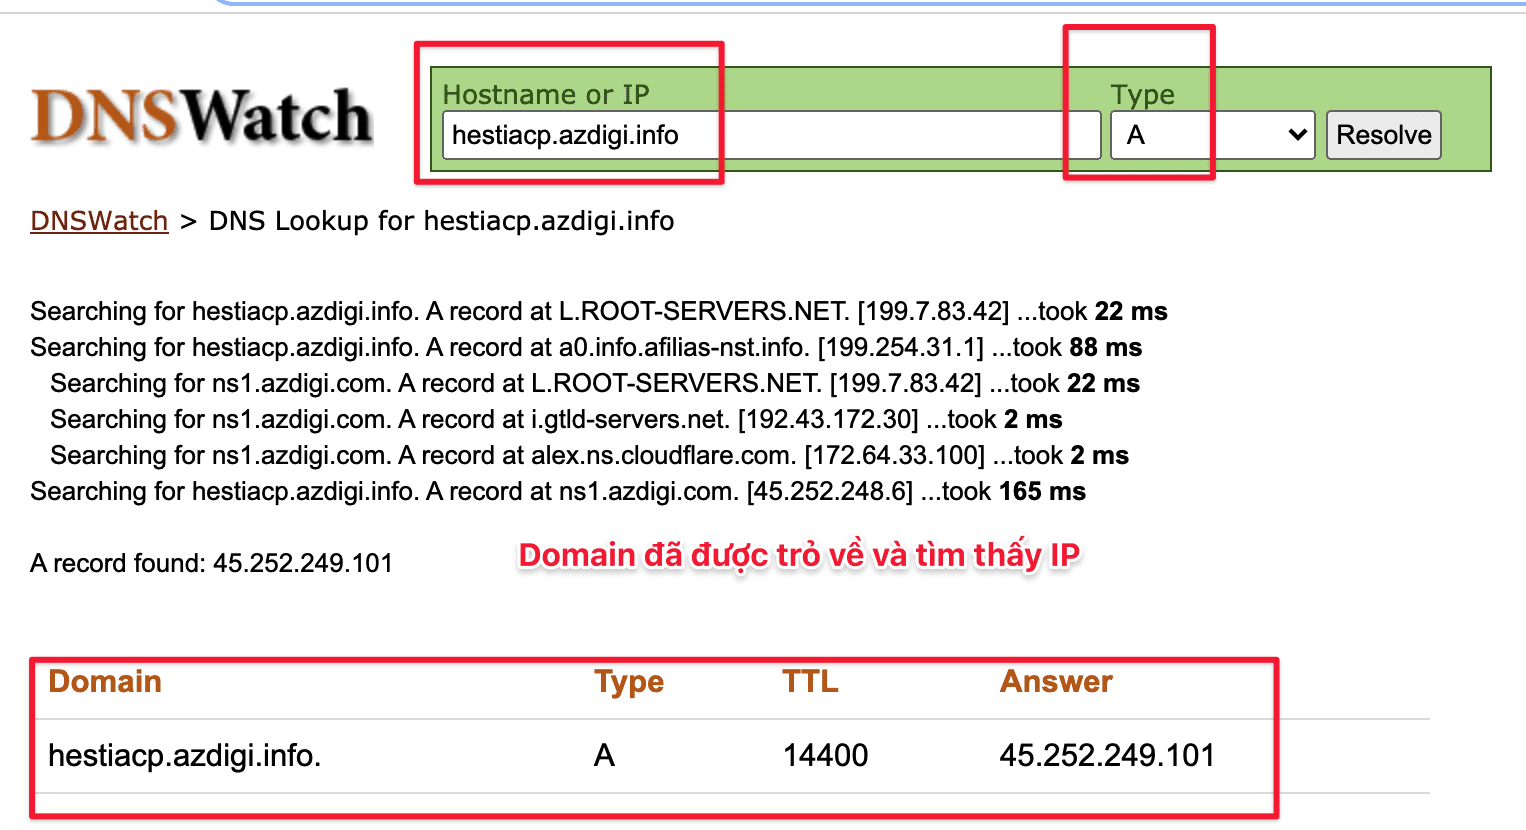
After determining the domain name pointed to IP hosting, you go to step 2 to start installing SSL.
Step 2: Install Let’s Encypt SSL on HestiaCP
Please log in to User to install SSL. To log in, click on the => icon, as shown below. Or you can log in directly from https://my-ip:8083 with the user and password created earlier.
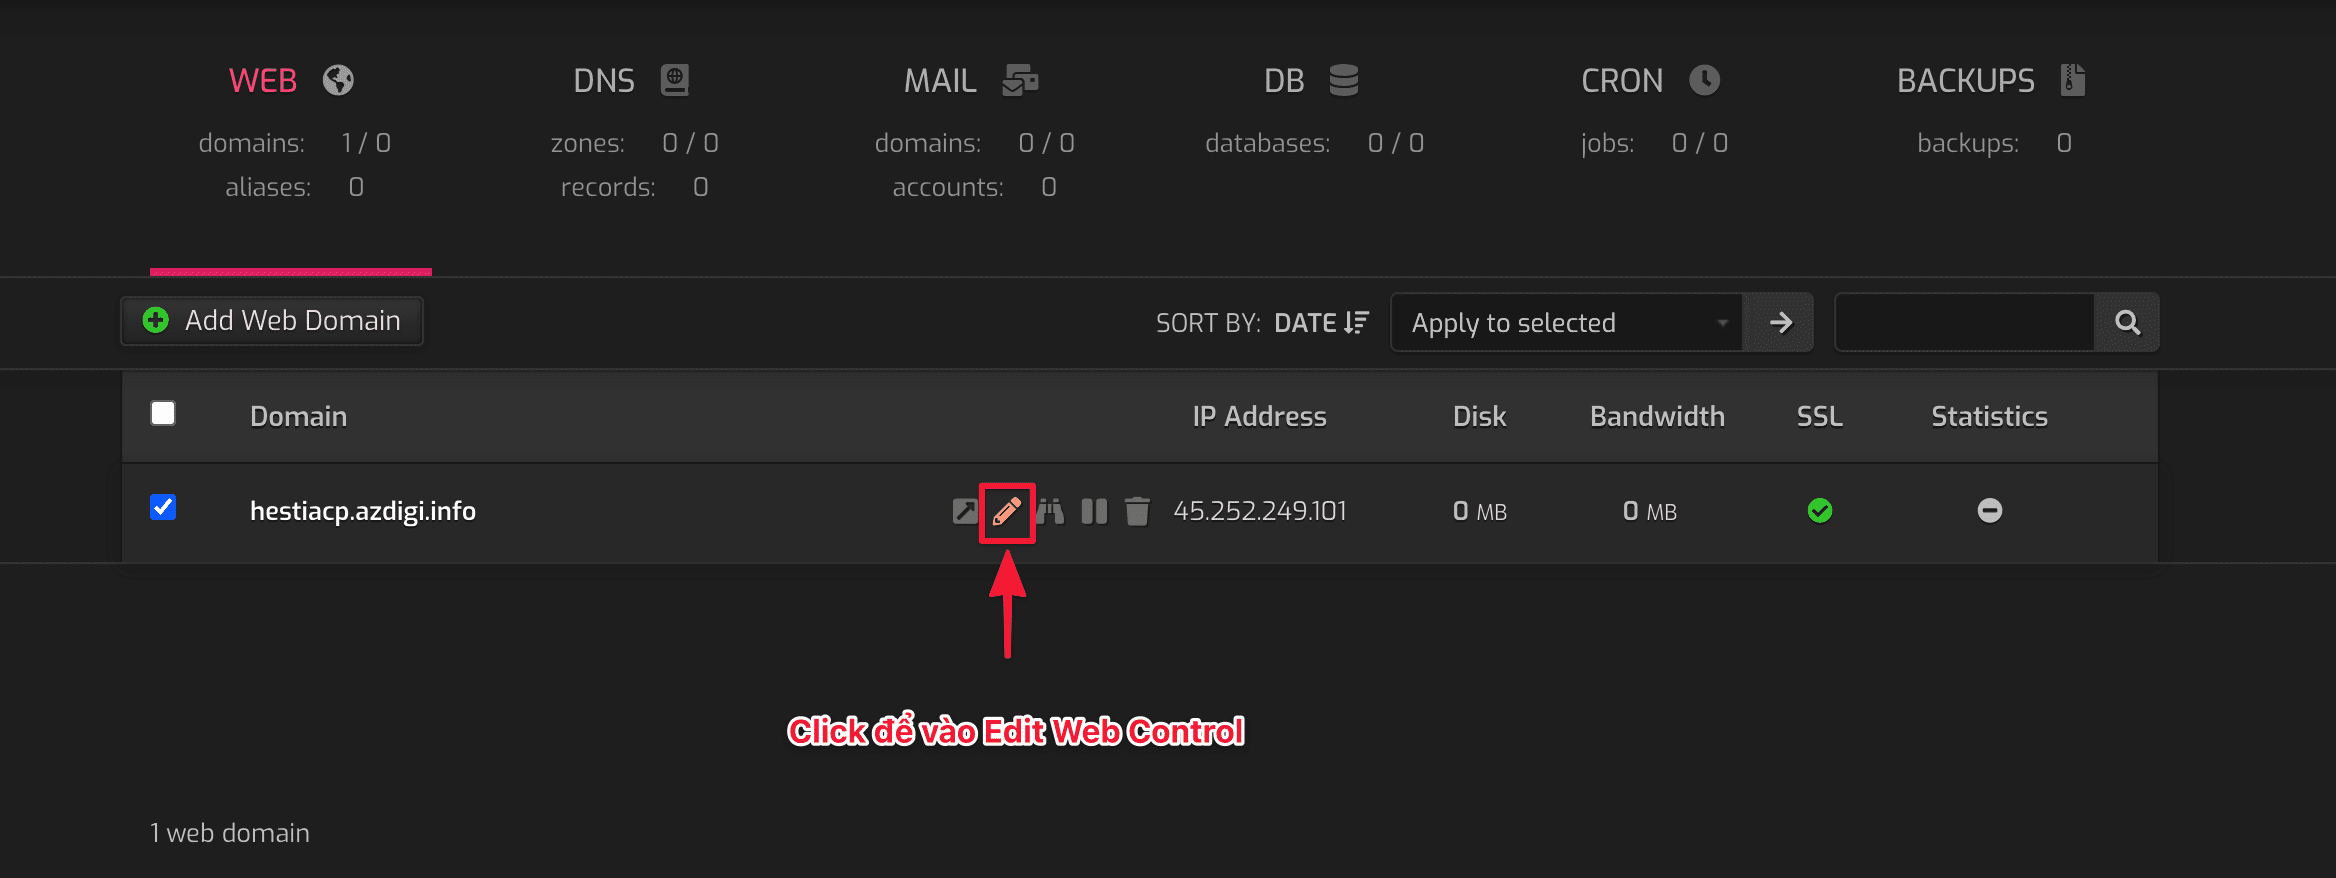
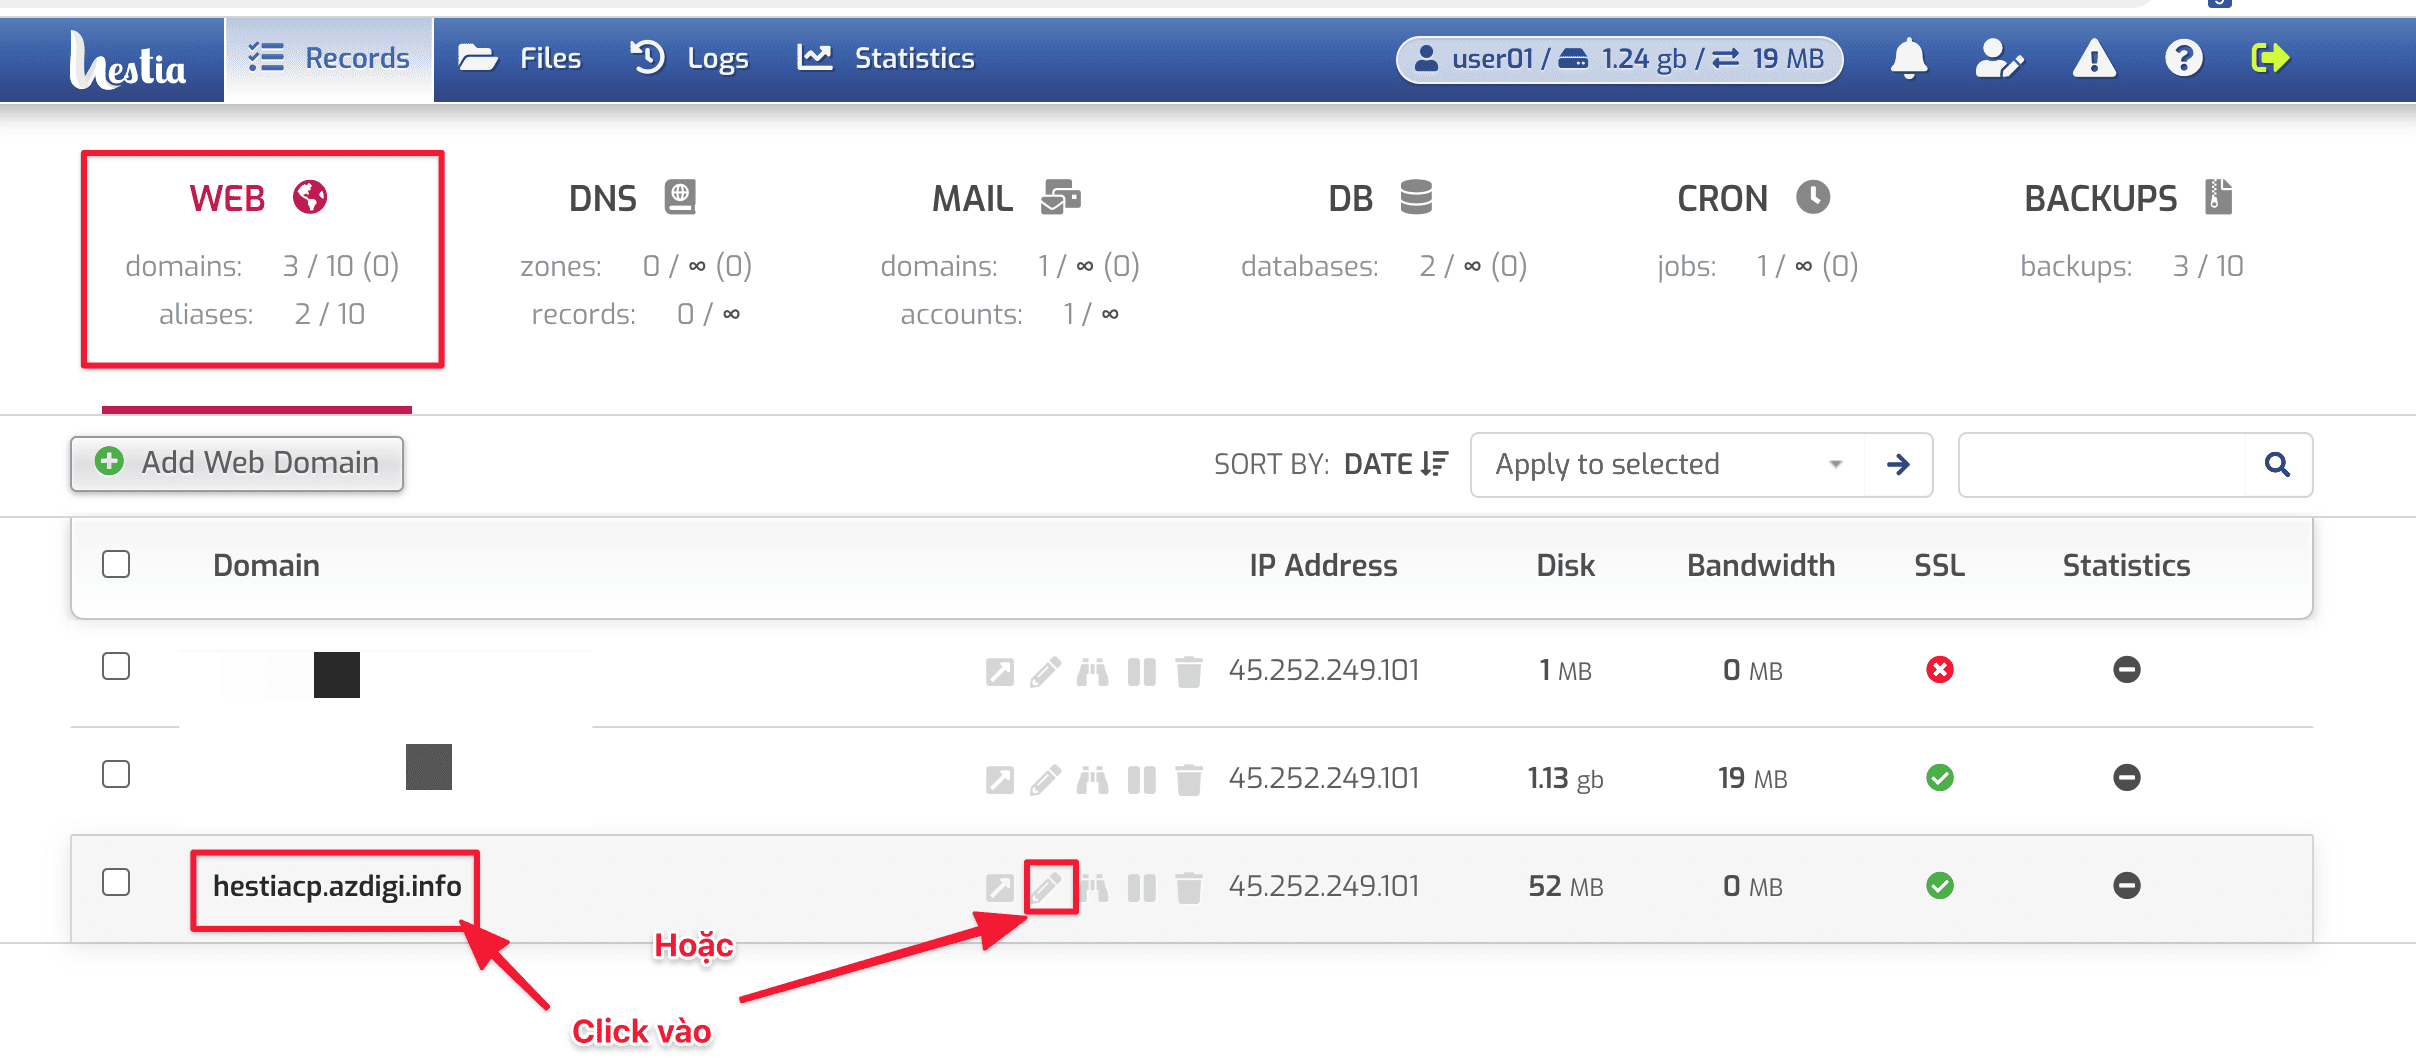
Next, click on the domain name or the “pen” icon to enter the edit interface.
Then you click Enable SSL for this domain and options as below and select Save to apply.
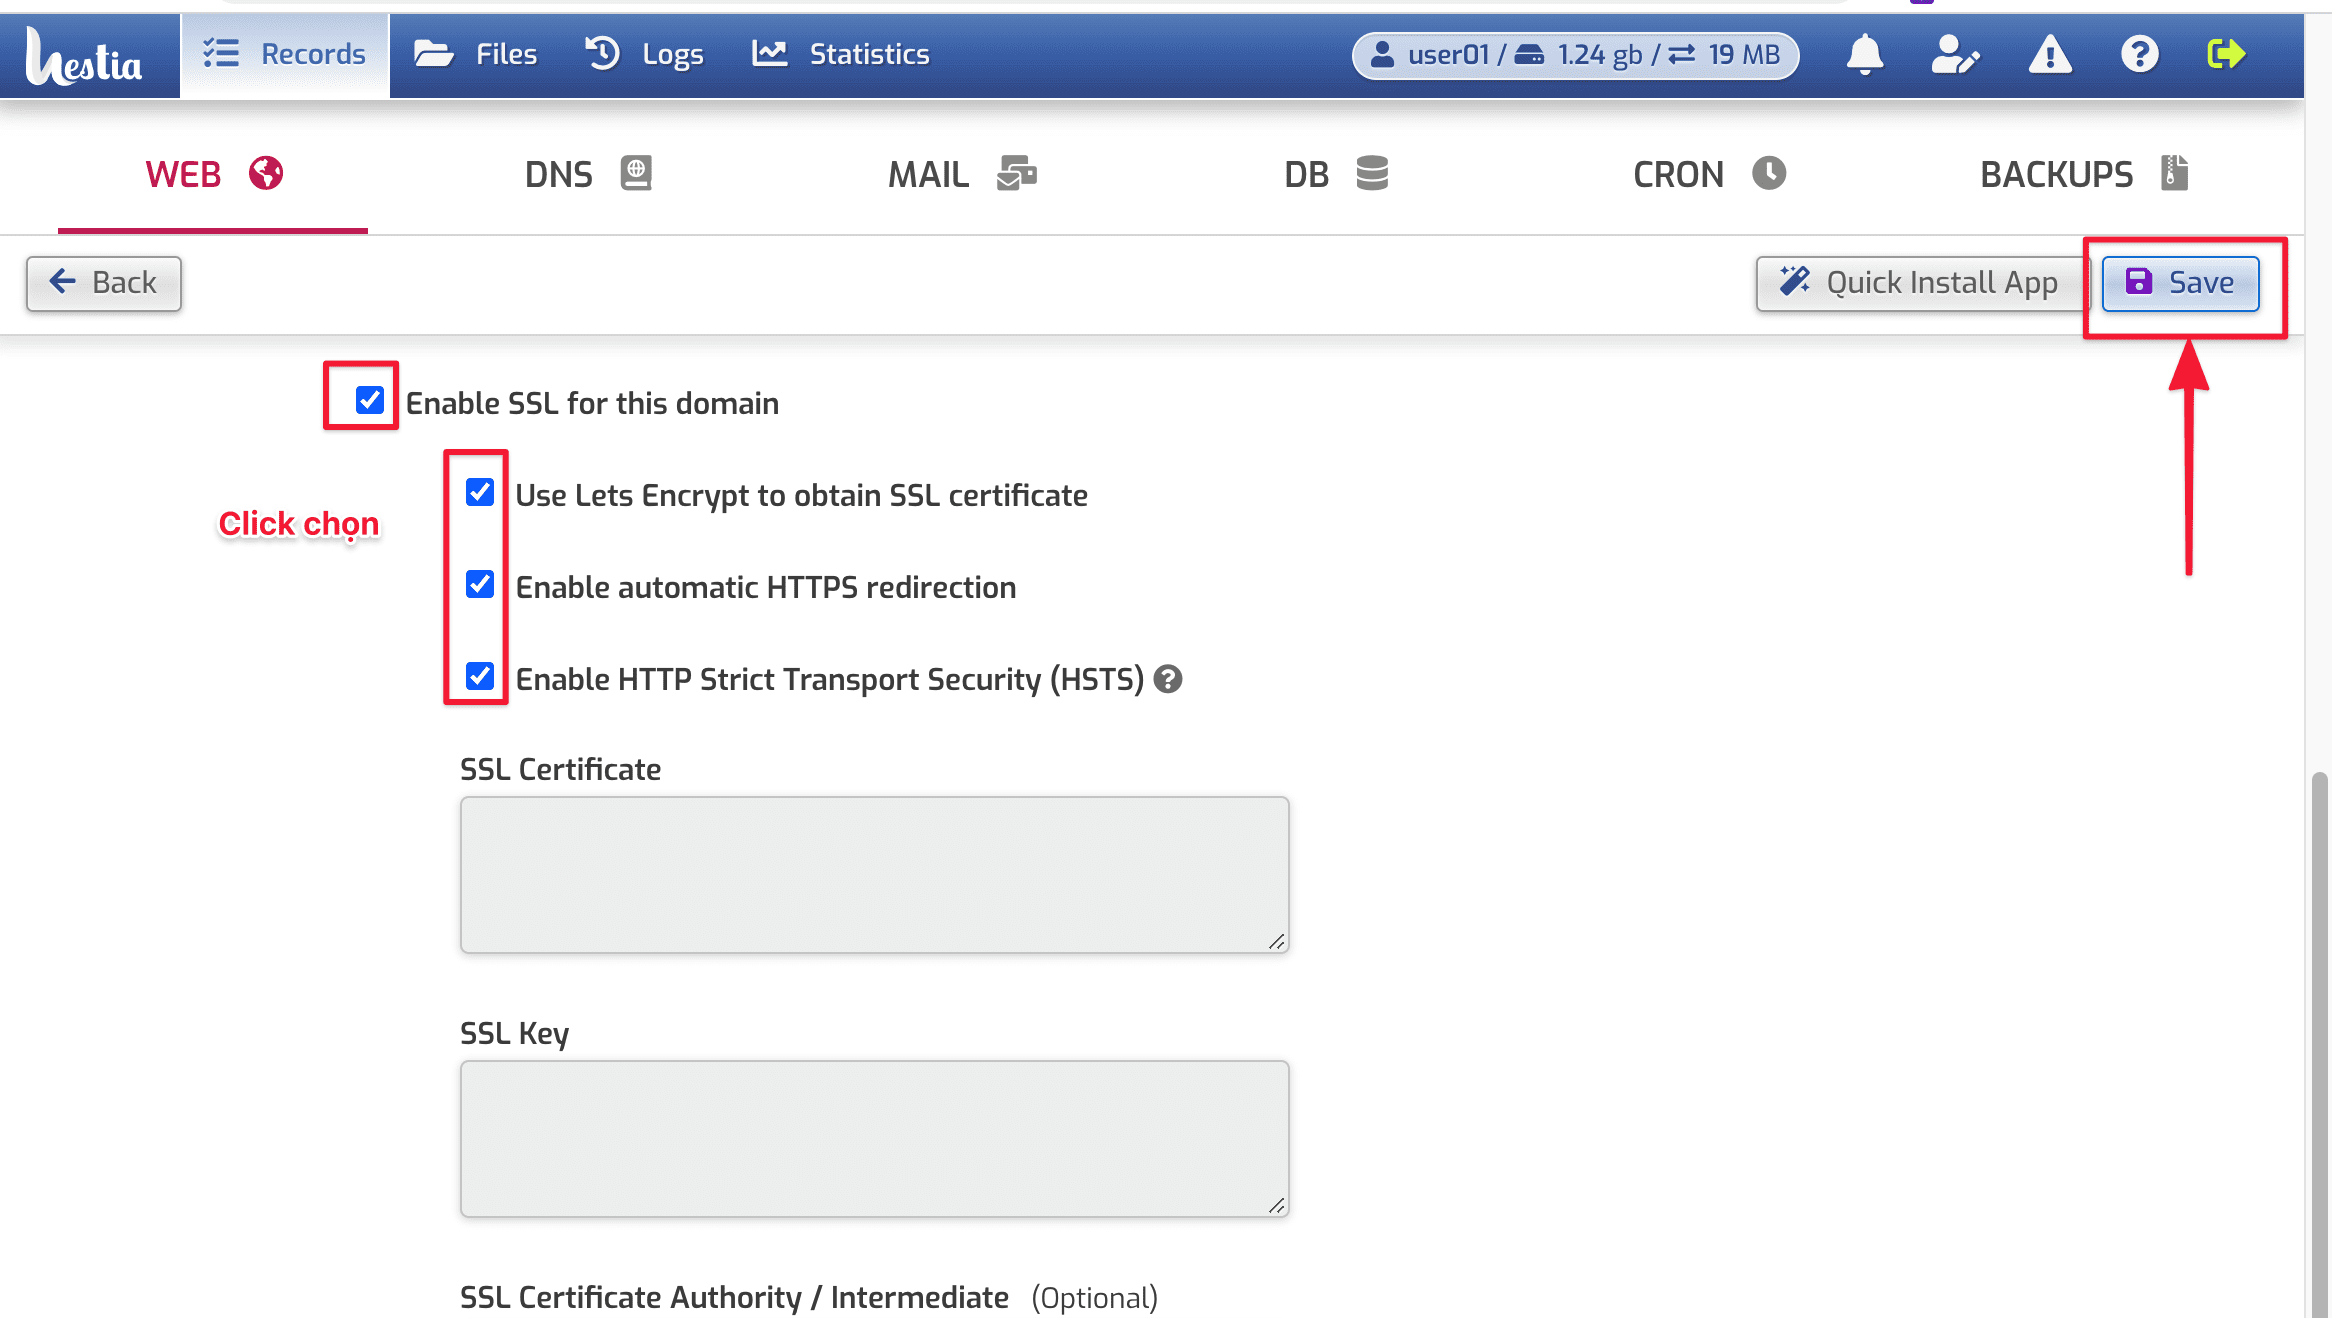
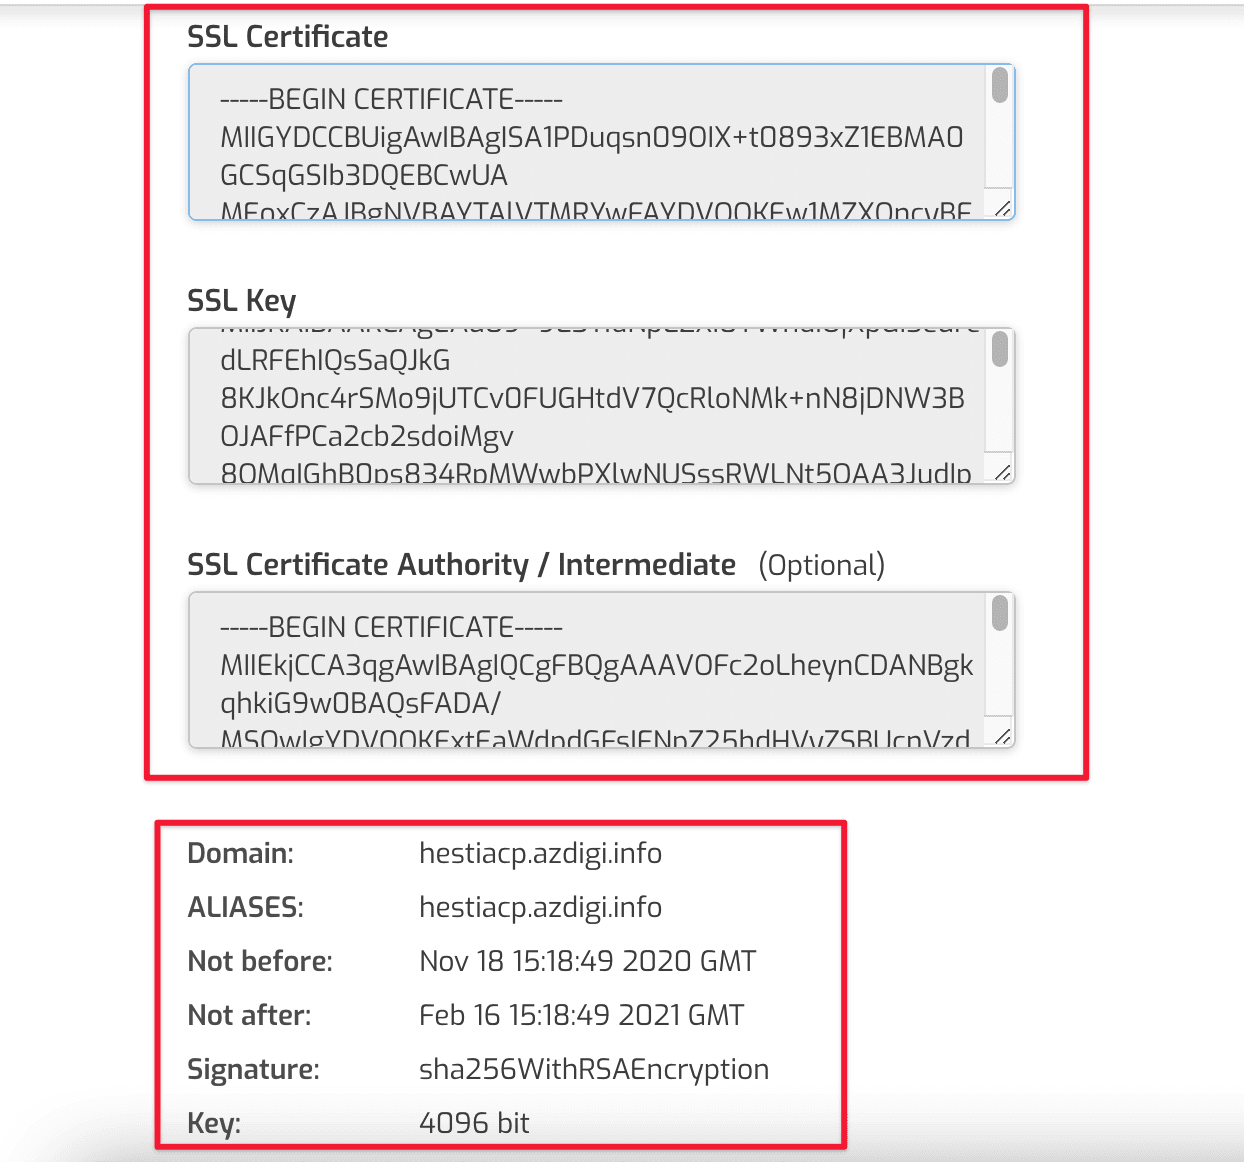
After the save is successful, you will receive the message Changes have been saved and comes with SSL information.
So you have completed the steps to install Let’s Encrypt SSL on HestiaCP.
2. Configure SSL certificates available on HestiaCP
Currently, AZDIGI provides SSL of all kinds, such as GOGETSSL, SECTIGO, DIGICERT with extremely attractive prices and supports free certificate verification with SSL DVs, you can refer to register at the following link:
Step 1: Prepare the SSL certificate file
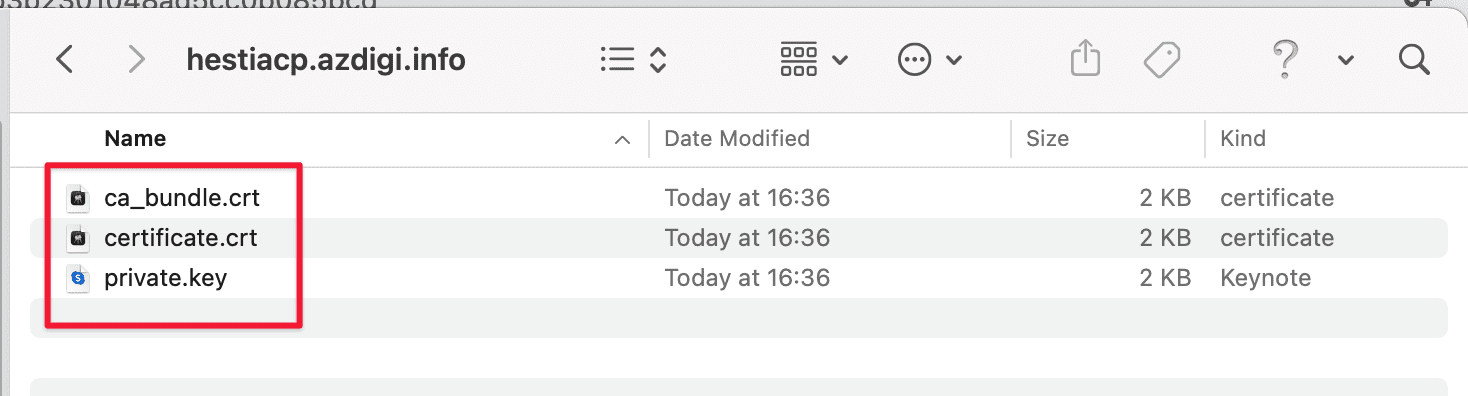
After registering for SSL, verifying and being issued SSL, you will have 3 files as below. These are the 3 necessary files that are linked together.
- Certificate: *.crt
- Private Key: *.key
- CACertificate *.crt
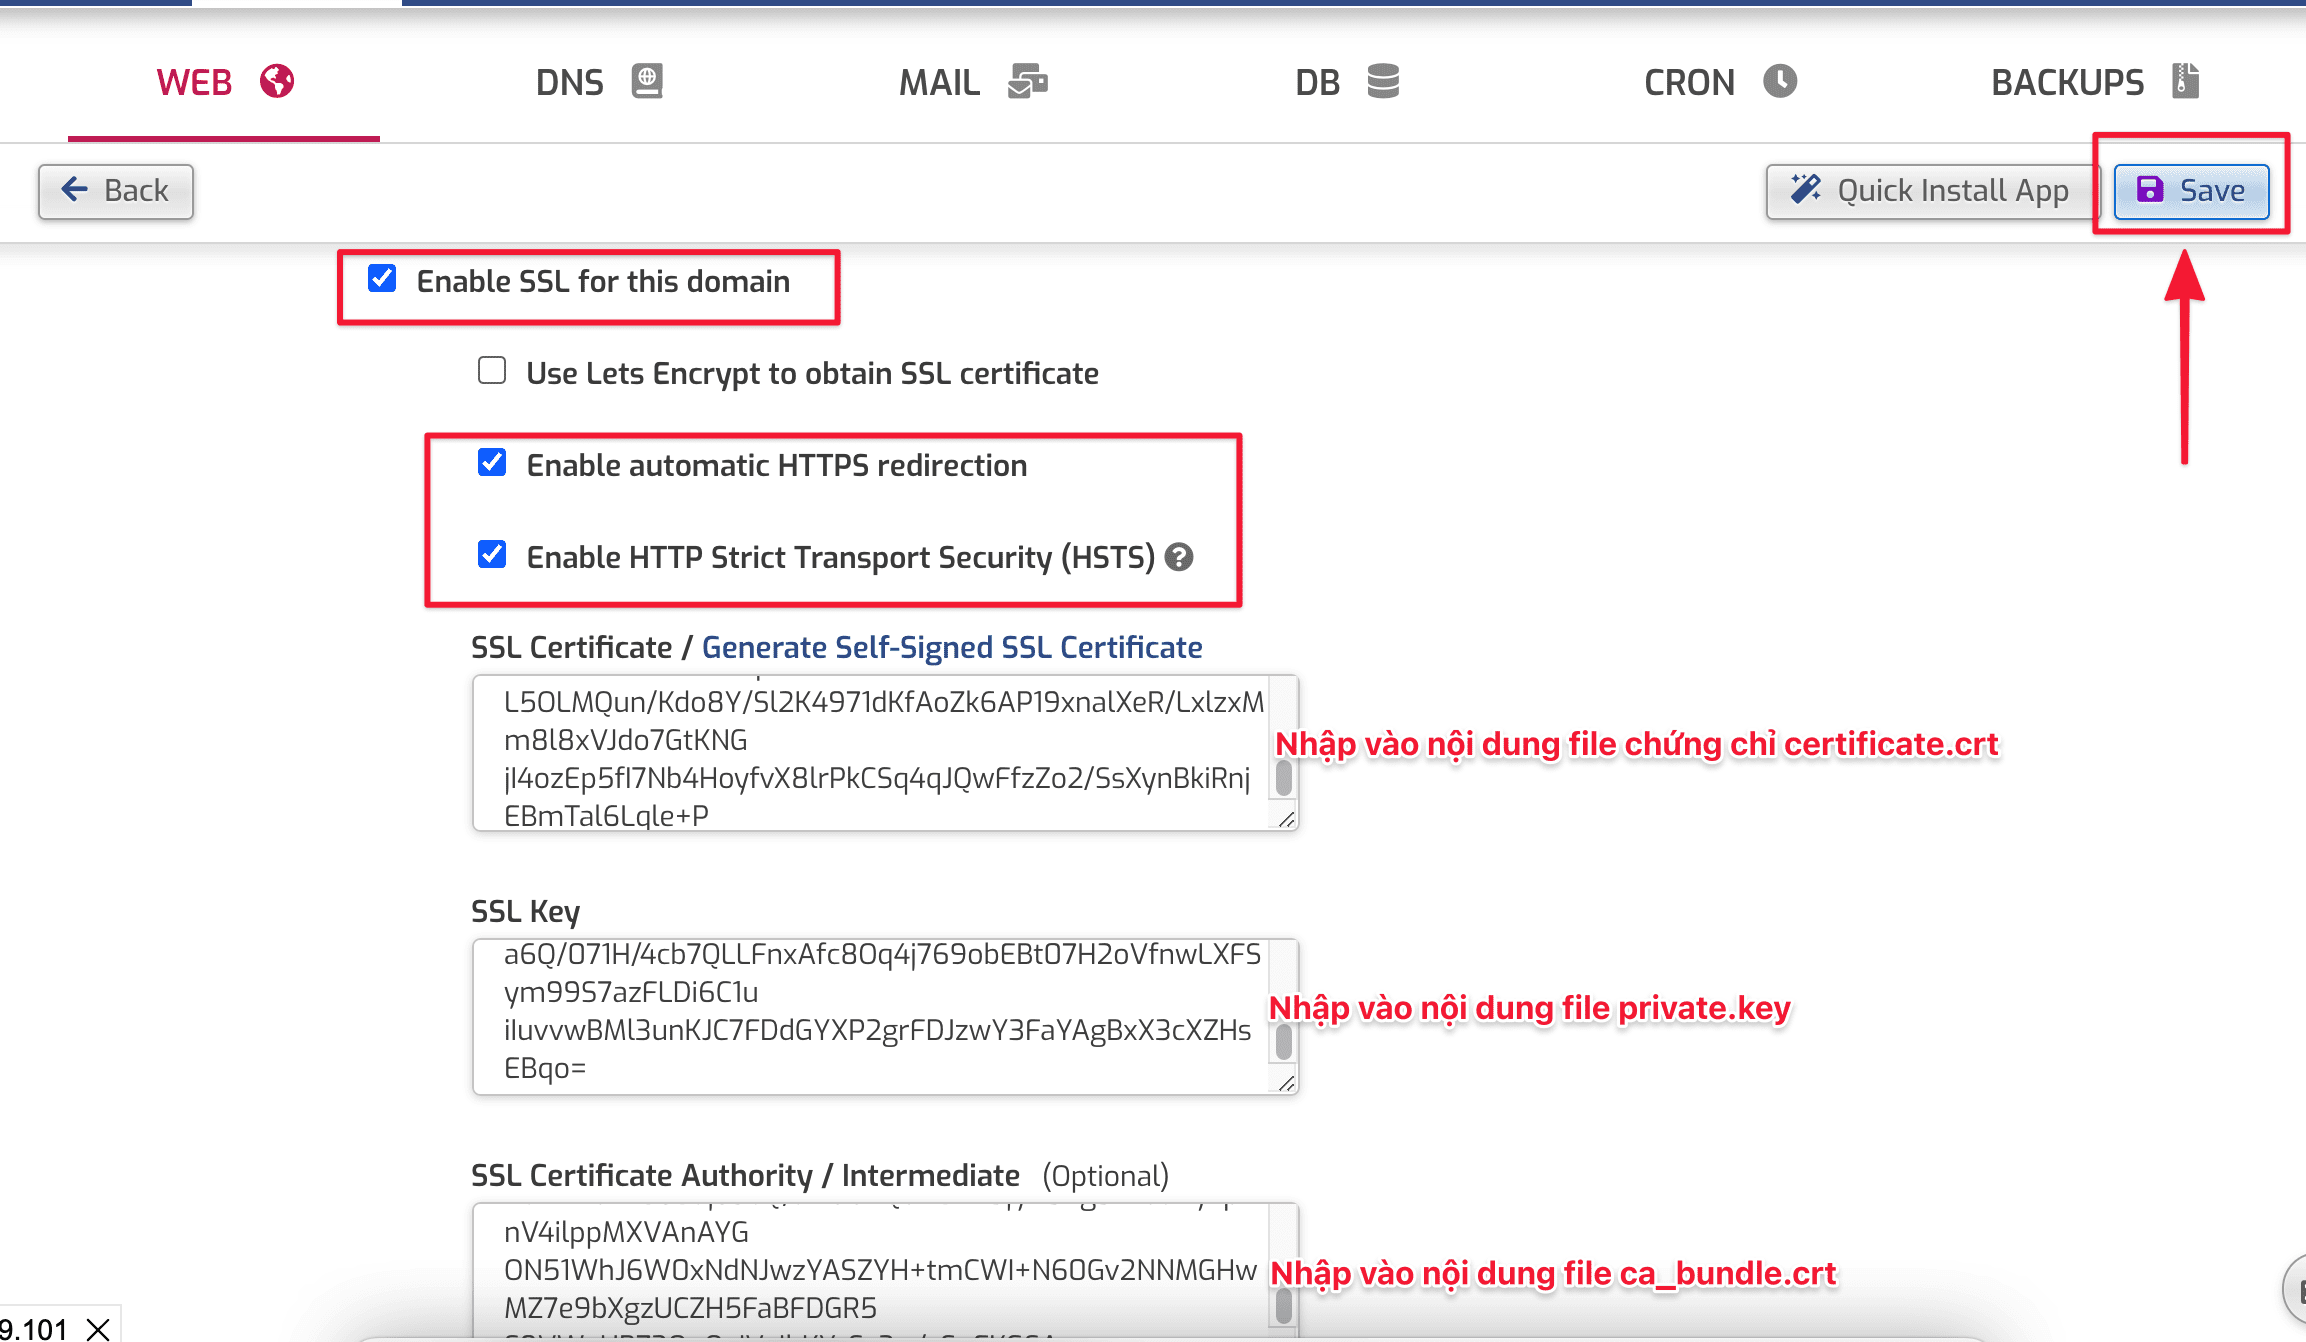
Step 2: Import the certificate to HestiaCP
You access the website editing interface, then tick the options as below and enter the content of the certificate files in the corresponding boxes Then click Save to apply.
Below is my result:

III. Summary
Hopefully, this article will bring a lot of helpful information to you so that you can install an SSL certificate for your website for higher information security.
Wishing you success!
If you need assistance, you can contact support in the ways below:
- Hotline 247: 028 888 24768 (Ext 0)
- Ticket/Email: You use the email to register for the service and send it directly to: support@azdigi.com .
About the author

Thạch Phạm
Đồng sáng lập và Giám đốc điều hành của AZDIGI. Có hơn 15 năm kinh nghiệm trong phổ biến kiến thức liên quan đến WordPress tại thachpham.com, phát triển website và phát triển hệ thống.