Install PostgreSQL on CentOS 7 with a few simple steps with AZDIGI.
I. Introduction
PostgreSQL has made its statement that they are “The World’s Most Advanced Open Source Database”. So what makes PostgreSQL so confident? Then in this article, we will learn what Postgresql is and the outstanding features that make Postgresql so powerful around the world.
What is PostgreSQL?
PostgreSQL is a general-purpose object-relational database management system, the most advanced open-source database system available today.
PostgreSQL was developed based on POSTGRES 4.2 at the Berkeley computer science department, University of California. PostgreSQL is designed to run on UNIX-like platforms. However, PostgreSQL was also dynamically adapted to run on many different platforms, such as Mac OS X, Solaris, and Windows.
PostgreSQL is free and open-source software. The software’s source code is available under the PostgreSQL license, a free open-source license. Accordingly, you will be free to use, modify, and distribute PostgreSQL in any form.
PostgreSQL does not require too much maintenance because it is highly stable. Therefore, if you develop applications based on PostgreSQL, the cost of ownership will be lower than with other data management systems.
Why should you use PostgreSQL?
PostgreSQL possesses a diverse set of features that help developers build apps, administrators protect data integrity and create a fault-tolerant environment that helps you manage data regardless of large or small data sets. Besides the free and open-source system, PostgreSQL also has great extensibility.
PostgreSQL follows the SQL standard but does not conflict with traditional features or could lead to harmful architectural decisions. Many SQL standard features are supported, but sometimes a slightly different syntax or function may be available.

Some of the various features of PostgreSQL
1. Data type
- Primitives: Integer, Number, String, Boolean
- Structure: Date/Time, Array, Range, UUID
- Document: JSON/JSONB, XML, Key-value (Hstore)
- Geometry: Point, Line, Circle, Polygon
- Customization: Composite, Custom Styles
2. Data integrity
- UNIQUE, NOT NULL
- Primary Keys
- Foreign Keys
- Exclusion constraints
- Function Locks/Explicit Locks, Recommendation Locks/Advisory Locks
Concurrent, performance
- Cataloging: B-tree, Multicolumn, Expressions, Partial
- Advanced cataloging: GiST, SP-Gist, KNN Gist, GIN, BRIN, Bloom filters
- Complex query planner/optimizer, index-only scan, multi-column statistic.
- Transactions, nested transactions (through saving points)
- Concurrent Version Control (MVCC)
- Parallel read query
- Table partition
- All transaction-independent levels defined in the SQL standard, including Serializable
- Reliability, disaster recovery
- Write-ahead Logging (WAL)
- Replication: Asynchronous, Synchronous, Logical
- Point-in-time-recovery (PITR), active standbys
- Tablespace
- Security: Authentication: GSSAPI, SSPI, LDAP, SCRAM-SHA-256, Certificate and others, Strong Access Control System, Column and Row Level Security
- Procedural Languages: PL/PGSQL, Perl, Python (and many more)
- External data wrapper: connect to other databases or streams with standard SQL interface
- Text search: Supports international character sets, e.g., through ICU collations, full-text search
To understand more about PostgreSQL, you can refer to the homepage here.
II. Implementation Guide
To install PostgreSQL on CentOS 7 you can follow these 4 steps.
Step 1: SSH into your VPS
To install PostgreSQL, we first need to SSH or access your VPS/server as root. If you don’t know how to SSH into your VPS/Server, you can refer to the following tutorial:
After successfully SSH-ing, we continue with step 2 to install PostgreSQL.
Step 2: Install PostgreSQL
When writing this article, the latest version of PostgreSQL is version 13. Before going into the installation, you can check to see if PostgreSQL Yum Repository has any other new version and can be installed the new version.
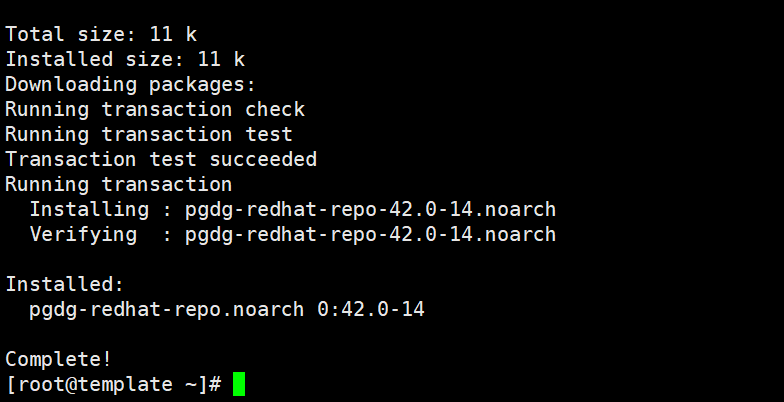
- Enable PostgreSQL repository
yum -y install https://download.postgresql.org/pub/repos/yum/reporpms/EL-7-x86_64/pgdg-redhat-repo-latest.noarch.rpm
- Install PostgreSQL
After enabling the repository, run the following command to install PostgreSQL:
yum -y install postgresql13 postgresql13-server

- Database Initialization
To initialize the PostgreSQL database, run the following command:
/usr/pgsql-13/bin/postgresql-13-setup initdb

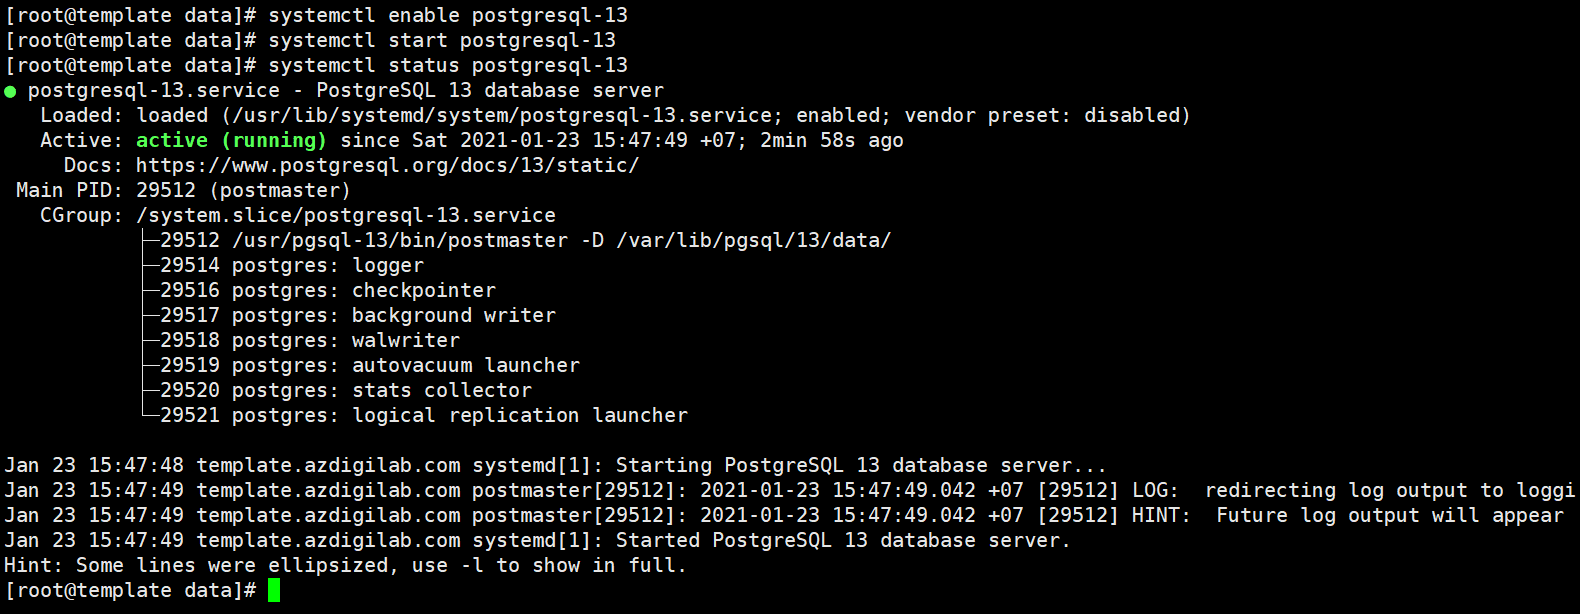
- Start PostgreSQL
systemctl enable postgresql-13     (Khởi động PostgreSQL cùng hệ thống)
systemctl start postgresql-13      (Khởi động PostgreSQL )
systemctl status postgresql-13     (Trạng thái PostgreSQL )
Step 3: PostgreSQL Roles and Authentication Methods
Database access in PostgreSQL is handled with the concept of Roles. A Role can represent a user or a group of users.
PostgreSQL supports multiple authentication methods. The most commonly used methods are:
- Trust – With this method, the Role can connect without a password as long as the criteria defined in pg_hba.conf are met.
- Password – A Role can connect by providing a password. Passwords can be stored as scram-sha-256, md5 or unencrypted text.
- Ident – This method is only supported on TCP/IP connections. It works by getting the client OS username, with optional username mapping.
- Peer – Similar to Ident, but it only supports local connections.
PostgreSQL application authentication is defined in a configuration file named pg_hba.conf. By default, for local connections, PostgreSQL will use the Peer authentication method.
The postgres user is automatically created when you install PostgreSQL. This user is the superuser of PostgreSQL and it is equivalent to the root user in MySQL.
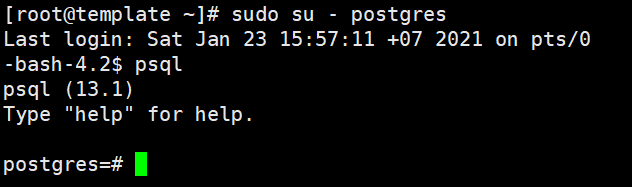
To login to the PostgreSQL server as a postgres user, you first need to switch to postgres user and then access the PostgreSQL prompt using the psql utility:
sudo su - postgres
psql
You can also access PostgreSQL without switching users with the sudo command:
sudo -u postgres psql
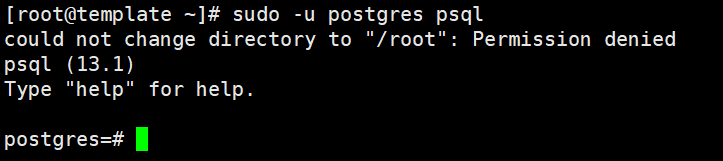
The postgres user is normally only used with local connections and a password should not be set for this user.
Step 4: Create the PostgreSQL Role and Database
Only superusers and users with CREATEROLE privilege can create new Roles.
For example, we will create a new Role named kythuat and a database named kythuat_data and then grant privileges to the database.
- Connect to Shell PostgreSQL
sudo -u postgres psql
- Create a new PostgreSQL Role
The following command will create a new Role named kythuat:
create role kythuat;

- Create a new PostgreSQL database
Create a new database named kythuat_data with the createdb command:
create database kythuat_data;

- Grant permission
To grant permission to user kythuat on the database kythuat_data created in the previous step, run the following query:
grant all privileges on database kythuat_data to kythuat;

III. Summary
So in this article, AZDIGI showed you how to install PostgreSQL on CenOS 7 quickly to experience the most powerful open-source database management software available today.
If you find the article helpful, please share it widely. In addition, you can refer to some other articles on Linux knowledge at the link below:
If you need assistance, you can contact support in the ways below:
- Hotline 247: 028 888 24768 (Ext 0)
- Ticket/Email: You use the email to register for the service and send it directly to: support@azdigi.com
About the author

Thạch Phạm
Đồng sáng lập và Giám đốc điều hành của AZDIGI. Có hơn 15 năm kinh nghiệm trong phổ biến kiến thức liên quan đến WordPress tại thachpham.com, phát triển website và phát triển hệ thống.