How to configure Static IP on Ubuntu for newbie
Hi guys, Welcome back to the documentation library at AZDIGI. In today’s article, AZDIGI will share with you how to configure Static IP on Ubuntu, including the Ubuntu server and Ubuntu Desktop. If you are used to configuring with Windows or have configured through servers running RHEL/CentOS, then for Ubuntu, the configuration will be completely different, the configuration files and executable commands are different.
Therefore, I have written this article hoping that it will help you configure it quickly and successfully. With Ubuntu, we will configure it via Netplan. So what is Netplan? Let’s find out together before doing the configuration.

What is Netplan?
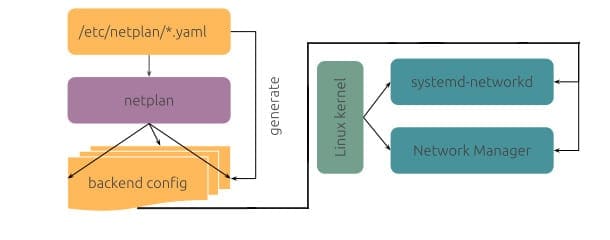
Since the release of version 17.10, Netplan has been the default network management tool on Ubuntu instead of theinterface configuration file at /etc/network/interface as before.
Netplan is used to configure the YAML syntax and to configure the network with Netplan, you need to create a YAML configuration file corresponding to the network card you use. Netplan currently supports 2 renderers, NetworkManager and Systemd-networkd. NetworkManager is mainly used on desktops and Systemd-networkd is used on servers without GUI.
In this article, AZDIGI will guide you through configuring on Ubuntu Server and Ubuntu Desktop, So let’s follow and do it with AZDIGI!
Configuration on Ubuntu Server
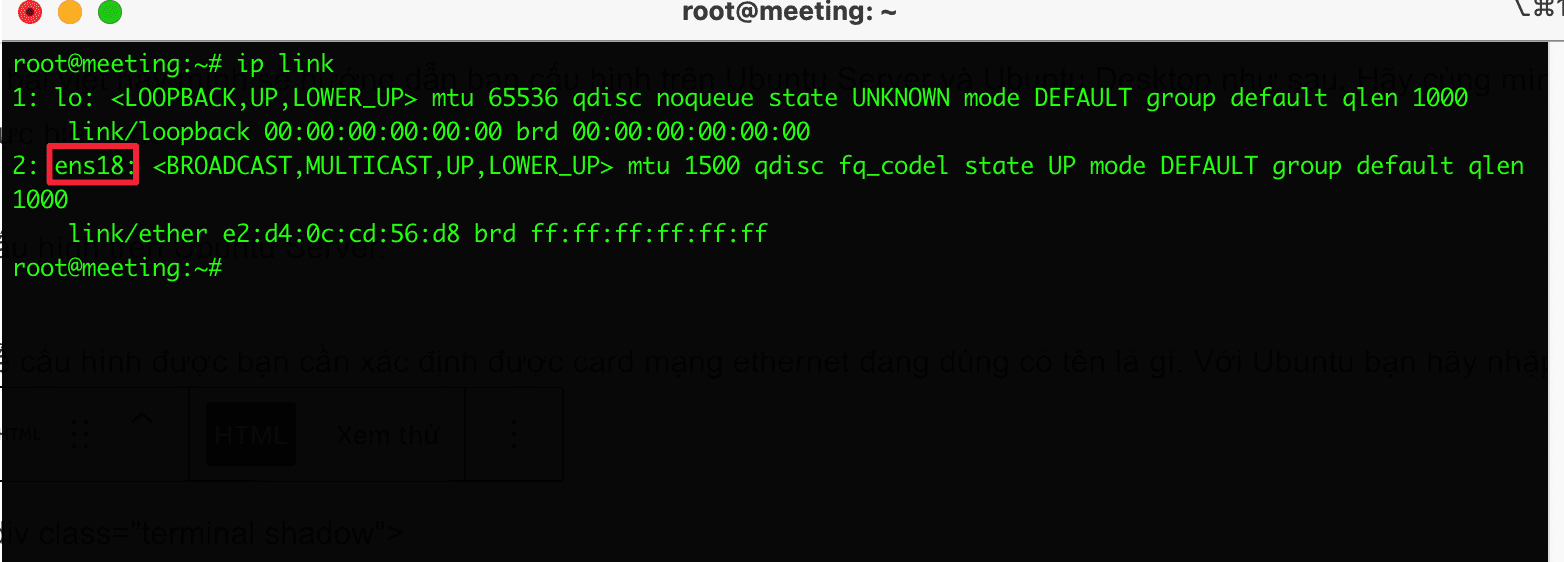
To configure, you need to determine the name of your ethernet network card. With Ubuntu, enter the ip link command to check.
ip link
At this point, the system will print out the network card information. As shown below, I have a Lookpack card and the main card is ens18.
Now open the configuration file to start configuring the IP. The netplan configuration files will be in the /etc/netplan path and the files with the extension will be .yaml.
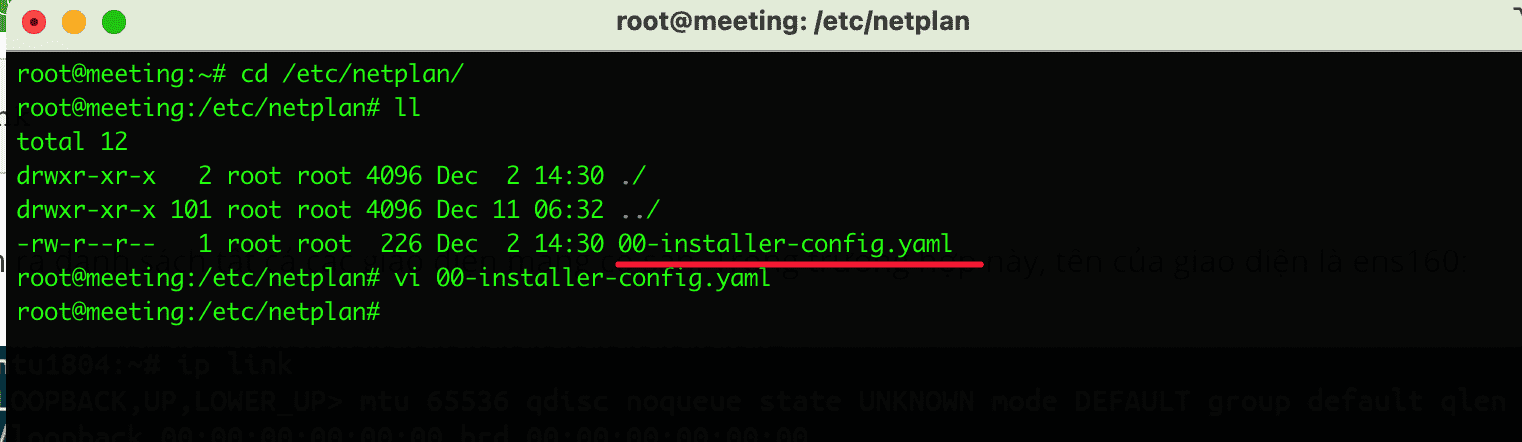
My configuration file is 00-installer-config.yaml, use vi editor to edit the vi 00-installer-config.yaml file.
What you need to know in this configuration file is that each Netplan file will start with the keyword network and have at least 2 required elements that are.
- version: Version parameter of the network
- device type: Can be ethernets, bonds, bridges, or vlans
Below is my entire configuration in the file with comments on each line following the # symbol.
# This is the network config written by 'subiquity'
network:
  ethernets:
    ens18: #Tên card mạng
      addresses:
      - 45.252.249.114/22 #Địa chỉ IP và Netmask của IP
      gateway4: 45.252.248.1 #Địa chỉ gateway
      nameservers:
        addresses:
        - 8.8.8.8 #Nameserver
  version: 2 #Phiên bản network
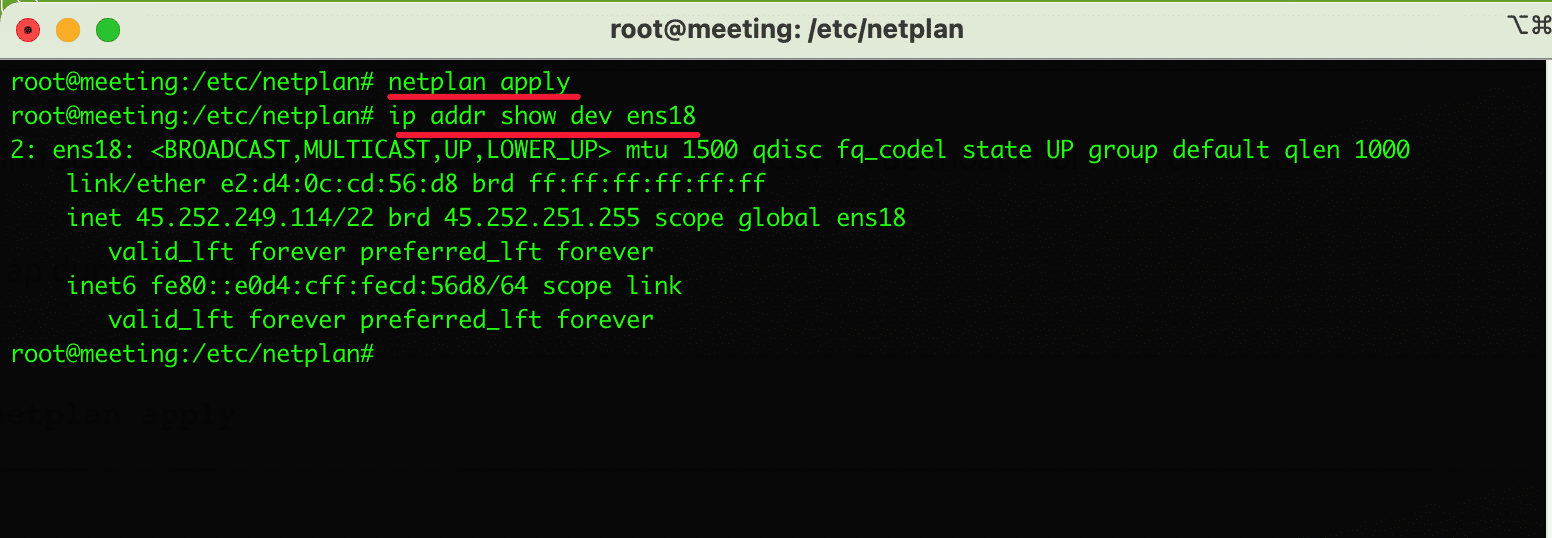
After the configuration file adjustment is complete, enter the following command to apply the change and verify the change.:
netplan apply
ip addr show dev
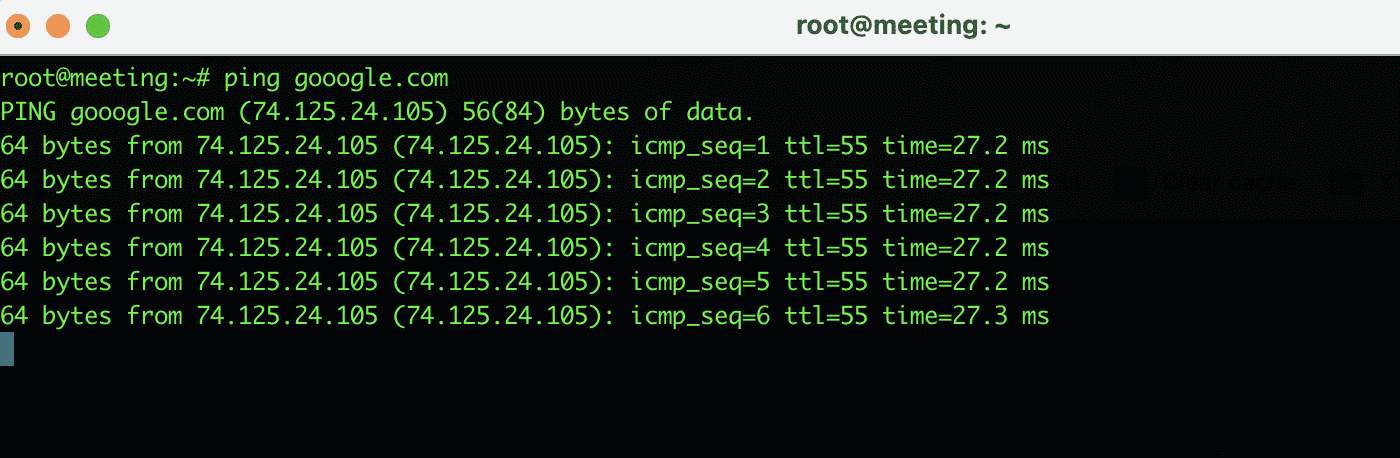
To check if there is a network, I do a Ping to the internet. Here I PING to google.com and the result was successful.
Configuration on Ubuntu Desktop
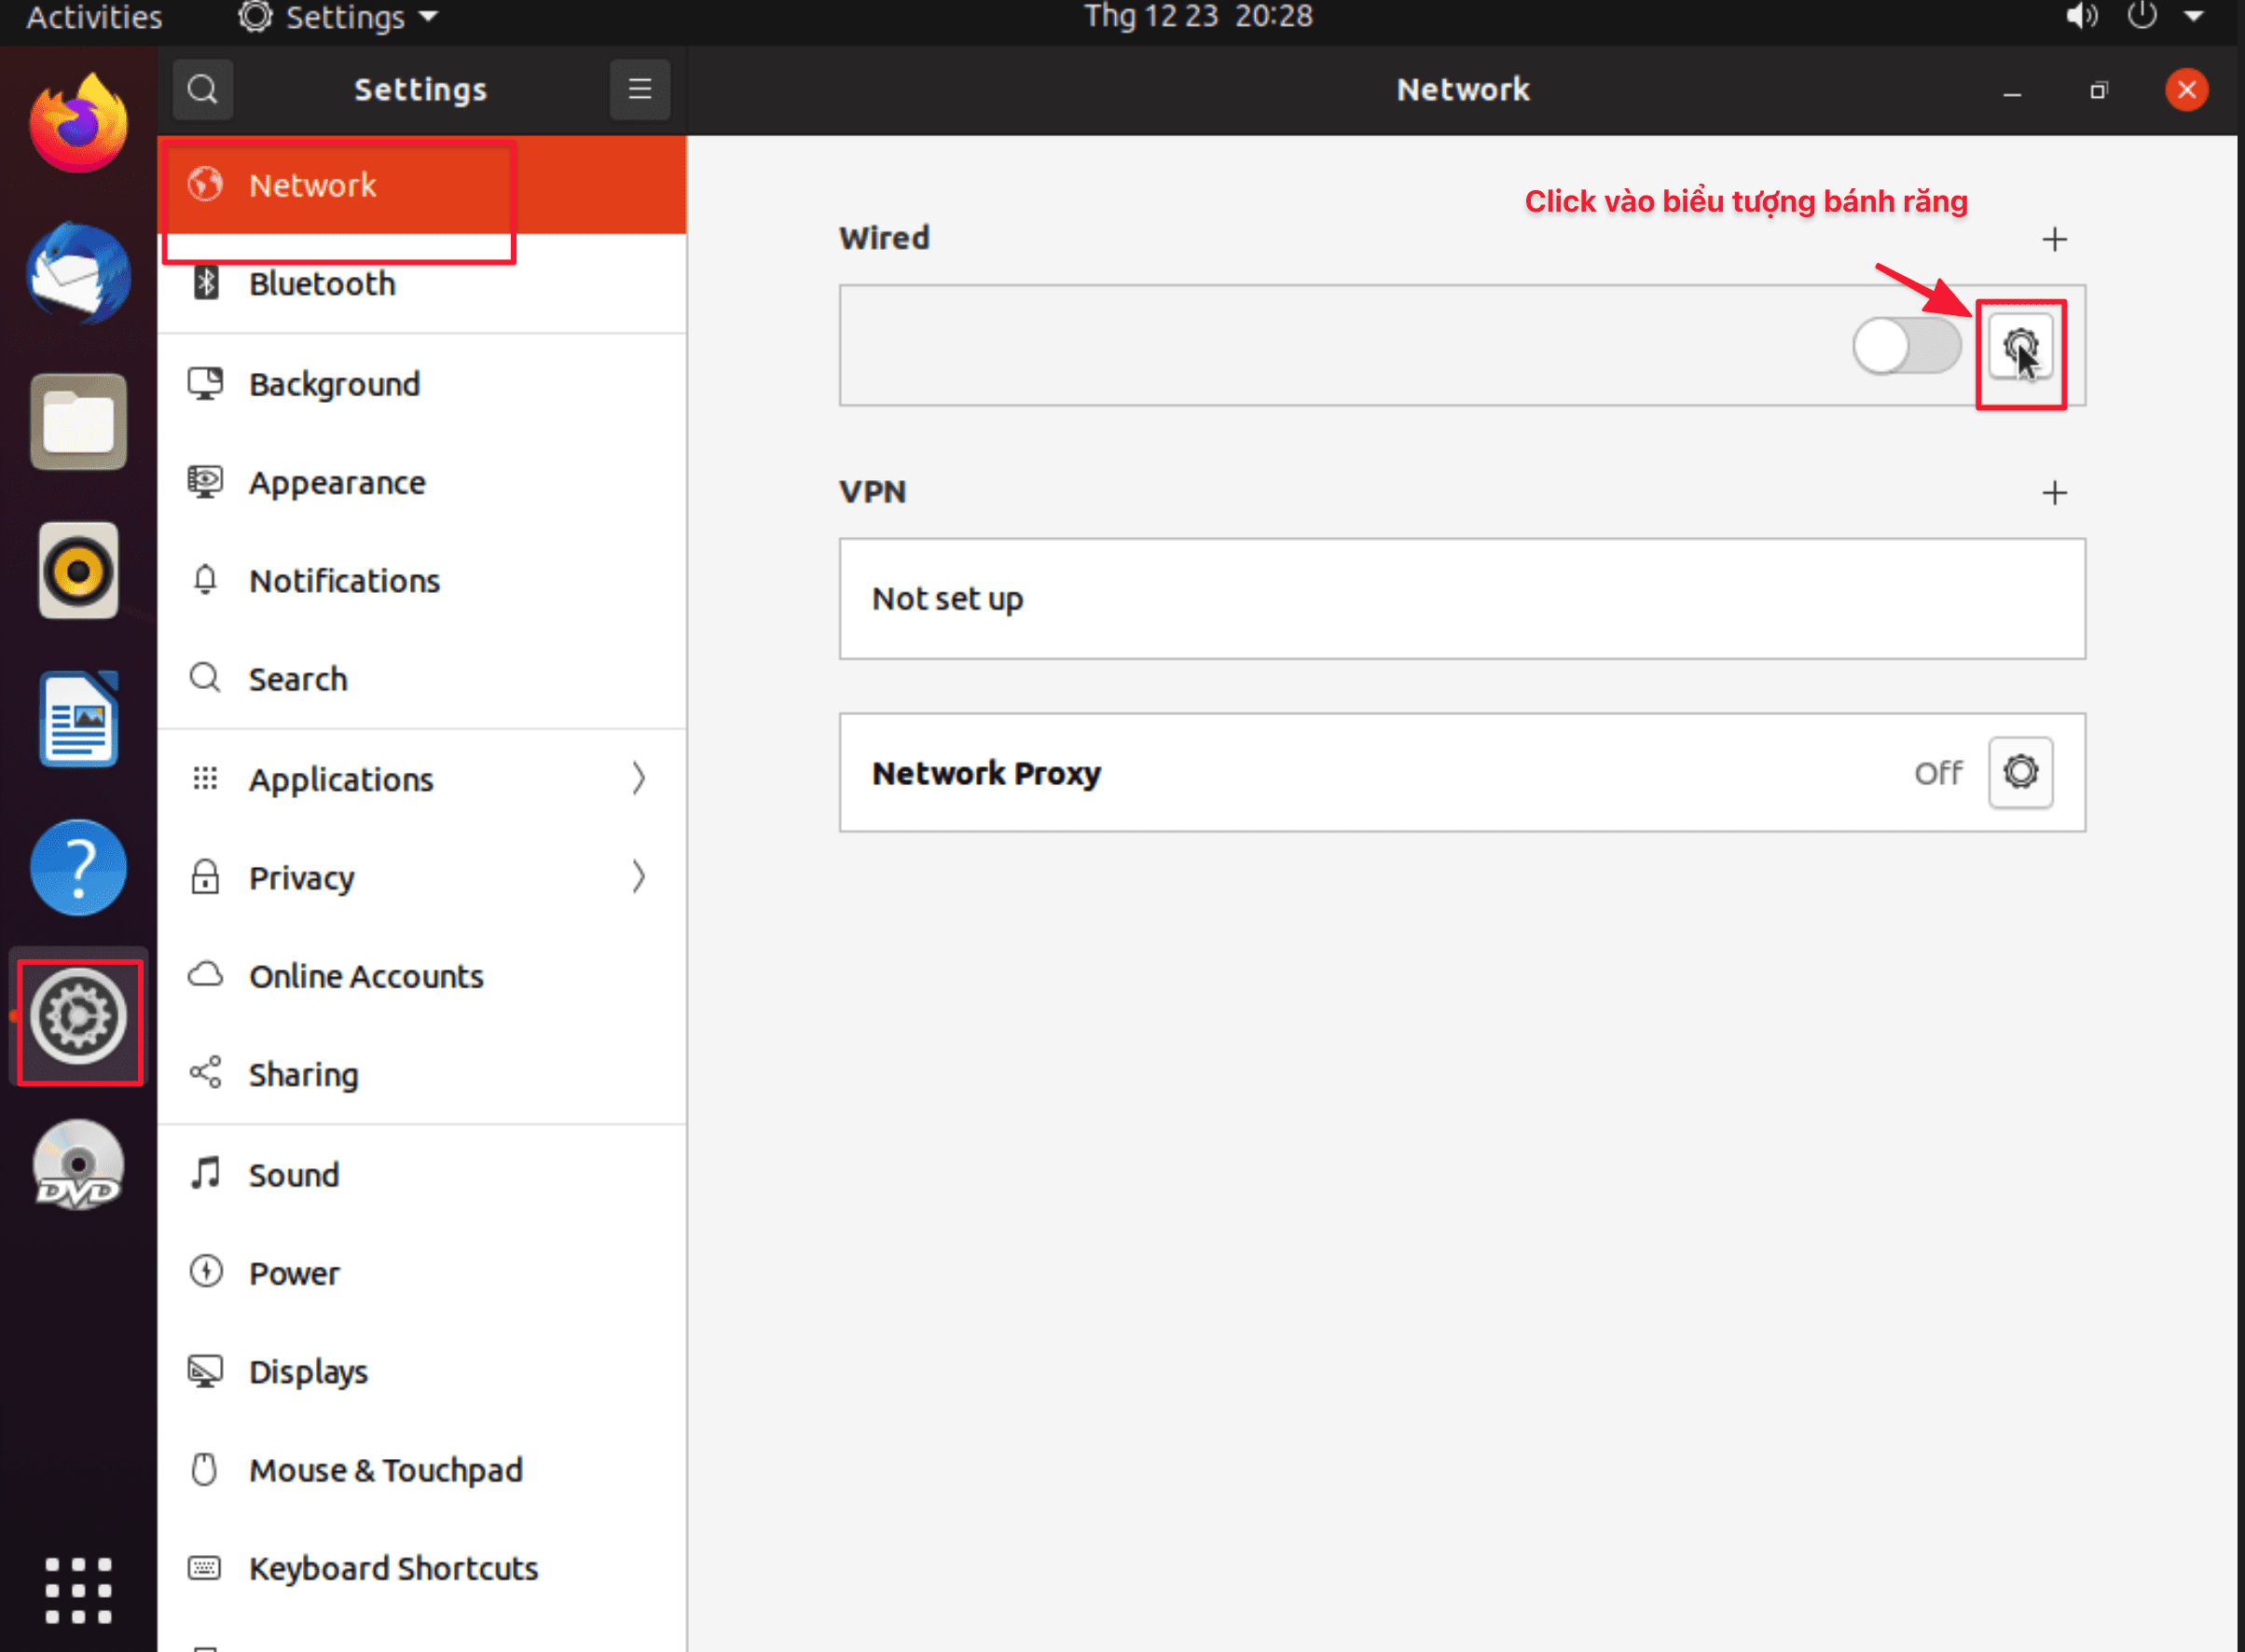
Ubuntu Desktop has an intuitive interface; To configure, follow the steps below.
First, go to Settings => select Network => click on the Gear icon to set up the network configuration.
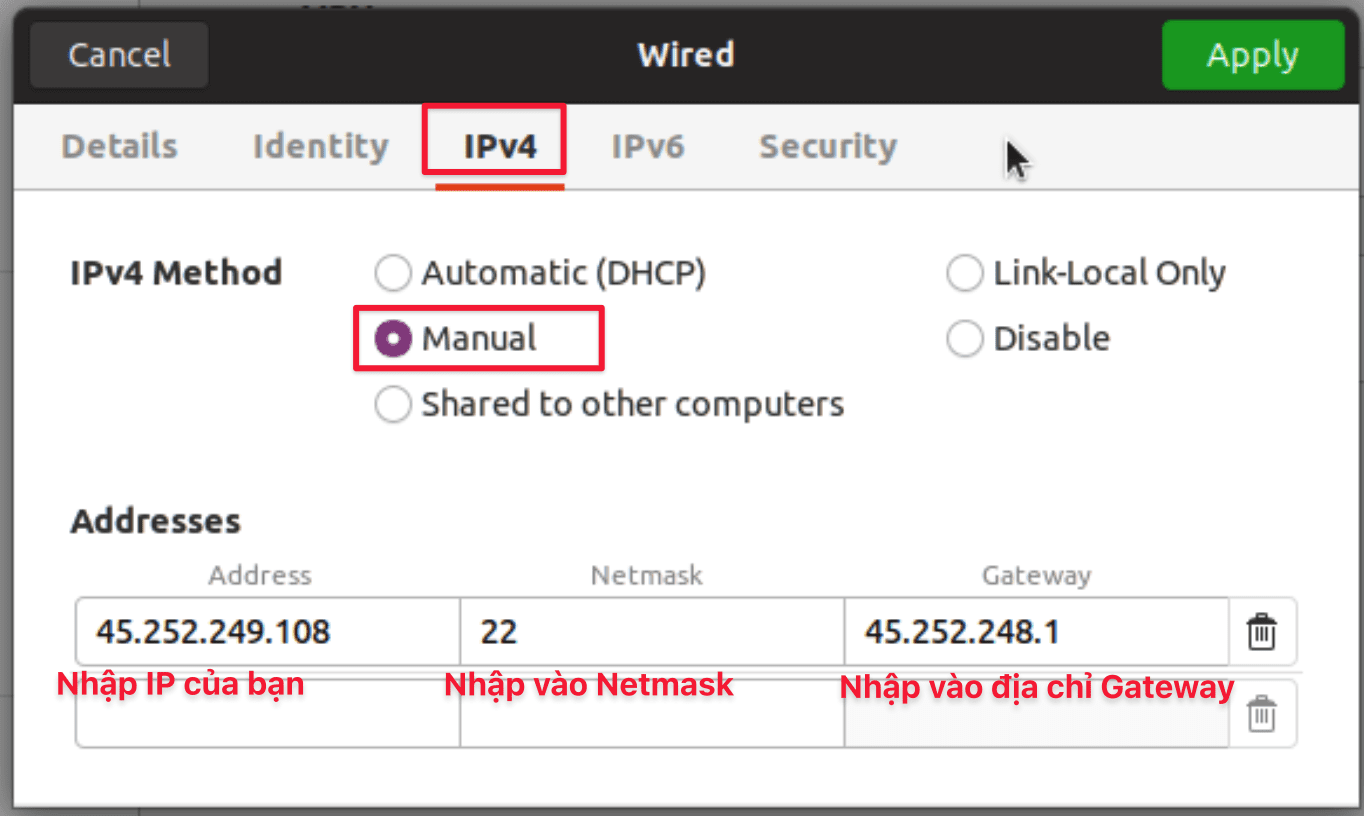
Next, select the IPv4 tab => Manual and configure the Address frame.
- Address: Please enter your IP.
- Netmask: Please enter the Netmask address (if you do not know your netmask address, you can visit the link http://jodies.de/ to check)
- Gateway: Enter your Gateway address.
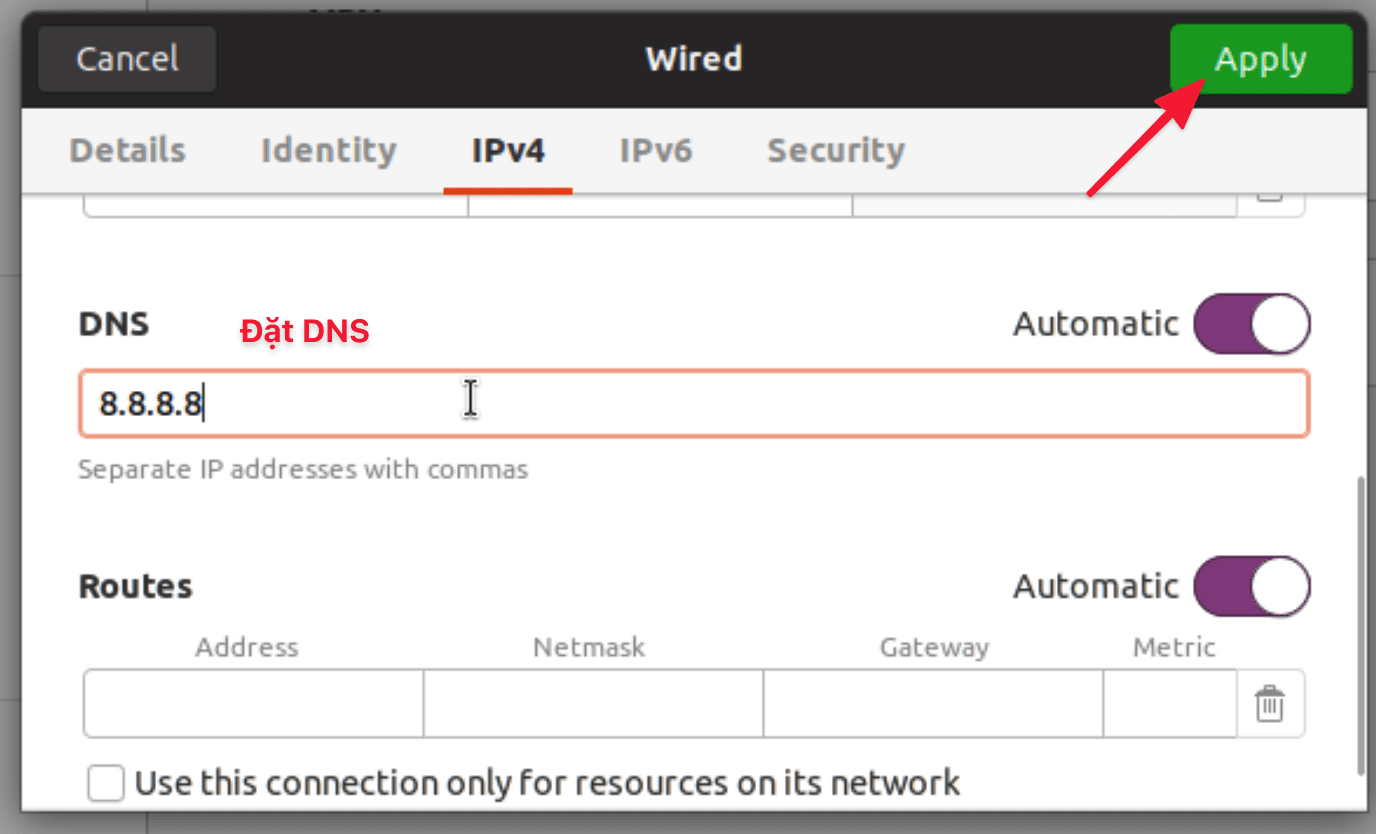
Then you scroll down to the bottom and configure DNS, here I configure Google DNS as 8.8.8.8. If you configure more DNS ranges, use commas “,” and add it. For example, 8.8.8.8, 1.1.1.1. After successfully entering, click Apply to apply the changes.
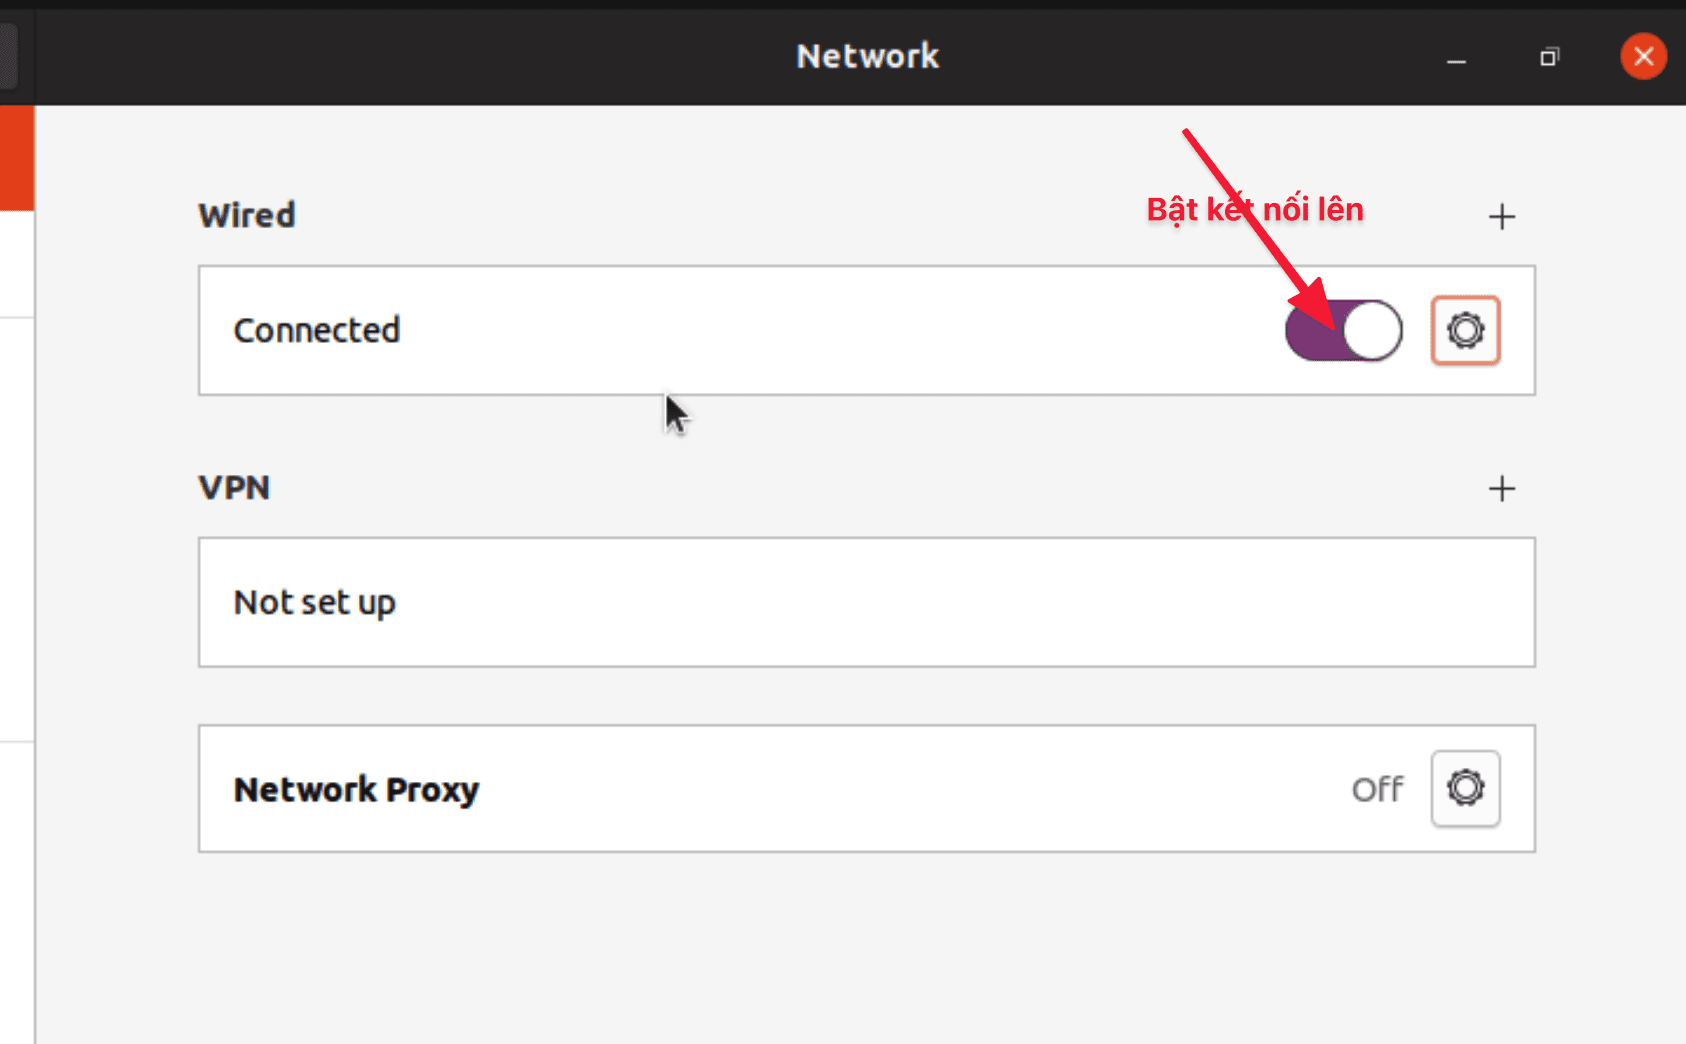
Now turn on the connection by clicking the button below to turn it off/on.
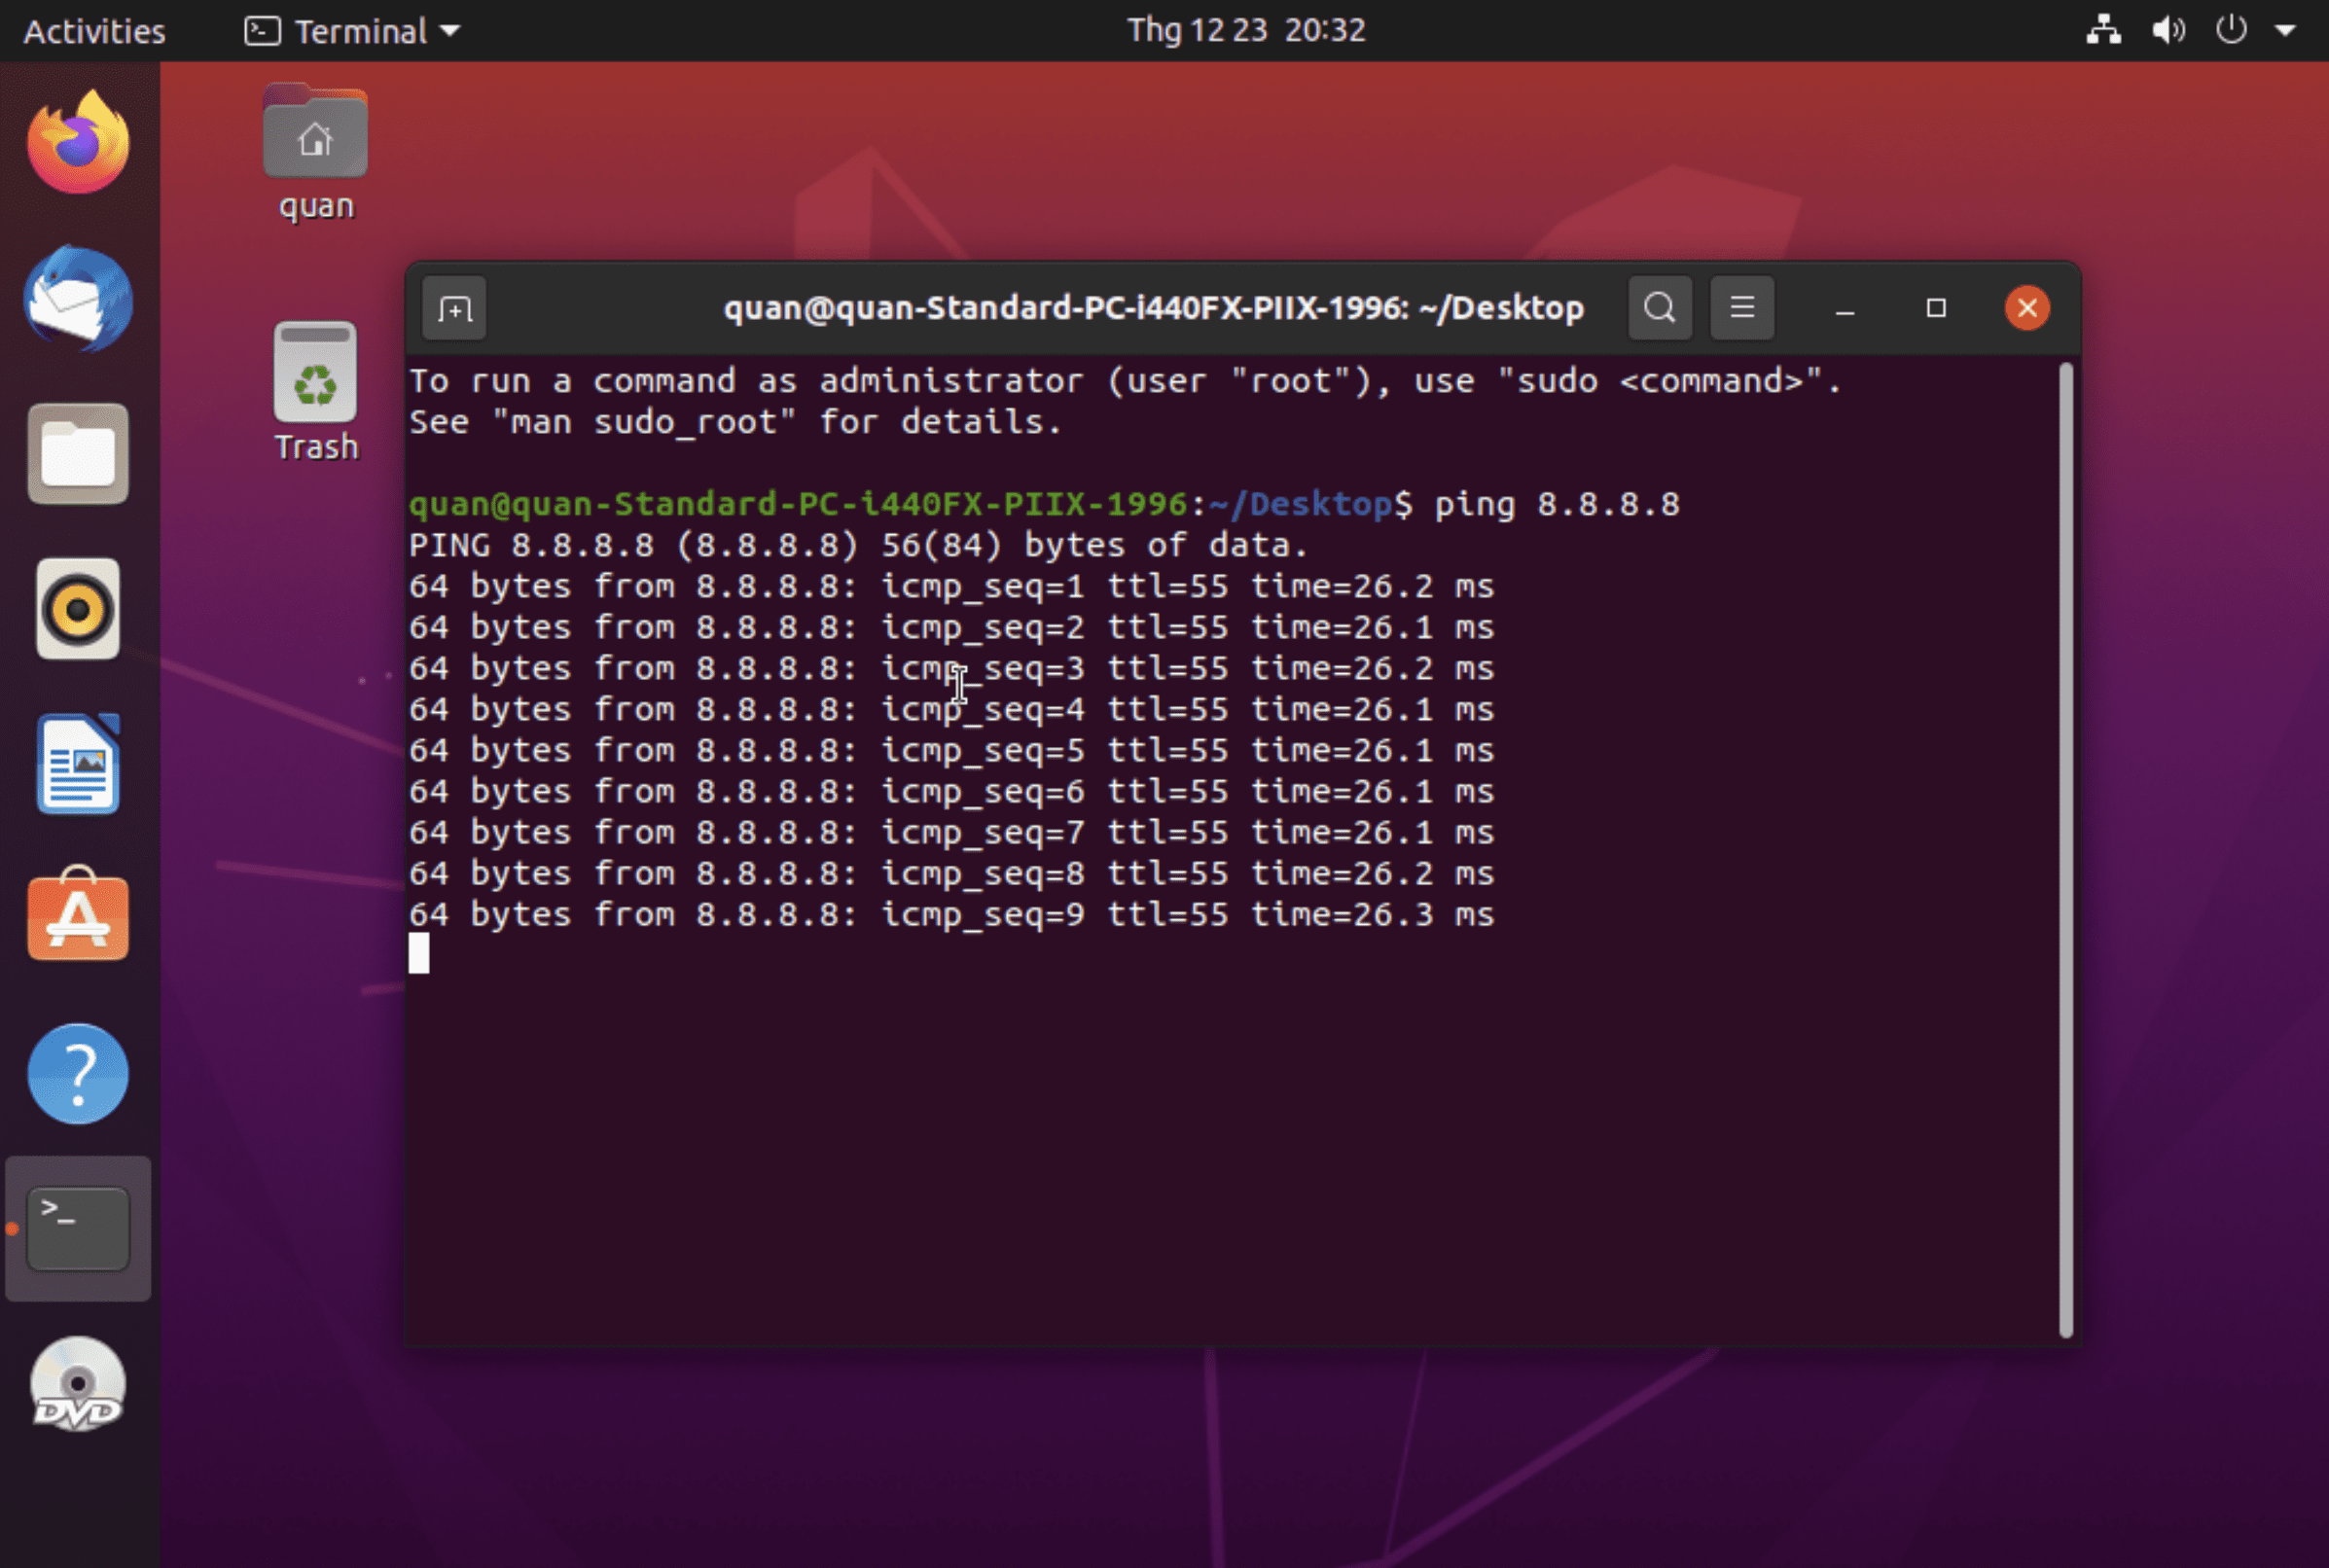
To check if the device has successfully configured the network, I will open the Terminal window and PING out. I performed PING 8.8.8.8 and the result was received successfully.
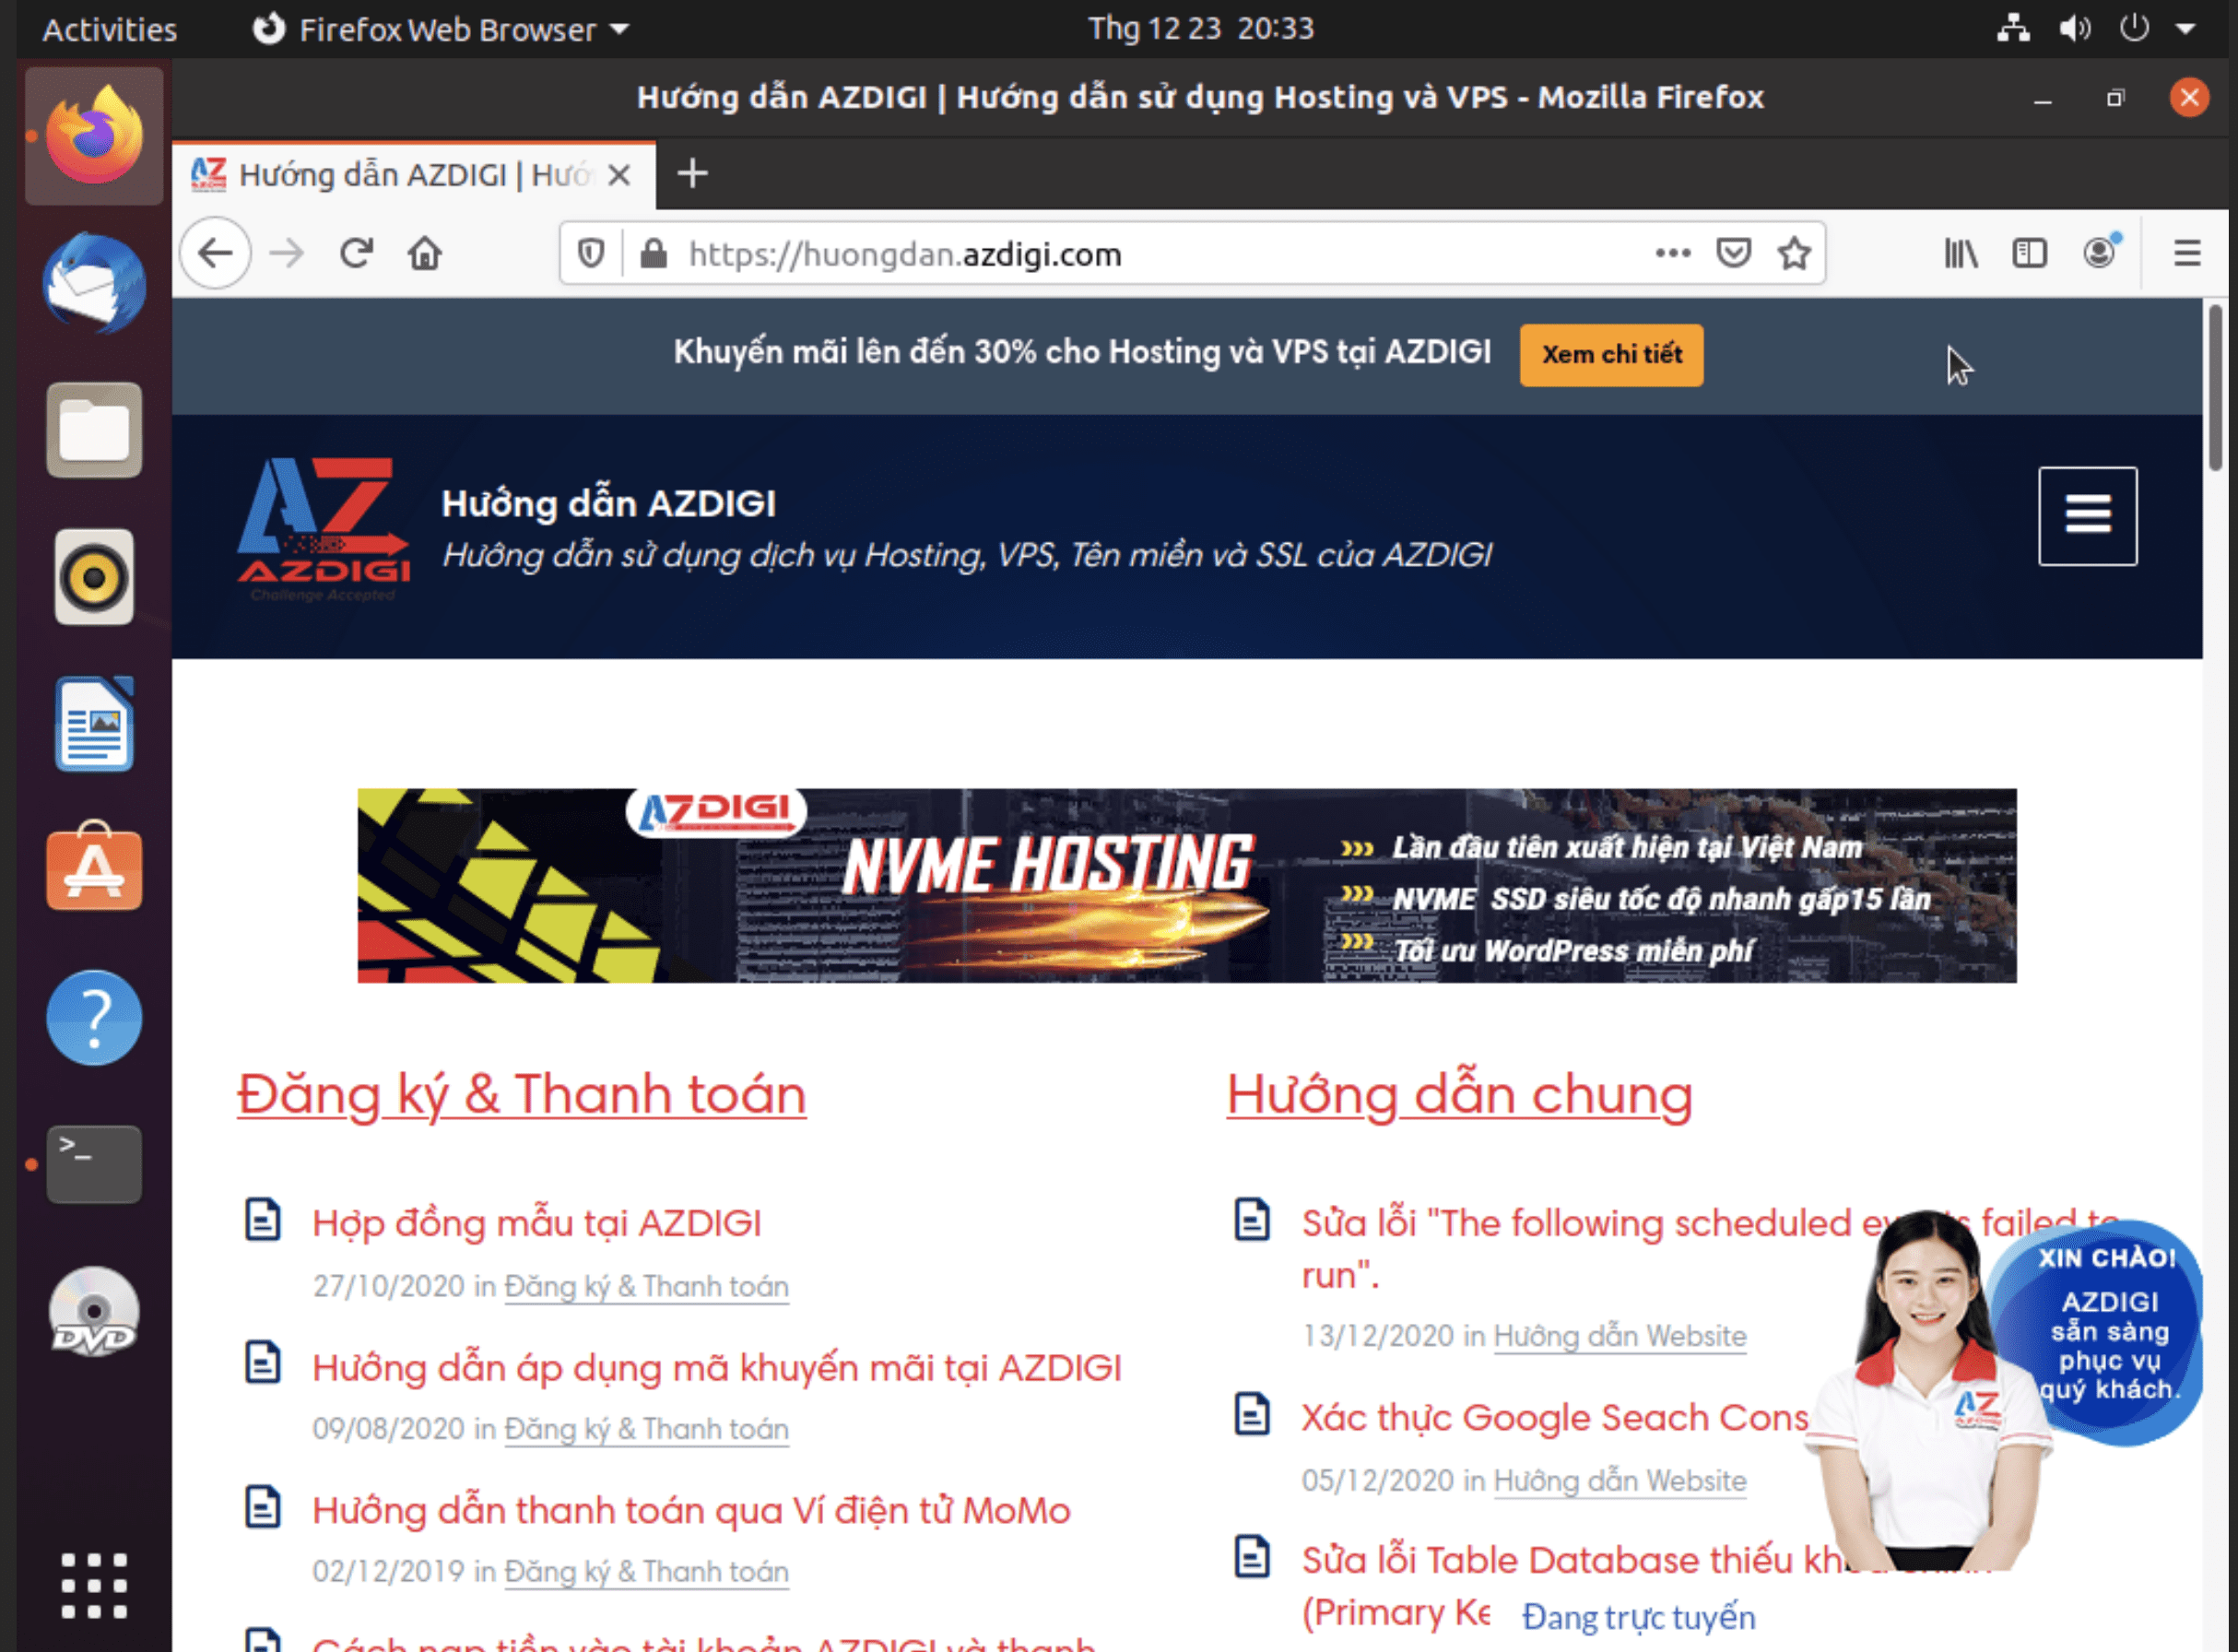
Now enter the website name into the browser to check the access results. As you can see, the result below shows that it has been successful.
Summary
So you have completed the steps to configure the network on Ubuntu. “It’s really easy when you follow the documentation, isn’t it?” Hopefully, this article will help you learn more about configuring and operating your server.
Wishing you success!
If you need assistance, you can contact support in the ways below:
- Hotline 247: 028 888 24768 (Ext 0)
- Ticket/Email: You use the email to register for the service and send it directly to: support@azdigi.com .
You might also like
- How to fix Name or service not known error on Linux
- AZDIGI Tools User Guide - Free DNS, Network, SSL Checker Toolkit
- Install and use Docker Compose on Ubuntu 22.04
- OpenClaw hybrid: Gateway on VPS + Node on local Mac
- How to install WireGuard on Ubuntu 20.04
- Explain and use CSF (ConfigServer & Firewall)
About the author

Thạch Phạm
Đồng sáng lập và Giám đốc điều hành của AZDIGI. Có hơn 15 năm kinh nghiệm trong phổ biến kiến thức liên quan đến WordPress tại thachpham.com, phát triển website và phát triển hệ thống.