Before going into the article, let’s learn what an SSH key is. and why should you use an SSH key?
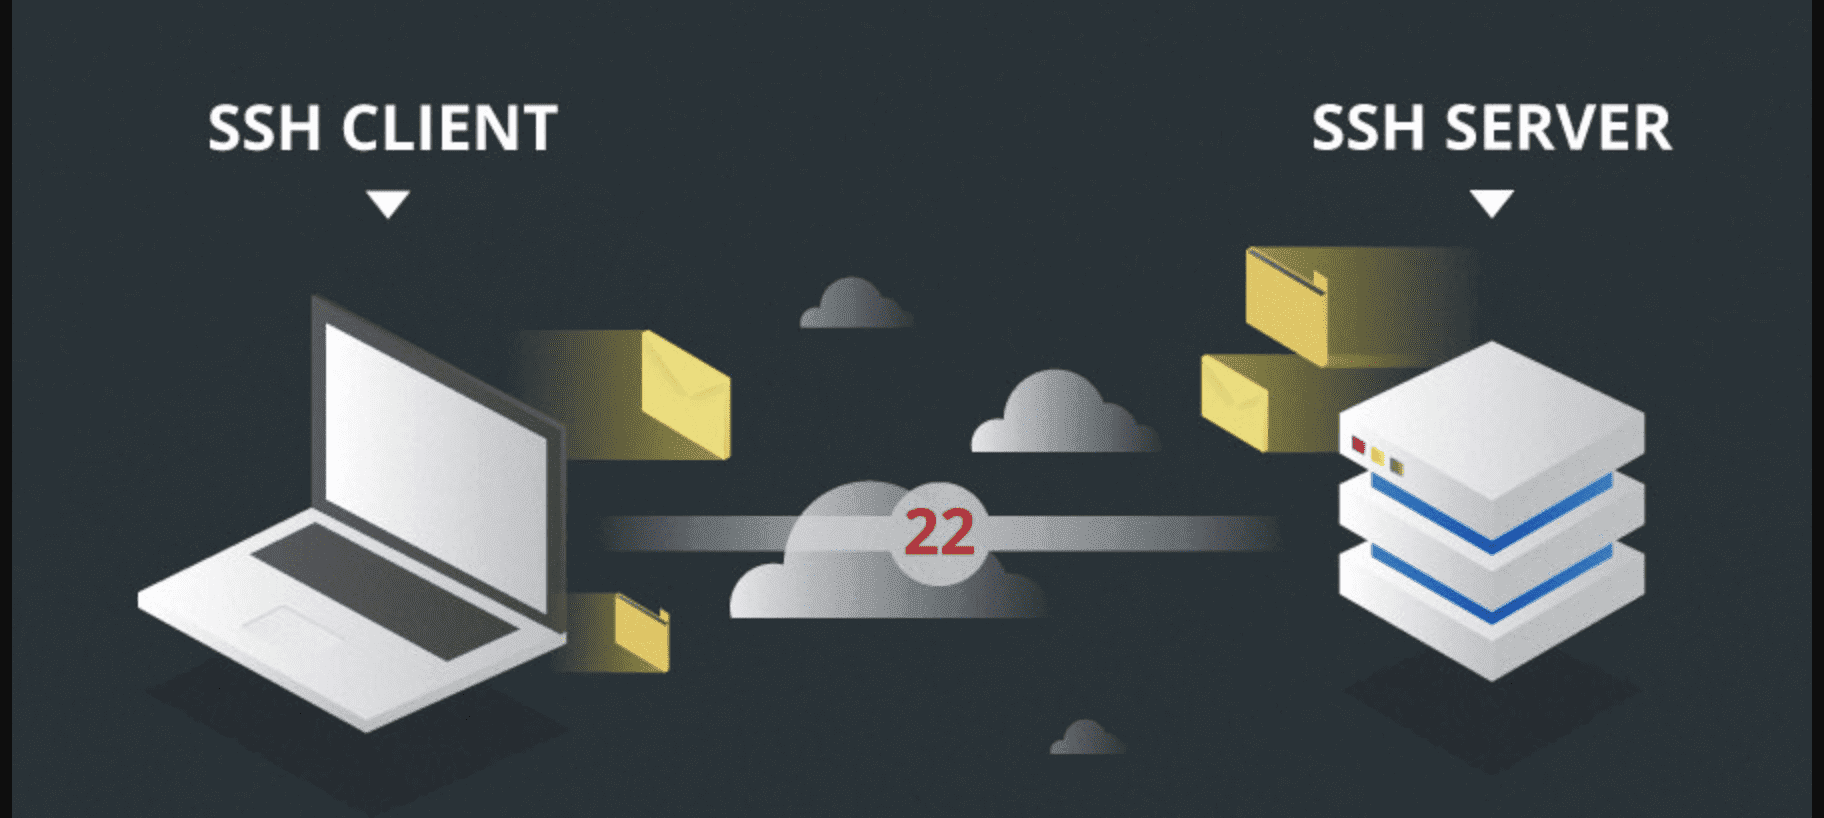
First, let’s define SSH. SSH is also known as Secure Shell, is a method used to encrypt data when you connect from your computer to the server.
Normally to connect to the Server you will use Passwd Root to SSH in, but is it really absolutely safe and secure? As a system technique and from my point of view, SSH with a root password is not really safe because when your VPS is online will face many risks, revealing admin clearance, having password detected by the attacker. So let’s learn how to create and use SSH KEY.
SSH Key you can understand simply is a type of authentication compared between the user (Private key) and the server/VPS server (Public key). Public key and Private key have a close relationship with each other to identify and unlock. When you create SSH Key, there will be 2 files including Public Key (this file you will put on the server/VPS server) and Private key (you will leave it on your personal computer). In a more understandable way, the Public key is the lock and the Private key is the key, and to open the lock, the right key must be used to open it.
Therefore, the use of an SSH Key is very necessary to ensure that the server is always safe and does not have to be logged in, even if you reveal the Private key string, you do not have to worry because there is still a Passphrase to open the private key. And without wasting time, let’s create and log in with AZDIGI.
How to create SSH Key
There are many tools to support creating it but the basic will also perform the creation of public and private strings. AZDIGI will guide you on Windows and Linux as follows:
1. Use Putty on Windows
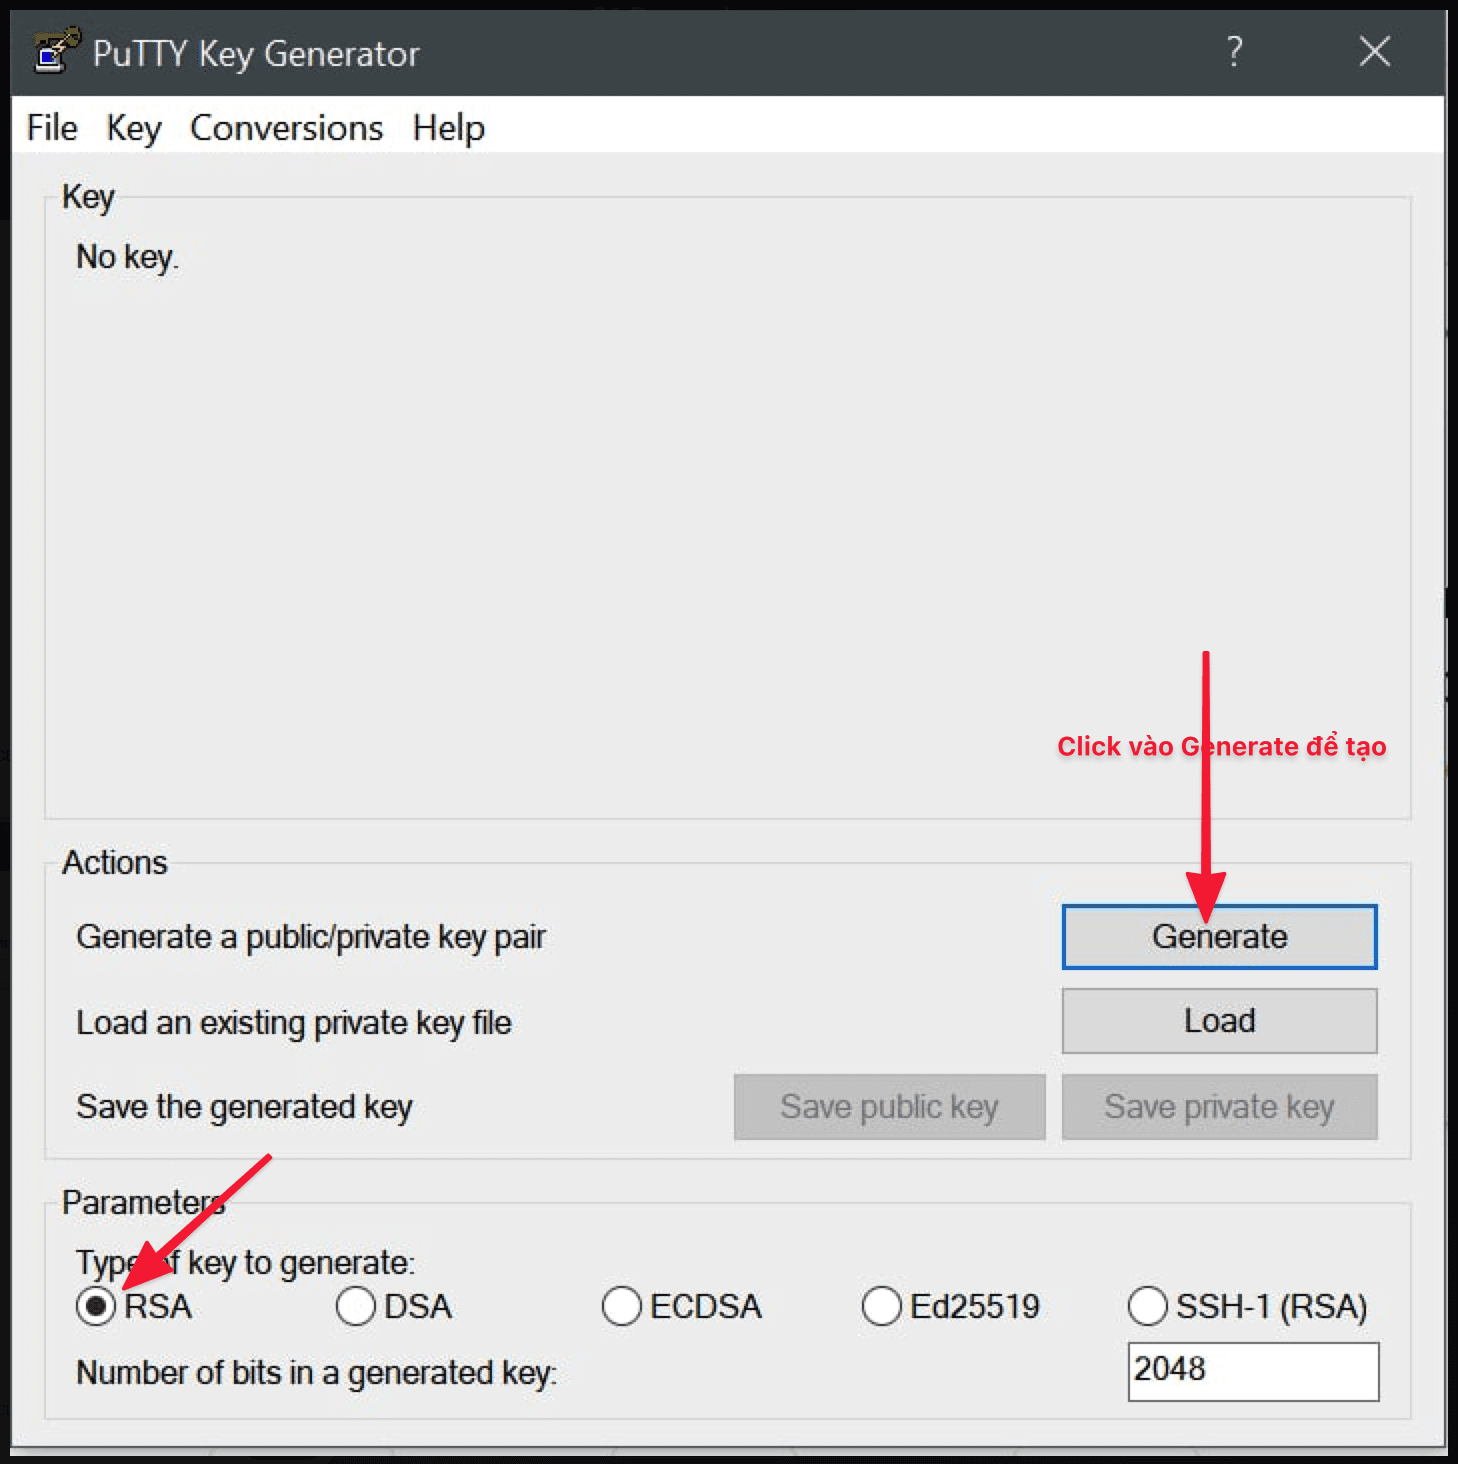
With the Windows operating system, I will introduce to you the most powerful SSH software, PuTTY, a software that many users use to SSH and create SSH KEY, you can download it at the link below:
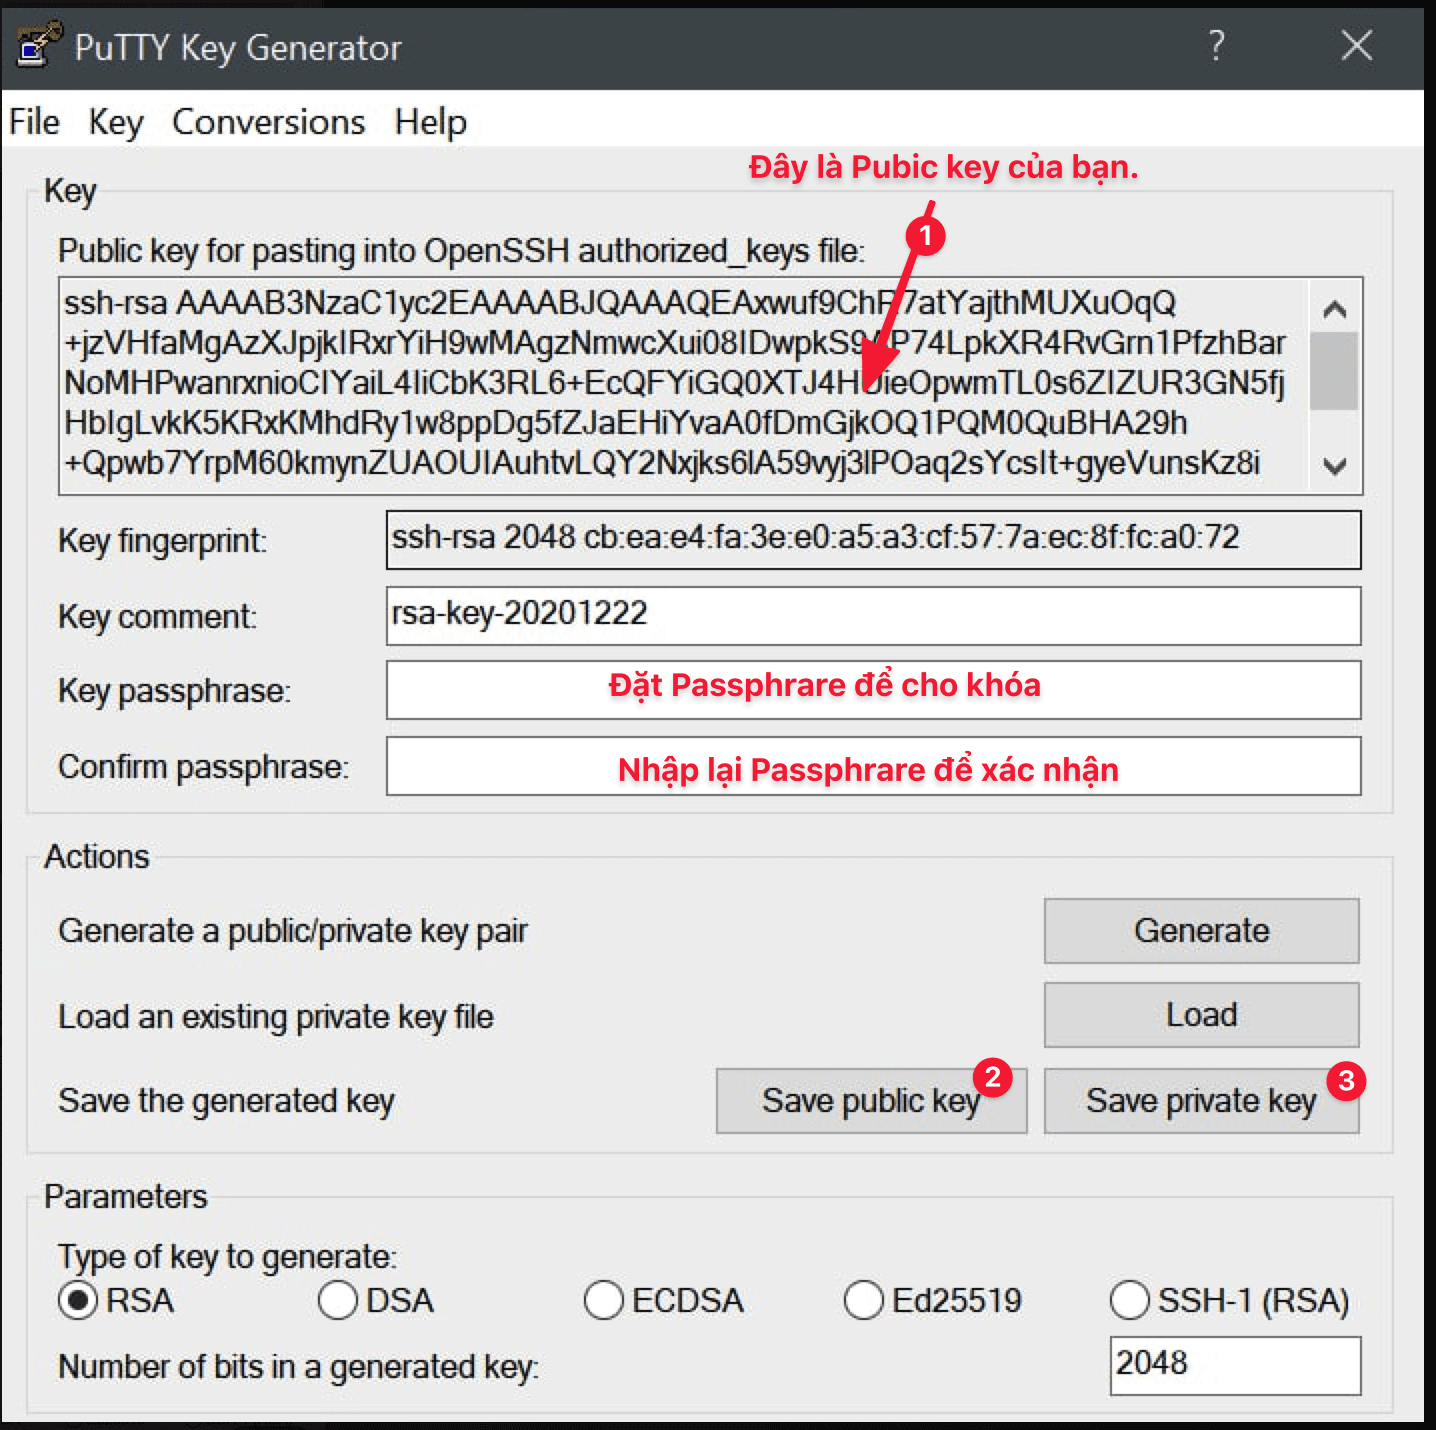
After downloading and installing, open PuTTY Gen to generate an SSH key. => click Generate to generate SSH Key.
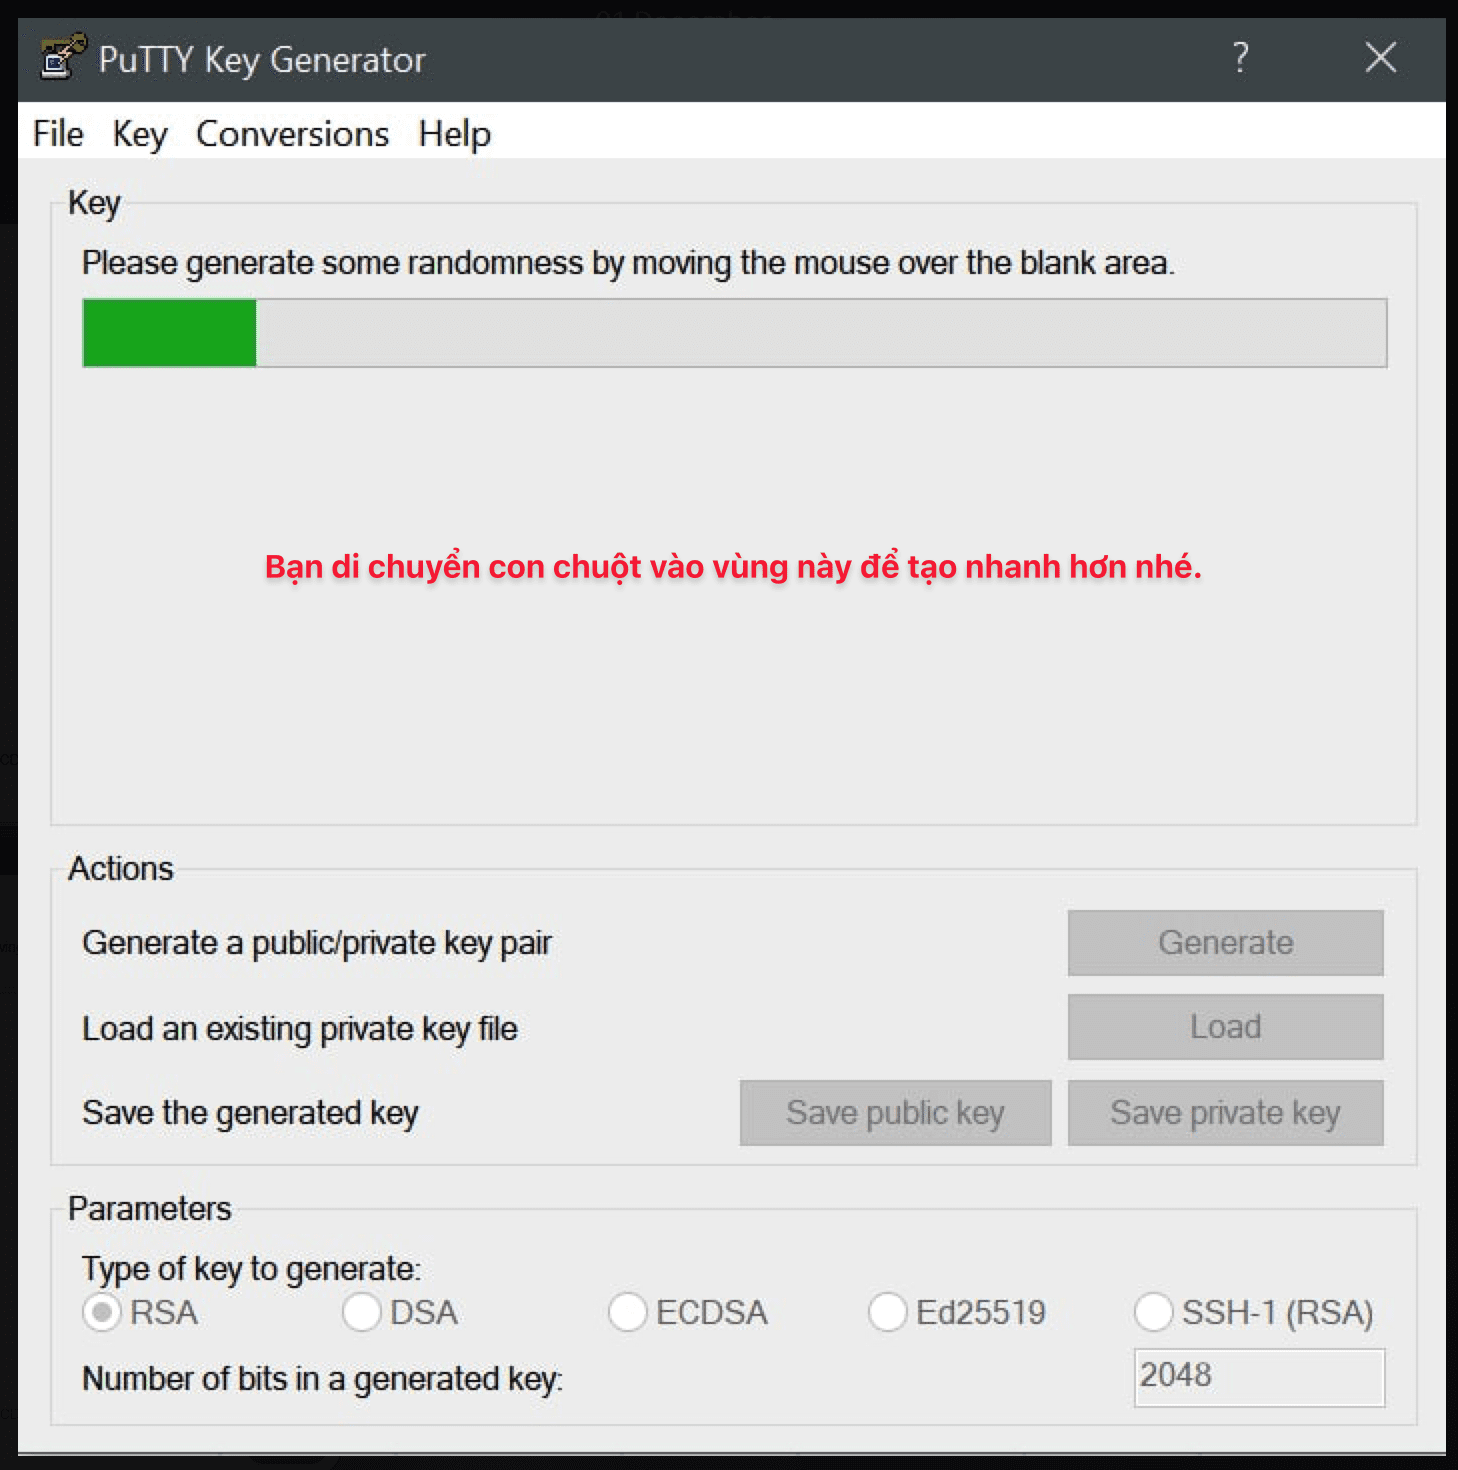
Next, move the mouse into this empty frame until the ssh key is generated.
As shown below, you have created it successfully. But please take one more step and set a passphrase to open the private key. You enter the optional password in the Key passphrase and Confirm passphrase. After entering, click Save private key and save public key to save it on your personal computer.
2. Use Linux/MacOS
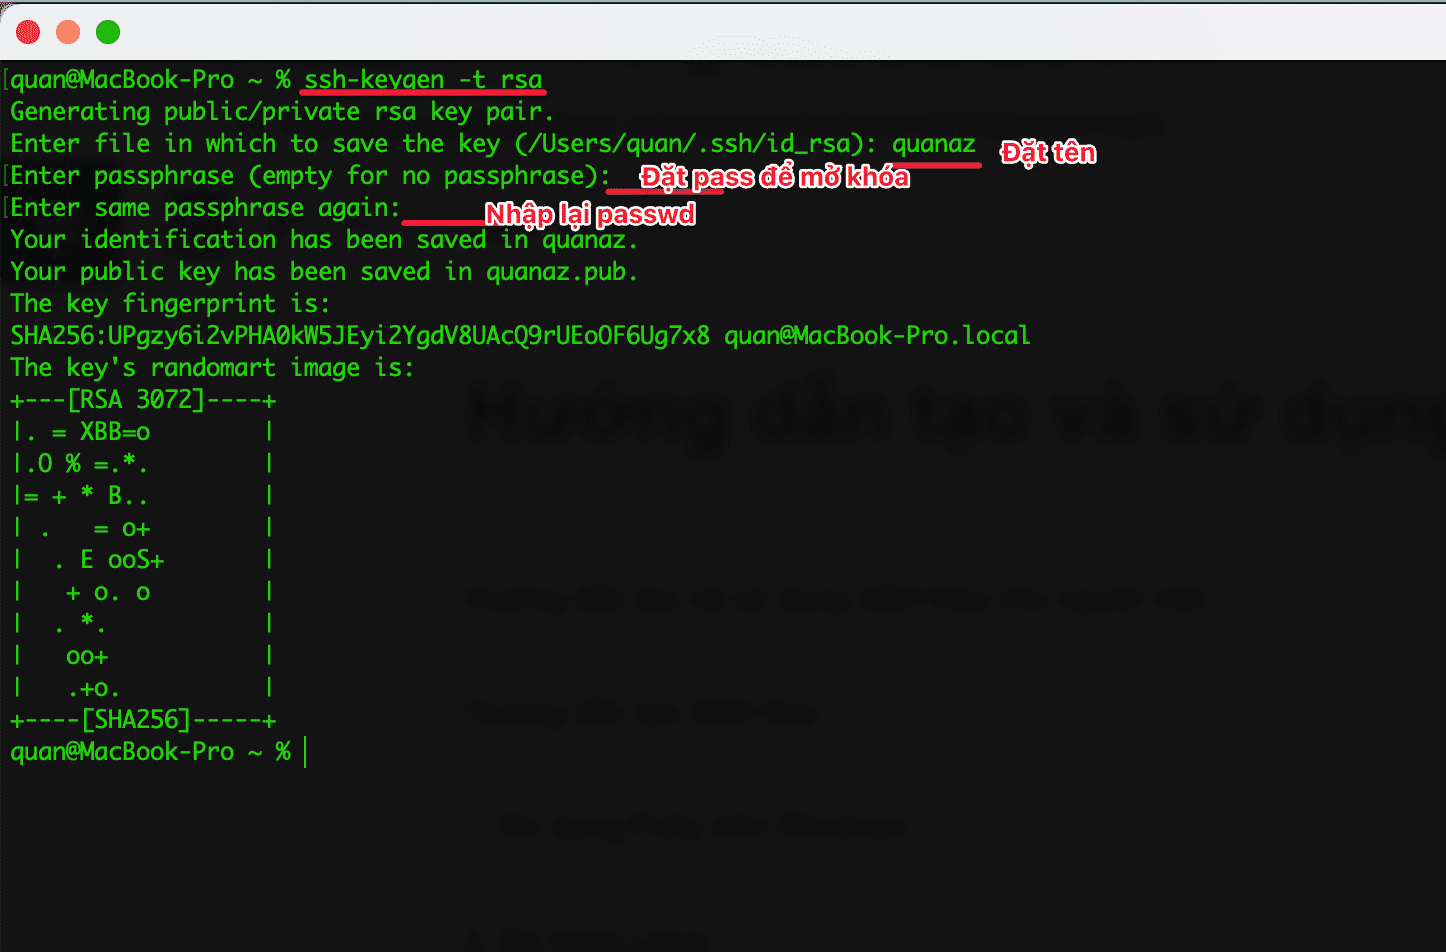
Linux and MacOS, both belong to the group of Unix operating systems, so the method and command will be similar. And to do that, open the Terminal window and execute the following command ssh-keygen -t rsa to generate the Public key and Private key string.
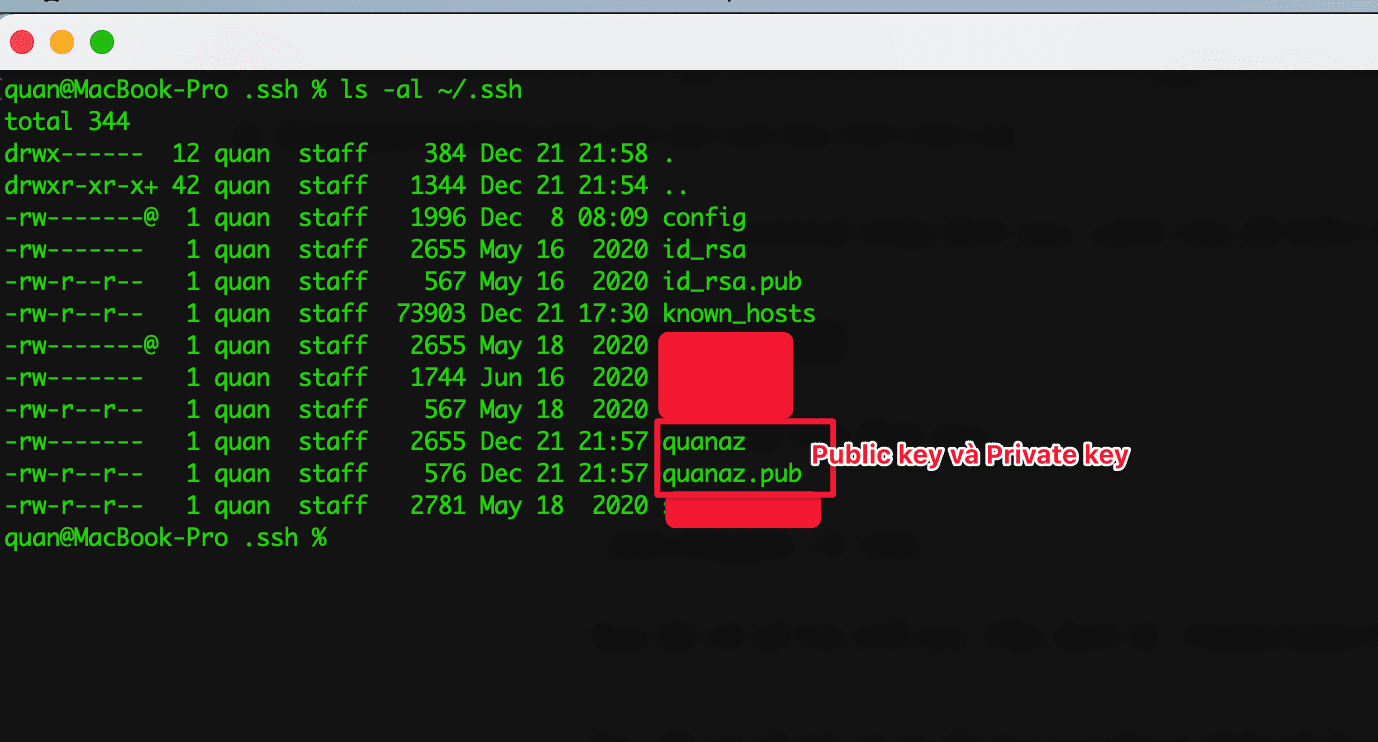
ls -al ~/.ssh
 ssh-keygen -t rsa
Note:
- ssh-keygen -t rsa: Command to generate
- Enter file in which to save the key: Name the file ssh key
- Enter passphrase (empty for no passphrase): Set password to unlock the ssh key
- Enter same passphrase again: Re-enter the password to confirm.
Your identification has been saved in quanazdigi: This is the key
Your public key has been saved in quanazdigi.pub: This is the public key that will be uploaded to the server
How to use SSH Key
After you have created the SSH key in the steps above, to use it, please perform the following steps:
Step 1: Add Public key to Server/VPS
Please ssh into the server/VPS with the root password information and execute the following commands sequentially.
mkdir ~/.ssh
chmod 700 ~/.ssh
touch ~/.ssh/authorized_keys
chmod 600 ~/.ssh/authorized_keys
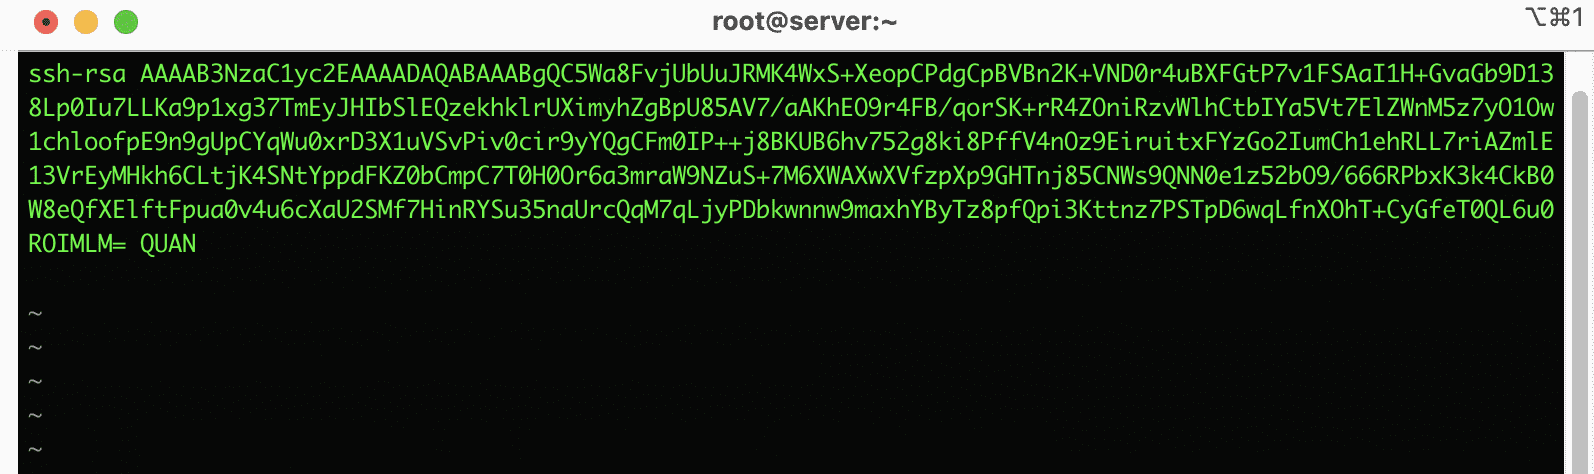
When finished creating the authorized_keys file, please open this file with the following command vi ~/.ssh/authorized_keys and copy the entire public key character string created.
Note: For the ssh key to work you need to disable SELinux. If SELinux is enabled, the ssh key won’t work.
Step 3: Use SSH Key
Using SSH Key with Windows and Linux is completely different, you can follow the steps below.
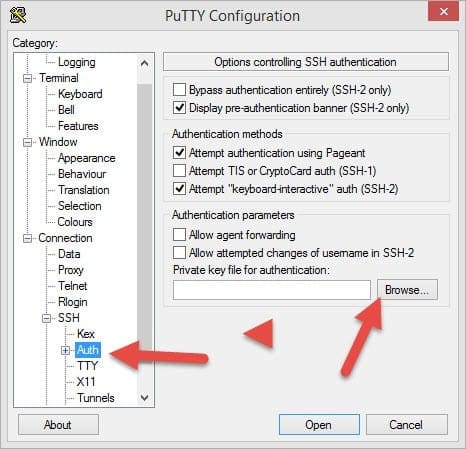
Using SSH Keys with PuTTY
You open PuTTY and click SSH => Auth. Next, click Browse to find the Private key file created and saved in the above step. Once you have pointed to the Private file and you perform SSH, you will receive a request to enter Passphrase, please enter Passphrase to complete the SSH step.
Using SSH Key with Linux/MacOS
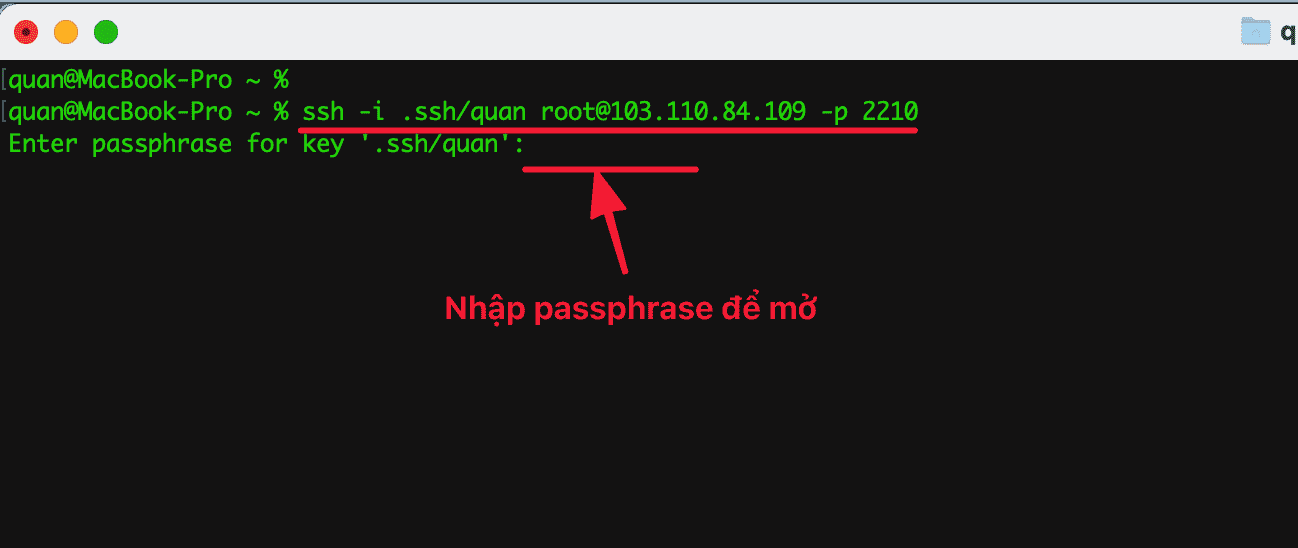
With Linux/MacOS to use the SSH key, you open Terminal and use the following command to SSH:
ssh -i duong_dan_file_private_key root@ip_may_chu -p nhap_vao_port_ssh
Example: ssh -i .ssh/quan root@103.110.84.109 -p 2210
In there:
- ssh -i: execute syntax
- .ssh/quan: path to fike private key, and here my private key is quan
- root: username
- @103.110.84.109: Server IP
- -p 2210: option and Port ssh, here I change the default ssh port 22 to 2210
After successfully calling the ssh file, enter the passphrase to ssh into the server.
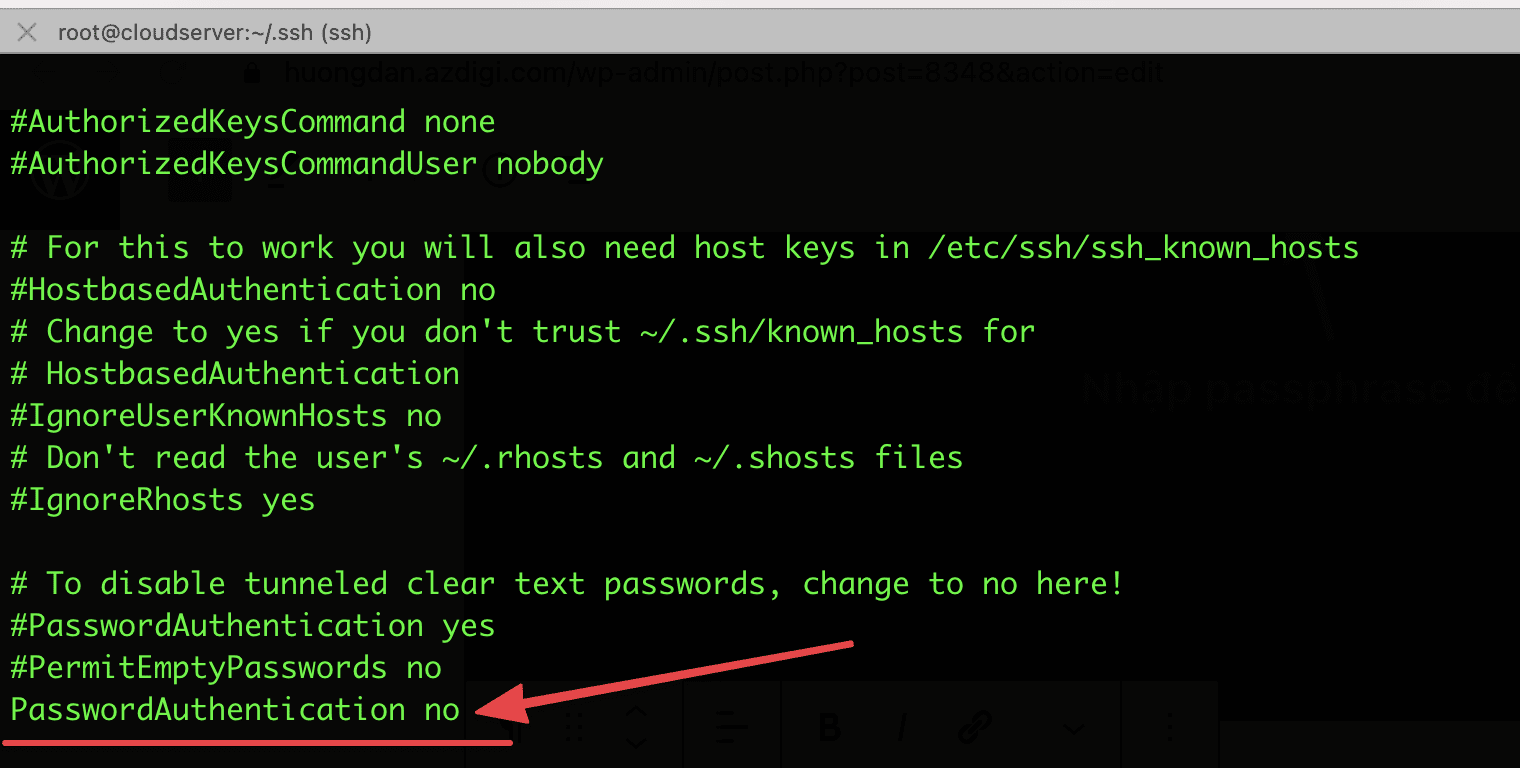
After you have successfully SSH key, you can turn off SSH with a Password to avoid password and brute force attacks. To disable ssh login with a password, do the following: You open the /etc/ssh/sshd_config file and find the linePasswordAuthentication Yes, then change it to PasswordAuthentication no
vi /etc/ssh/sshd_config
Change it to
PasswordAuthentication no
When you’re done saving, don’t forget to restart the sshd service.
systemctl restart sshd
#UsePAM no
Summary
Hopefully, this tutorial will help you better understand SSH Key and why you need to use SSH Key. Using the SSH key ensures security to the server, eliminating the traditional ssh method with user root and password. The use of SSH Key AZDIGI is always encouraged by users and all customers at AZDIGI to ensure that these servers are always secure, and cannot be accessed by unauthorized parties.
Wishing you success!
If you need assistance, you can contact support in the ways below:
- Hotline 247: 028 888 24768 (Ext 0)
- Ticket/Email: You use the email to register for the service and send it directly to: support@azdigi.com .
About the author

Thạch Phạm
Đồng sáng lập và Giám đốc điều hành của AZDIGI. Có hơn 15 năm kinh nghiệm trong phổ biến kiến thức liên quan đến WordPress tại thachpham.com, phát triển website và phát triển hệ thống.