EasyEngine is a Python script that automates the installation of NGINX and PHP-FPM webservers specifically for WordPress. EasyEngine will work on servers using Ubuntu or Debian.
- Note:
EEv3 will use the NGiNX installer, PHP, MySQL/MariaDB, and related services. In v4, everything in EasyEngine will be split into docker containers.
This is a script, so there will be no control panel or management interface, which requires basic knowledge of manipulation on VPS using Linux.
Install
Update packages installed on the system
apt update -y

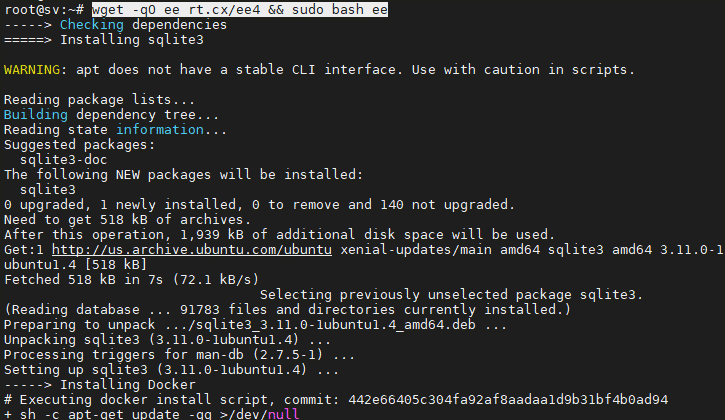
Install EasyEngine by executing the following command, the system will automatically install the included packages and launch EasyEngine
wget -qO ee rt.cx/ee4 && sudo bash ee

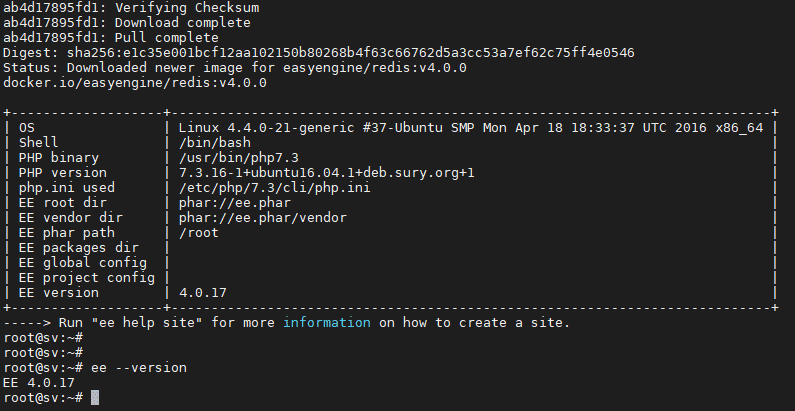
After successful installation, you can check the version with the command
ee --version

Refer to some common commands via EasyEngine’s –help option
ee --help site
- clean: clears the object and page cache.
- create: create a new site.
- delete: delete a web.
- disable: deactivate a site, stop and remove the docker container containing any website.
- enable: re-enable the website if it was stopped before.
- info: Displays relevant information of the website.
- list: list of websites that have been created.
- reload: re-initialize the specific service at the container without interfering with the container.
- restart: re-initializes the container.
- ssl: authenticate SSL or create a new SSL.
- ssl-renew: create a new SSL certificate.
- update: update, upgrade the site.
Basic EEv4 configuration files/directories:
Nginx:
Nginx Configuration
- EasyEngine Nginx configuration: /opt/easyengine/services/nginx-proxy/conf.d/
- Configure nginx for site domain.com: /opt/easyengine/sites/domain.com /config/nginx/nginx.conf
Logs:
- Directory containing all NGINX log files: /opt/easyengine/services/nginx-proxy/logs/
- nginx access log file: /opt/easyengine/services/nginx-proxy/logs/access.log
- nginx error log file: /opt/easyengine/services/nginx-proxy/logs/error.log
- The directory containing the access log and error log files of the domain.com site: /opt/easyengine/sites/schromy.tk/logs/nginx/
- PHP:
PHP Configuration
- Configure PHP for the entire EasyEngine server: /etc/php/7.3/cli/php.ini
- PHP configuration for domain.com site: /opt/easyengine/sites/domain.com/config/php/php/php.ini
Logs:
- PHP log of domain.com: /opt/easyengine/sites/domain.com/logs/php/
- MariaDB:
MariaDB Configuration:
- Main configuration for MariaDB: /opt/easyengine/services/mariadb/conf/my.cnf
Logs:
- General MariaDB log: /opt/easyengine/services/mariadb/logs/
- Web source code directory: /opt/easyengine/sites/domain.com/app/htdocs/
- Individual services for each website: /opt/easyengine/sites/domain.com/config/
So you have successfully installed Easy Engine, please follow AZDIGI’s Blog to update useful articles!

