Guide to installing Nginx Proxy Apache 2.4.6
I. Introduction
To find out about Nginx and Apache settings, you can refer to LEMP and LAMP installation.
In the article installing Nginx proxy for Apache, AZDIGI will combine both to create the Nginx Proxy Apache webserver.

Nginx webserver operates in a multitasking environment, so it can be used in combination with Apache to work together.
However, each web server has its own advantages and disadvantages to support each other. Depending on the user’s needs, choose the solution to have the most suitable web server for their source code to achieve the best performance.
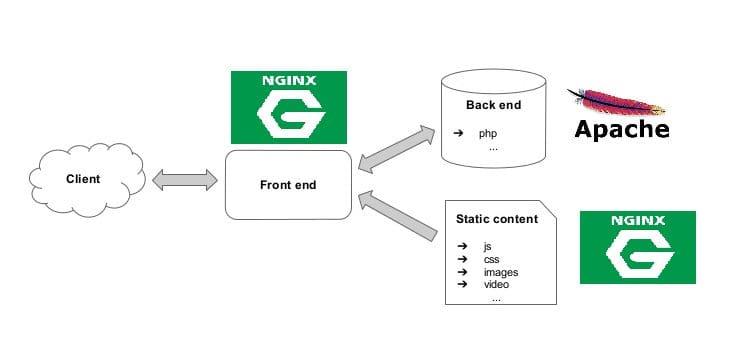
As a front-end processing static files, Nginx stands first to receive requests, while Apache handles the back-end.
Therefore, we can take advantage of the strengths of both Apache and Nginx by combining them into an Nginx proxy Apache web server.
II. Guide to installing Nginx proxy Apache
Step 1: Check to disable firewalld & selinux and packages
First, disable firewalld as follows:
systemctl disable firewalld
systemctl stop firewalld
You can disable selinux as below:
sed -i 's/SELINUX=enforcing/SELINUX=disabled/g' /etc/sysconfig/selinux
sed -i 's/SELINUX=enforcing/SELINUX=disabled/g' /etc/selinux/config
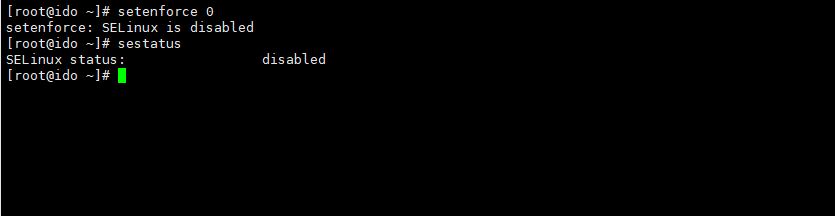
# Kiểm tra status selinux đã disabled hoàn tắt nếu chưa cần reboot lại VPS
setenforce 0
sestatus
Install the Package to support nginx
yum groupinstall " Development Tools"  -y
yum install zlib-devel pcre-devel openssl-devel wget -y
yum install epel-release -y
Step 2: Install Nginx
Next, proceed to install Nginx, in this article I use the YUM command to install NGINX automatically.
yum install nginx -y
After installing the nginx complete, open thenginx.conf configuration file at /etc/nginx/nginx.conf. Copy the paragraphs below and then paste them into the file:
worker_processes auto;
pid /var/run/nginx.pid;
events {
        worker_connections  8096;
		multi_accept        on;
		use                 epoll;
}
http {
log_format  main  '$remote_addr - $remote_user [$time_local] "$request" '
                      '$status $body_bytes_sent "$http_referer" '
                      '"$http_user_agent" "$http_x_forwarded_for"';
access_log /var/log/nginx/access.log main;
server {
         listen       80 default_server;
         listen       [::]:80 default_server;
         server_name  _;
         root         /var/www/html;
location / {
         }
error_page 404 /404.html;
         location = /404.html {
         }
error_page 500 502 503 504 /50x.html;
         location = /50x.html {
         }
        }
sendfile on;
        tcp_nopush on;
        tcp_nodelay on;
        keepalive_timeout 65;
        types_hash_max_size 2048;
include /etc/nginx/mime.types;
        default_type application/octet-stream;
access_log /var/log/nginx/access.log;
        error_log /var/log/nginx/error.log;
gzip on;
        gzip_disable "msie6";
        gzip_min_length  1100;
        gzip_buffers  4 32k;
        gzip_types    text/plain application/x-javascript text/xml text/css;
# File Cache Settings
        open_file_cache          max=10000 inactive=10m;
        open_file_cache_valid    2m;
        open_file_cache_min_uses 2;
        open_file_cache_errors   on;
server_names_hash_bucket_size 64;
        ignore_invalid_headers on;
        client_max_body_size    8m;
        client_header_timeout  3m;
        client_body_timeout 3m;
        send_timeout     3m;
        connection_pool_size  256;
        client_header_buffer_size 4k;
        large_client_header_buffers 4 32k;
        request_pool_size  4k;
        output_buffers   4 32k;
        postpone_output  1460;
## Enable caching of SSL sessions
        ssl_session_cache shared:SSL:10m;
	ssl_session_timeout 10m;
	ssl_ciphers HIGH:!aNULL:!MD5;
	ssl_protocols TLSv1 TLSv1.1 TLSv1.2;
	ssl_prefer_server_ciphers on;
include /etc/nginx/conf.d/*.conf;
        include /etc/nginx/sites-enabled/*.conf;
}
To make sure the configuration file is not faulty before starting the service, you use the nginx -t command to test the configuration file. If it shows successful, means the configuration file is correct and you should take the next steps.

Activate and start nginx with the system
systemctl start nginx
systemctl enable nginx
systemctl status nginx
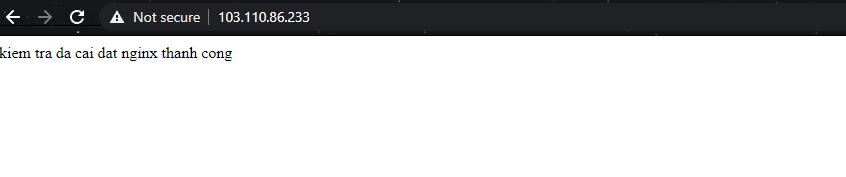
After installation, to quickly check if nginx is working or not, you can go to /var/www/html and create an index.html file to test.
You can copy and paste the following command into the terminal window:
echo "kiem tra da cai dat nginx thanh cong" > /var/www/html/index.html

Step 3: Install Apache
Next, please install Apache with the following command. I will also use the YUM command to automatically install Apache.
yum install httpd
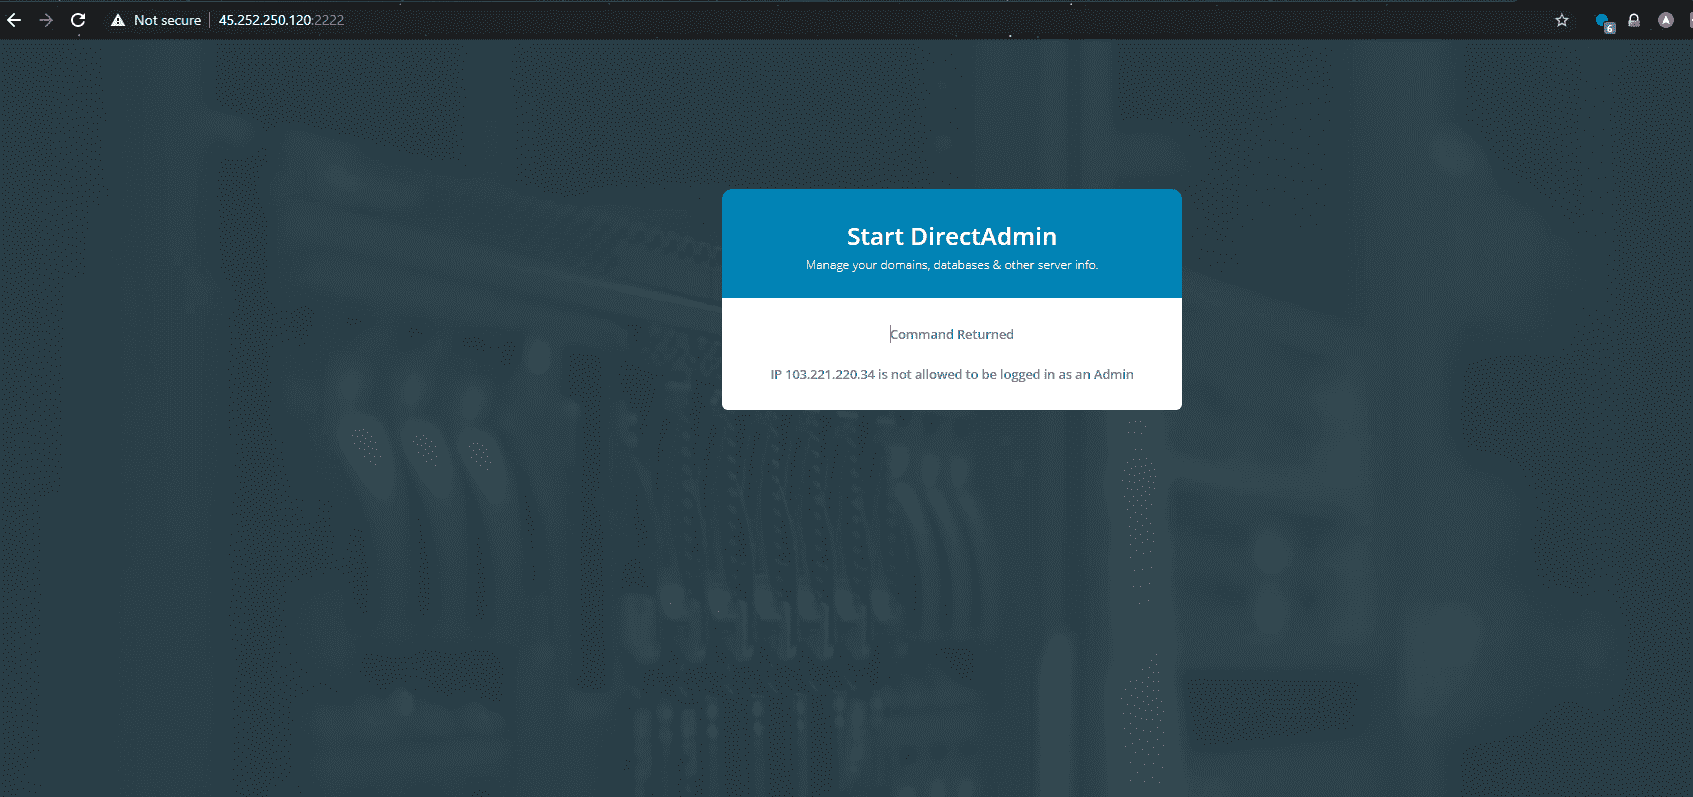
After successfully installing HTTPD, HTTPD cannot operate when the start is up because of the Port 80 with Nginx, you can see the actual illustration image below:
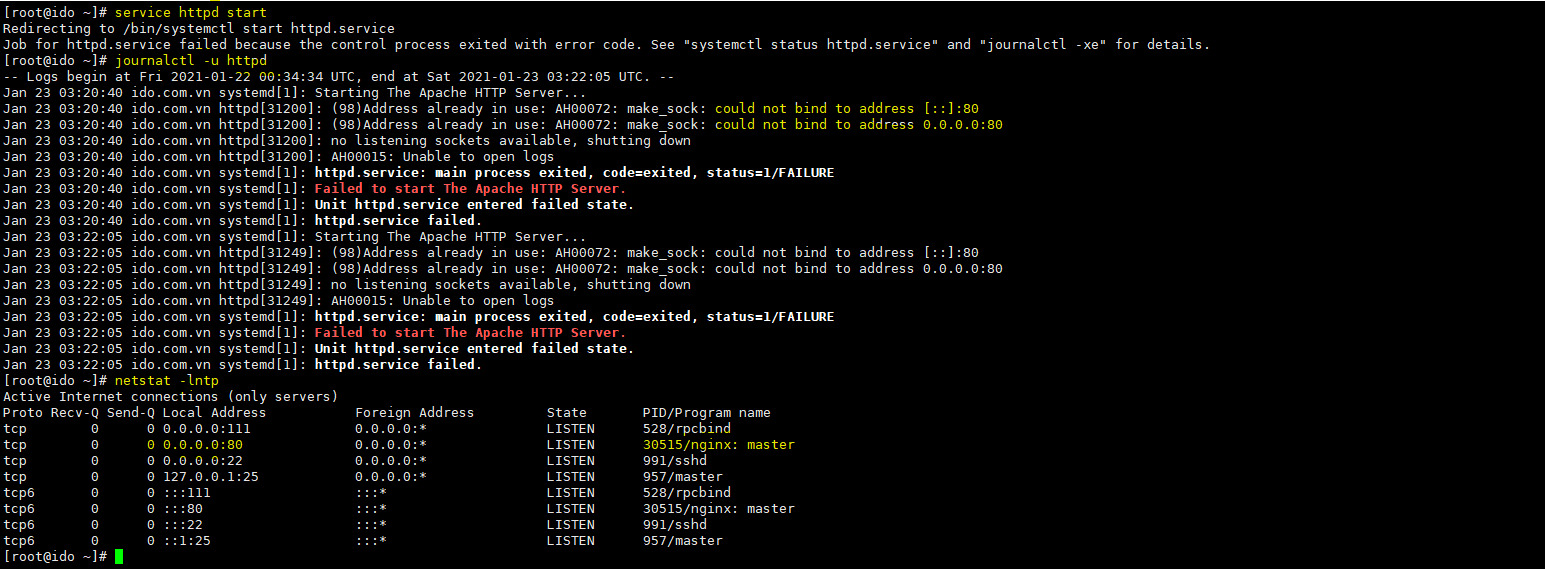
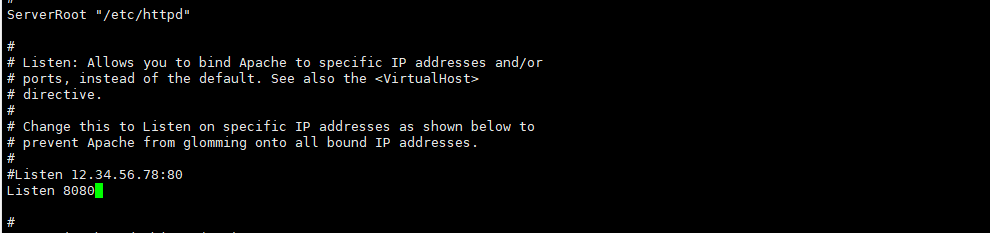
So I will proceed to change the HTTPD port to be able to start HTTPD. Here I will change the HTTPD port from 80 to 8080 as follows:
vi /etc/httpd/conf/httpd.conf
sed -i 's/Listen 80/Listen 8080/g' /etc/httpd/conf/httpd.conf
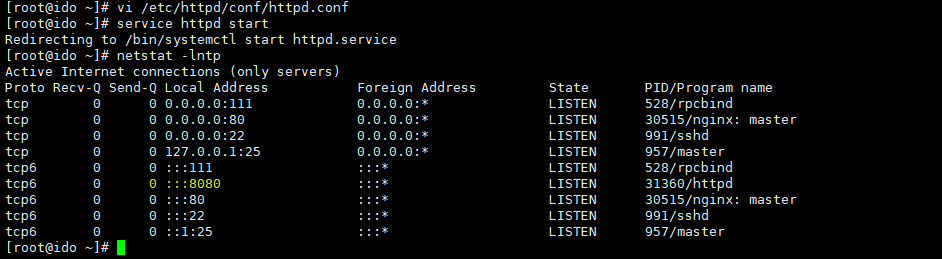
After successfully editing Port 8080, you save and start httpd the commands below:
systemctl start httpd
systemctl enable httpd
systemctl status httpd
After successfully installing nginx and httpd, we need to create vhosts for both nginx and httpd. If you use a domain and test online, you need to point the domain to the IP of the VPS. If you test locally, you need to edit the hosts’ file to check the actual results.
First, we create a vhost for nginx at the correct path specified in nginx.conf, which is include /etc/nginx/sites-enabled/*.conf;
cd  /etc/nginx/sites-enabled/
vi kienthuclinux.info.conf
Then copy the entire configuration below to the file my-doamin.conf
server {
        listen    80;
        server_name  kienthuclinux.info www.kienthuclinux.info;
        access_log off;
        error_log  /var/log/httpd/kienthuclinux.info-error_log crit;
location ~* .(gif|jpg|jpeg|png|ico|wmv|3gp|avi|mpg|mpeg|mp4|flv|mp3|mid|js|css|html|htm|wml)$ {
        root /var/www/html/kienthuclinux.info;
        expires 30d;
        }
location / {
        client_max_body_size    10m;
        client_body_buffer_size 128k;
proxy_send_timeout   90;
        proxy_read_timeout   90;
        proxy_buffer_size    128k;
        proxy_buffers     4 256k;
        proxy_busy_buffers_size 256k;
        proxy_temp_file_write_size 256k;
        proxy_connect_timeout 30s;
proxy_redirect  http://www.kienthuclinux.info:8080   http://www.kienthuclinux.info;
        proxy_redirect  http://kienthuclinux.info:8080   http://kienthuclinux.info;
proxy_pass   http://127.0.0.1:8080/;
proxy_set_header   Host   $host;
        proxy_set_header   X-Real-IP  $remote_addr;
        proxy_set_header   X-Forwarded-For $proxy_add_x_forwarded_for;
        }
}
After successfully setting up the virtual host, check if the declared paths have been created. If not, you can create them as follows:
mkdir -p /var/www/html/kienthuclinux.info
touch  /var/log/httpd/kienthuclinux.info-error_log
To make sure there is no syntax error, you can use the test nginx - command to check if there is any syntax error when creating the vhost.
nginx -t
systemctl reload nginx
Proceed to create vhost for HTTPD with the following command:
cd /etc/httpd/conf.d/
vi kienthuclinux.info.conf
<VirtualHost *:8080>
ServerAdmin adminr@kienthuclinux.info
    DocumentRoot /var/www/html/kienthuclinux.info
    ServerName kienthuclinux.info
    ServerAlias www.kienthuclinux.info
    <Directory "/var/www/html/kienthuclinux.info">
               AllowOverride All
               Order allow,deny
               Allow from all
    </Directory>
       RewriteEngine on
    ErrorLog logs/kienthuclinux.info-error_log
    CustomLog logs/kienthuclinux.info-access_log common
# config log /etc/httpd/logs/*
</VirtualHost>
After creating a successful VHOST HTTPD, you should check if it has any errors by using the httpd -t command.
httpd -t
systemctl reload httpd
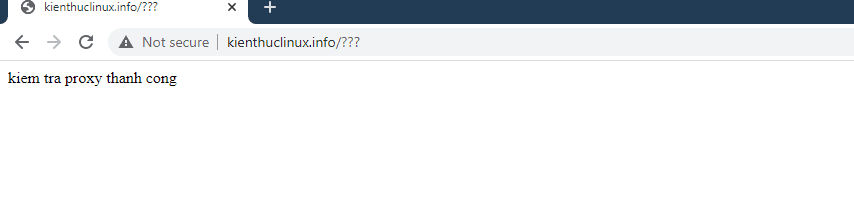
cd /var/www/html/kienthuclinux.info
echo "kiem tra proxy thanh cong"> index.html
Then access by domain to check the results:
Step 4: Install PHP-FPM and modules
Để chạy được php-fpm thì bạn cần thực hiện cài đặt với các bước như sau.
yum -y install yum-utils -y
rpm -Uvh http://rpms.remirepo.net/enterprise/remi-release-7.rpm
yum -y update
yum-config-manager --enable remi-php73
yum -y install php php-fpm php-ldap php-zip php-embedded php-cli php-mysql php-common php-gd php-xml php-mbstring php-mcrypt php-pdo php-soap php-json php-simplexml php-process php-curl php-bcmath php-snmp php-pspell php-gmp php-intl php-imap perl-LWP-Protocol-https php-pear-Net-SMTP php-enchant php-pear php-devel php-zlib php-xmlrpc php-tidy php-mysqlnd php-opcache php-cli php-pecl-zip unzip gcc
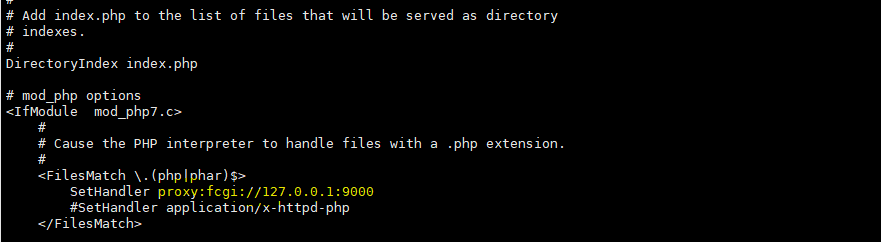
Next, please configure php-fpm for httpd so that it works.
vi /etc/httpd/conf.d/php.conf
SetHandler application/x-httpd-php
sửa thành
SetHandler proxy:fcgi://127.0.0.1:9000
Adjust some basic php configs for the php.ini file as follows:
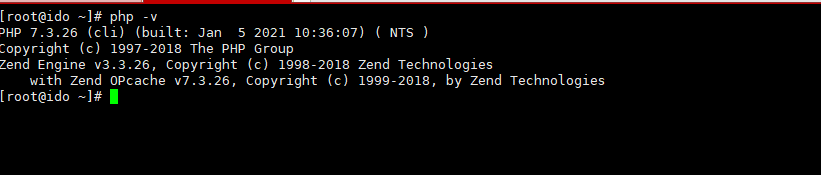
If you do not know the php.ini file position, you can use the command below to find it. When you finish entering, you see the Loader line to locate the file.
php -i | grep php.ini

Then you open the /etc/php.ini file and adjust as follows:
;date.timezone = expose_php = On short_open_tag = Off ;max_input_vars = 1000 disable_functions = upload_max_filesize = 2M max_execution_time = 30 max_input_time = 60##Sửa thành
max_input_time = 600 max_execution_time = 300 date.timezone = Asia/Ho_Chi_Minh upload_max_filesize = 1024M expose_php = Off short_open_tag = On max_input_vars = 3000 disable_functions = exec,system,passthru,shell_exec,proc_close,proc_open,dl,popen,show_source,posix_kill,posix_mkfifo,posix_getpwuid,posix_setpgid,posix_setsid,posix_setuid,posix_setgid,posix_seteuid,posix_setegid,posix_uname ;==> một số functions không sử dụng mình tắt đi để tăng độ bảo mật cho webserver.
After you have successfully installed PHP-FPM, you can restart the service to receive a new configuration.
systemctl start php-fpm
systemctl enable php-fpm
systemctl reload httpd
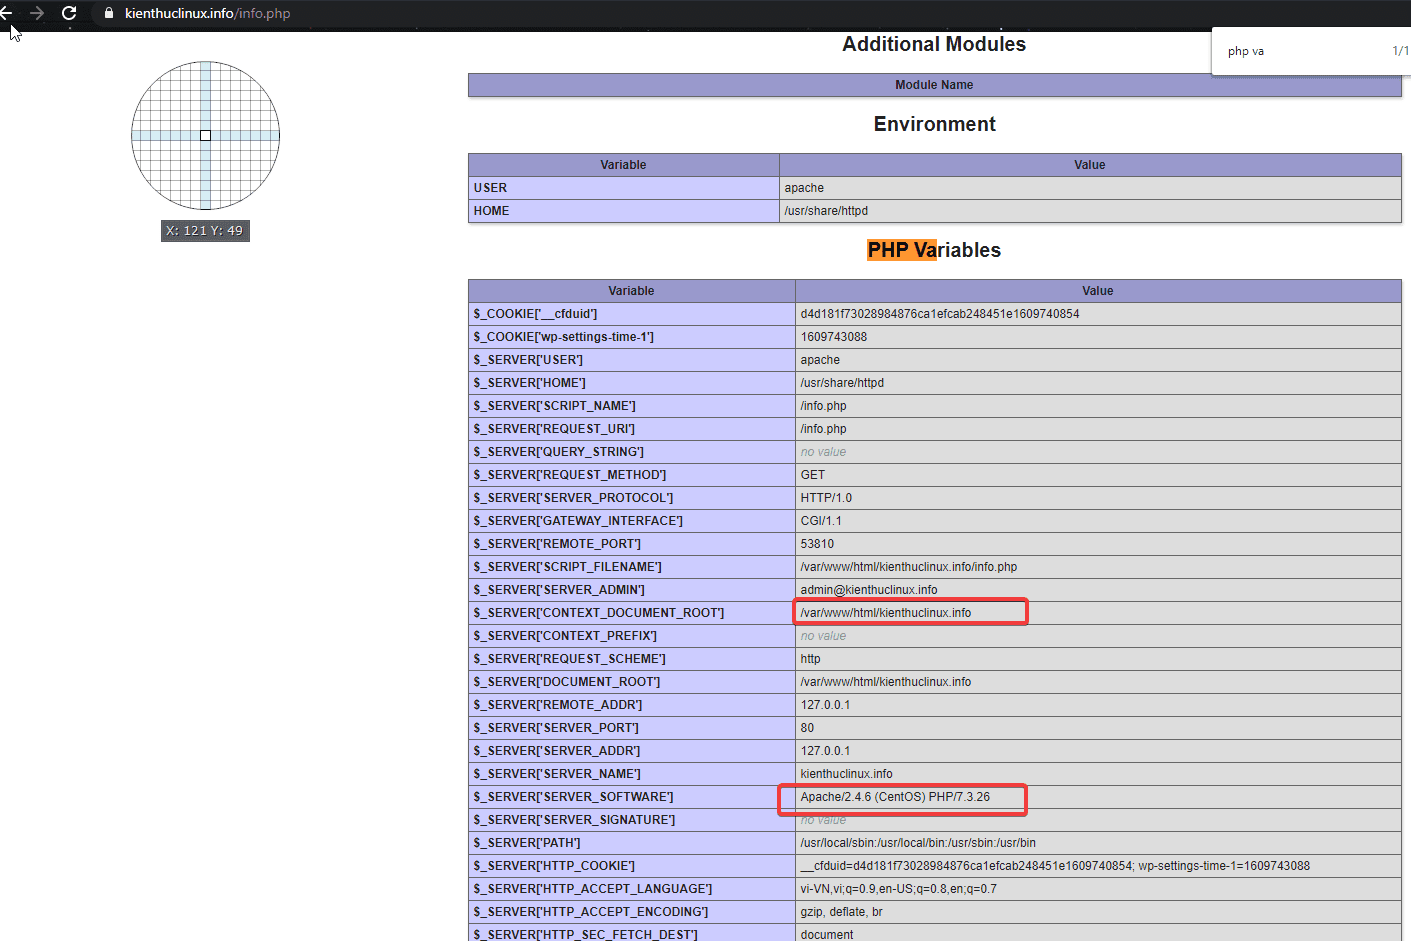
To check the PHP-FPM has not worked, please create a php.info file to check:
cd /var/www/html/kienthuclinux.info
echo "<?php phpinfo(); phpinfo(INFO_MODULES); ?>" > info.php
After successfully creating PHP.info file, you access the shown below to check:
III. Summary
Hopefully, this article will help you build a strong server and work well for your websites.
If you need assistance, you can contact support in the ways below:
- Hotline 247: 028 888 24768 (Ext 0)
- Ticket/Email: You use the email to register for the service and send it directly to: support@azdigi.com .
About the author

Thạch Phạm
Đồng sáng lập và Giám đốc điều hành của AZDIGI. Có hơn 15 năm kinh nghiệm trong phổ biến kiến thức liên quan đến WordPress tại thachpham.com, phát triển website và phát triển hệ thống.