Nội dung
What is OpenLitespeed?
OpenLiteSpeed is the open-source version of LiteSpeed Web Server Enterprise, this is a free version created to support individual web servers with a small number of websites. If you are a general user, OpenLiteSpeed is your wise choice because although it is free, it supports most of the essential features found in LiteSpeed Enterprise, including LS cache.
With LS cache, you can install and use it on most open-source code today, such as WordPress, Opencart, Xenforo, Magento, Joomla…
You can see more details of supported features on OpenLitespeed here.
And compare features between OpenLitespeed and Litespeed Enterprise in detail here.
Implementation guide
Step 1: Uninstall the current webserver
To install OpenLiteSpeed, you first need to remove the old web server you are using.
I’m using Nginx as a web server, you can see the image below:

So now I will proceed to uninstall Nginx as follows: (if using Apache, you do the same)
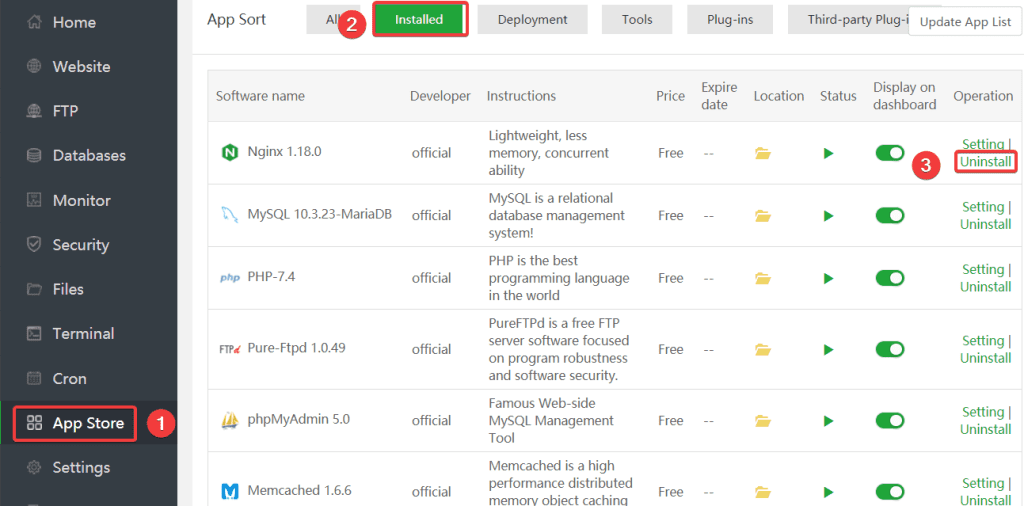
At the aaPanel interface, go to App Store (1) => Installed (2) => at Nginx, select Uninstall (3).
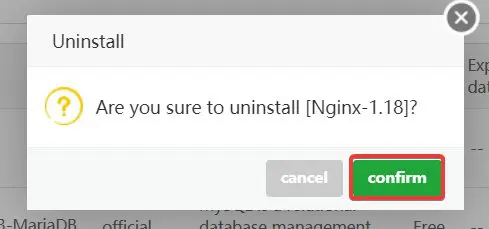
Next, click confirm to uninstall.
The uninstall process will be done, and you just need to wait for it to finish.
Step 2: Install OpenLiteSpeed
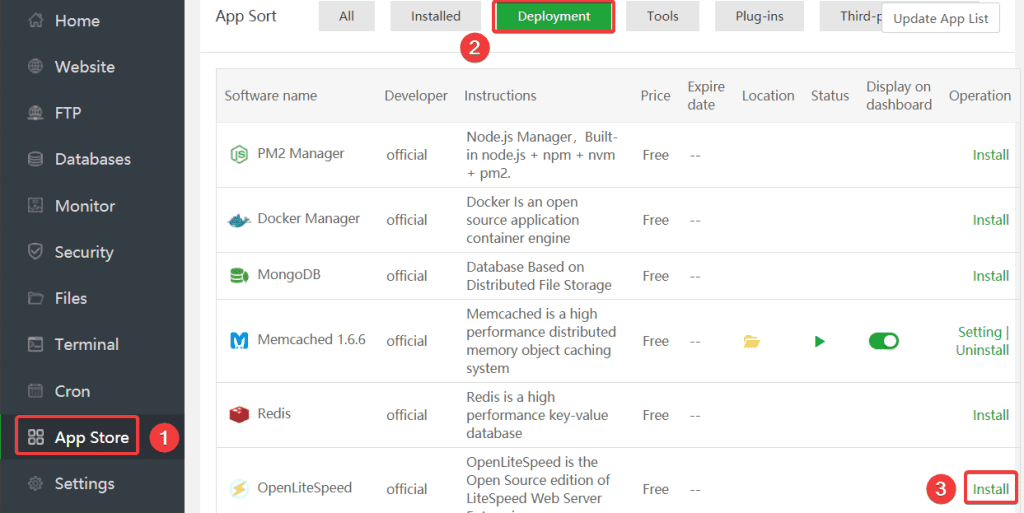
To install OpenLiteSpeed, at the App Store interface (1) => Deployment (2) => in the OpenLiteSpeed section, select Install (3).
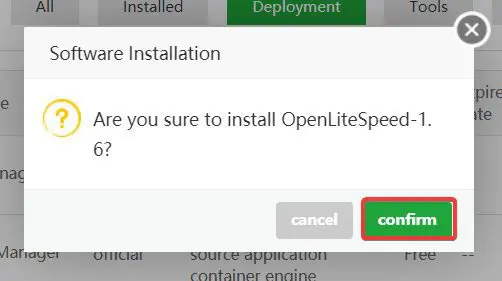
Next, click confirm to confirm the installation.
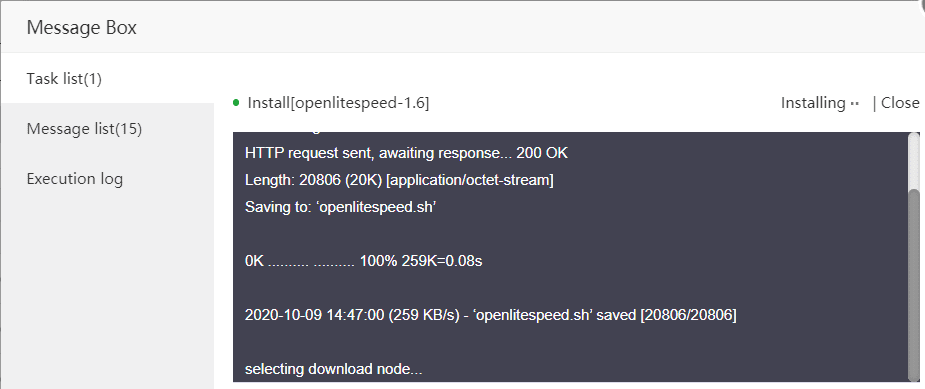
The installation process will take about 5-10 minutes depending on each VPS. As shown below, I have successfully installed OpenLiteSpeed.
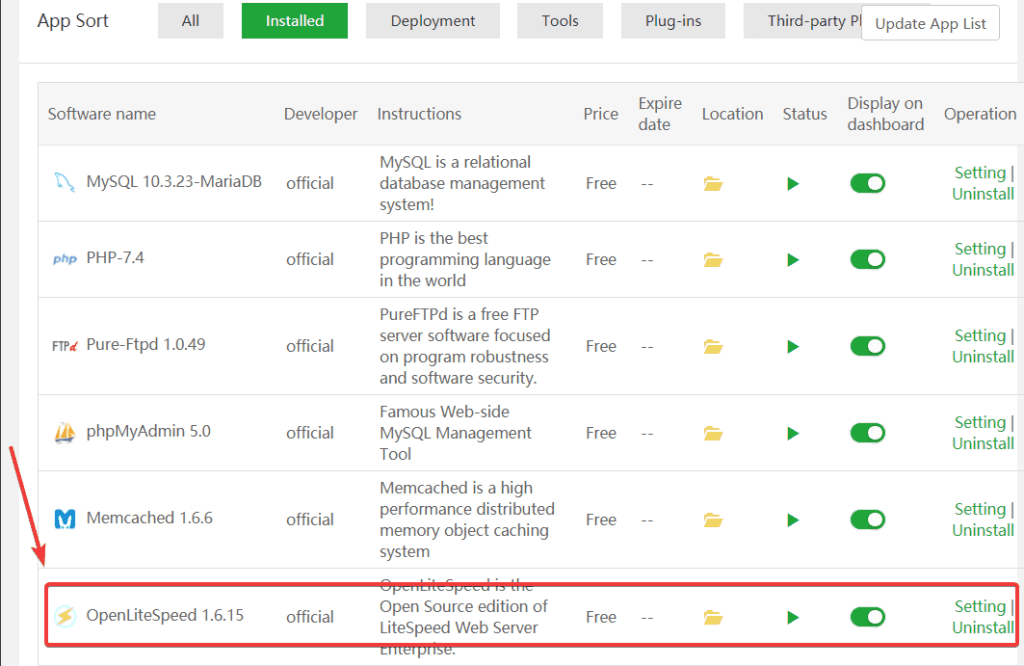
Step 4: Check Web admin OpenLiteSpeed
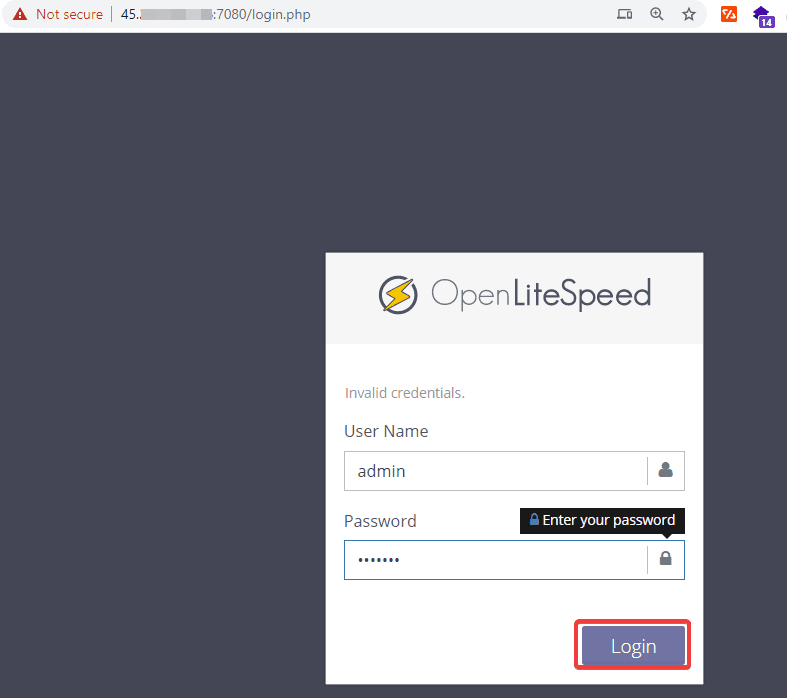
After successful installation, the default OpenLiteSpeed Web admin access path will be: https://IPVPS:7080/
However, to be able to access it, you need to do the following 2 steps:
- Open firewalld port
By default, port 7080 will not be opened on the firewalld, so you will not be able to access it after installation, you can stop the firewall or open the port with the following command:
firewall-cmd --zone=public --add-port=7080/tcp
If you receive a message like the below that you have succeeded:
[root@sv ~]# firewall-cmd --zone=public --add-port=7080/tcp
success
- Reset OpenLiteSpeed Webadmin credentials
After installing OpenLiteSpeed, we will not be provided with login information, but you need to reset the password with the following command:
cd /usr/local/lsws/admin/misc
./admpass.sh
Command annotation:
- Navigate to the path containing the login information file
- Run the command reset password
You do the following:
[root@sv /]# cd /usr/local/lsws/admin/misc
[root@sv misc]# ./admpass.sh
Please specify the user name of administrator.
This is the user name required to login the administration Web interface.

User name [admin]: admin   (nhập admin)
Please specify the administrator's password.
This is the password required to login the administration Web interface.
Password:         (nhập pass mới)
Retype password:  (nhập lại pass mới)
Administrator's username/password is updated successfully!
[root@sv misc]#
Now you can try to access Webadmin with the information just reset, the Webadmin interface will look below:

Step 5: Recheck the website
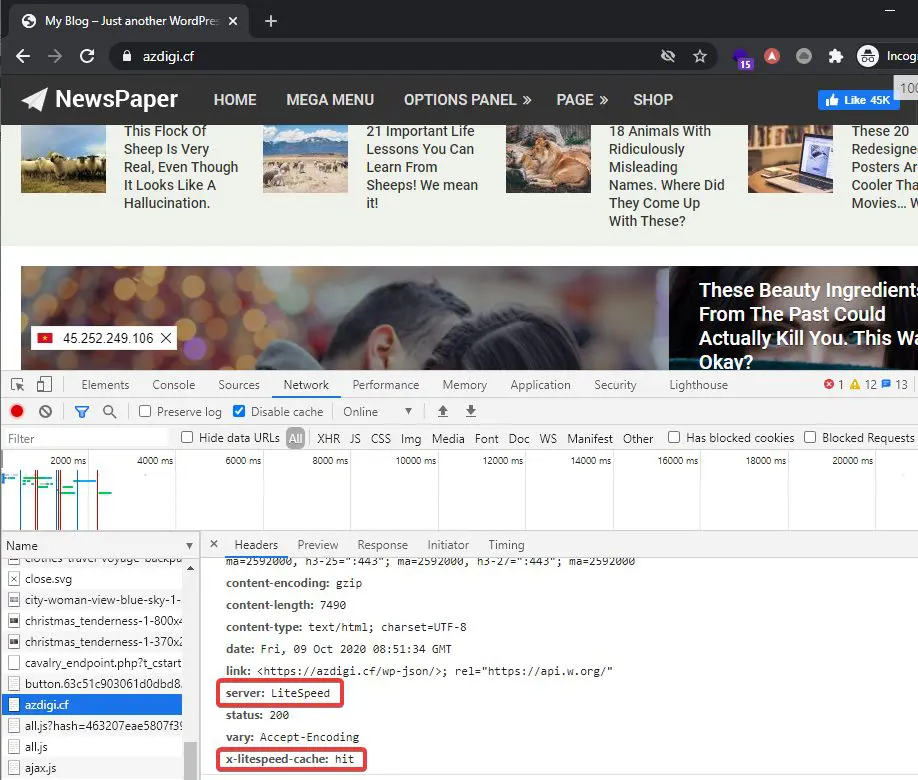
After the installation completes the OpenLiteSpeed installation, you can visit and recheck your website. As shown below, my website has been successfully run on Server Litespeed.
If the Webserver is OpenLiteSpeed or Litespeed Enterprise, you can install the LiteSpeed Cache plugin to combine and optimize the most powerful cache with this server.
Summary
So in this article, AZDIGI showed you how to install OpenLiteSpeed on VPS using aaPanel in the simplest and most detailed way with just a few mouse clicks. Converting Webserver from Nginx/Apache to OpenLiteSpeed will bring outstanding performance to your website, especially websites using open-source code such as WordPress, Opencart, Xenforo, Magento, Joomla… If you find the article interesting and useful, you can share it widely.
You can refer to some other useful aaPanel articles below:
Wishing you success!
If you need assistance, you can contact support in the ways below:
- Hotline 247: 028 888 24768 (Ext 0)
- Ticket/Email: You use the email to register for the service and send it directly to: support@azdigi.com

