Upgrade MariaDB 10.5 on CyberPanel to experience stability and database performance!
Currently, MariaDB 10.5 is stable, released in June 2020 and supported until June 2025. In this article, AZDIGI will guide you through upgrading MariaDB to version 10.5.8, released on November 11, 2020.
I. Overview
Currently, the latest MariaDB version is 10.5.8, this version is only automatically installed when you install a new CyberPanel. With older versions, you will need to upgrade to the new version. Upgrading the MariaDB version to the latest version will have many benefits as follows:
- Improves the overall stability of
MariaDB. - Fixed a lot of minor bugs in older versions of
MariaDB. - Improved performance compared to older versions.
- Increased security.
- Support for many new features.
- Retrieval handles data queries better.
And many more benefits. With such good benefits, let’s upgrade now.
II. Upgrade MariaDB to version 10.5 on CyberPanel
To upgrade to MariaDB 10.5 on CyberPanel, follow the steps below. And in order not to be interrupted during the implementation, please create a screen to use.
Step 1: SSH into the server
To upgrade to MariaDB 10.5 on CyberPanel, we first need to SSH or access your VPS/server with root privileges. If you don’t know how to SSH into your VPS/Server, you can refer to the following tutorial:
Step 2: Backup data
Although this upgrade does not affect the internal database, as a system administrator, it is necessary and impossible to ignore before every update, the operation is to back up important data. Therefore, I will backup the database with the following command:
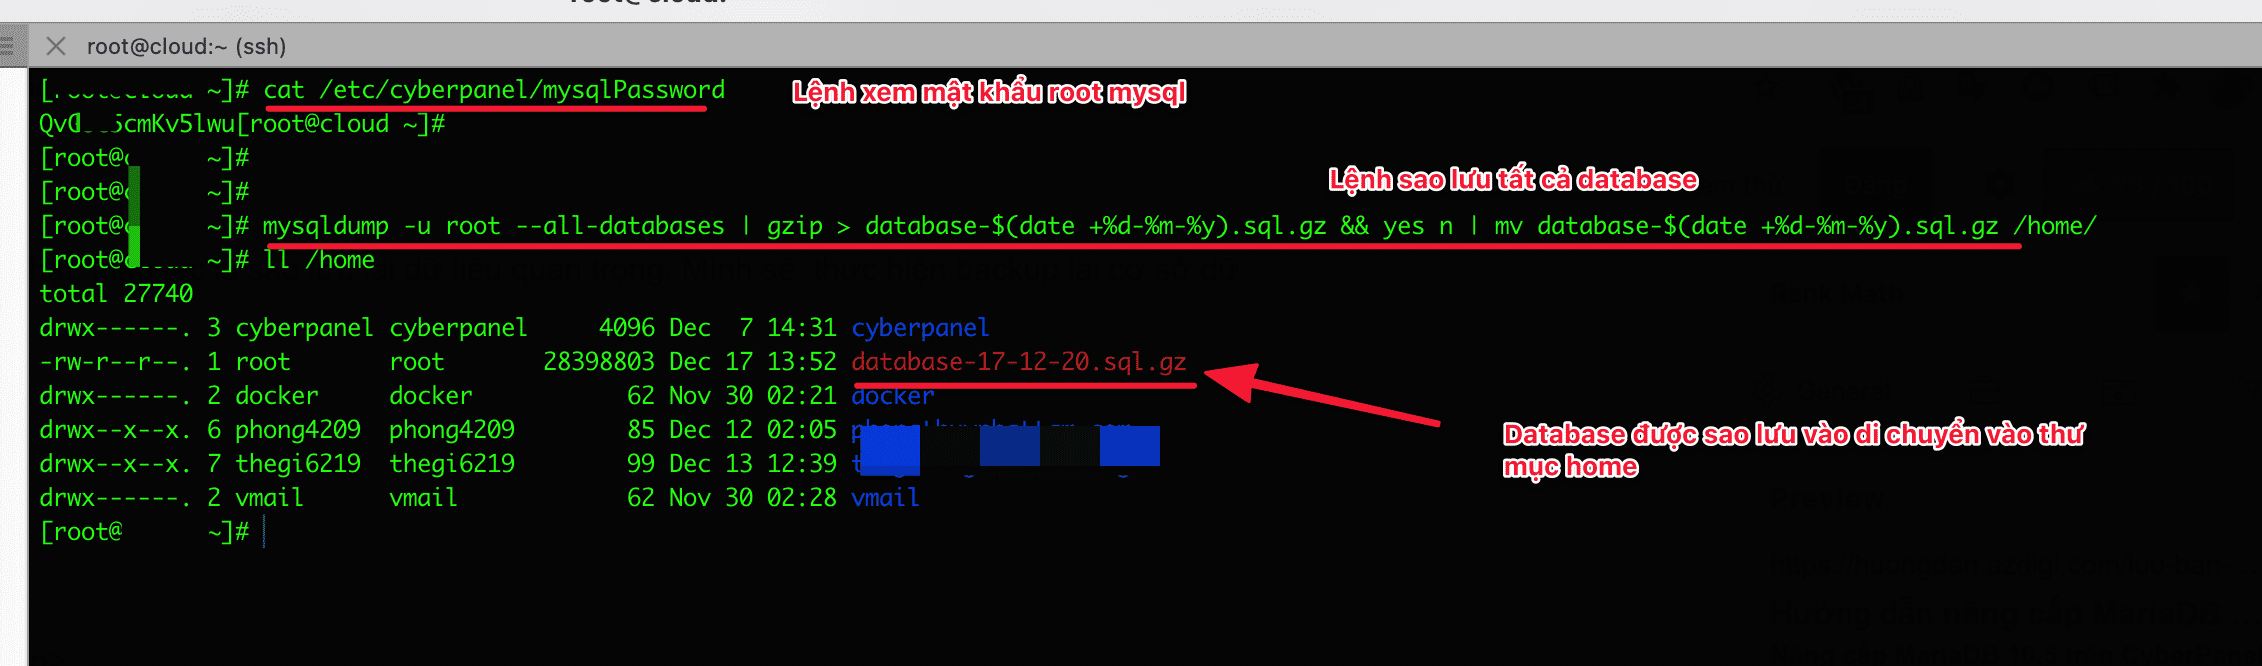
cat /etc/cyberpanel/mysqlPassword
mysqldump -u root --all-databases | gzip > database-$(date +%d-%m-%y).sql.gz && yes n | mv database-$(date +%d-%m-%y).sql.gz /home/
The above command will backup all the databases and pack them in gz file format. I will note some of the following information:
- cat /etc/cyberpanel/mysqlPassword: This command to see the root password of mysql, when backing up will need this password information.
- mysqldump -u root –all-databases:This command will backup all databases as root.
- gzip > database-$(date +%d-%m-%y).sql.gz: After the backup is complete, it will be compressed with
gzfile format and the file will be named database-day-month-year .sql.gz - mv database-$(date +%d-%m-%y).sql.gz /home/: This command will move the compressed file to the
/home/directory for preservation.

Step 3: Upgrade to MariaDB 10.5
Once the database is backed up securely, the next step will be the main step in upgrading MariaDB to version 10.5.
Currently, my server is using version 10.1.43-MariaDB, which is quite old, so I will upgrade. You can use the mysql -V command to check your version.
[root@azdigi ~]# clear
[root@azdigi ~]# mysql -V
mysql  Ver 15.1 Distrib 10.1.43-MariaDB, for Linux (x86_64) using readline 5.1
[root@azdigi ~]#
Check the repo and you have to make sure the repo is up to date.
[root@azdigi ~]# cat /etc/yum.repos.d/MariaDB.repo
Output
# MariaDB 10.1 CentOS repository list - created 2018-02-02 12:38 UTC
# http://downloads.mariadb.org/mariadb/repositories/
[mariadb]
name = MariaDB
baseurl = http://yum.mariadb.org/10.1/centos7-amd64
gpgkey=https://yum.mariadb.org/RPM-GPG-KEY-MariaDB
gpgcheck=1
[root@azdigi ~]#
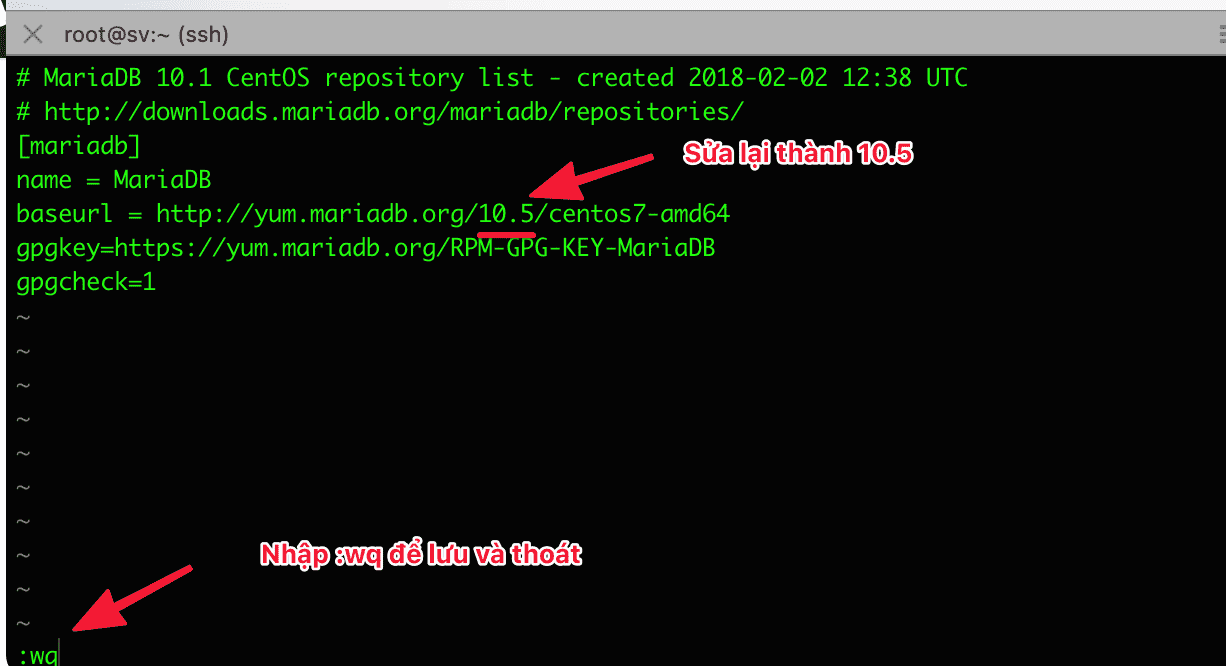
As you can see above, the Output section still shows as version 10.1. So you do edit 10.1 with 10.5 respectively. Use the vi, vim or nano editor command to open the MariaDB.repo file and edit it.
vi /etc/yum.repos.d/MariaDB.repo
After you have customized MariaDB.repo, the next step is to back up the MariaDB configuration files. You can quickly use the following commands to perform a backup:
cp /etc/my.cnf /etc/my.cnf.bak
mkdir /etc/backup_mariadb_conf
cp -R /etc/my.cnf.d/ /etc/backup_mariadb_conf/
Note the command above:
- Command 1: copy the
my.cnffile tomy.cnf.bakfor backup. - Command 2: this is the command to create a directory, I will create a directory called
backup_mariadb_confinside /etc - Command 3: This command has an option -R, which will copy the entire
my.cnf.ddirectory inside the newly created directory/etc/backup_mariadb_conf
Delete the current MariaDB instance
After safely backing up the configuration file, delete the current MariaDB instance with the following command:
- For CentOS
yum remove MariaDB-server MariaDB-client galera MariaDB-devel MariaDB-shared -y
- For Ubuntu
apt remove MariaDB-server MariaDB-client galera MariaDB-devel MariaDB-shared -y
Please wait a few minutes for the program to run it. After deleting, you can upgrade to MariaDB 10.5.
- For CentOS
yum --enablerepo=mariadb -y install MariaDB-server MariaDB-client MariaDB-devel MariaDB-shared -y
- For Ubuntu
apt install MariaDB-server MariaDB-client MariaDB-devel MariaDB-shared -y
The upgrade process will take 10 to 15 minutes, depending on the strong or weak server configuration. And you must not turn off the SSH window unless you are running in Screen like the beginning of the article I mentioned. When it is finished, you will receive a successful message.
And this is the final step for the MariaDB 10.5 upgrade to be complete. Please restore the configuration files backed up in the previous step to the old location.
cp -f /etc/my.cnf.bak /etc/my.cnf
rm -rf /etc/my.cnf.d/
mv /etc/backup_mariadb_conf/my.cnf.d /etc/
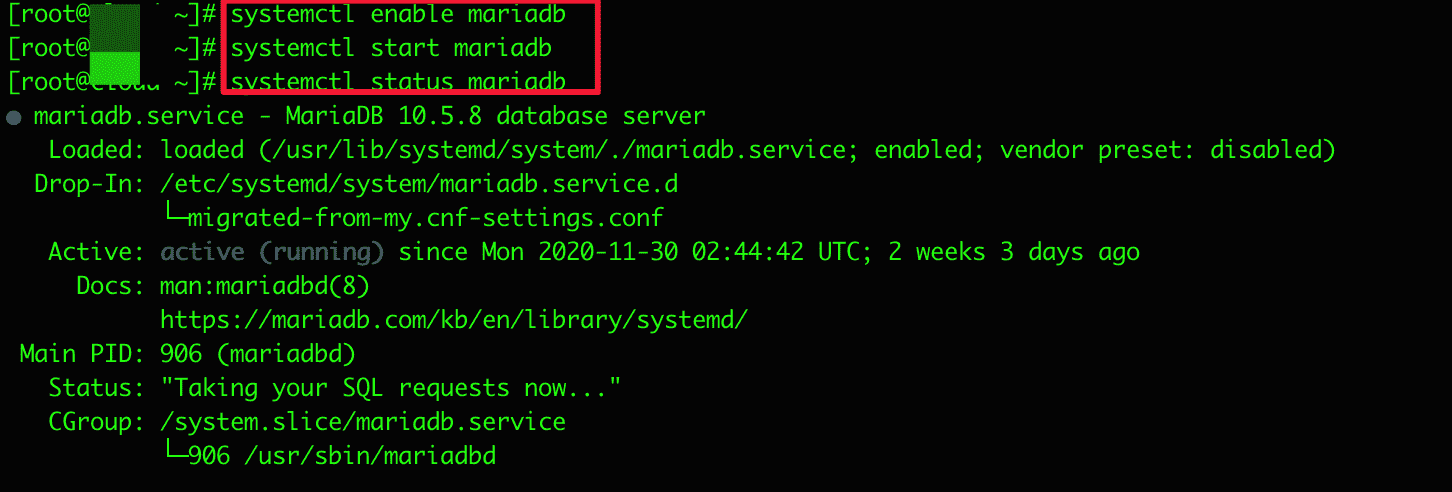
Once the copy and migration are complete, enable and restart the MariaDB service.
systemctl enable mariadb
systemctl start mariadb
Below are some images after upgrading:

III. Summary
Hopefully, this article brings a lot of new and helpful information to you, from which you can actively manage and upgrade services to the latest version and also can not ignore the improving operational performance of the new version.
If you need assistance, you can contact support in the ways below:
- Hotline 247: 028 888 24768 (Ext 0)
- Ticket/Email: You use the email to register for the service and send it directly to: support@azdigi.com .
- Website AZDIGI: https://azdigi.com/
About the author

Thạch Phạm
Đồng sáng lập và Giám đốc điều hành của AZDIGI. Có hơn 15 năm kinh nghiệm trong phổ biến kiến thức liên quan đến WordPress tại thachpham.com, phát triển website và phát triển hệ thống.