
How to transfer website data to HestiaCP. Let’s find out with AZDIGI!
I. Overview
Not any administrator knows how to transfer website data to HestiaCP and it has many ways to do it. Transfer to the traditional backup/restore. Use the plugin, and transfer with cmd linux tools. In this article, AZDIGI will guide you on how to upload an available source code from Local on a VPS running HestiaCP. Let’s take the steps with AZDIGI.
II. Transfer website data to HestiaCP
To transfer website data to HestiaCP, you can follow these steps.
In this tutorial, I will work with the WordPress source code. For other source codes, you can also do the same steps, the only difference is in the database configuration step in the connection string.
Step 1: Check available data
To upload the available source code to HestiaCP, you need to prepare the following data:
- Source code: This is the source code of the website including the core, theme, plugin, folder containing image data.
- Database: The database of the website above, this file is usually in the format
*.sql
And the illustration below is my available source code including a backup.zip file and *.sql
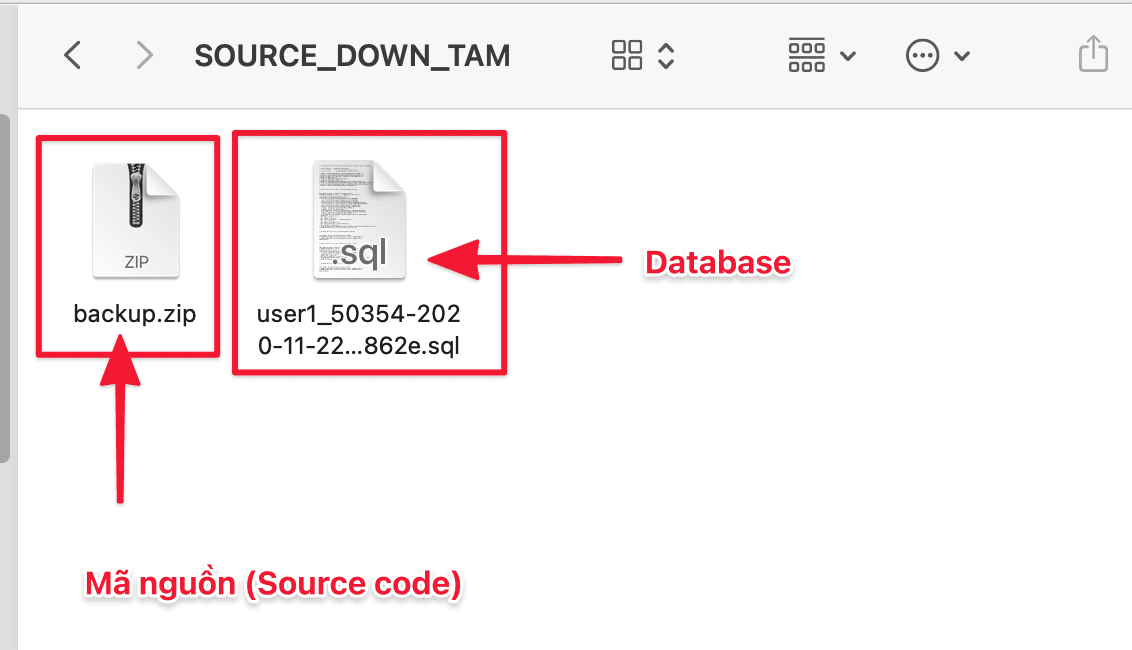
If you haven’t compressed the source code yet, You will need to compress the source code into a .zip file to upload to HestiaCP to extract it. Once done, proceed to the next steps.
Step 2: Login to HestiaCP in User
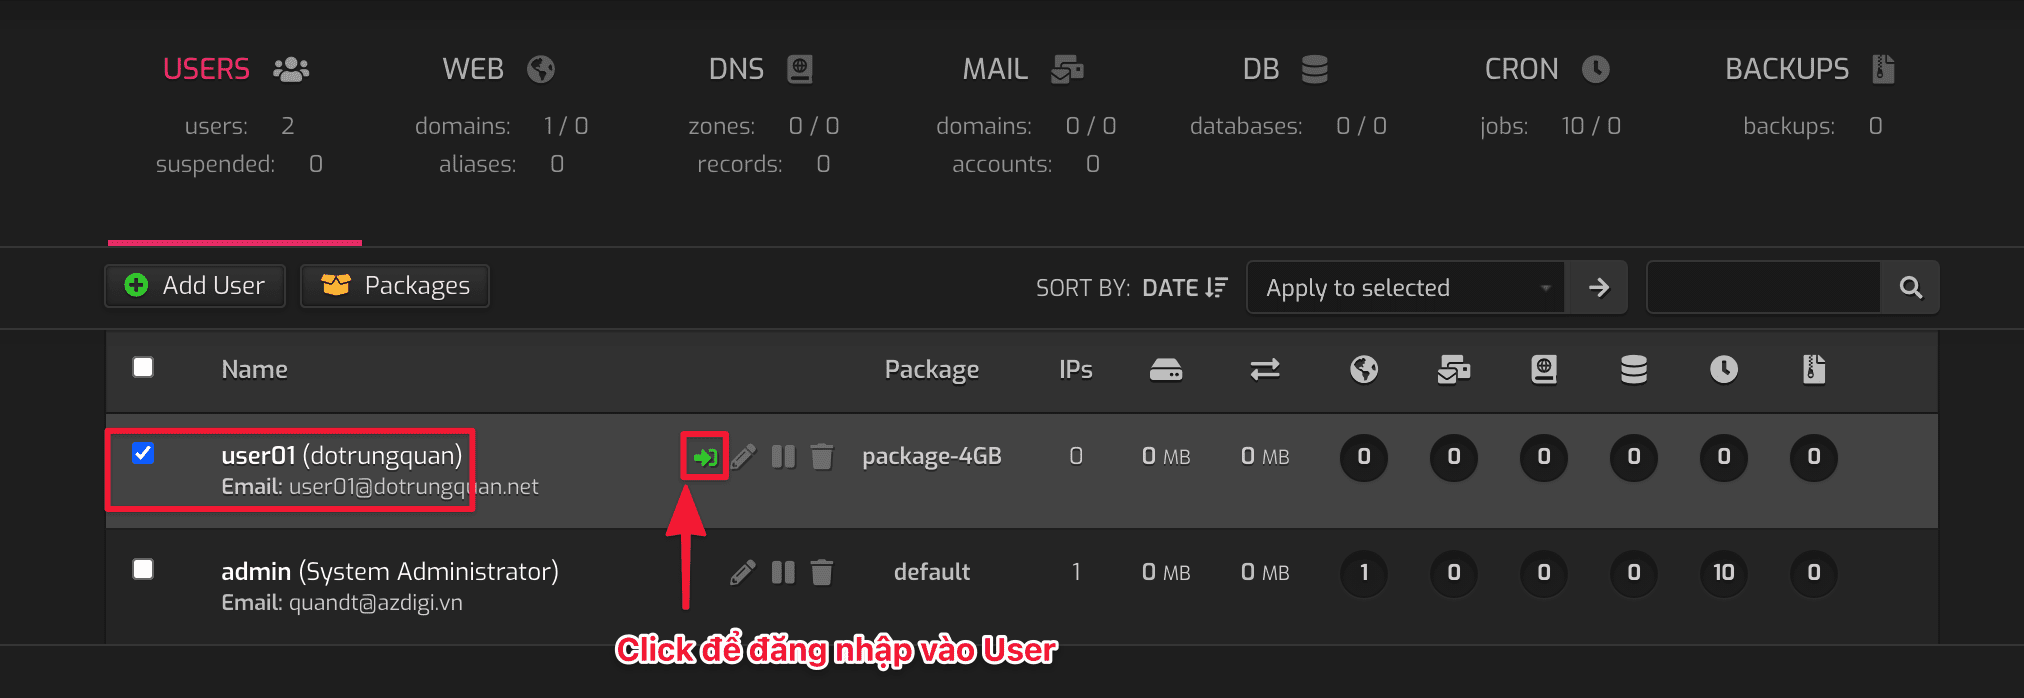
First, log in to the User to install WordPress. click on the => ⏩ icon, as shown below. Or you can log in directly from https://my-ip:8083 with the user and password created earlier.
Step 3: Add Web Domain
To create a website, you log in to the previously created User to create a website. Click USERS => Select > to Login
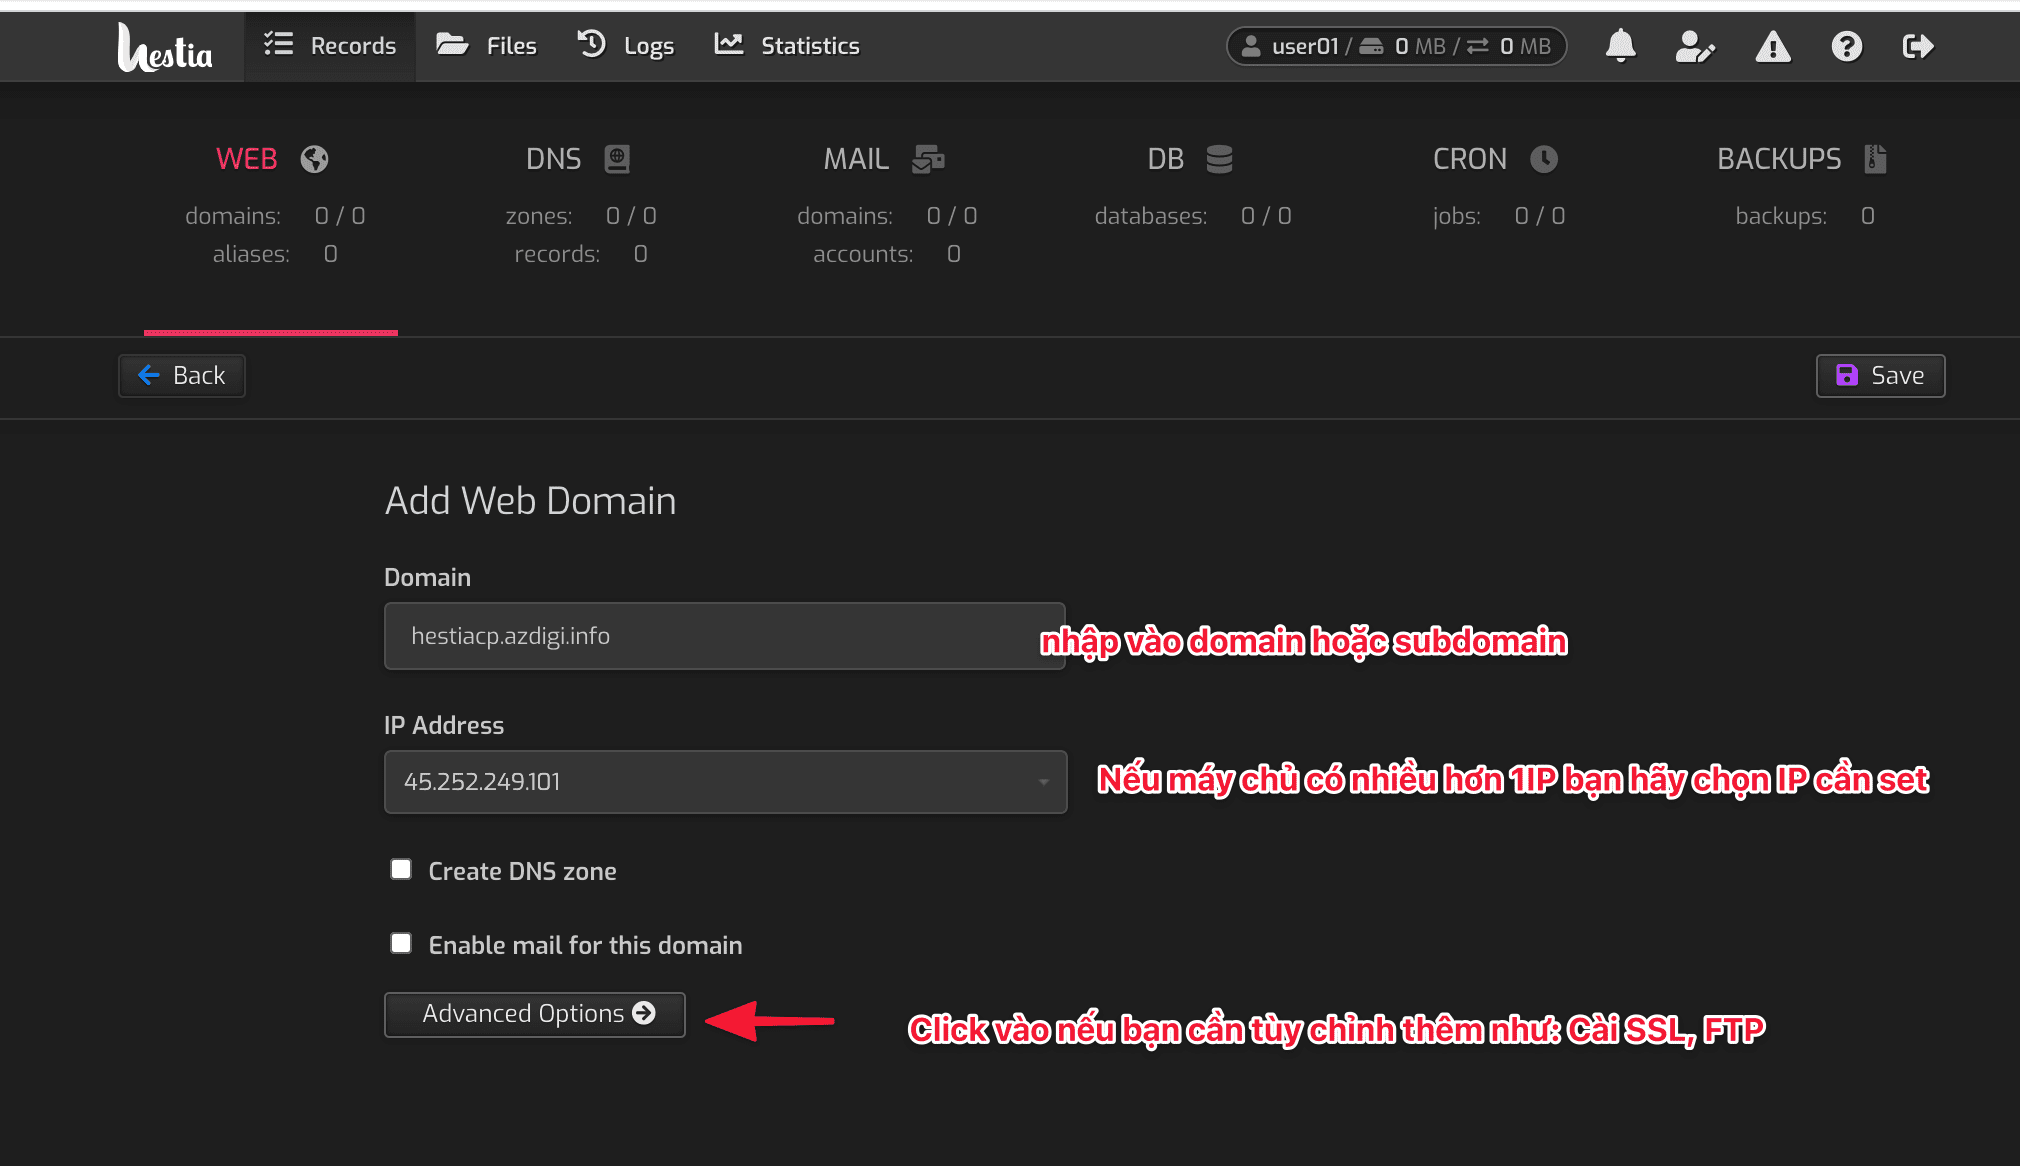
Next, you click Add Web Domain to add a new website.

In the next interface, enter the following information:
- Domain: enter your domain name
- IP Address: If VPS has more than 1 IP, you choose the corresponding IP here. If you have 1 IP, you keep it.
- Create DNS zone: If you need to create a DNS zone, check this box.
- Enable mail for this domain
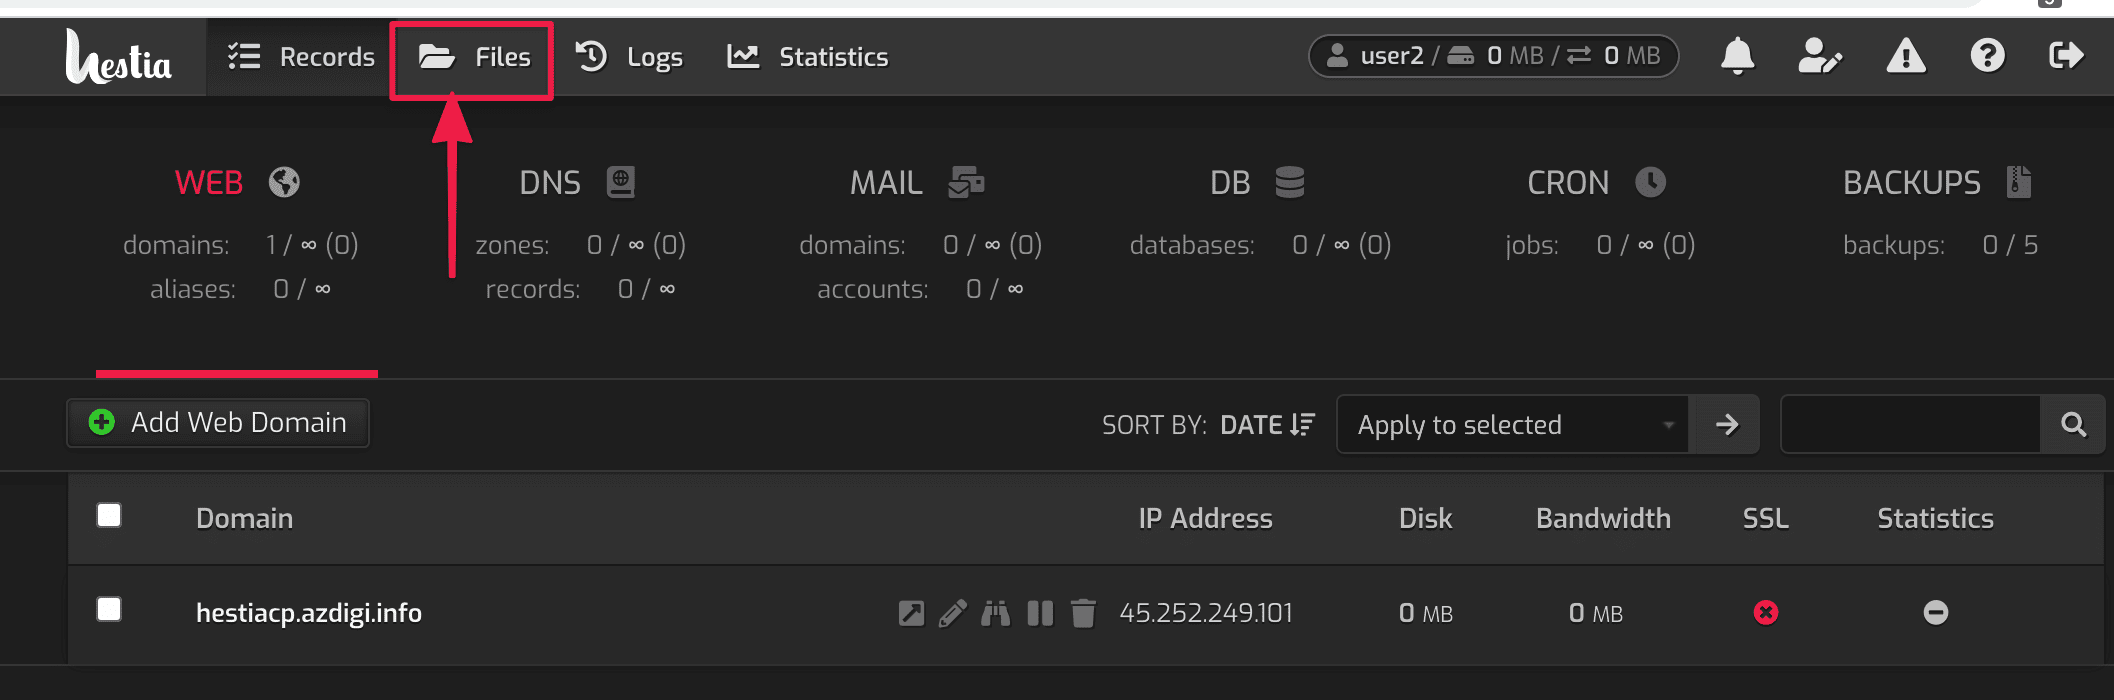
Step 4: Upload the source code
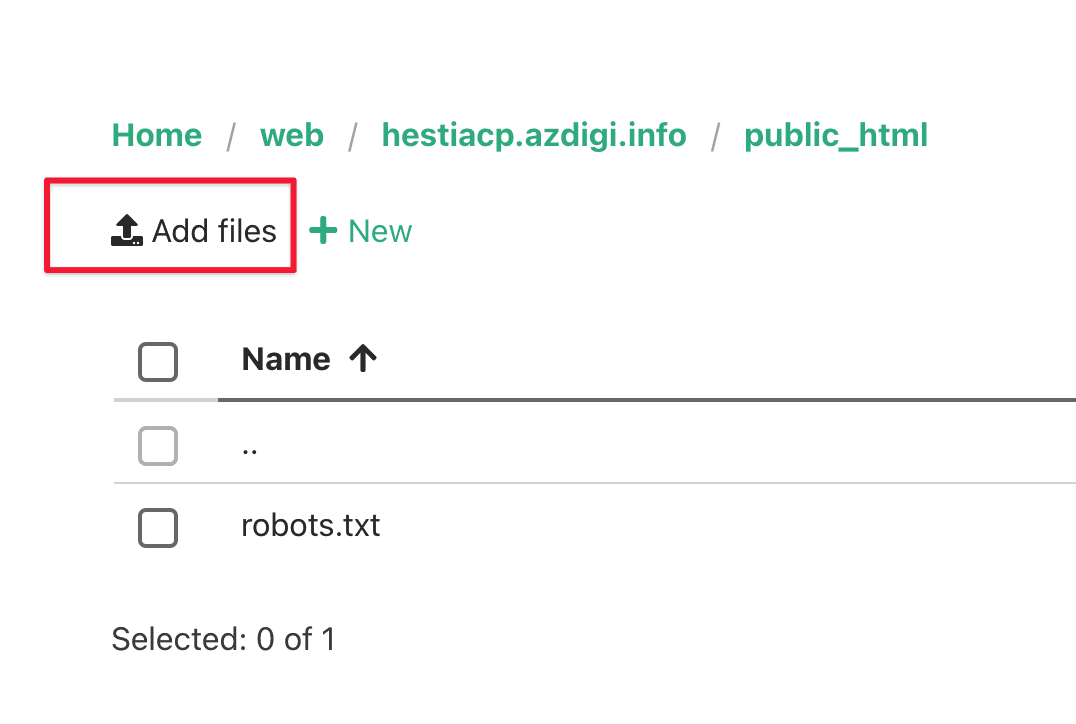
You access File => click /Home/web/my-domain/public_html/ to upload the source code.
Select Add files => select the file to upload the file in Local.
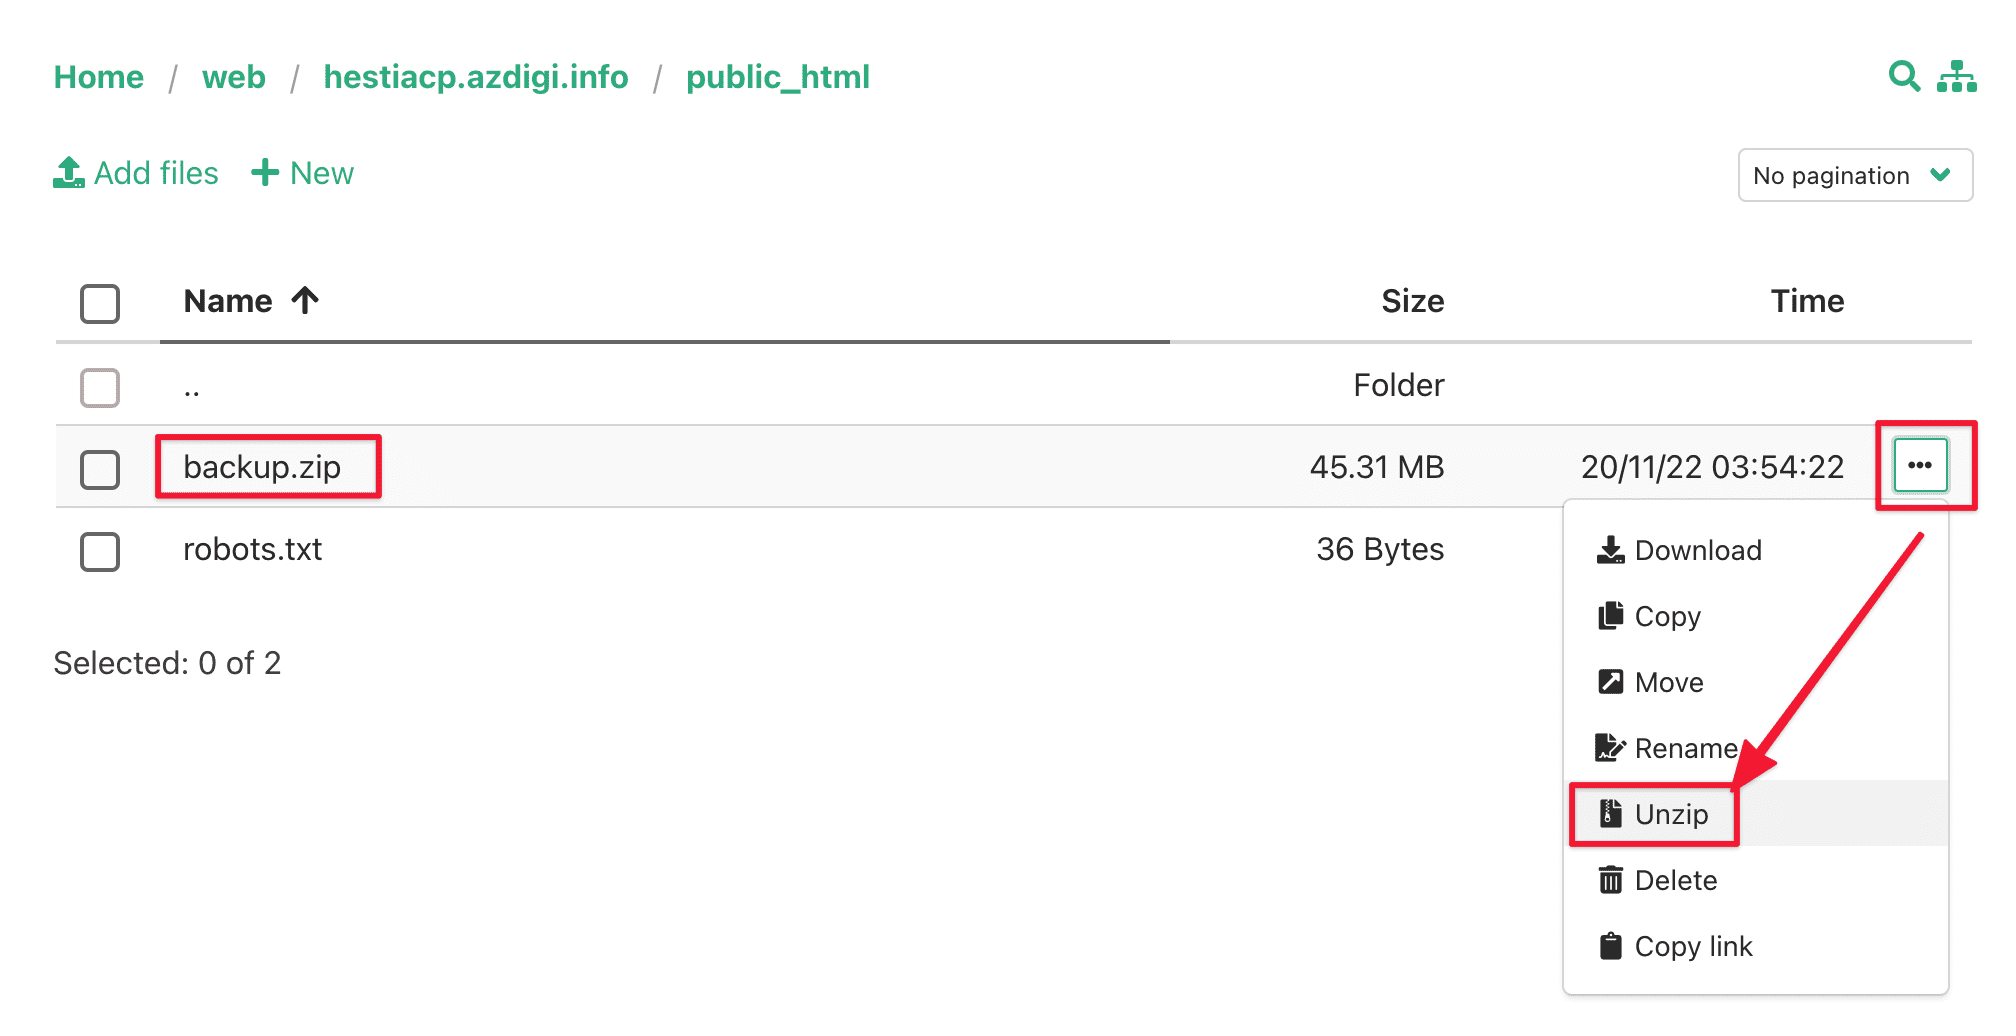
Once the upload is complete, start extracting the file. You click on ... and then select Unzip to extract the file.
And here is my entire WordPress source code.
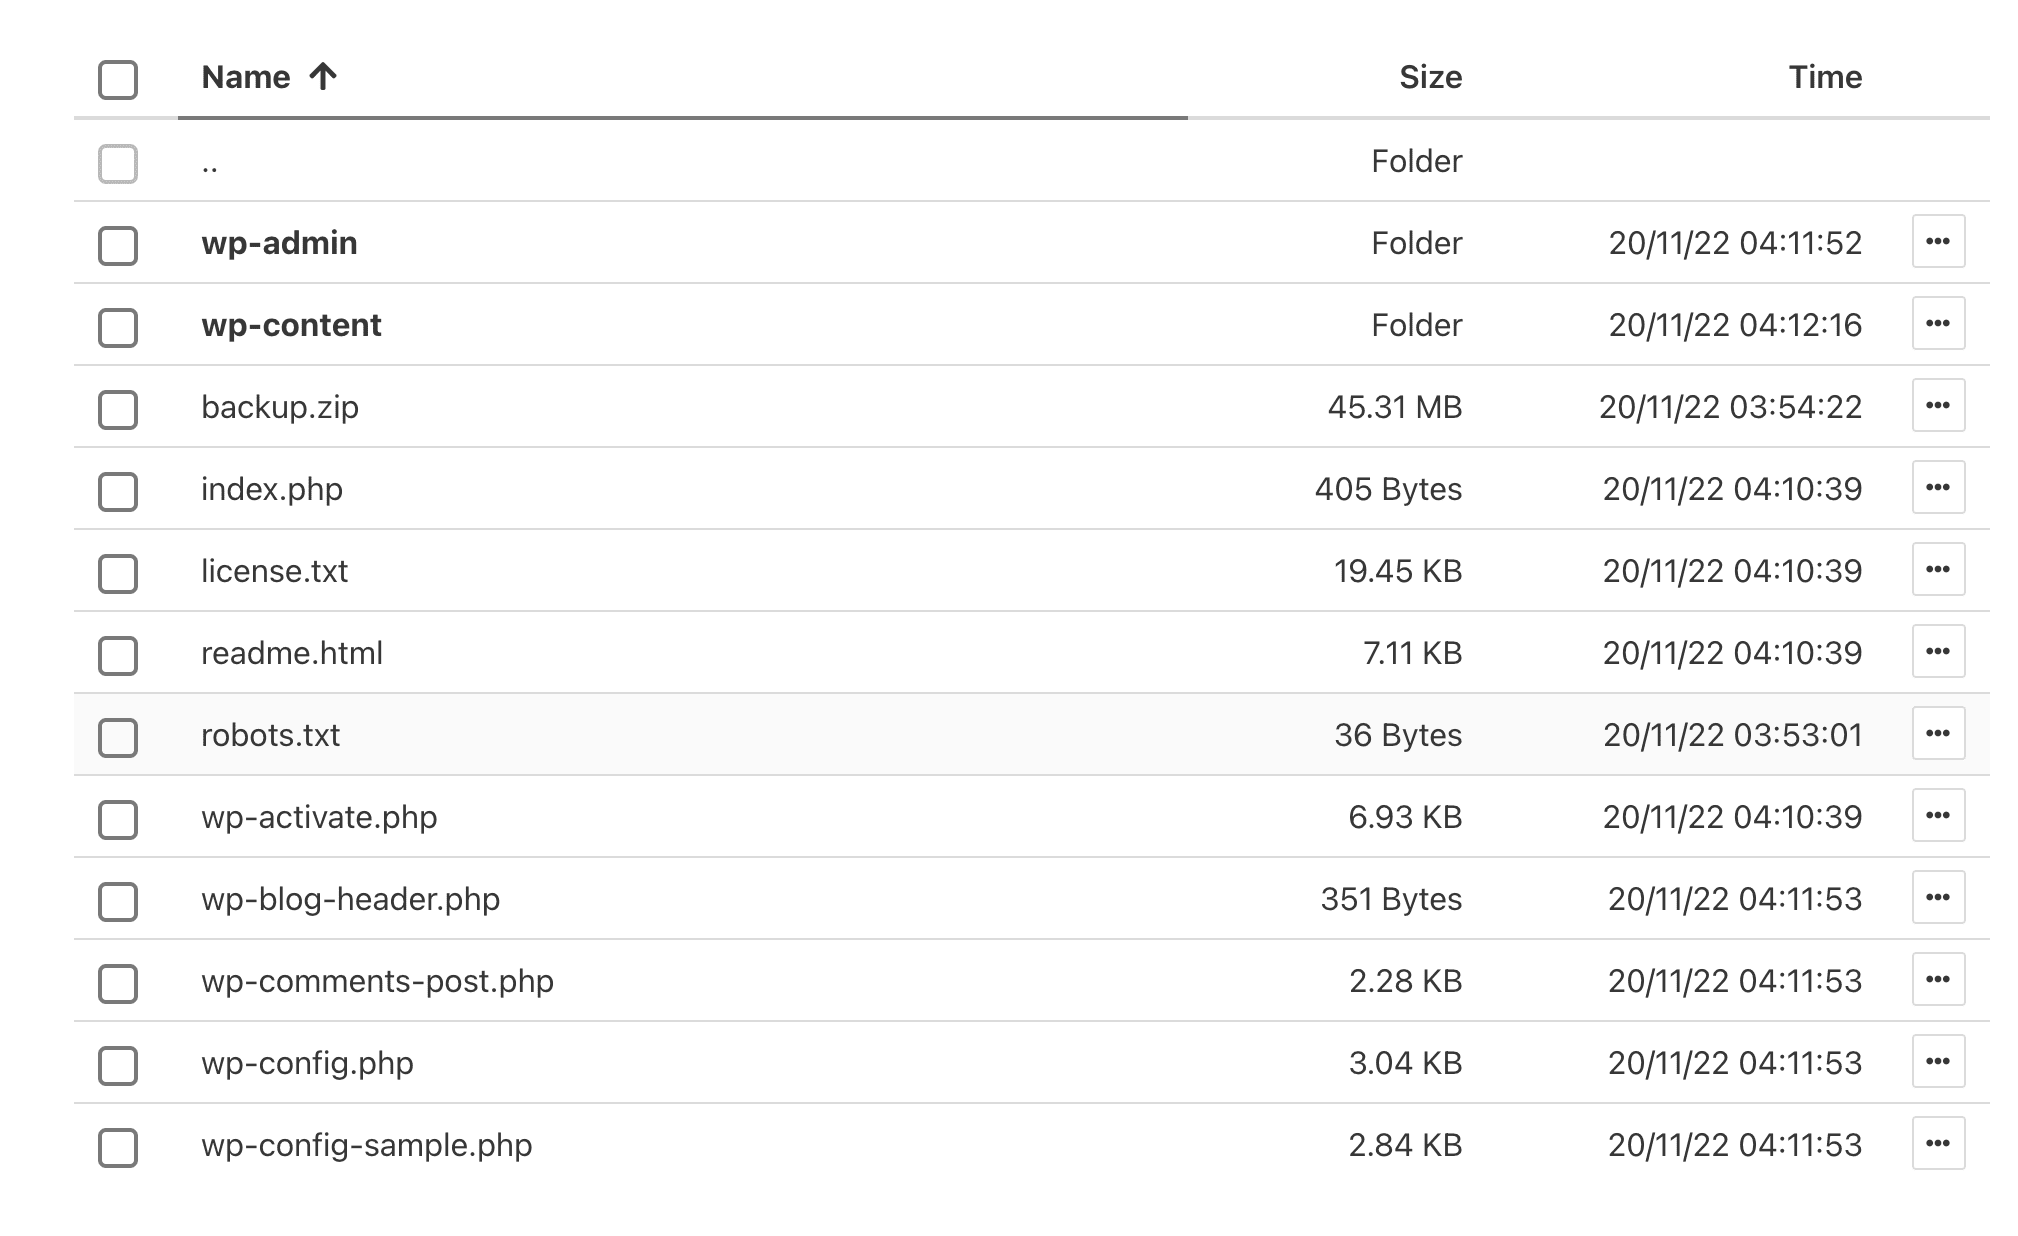
Note: Remember to delete the index.html file if any.
Step 5: Create a database and import it
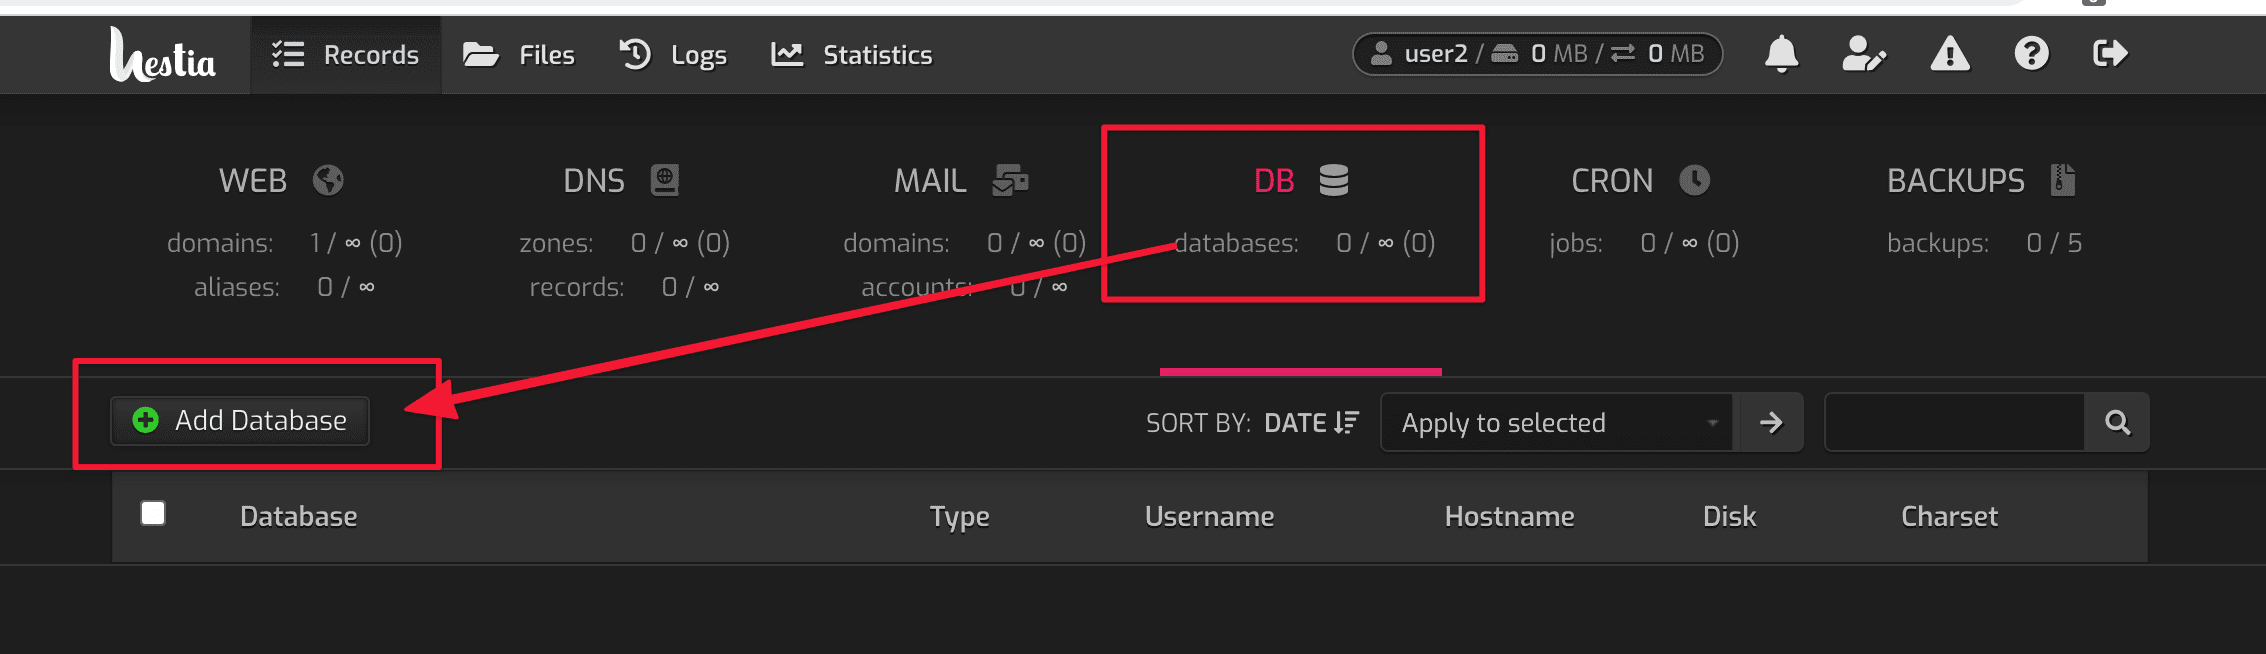
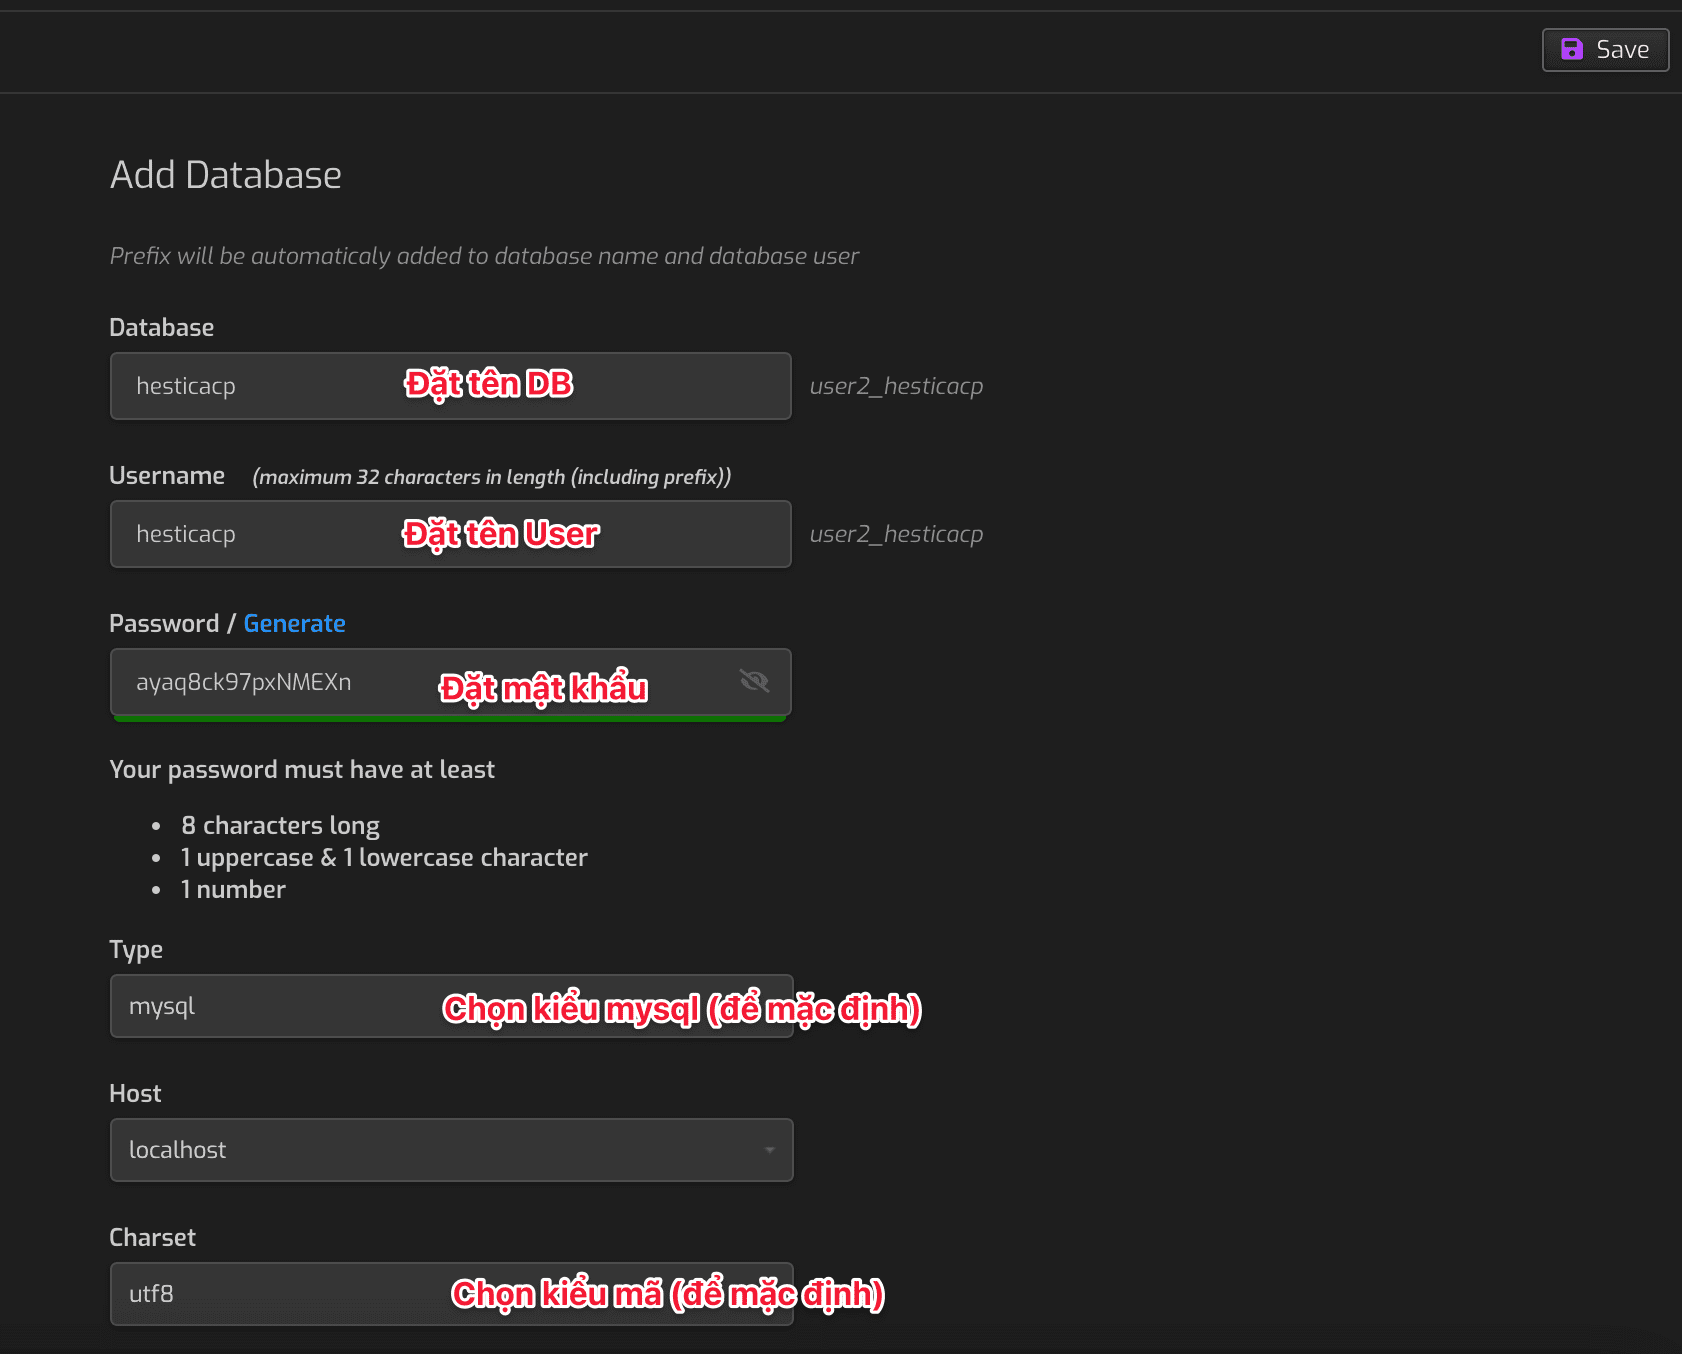
You will need to create a new database account to import the *.sql file. To create, you click DB and select Add Database.
In this interface, you enter information as follows:
- Database: Enter your database name
- Username: Enter your Username (you should enter these two values together for easy management)
- Password: Enter the password for the user
- Type: Leave as default
- Host: Select localhost
- Charset: Leave as the default
After entering all the information, click Save.
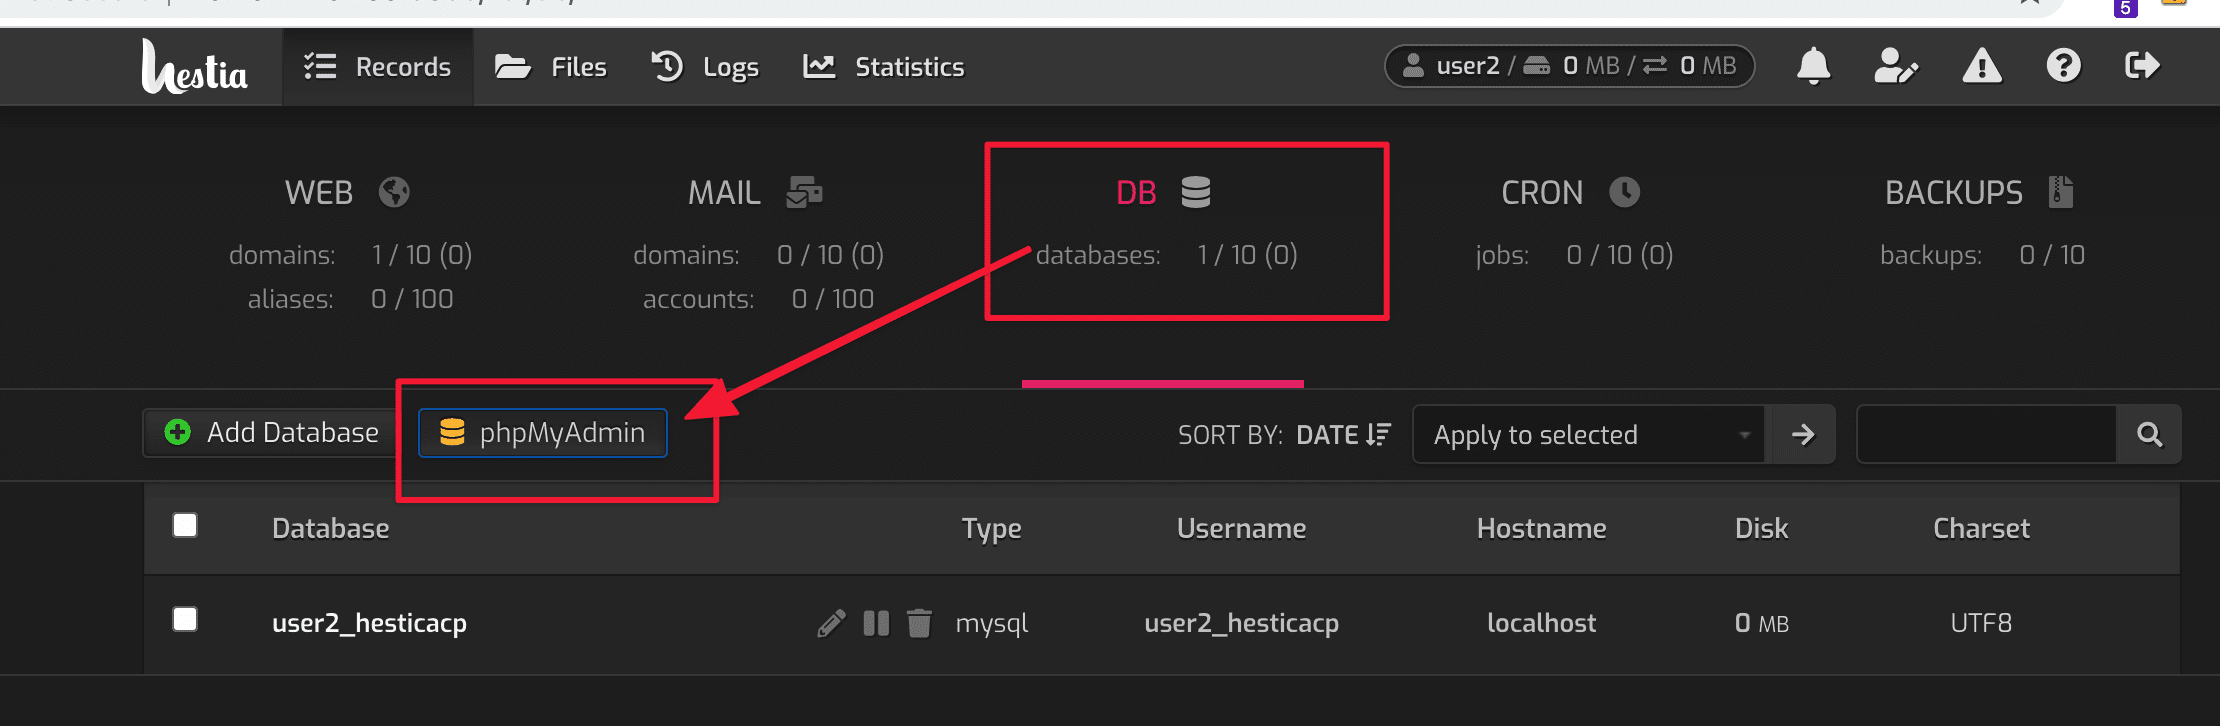
The database has been created successfully, please take the next step to import the sql database into the newly created database.
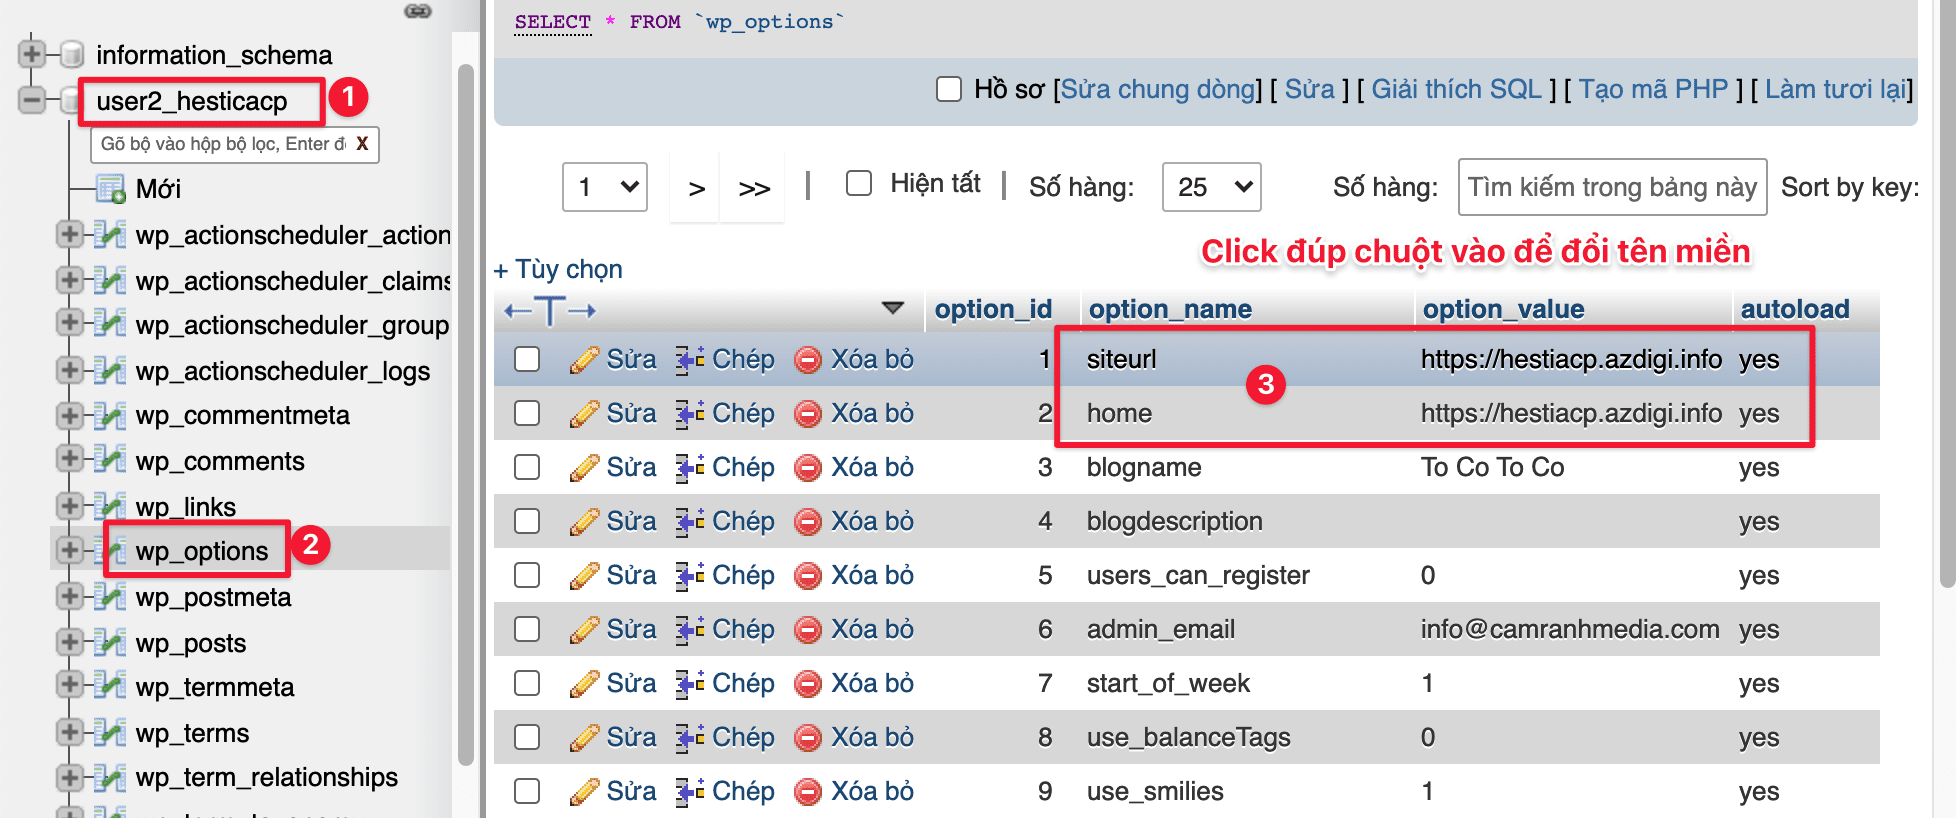
Click DB => phpMyAdmin
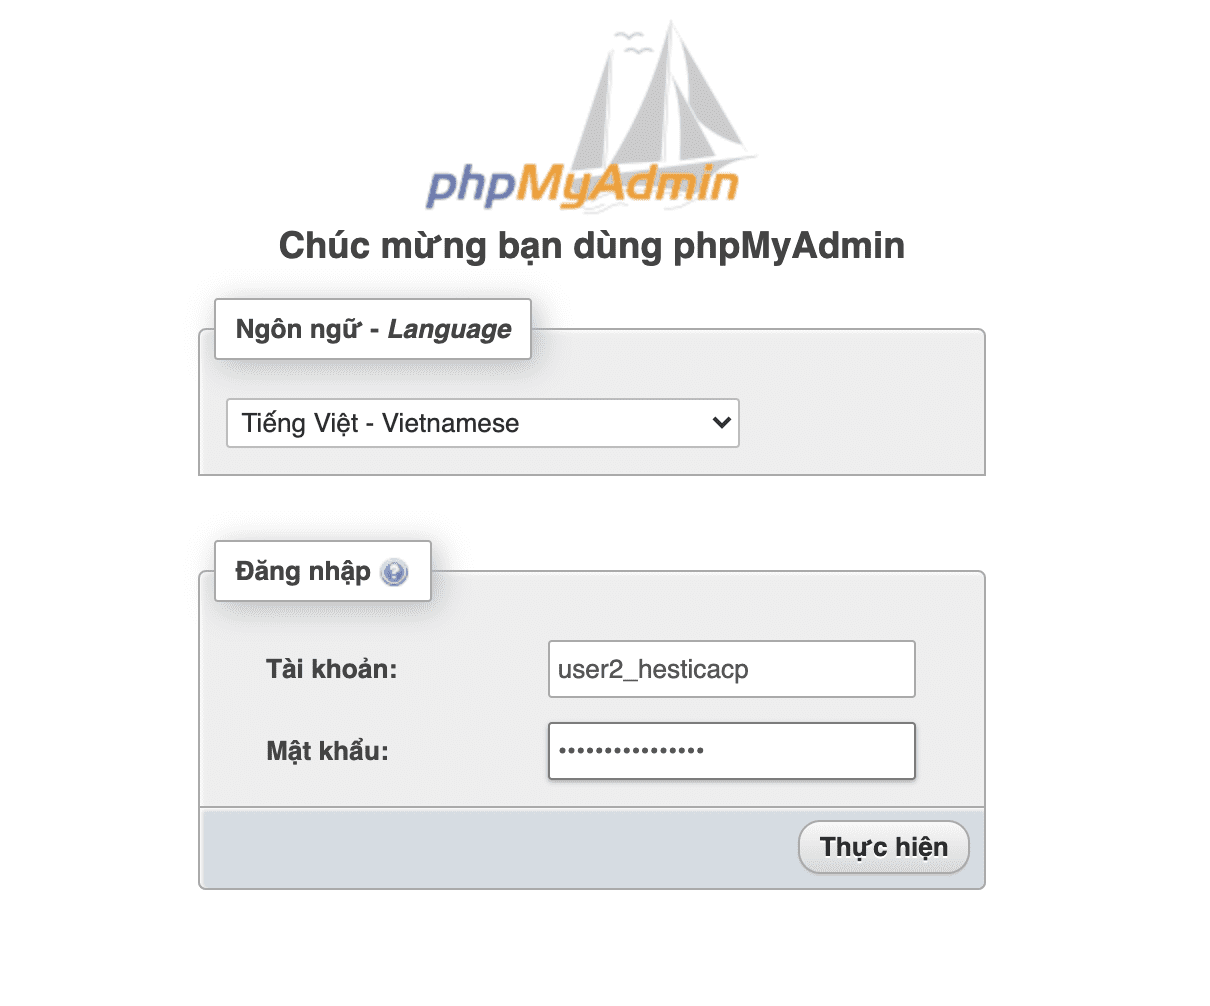
The login interface will appear as shown below: Please enter the account information you just created.
Next, you choose 1 > 2 > 3 >4 sequentially which I numbered in order to import the database:
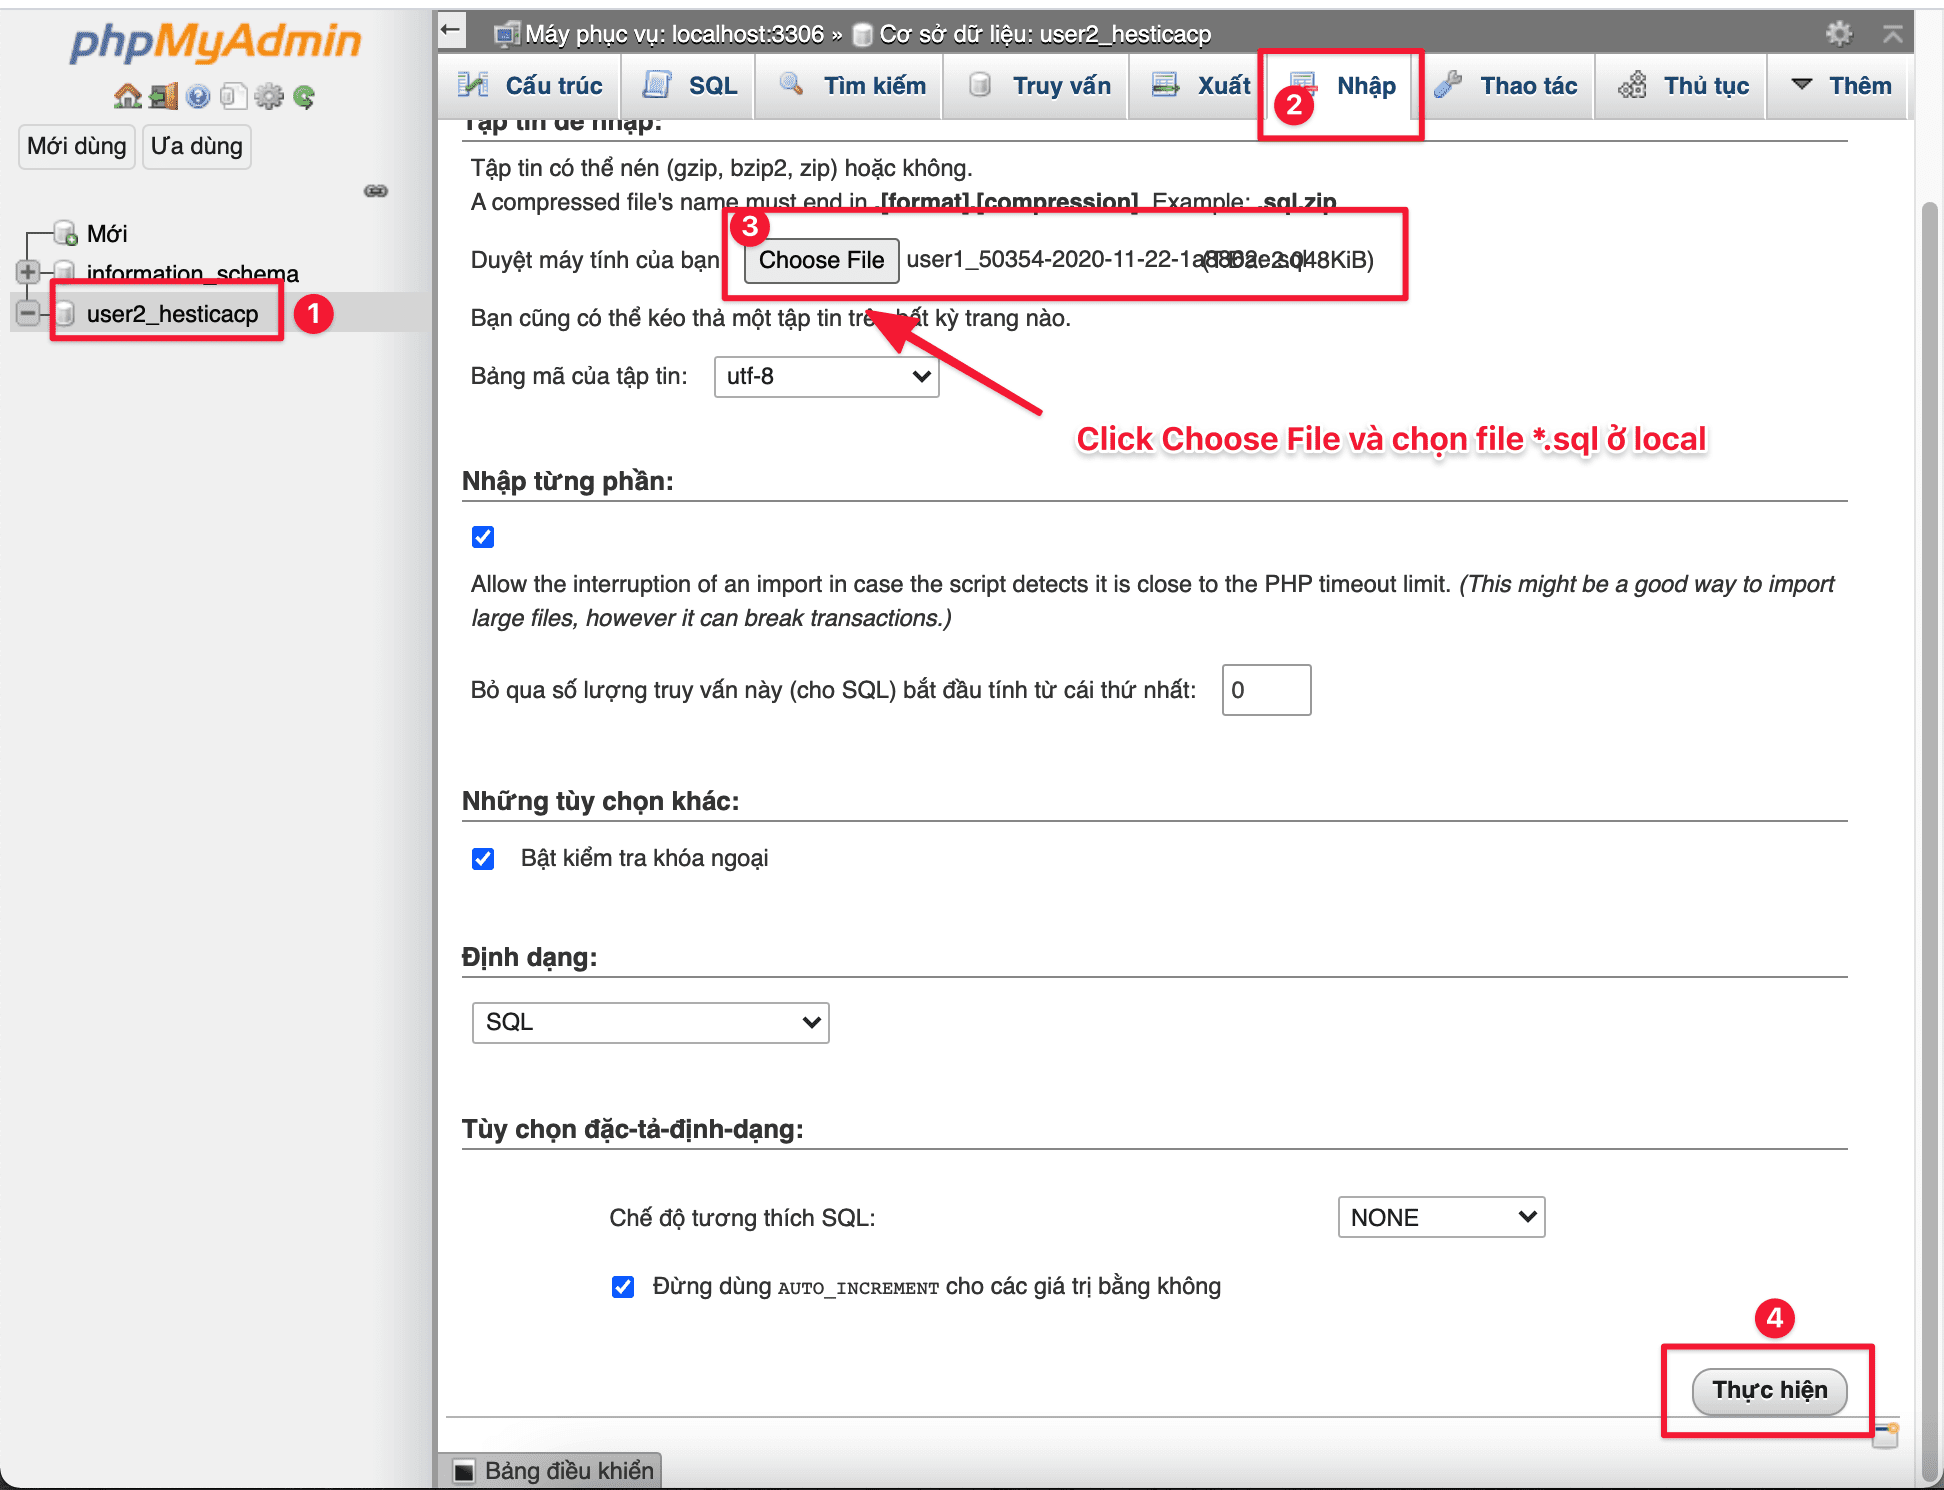
When the import is complete, check and correct the URL SITE/HOME name. If you change the domain name, double-click on the number 3 box and enter the domain name to change.
Step 6: Connect Database to the source code
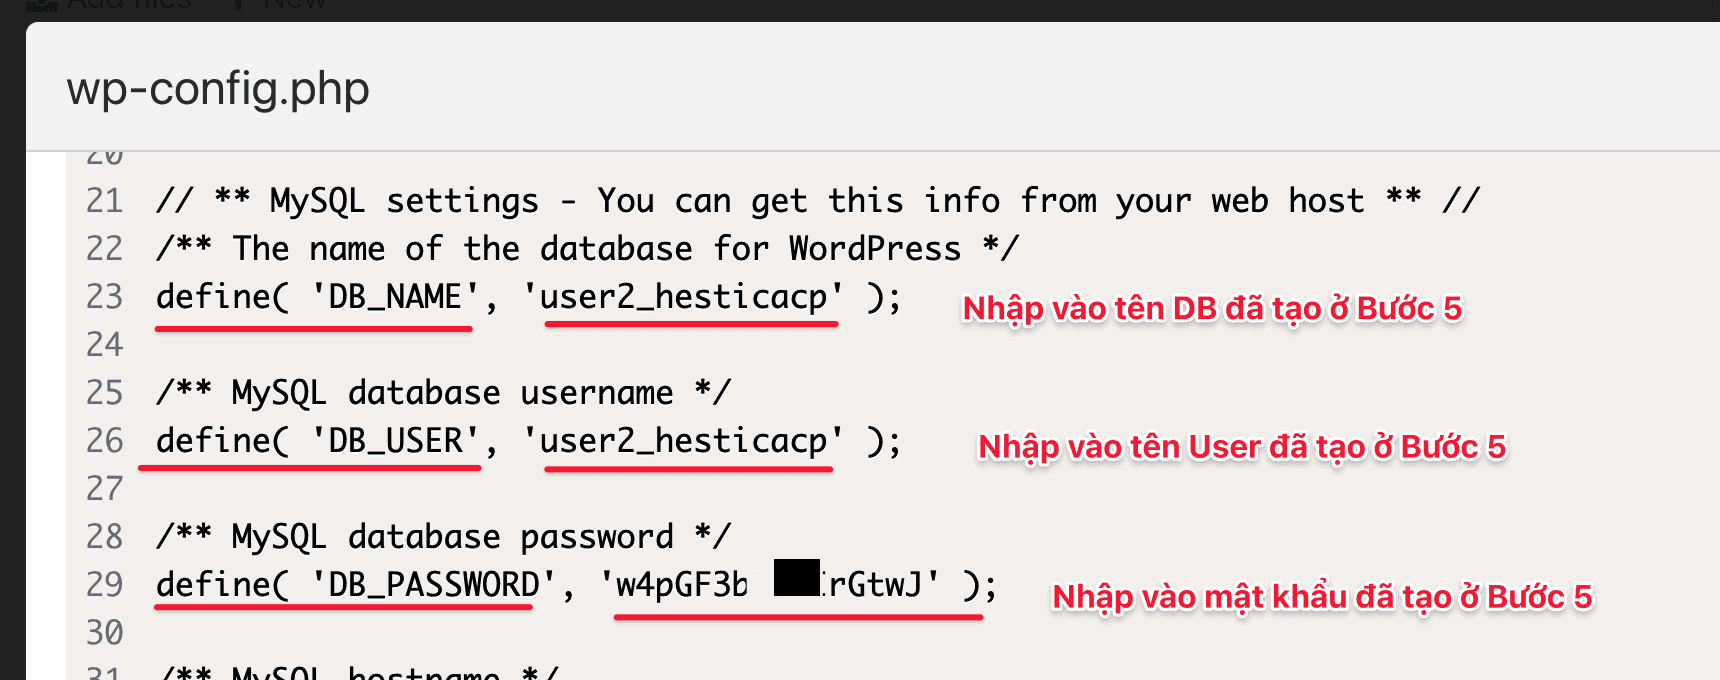
This is the final step to complete the website transfer from local to the host. You will configure the database account created in Step 5 into the source code uploaded in Step 4.
You access File => click /Home/web/my-domain/public_html/ . Here you open the wp-config.php file to configure the Database connection.
After the connection is complete, Please visit the website to check if it works.
If you need to install more SSL, see the following guide to install the free Let’s Encrypt SSL with AZDIGI.
III. Summary
Hopefully, this article brings a lot of useful knowledge to you, so that you can actively perform data conversion and upload source code operations safely and effectively.
Wishing you success!
If you need assistance, you can contact support in the ways below:
- Hotline 247: 028 888 24768 (Ext 0)
- Ticket/Email: You use the email to register for the service and send it directly to: support@azdigi.com .
About the author

Thạch Phạm
Đồng sáng lập và Giám đốc điều hành của AZDIGI. Có hơn 15 năm kinh nghiệm trong phổ biến kiến thức liên quan đến WordPress tại thachpham.com, phát triển website và phát triển hệ thống.