Install SSL for websites on CloudFlare with 4 simple steps.
What is an SSL certificate?
An SSL (Secure Sockets Layer) certificate is a standard security technology for establishing links between a web server and a browser. This link ensures that the transmitted data is not tampered with or altered during transmission.
SSL helps ensure 2 main tasks:
- Two-way authentication includes the transmitting object, also known as the server and the receiving object of the client, to avoid cases of counterfeiting of brands or hackers.
- The encryption task helps secure the information at the highest level so that only the sender and receiver can read it.
Actual benefits that SSL brings:
- Security of user information.
- Provide authentication (domain, organization or individual, anti-spoofing)
- Google appreciates when the website uses SSL.
- Create trust for users.
Install SSL on CloudFlare
On Cloudflare, there will be 3 types of SSL certificates, these 3 types all support traffic encryption, helping the website be better evaluated by Google. To use SSL, you need to ensure that your website has CloudFlare Proxy enabled.
Different types of SSL will have different levels of usage and security.

- Flexible SSL: Most websites use this certificate because it is very easy to set up. Users will not need to install anything on the server when using this type, but SSL (HTTPS) will automatically be enabled. However, the traffic exchanged between the web server and Cloudflare will not be encrypted.
- Full SSL : This type of CloudFlare will support visitors to the website via HTTPS protocol and the data from CloudFlare sent to the server containing the website will be encrypted. However, you must have an SSL certificate, but CloudFlare will not validate this certificate to use a self-signed certificate or create a CloudFlare certificate.
- Full SSL (Strick): Same as Full SSL, but CloudFlare will validate this certificate, your certificate must buy or use Let’s Encrypt. Your account must be a Pro account to use a private certificate on CloudFlare.
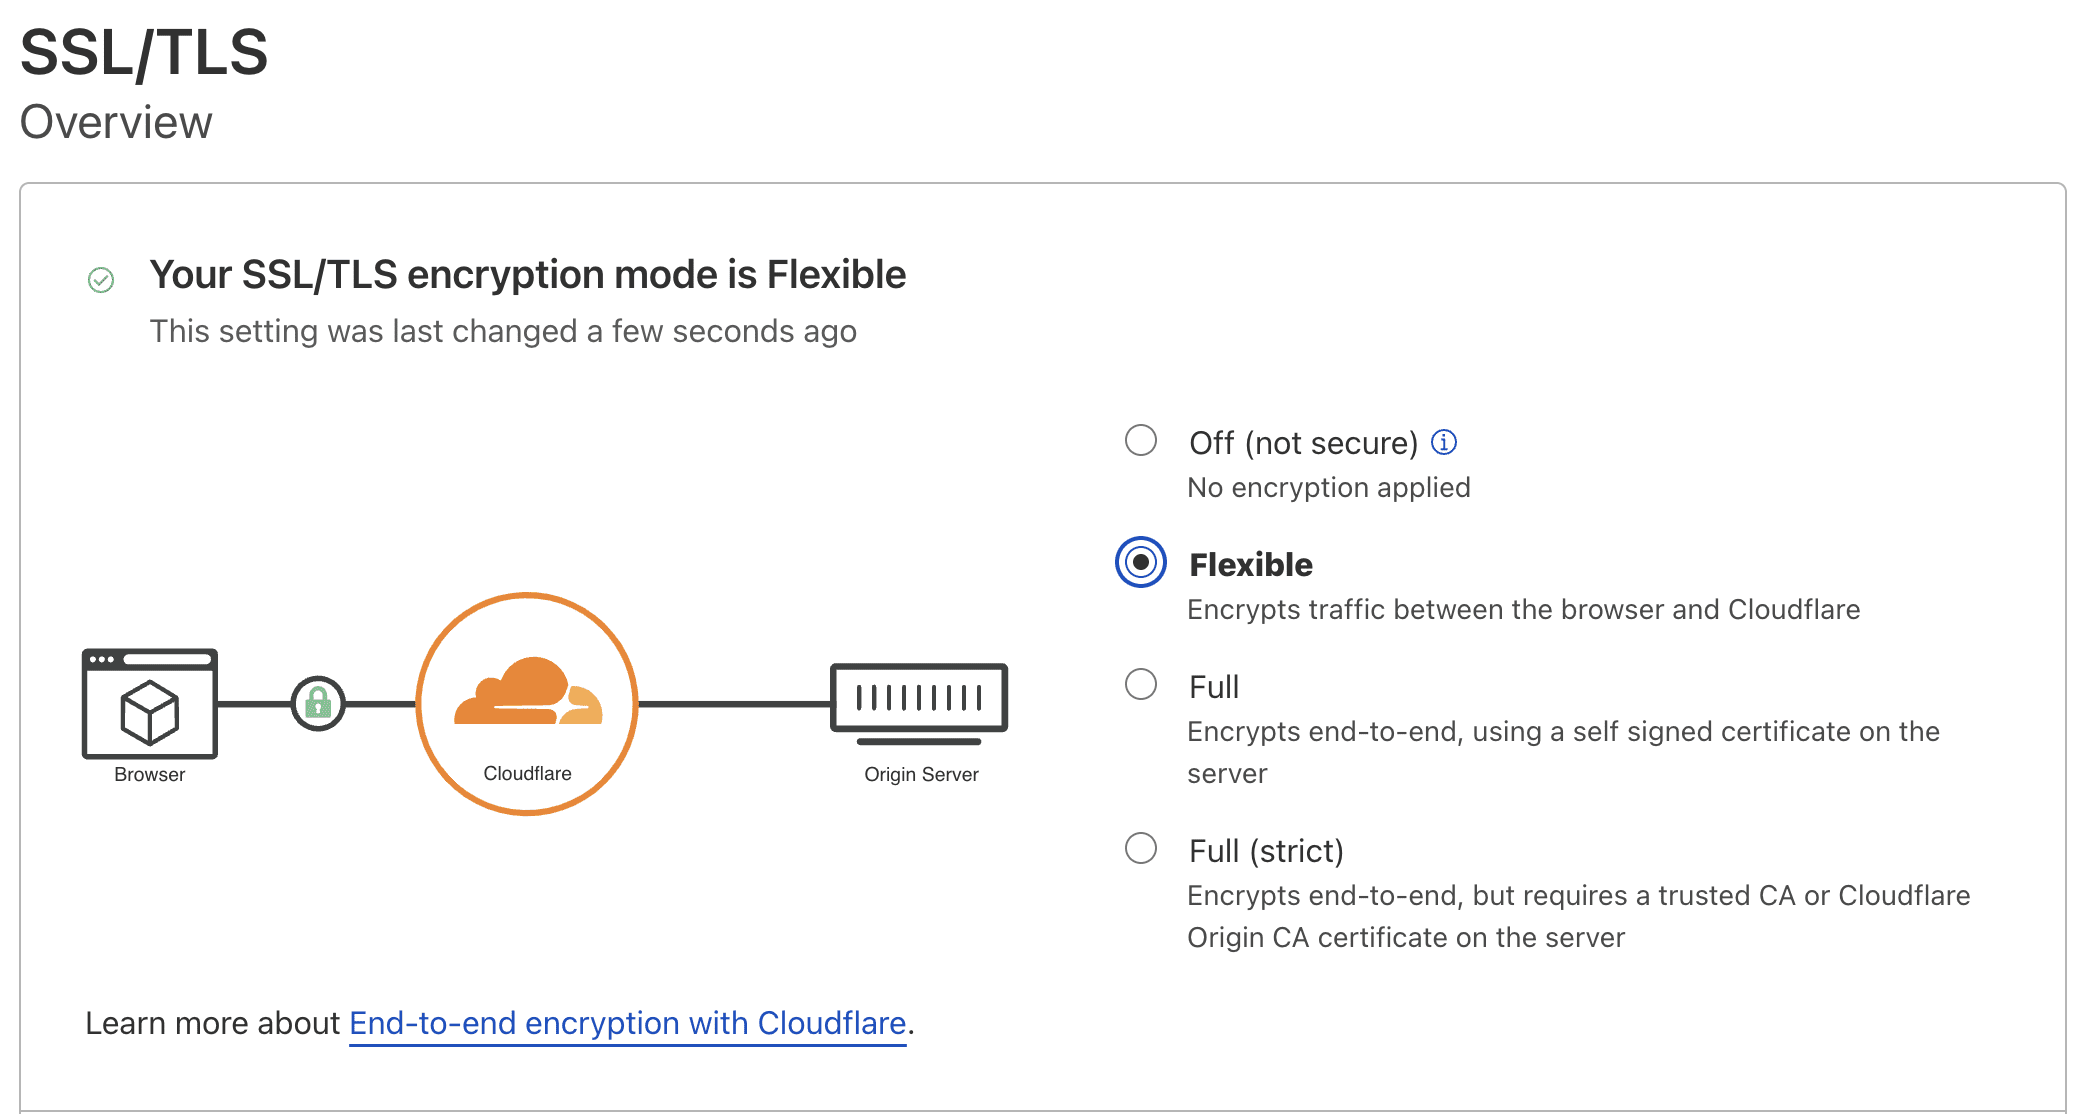
Using Flexible SSL
First, you need to ensure that your website has successfully been added to CloudFlare and enabled Proxy (yellow cloud).
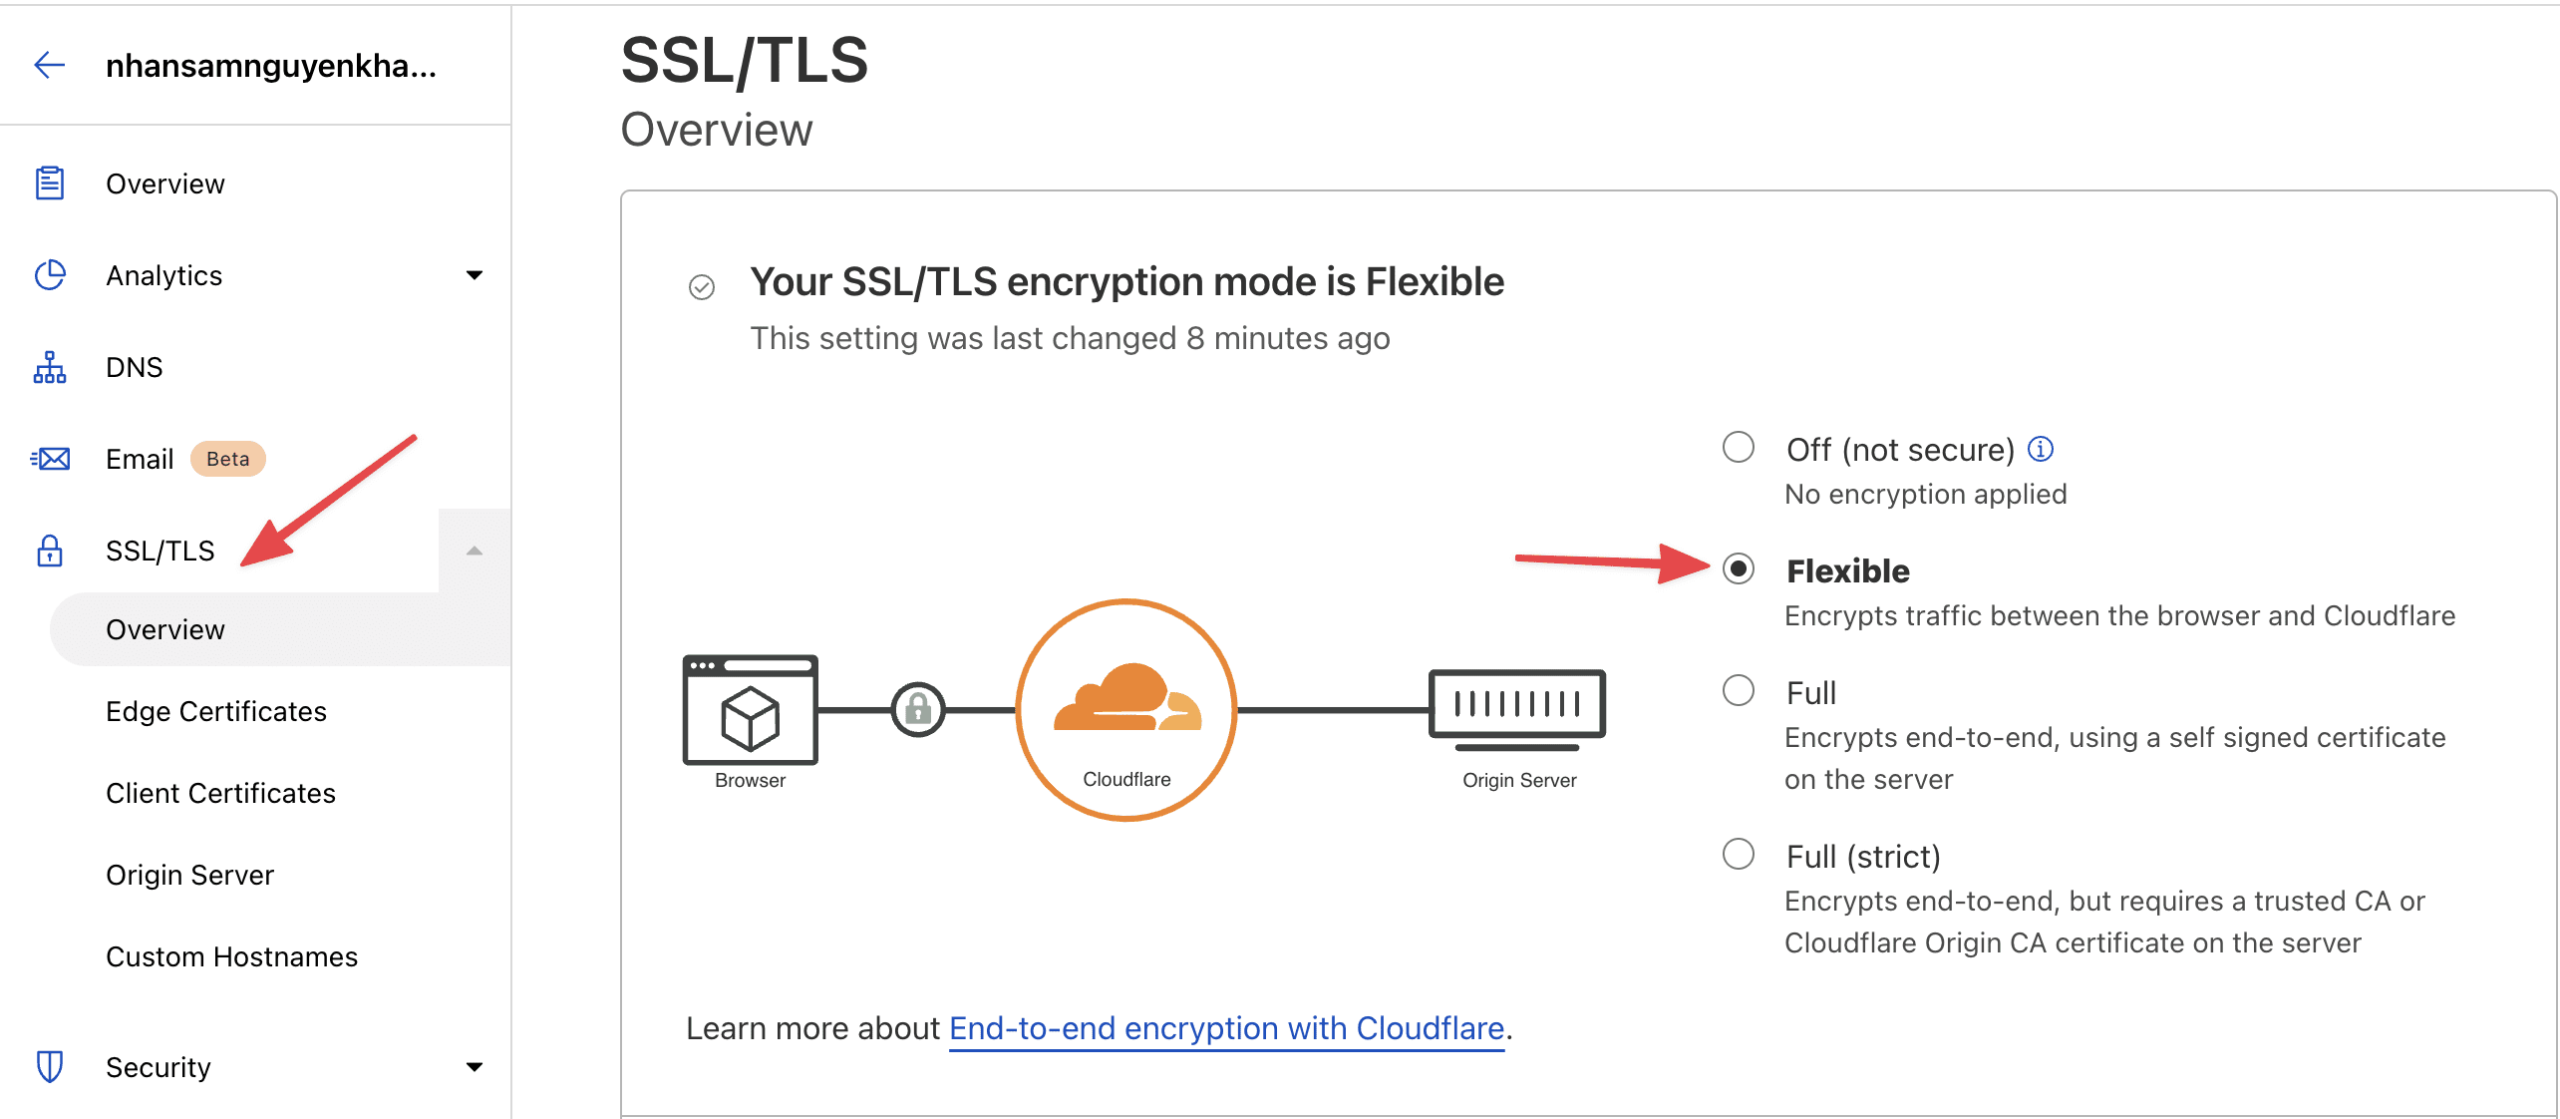
Next, you access SSL/TLS => Overview => select Flexible.
Install CloudFlare’s Full SSL
AZDIGI recommends using this method so that the data you send to CloudFlare or from CloudFlare is encrypted more securely. Now I will guide you to use the certificate provided by CloudFlare itself.
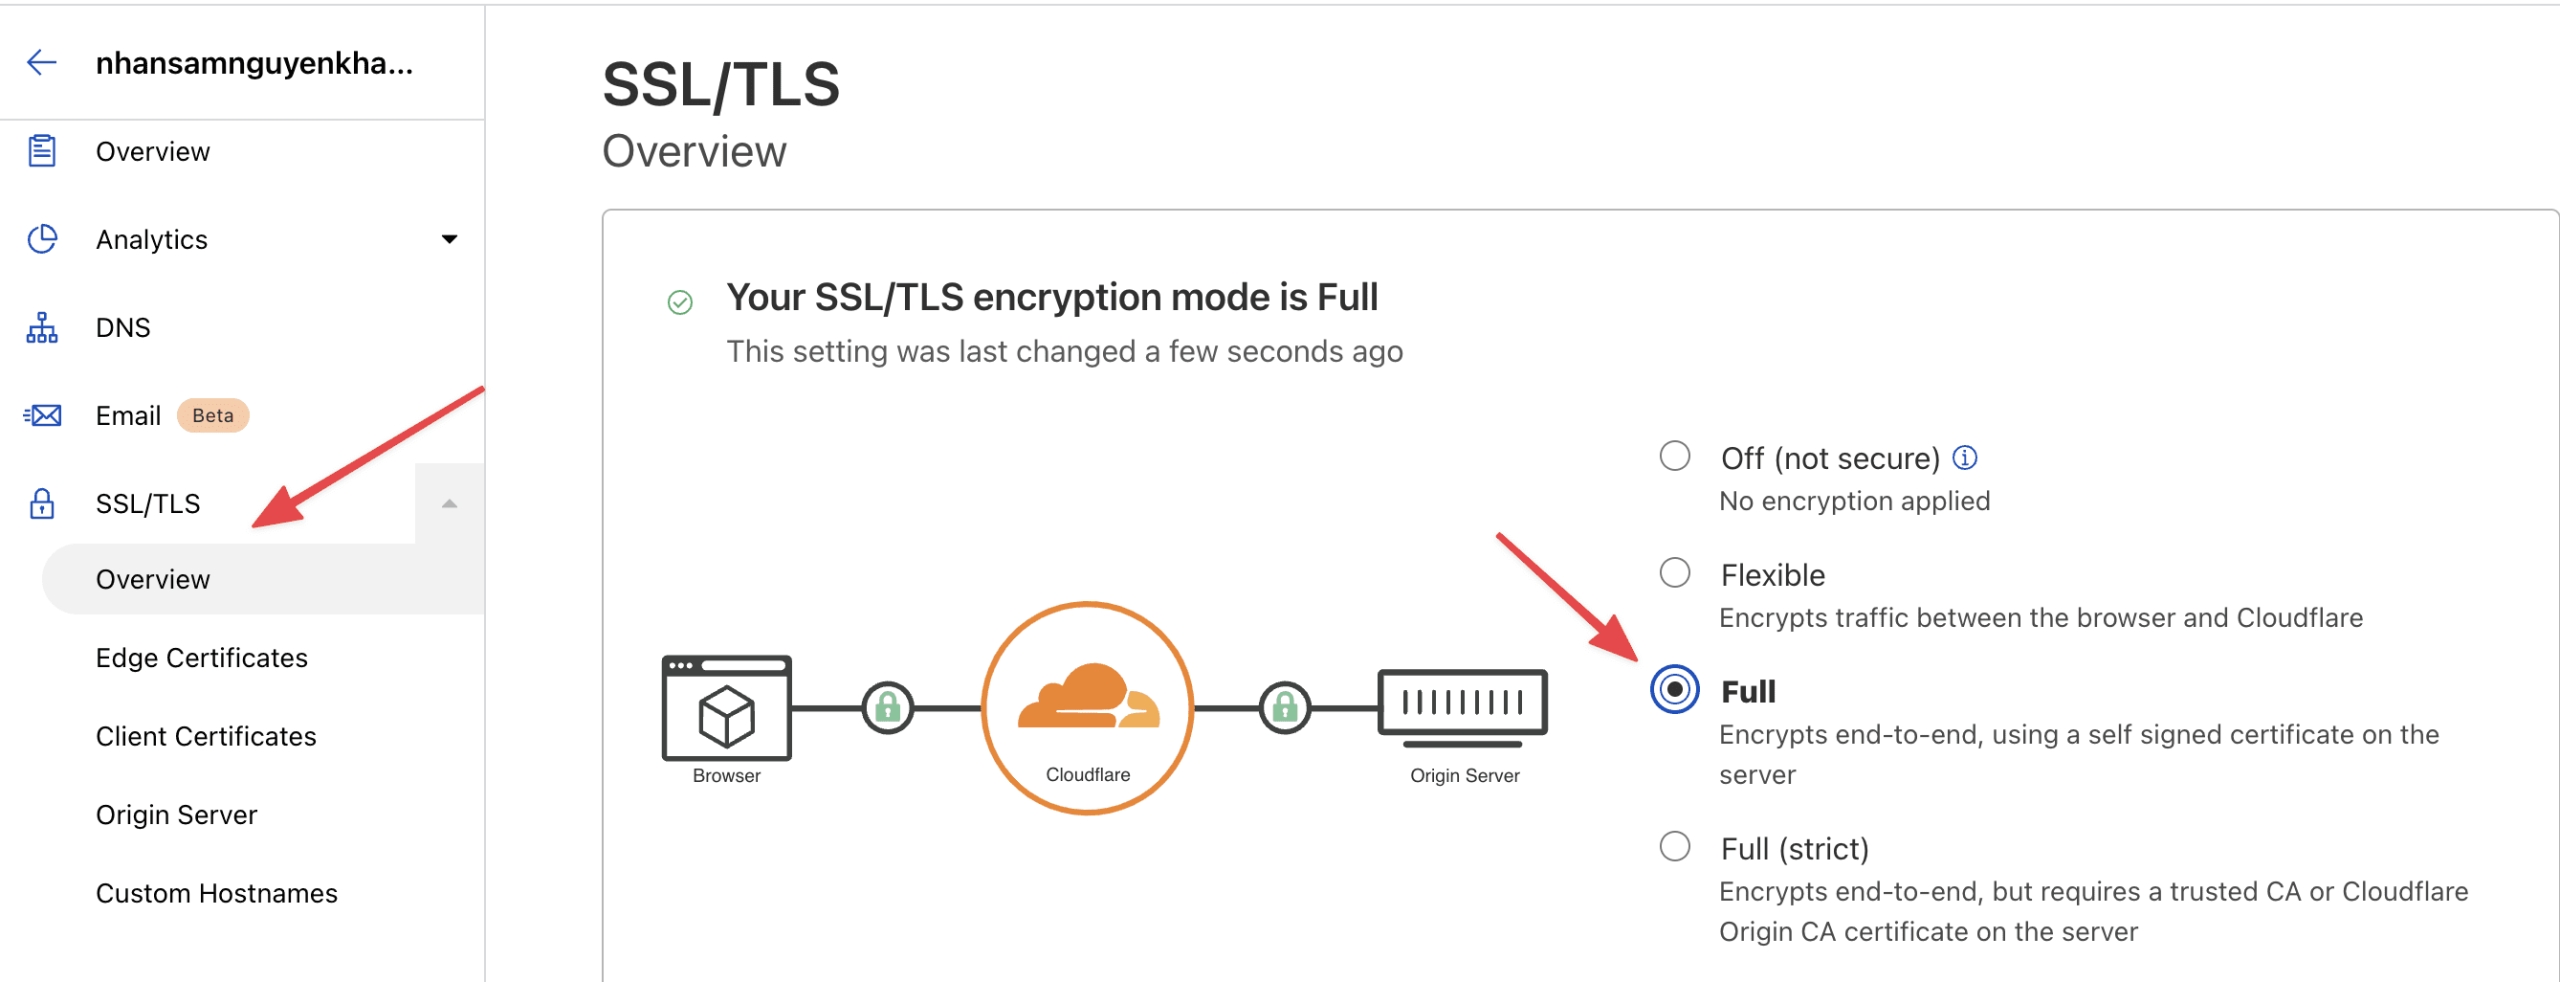
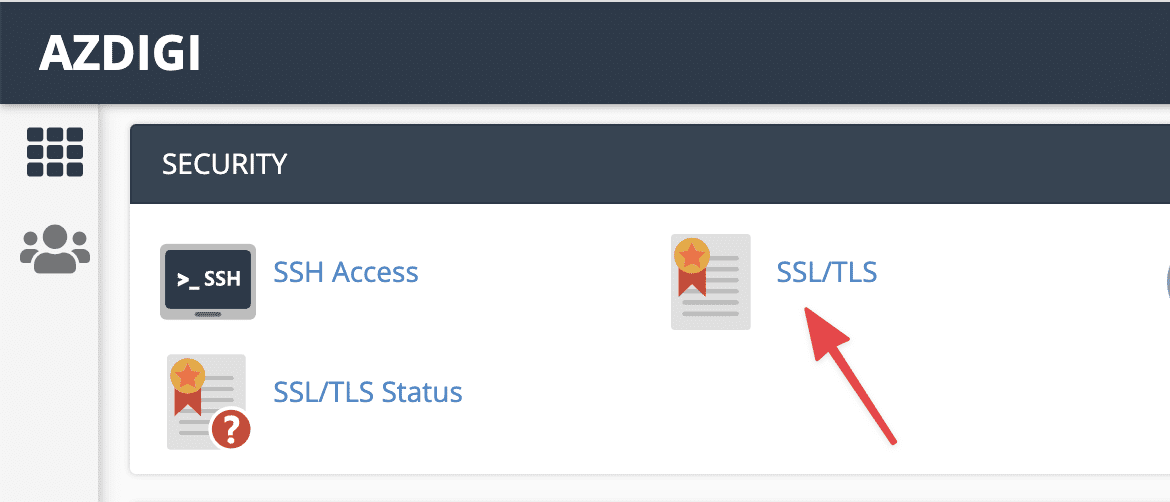
Step 1: Choose SSL type
You access SSL/TLS => Overview => select Full or Full (strict).
Step 2: Create an SSL certificate
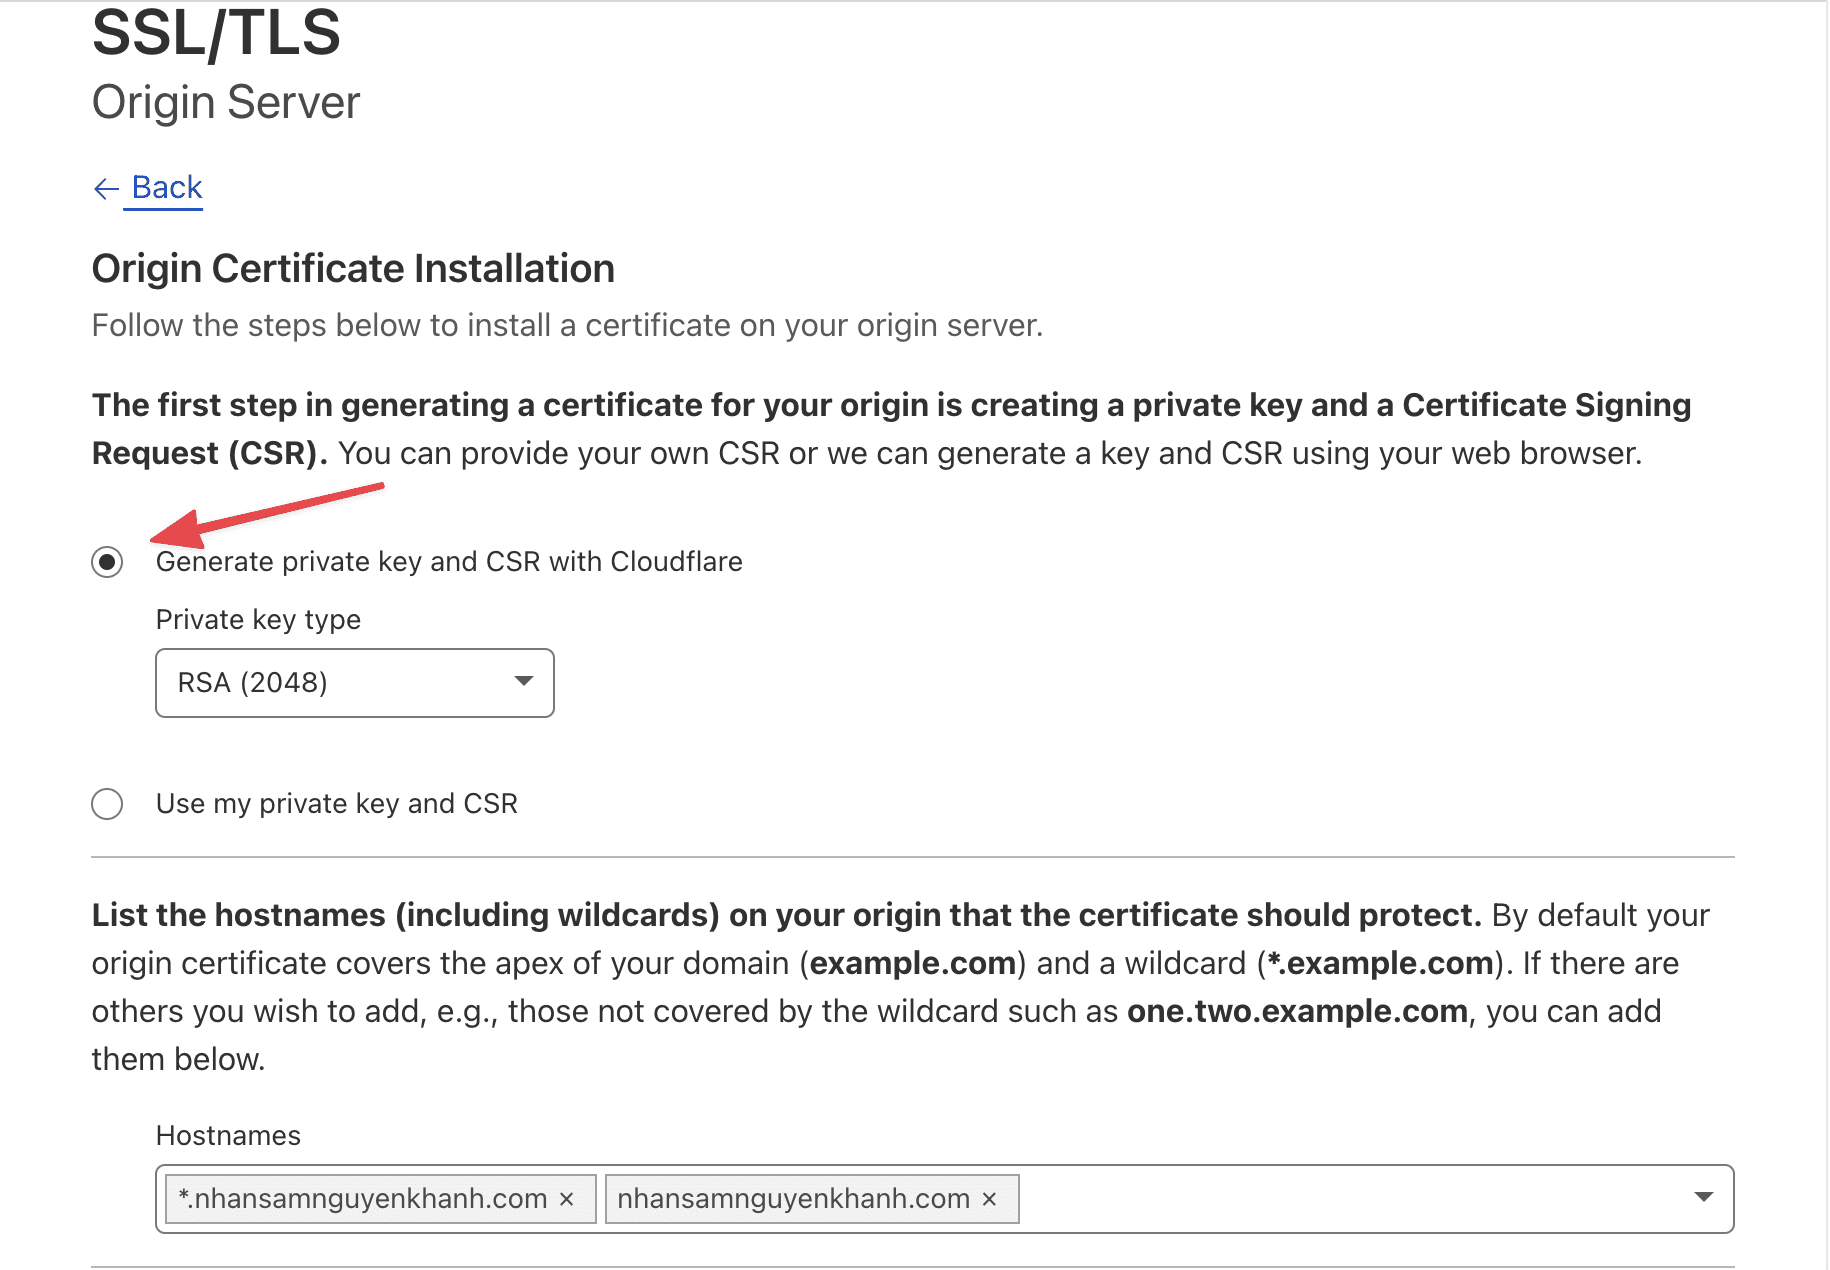
Go to SSL/TLS => Origin Server => Create Certificate
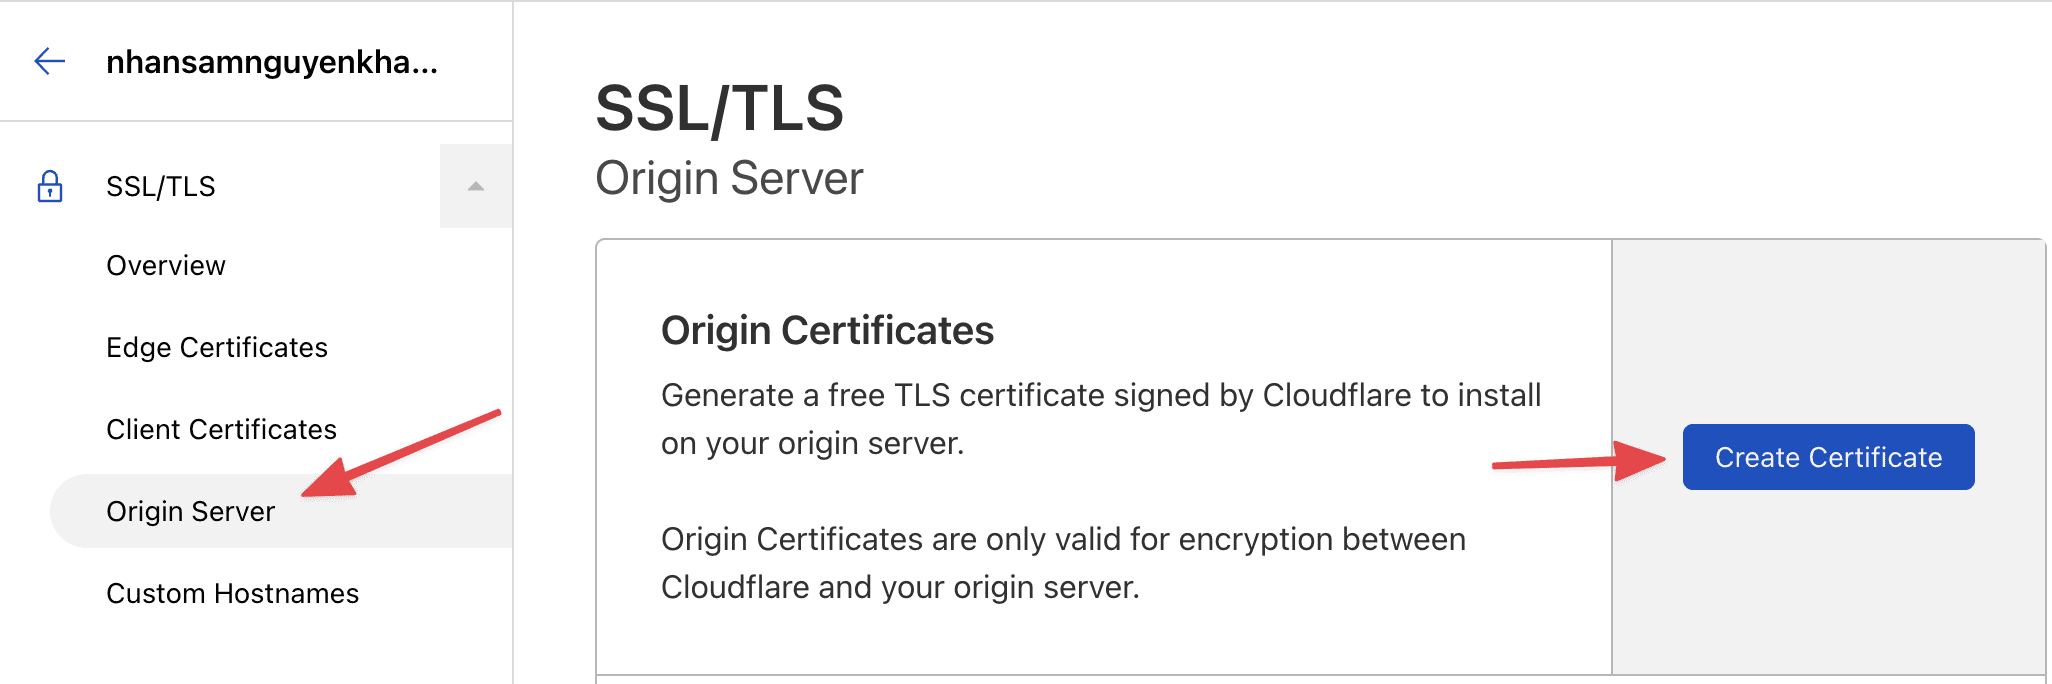
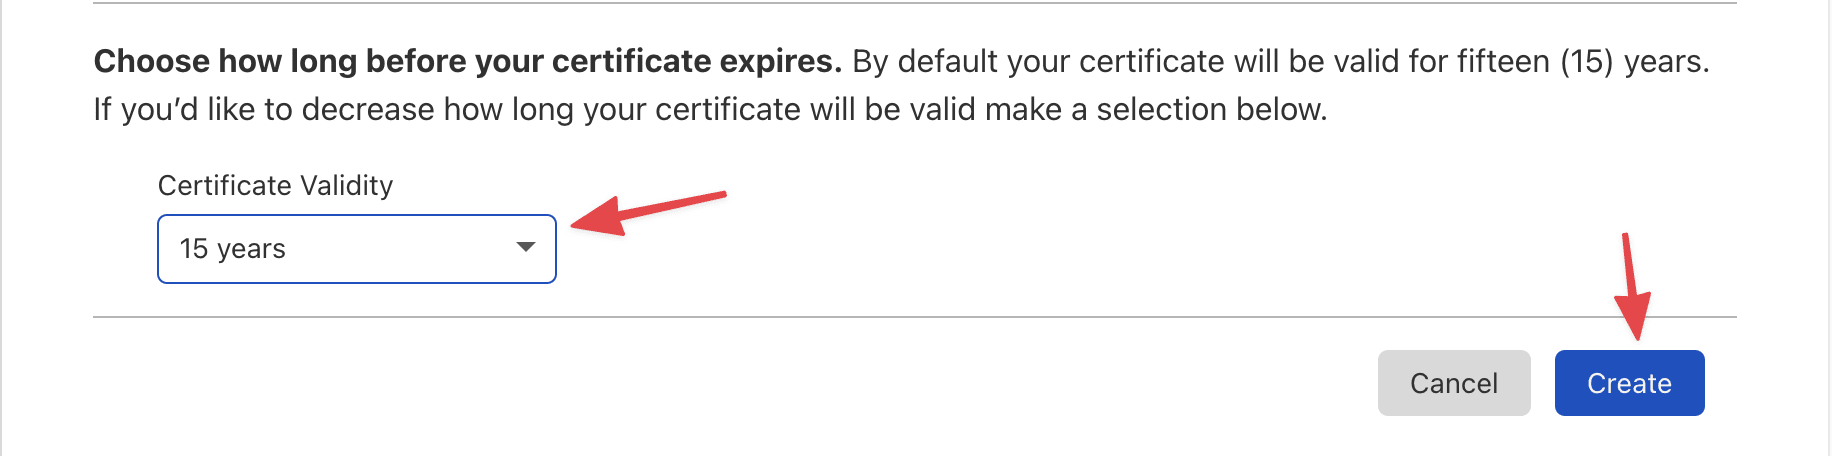
Select Generate private key and CSR with Cloudflare, click Create.
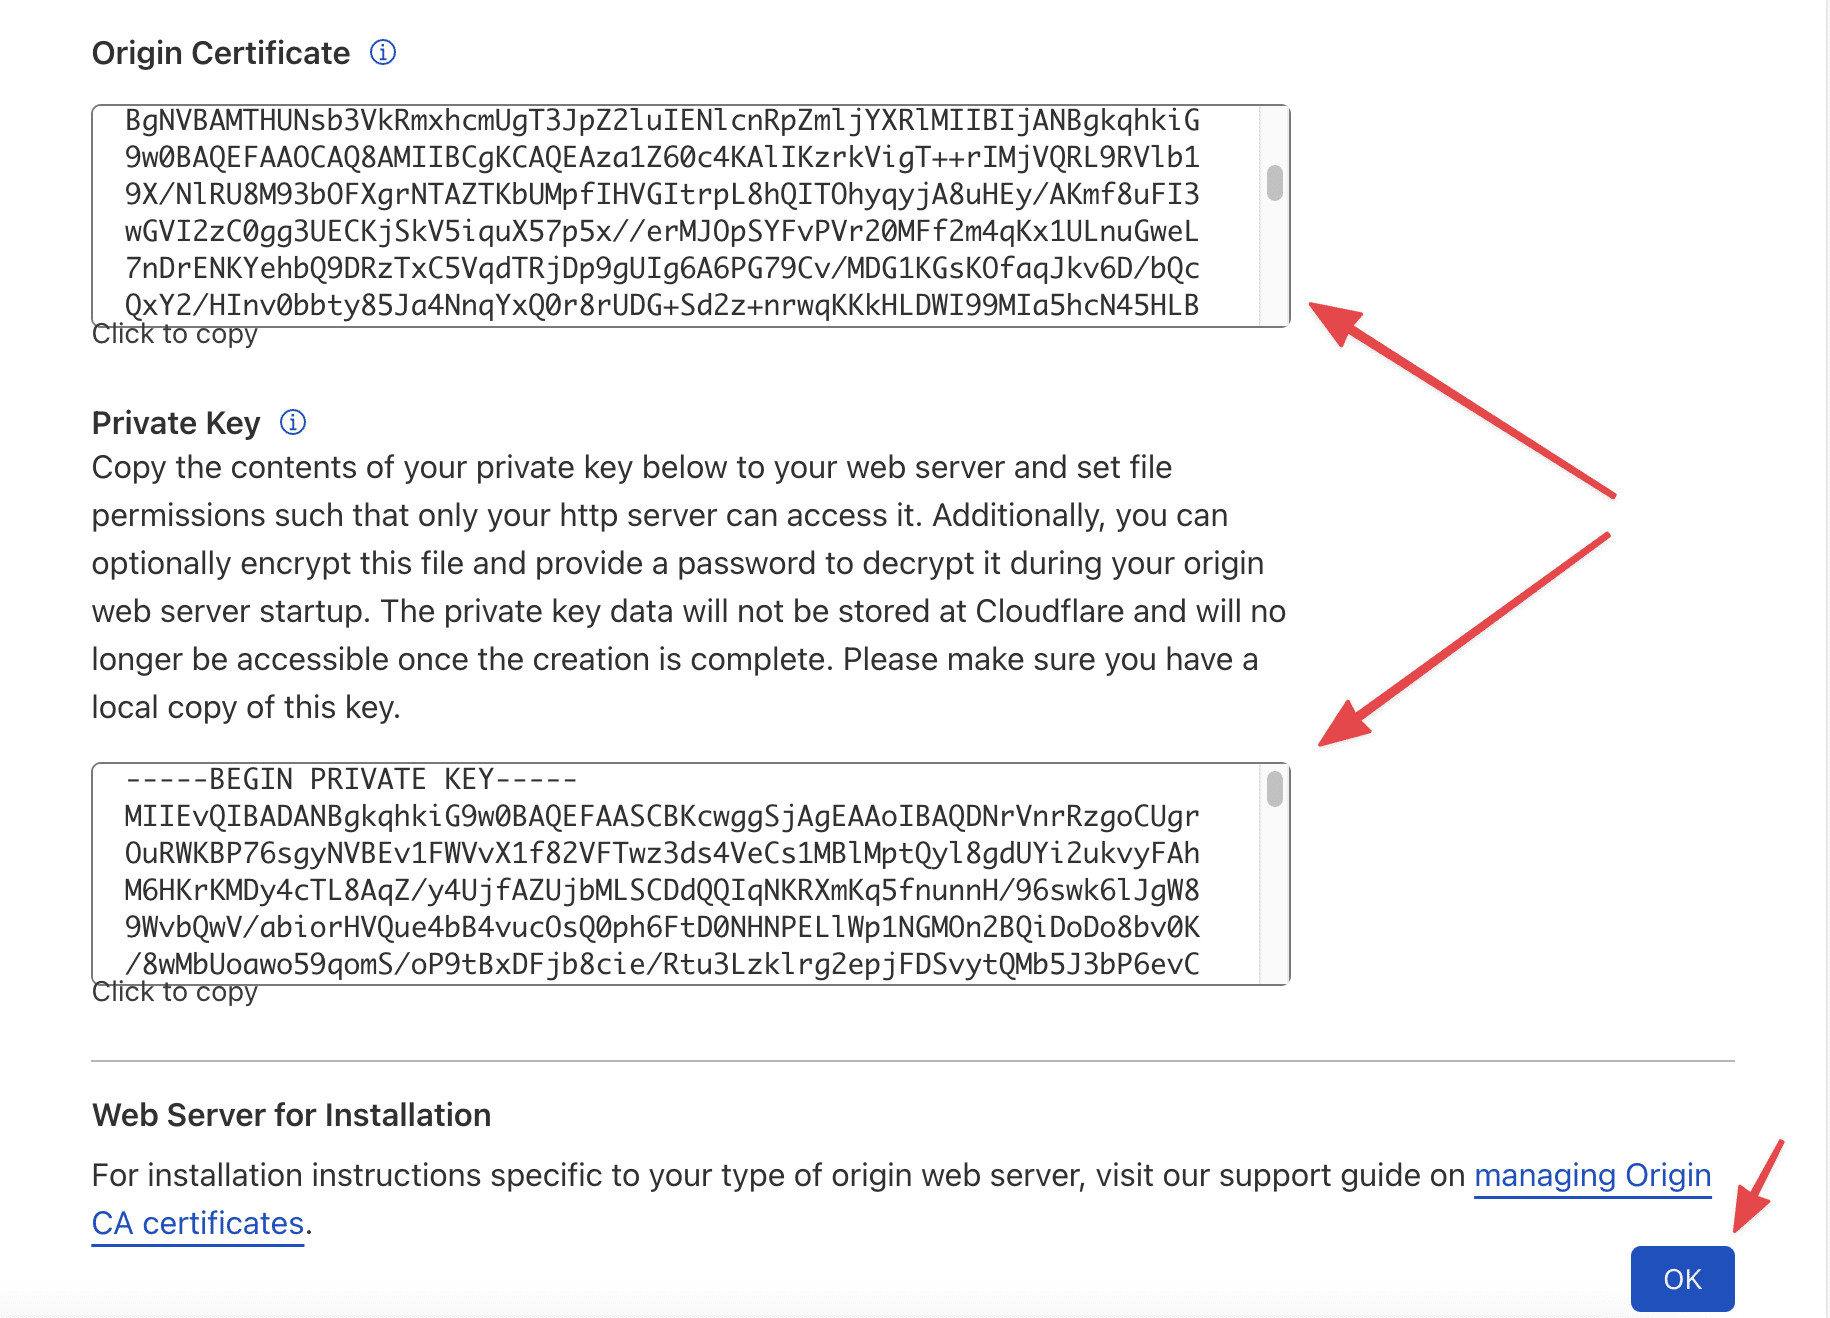
CloudFlare will provide you with an Origin Certificate and Private Key. Please copy and save the contents of these two files (essential). After saving, click OK.
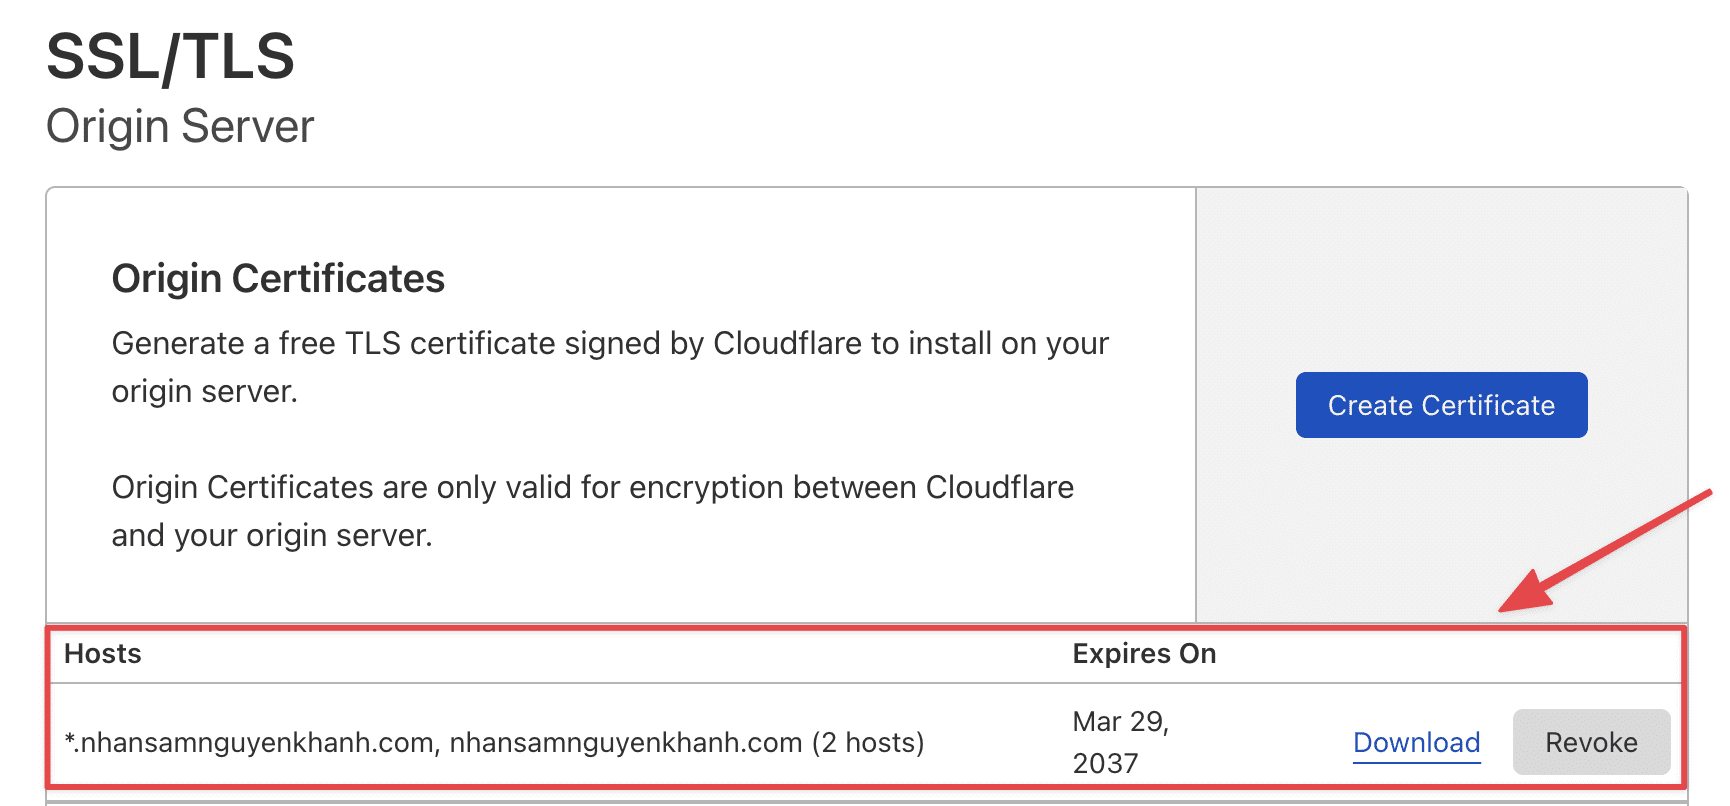
Then you need to wait a few minutes for CloudFlare to approve the certificate. If displayed as shown below, the certificate has been issued and can be used.
Step 3: Install the certificate on the server
I will do it with Host/VPS using cPanel, with other controls, you also go to the SSL configuration section and do the same.
At cPanel, go to SSL/TLS section.
Next, select Manage SSL sites

Next, in the Install an SSL Website section, select the website to install and fill in the Origin Certificate, Private Key ( in Step 2: Create an SSL certificate). You can refer to the installation in the video below:
With the Certificate Authority Bundle (CABUNDLE) or CA root, you can use the Autofill by Certificate feature to scan based on the Certificate automatically. Or you can use the content below or refer here.
-----BEGIN CERTIFICATE-----
MIID/DCCAuagAwIBAgIID+rOSdTGfGcwCwYJKoZIhvcNAQELMIGLMQswCQYDVQQG
EwJVUzEZMBcGA1UEChMQQ2xvdWRGbGFyZSwgSW5jLjE0MDIGA1UECxMrQ2xvdWRG
bGFyZSBPcmlnaW4gU1NMIENlcnRpZmljYXRlIEF1dGhvcml0eTEWMBQGA1UEBxMN
U2FuIEZyYW5jaXNjbzETMBEGA1UECBMKQ2FsaWZvcm5pYTAeFw0xNDExMTMyMDM4
NTBaFw0xOTExMTQwMTQzNTBaMIGLMQswCQYDVQQGEwJVUzEZMBcGA1UEChMQQ2xv
dWRGbGFyZSwgSW5jLjE0MDIGA1UECxMrQ2xvdWRGbGFyZSBPcmlnaW4gU1NMIENl
cnRpZmljYXRlIEF1dGhvcml0eTEWMBQGA1UEBxMNU2FuIEZyYW5jaXNjbzETMBEG
A1UECBMKQ2FsaWZvcm5pYTCCASIwDQYJKoZIhvcNAQEBBQADggEPADCCAQoCggEB
AMBIlWf1KEKR5hbB75OYrAcUXobpD/AxvSYRXr91mbRu+lqE7YbyyRUShQh15lem
ef+umeEtPZoLFLhcLyczJxOhI+siLGDQm/a/UDkWvAXYa5DZ+pHU5ct5nZ8pGzqJ
p8G1Hy5RMVYDXZT9F6EaHjMG0OOffH6Ih25TtgfyyrjXycwDH0u6GXt+G/rywcqz
/9W4Aki3XNQMUHNQAtBLEEIYHMkyTYJxuL2tXO6ID5cCsoWw8meHufTeZW2DyUpl
yP3AHt4149RQSyWZMJ6AyntL9d8Xhfpxd9rJkh9Kge2iV9rQTFuE1rRT5s7OSJcK
xUsklgHcGHYMcNfNMilNHb8CAwEAAaNmMGQwDgYDVR0PAQH/BAQDAgAGMBIGA1Ud
EwEB/wQIMAYBAf8CAQIwHQYDVR0OBBYEFCToU1ddfDRAh6nrlNu64RZ4/CmkMB8G
A1UdIwQYMBaAFCToU1ddfDRAh6nrlNu64RZ4/CmkMAsGCSqGSIb3DQEBCwOCAQEA
cQDBVAoRrhhsGegsSFsv1w8v27zzHKaJNv6ffLGIRvXK8VKKK0gKXh2zQtN9SnaD
gYNe7Pr4C3I8ooYKRJJWLsmEHdGdnYYmj0OJfGrfQf6MLIc/11bQhLepZTxdhFYh
QGgDl6gRmb8aDwk7Q92BPvek5nMzaWlP82ixavvYI+okoSY8pwdcVKobx6rWzMWz
ZEC9M6H3F0dDYE23XcCFIdgNSAmmGyXPBstOe0aAJXwJTxOEPn36VWr0PKIQJy5Y
4o1wpMpqCOIwWc8J9REV/REzN6Z1LXImdUgXIXOwrz56gKUJzPejtBQyIGj0mveX
Fu6q54beR89jDc+oABmOgg==
-----END CERTIFICATE-----
Step 4: Check the certificate
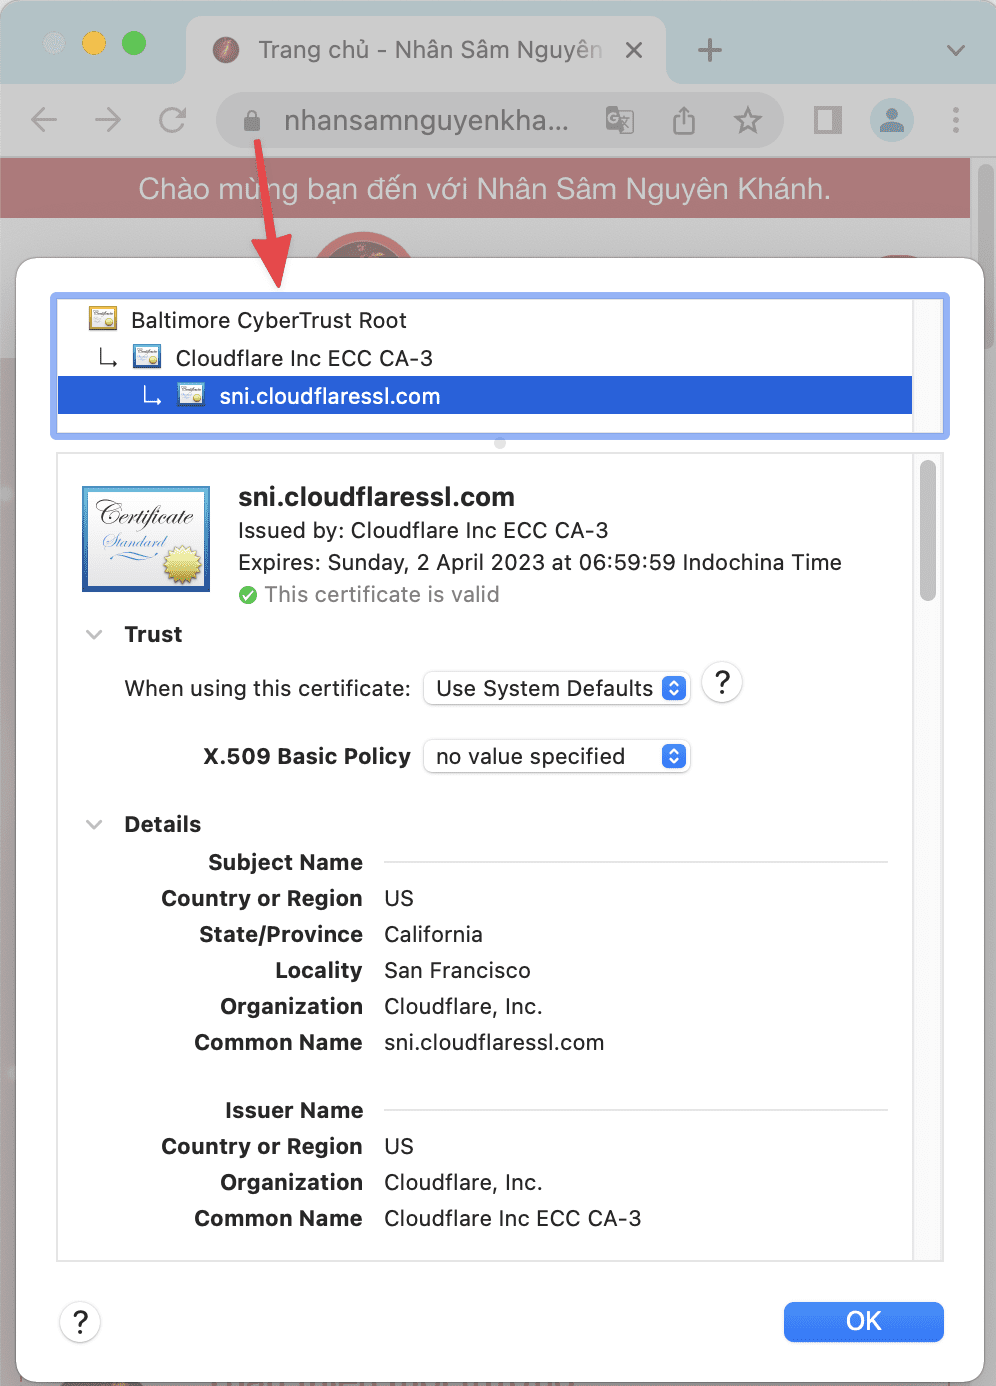
Method 1: Check the certificate directly by visiting the website => click on the padlock.
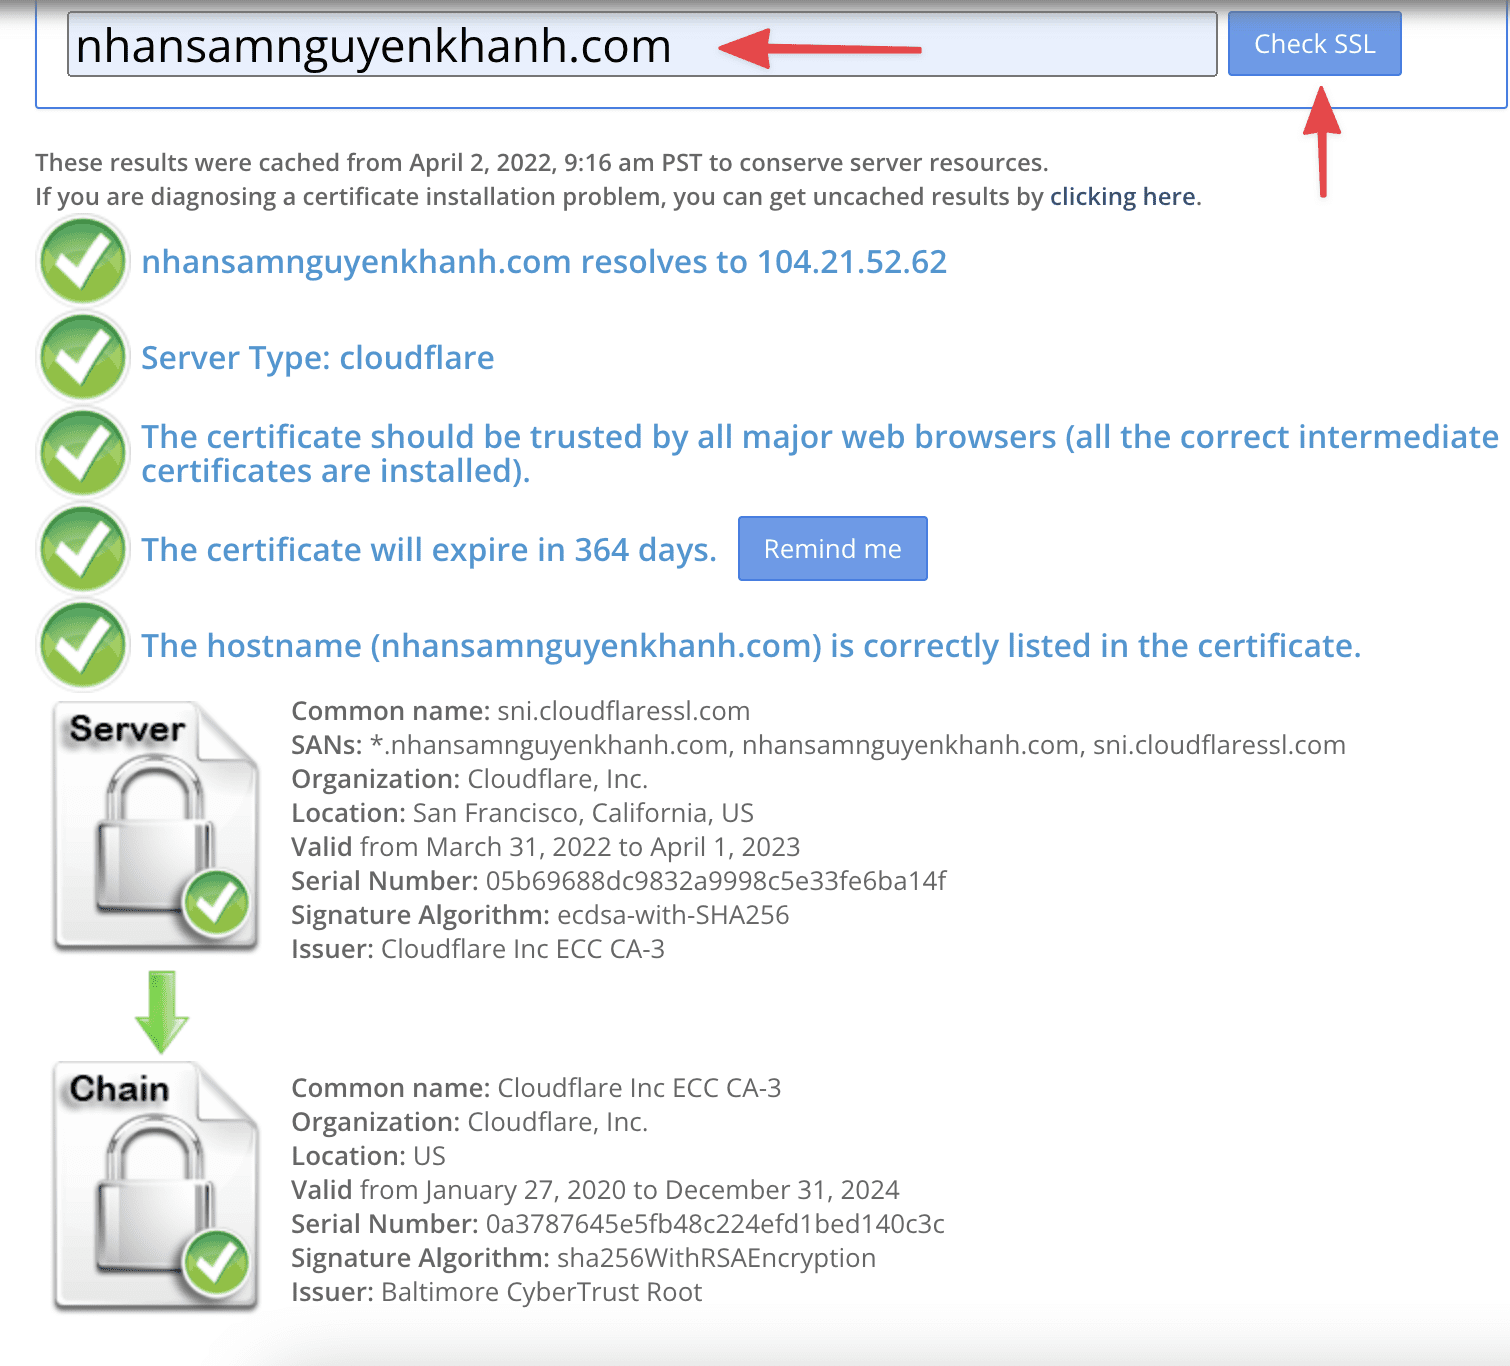
Method 2: Check the certificate through the SSL Shopper tool
You access SSL Shopper by following the link: https://www.sslshopper.com/ssl-checker.html, enter your website and click Check SSL.
Above is a detailed tutorial on how to install SSL on CloudFlare. Hopefully, with this article, you will better understand what SSL is and how to install SSL on CloudFlare for your website easily. SSL will bring many benefits to the website, one of which is notable for its security and is highly appreciated by Google, which helps a lot for your SEO. Goodbye and see you in the next tutorials.!
If you need assistance, you can contact support in the ways below:
- Hotline 247: 028 888 24768 (Ext 0)
- Ticket/Email: You use the email to register for the service and send it directly to: support@azdigi.com
About the author

Thạch Phạm
Đồng sáng lập và Giám đốc điều hành của AZDIGI. Có hơn 15 năm kinh nghiệm trong phổ biến kiến thức liên quan đến WordPress tại thachpham.com, phát triển website và phát triển hệ thống.