
Nowadays, Email is an indispensable tool for companies, businesses and other individuals. Email helps you exchange contact information quickly, saving a lot of time. In addition, security is a top priority, email access links need to be encrypted to ensure that emails are always safe. In the article, I will guide you to install SSL Mail Hosting at AZDIGI.
I. Install SSL Mail Hosting
1. Install free SSL Mail Hosting
To install SSL, you need to access the cPanel Email Hosting service at AZDIGI.
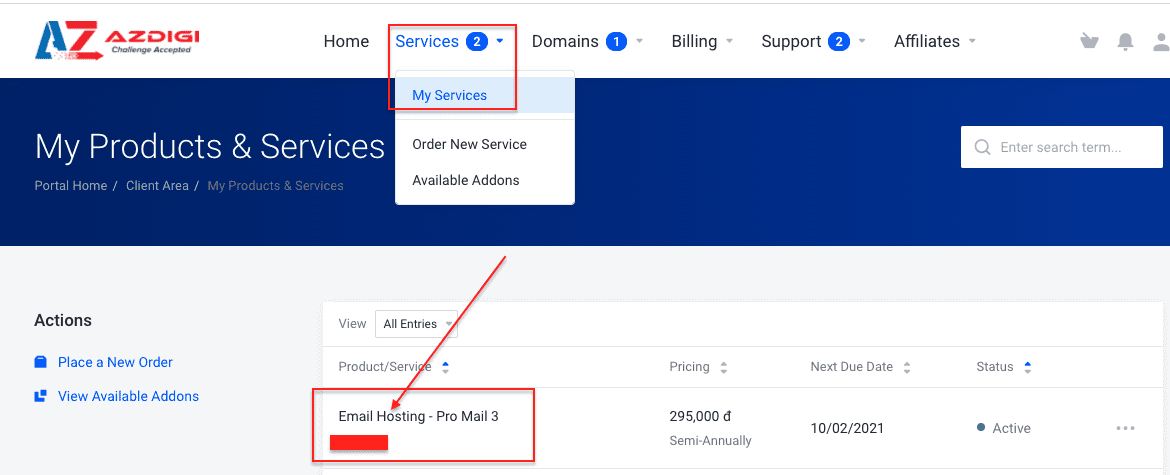
You log in to the service administration in my.azdigi.com
Click Services => My Services => select the corresponding mail service.
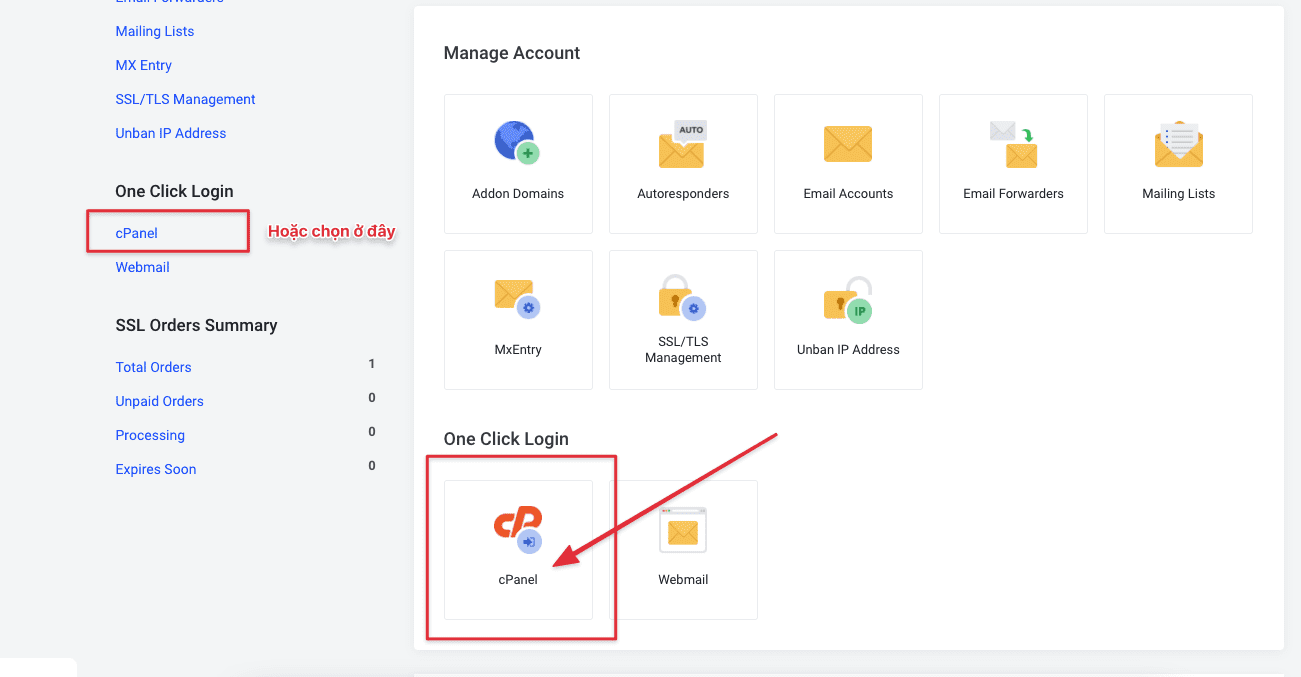
Next, you select the cPanel icon as shown below:
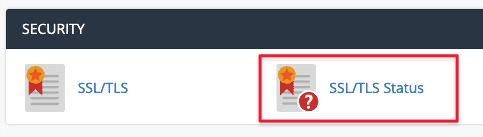
You go to the SECURITY tab and select SSL/TLS Status.
At the interface below, click mail.domain and webmail.domain. Or you can Check all > Include Domain During Auto SSL => Run Auto.
The system will automatically find and install all the subdomains below, any domain that does not find a record pointing to IP mail hosting will be removed. So you only need to notice about 2 records:
- mail.domain
- webmail.domain
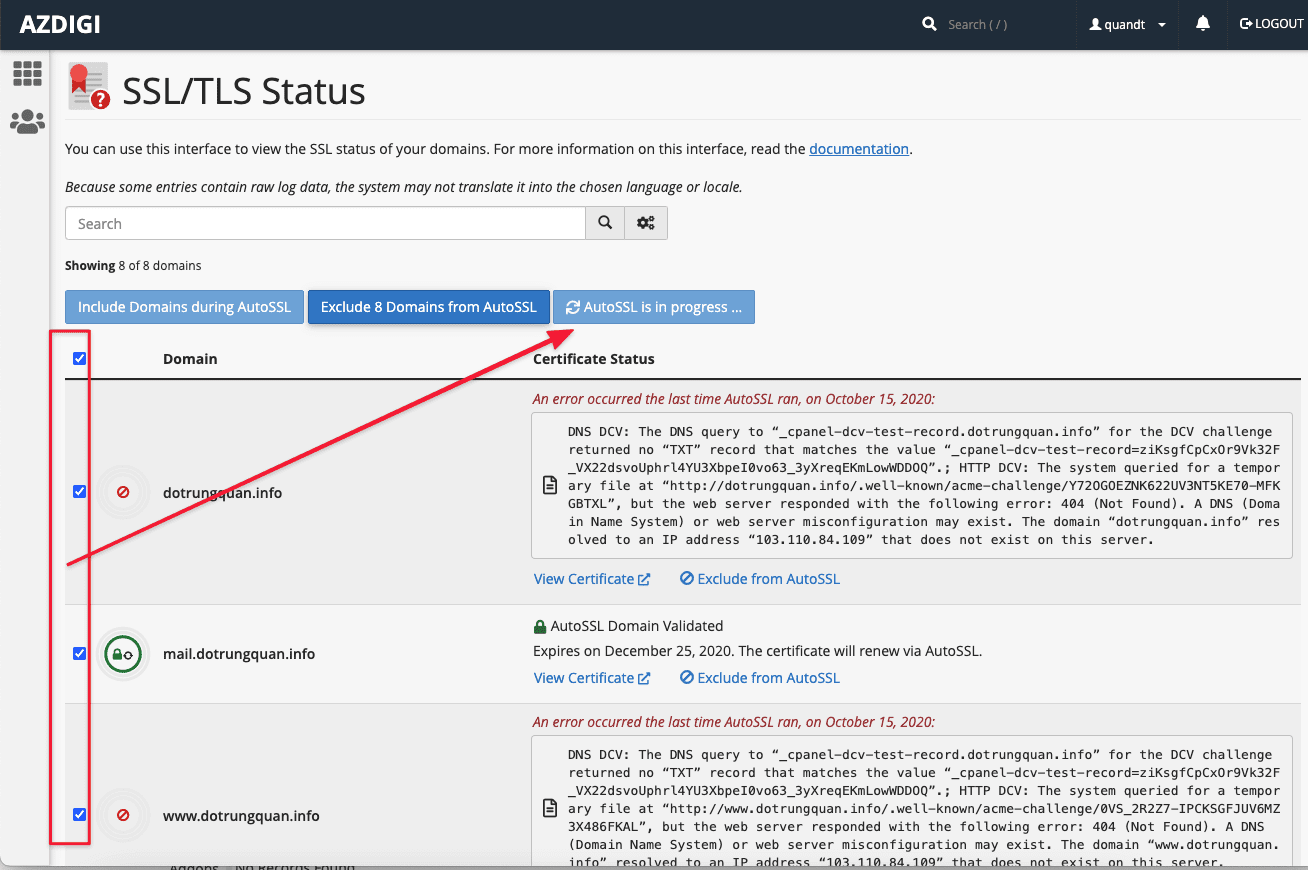
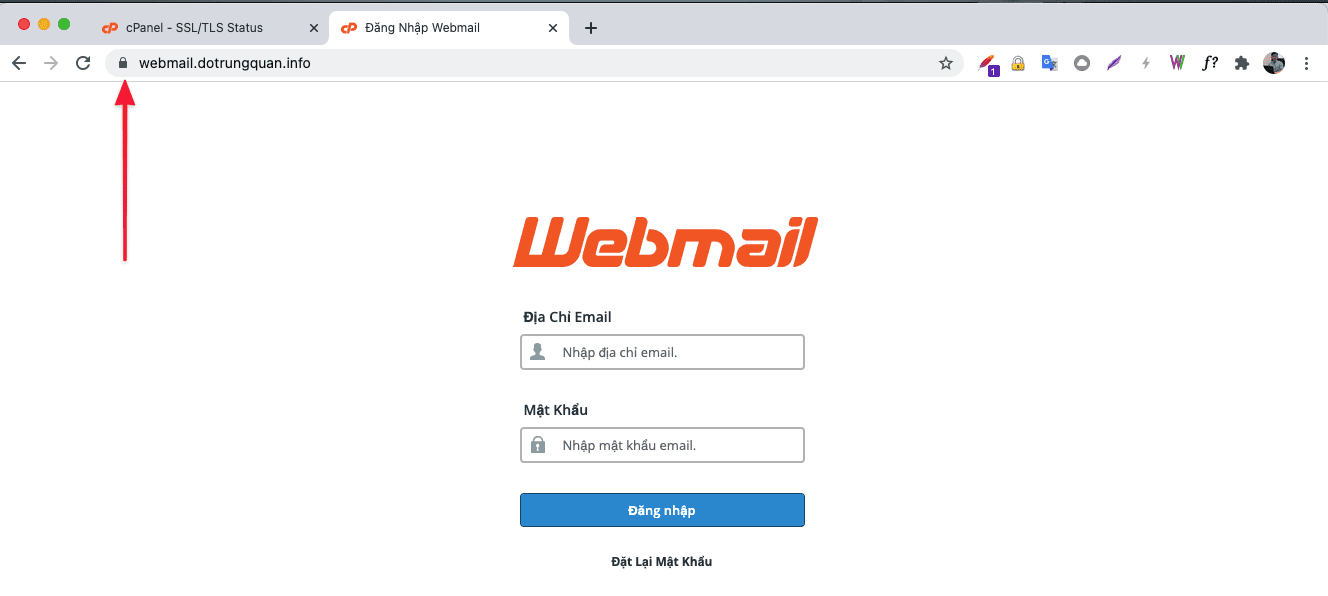
After successful installation, you will see 2 subs shown in green below, which means it has been successfully installed. Now open your browser and access the link.
2. Install Paid SSL Mail Hosting
If you already have your SSL certificate, a paid SSL is installed for webmail. You can configure it as follows:
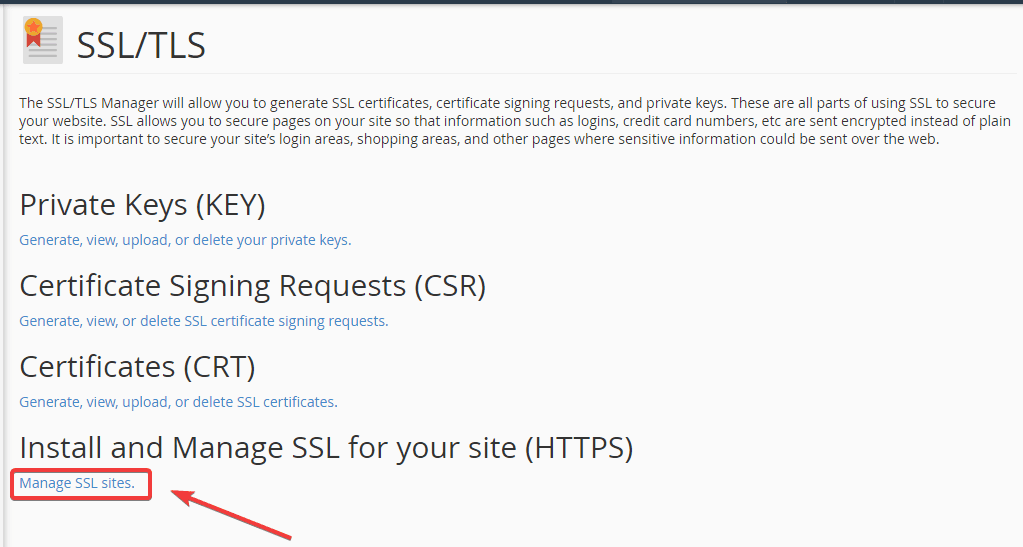
Step 1: Prepare the necessary certificate files
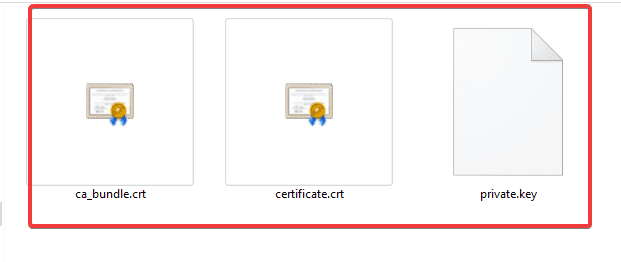
To install a complete SSL for a website, you need to have all the certificate files below, if any of the files are missing, you will not be able to install the SSL certificate on the website.
- Certificate.crt
- Private.key
- CA.crt (Intermediate/Chain files)
Step 2: Install the certificate on cPanel
Once you have prepared all the certificate files, proceed to add the certificate to the website via cPanel as follows:
You log into your cPanel and go to SSL/TLS section.
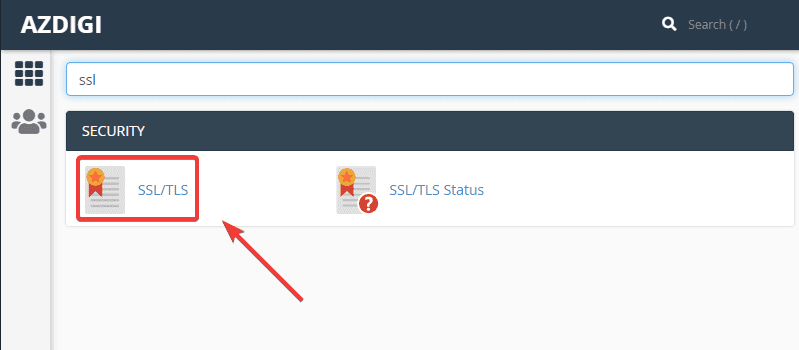
Next, select Manage SSL sites.
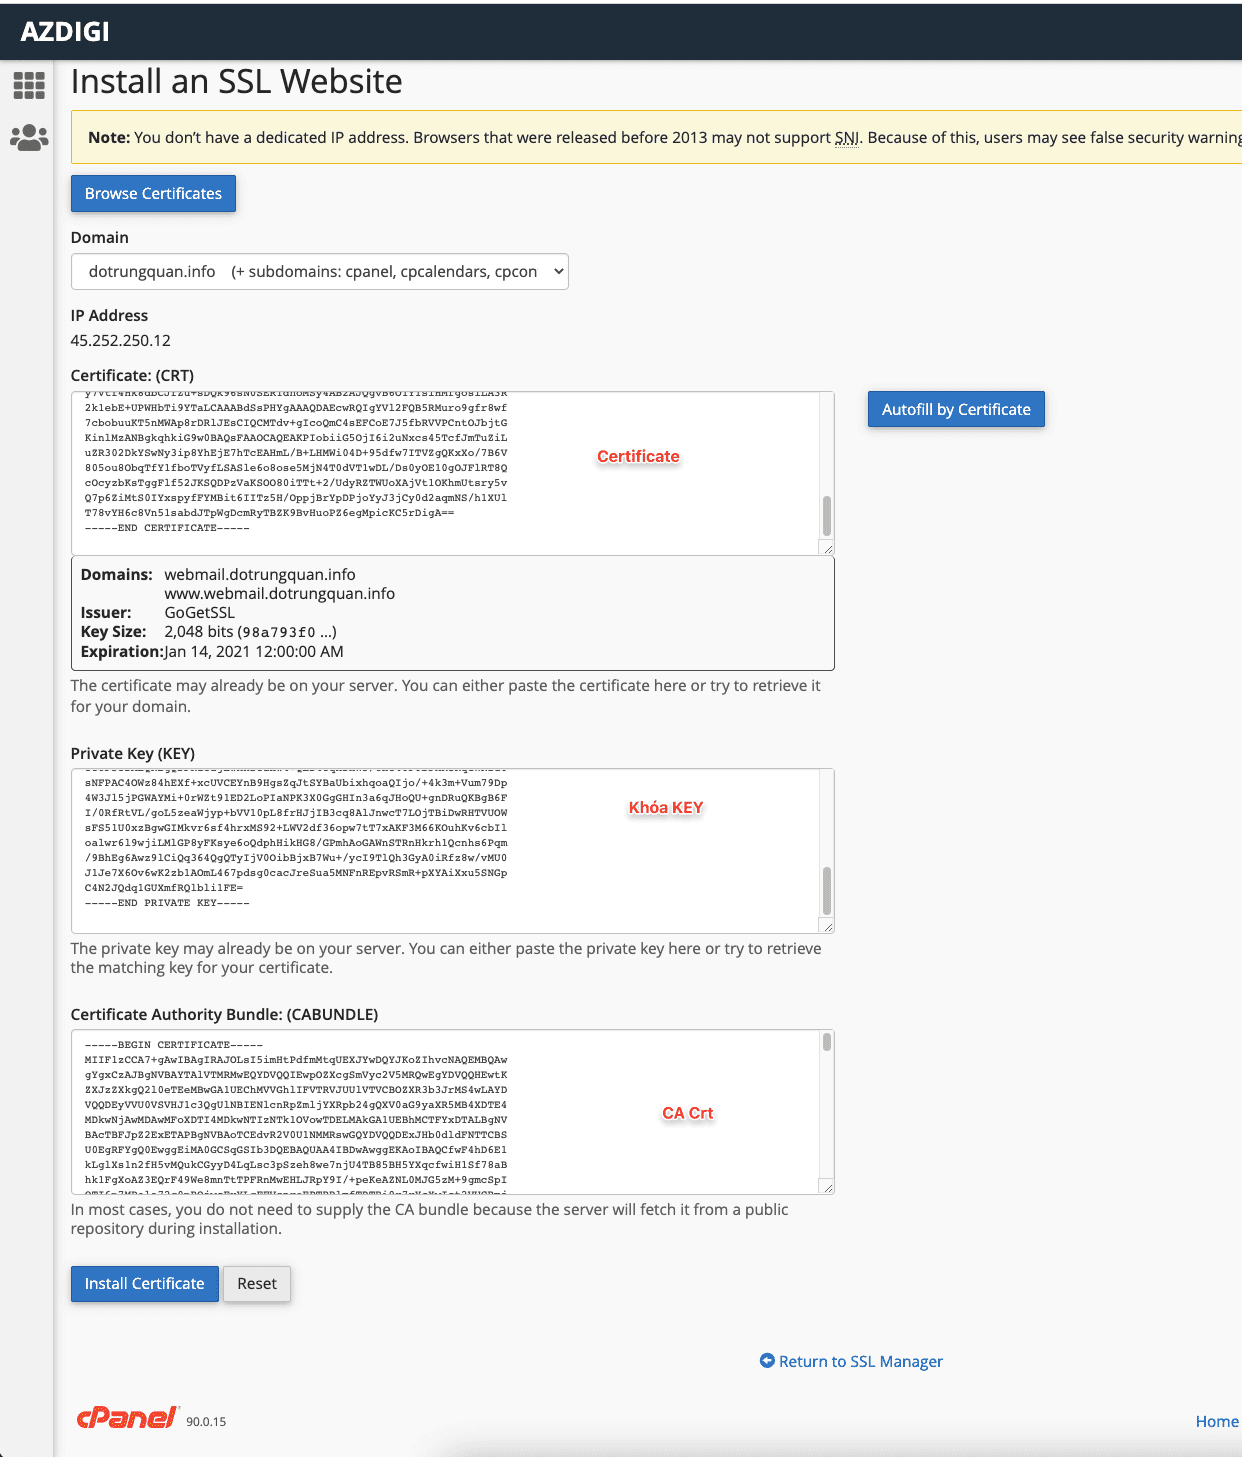
At the installation interface, select the correct domain to install the SSL certificate in the Domain section. Next, in 1 – 2 – 3, you need to paste the contents of the corresponding files in Step 1.
As follows:
- Certificate: (CRT) <=> Certificate.crt
- Private Key (KEY)<=> Private.key
- Certificate Authority Bundle: (CABUNDLE)<=> CA.crt
Step 3: Check SSL Status
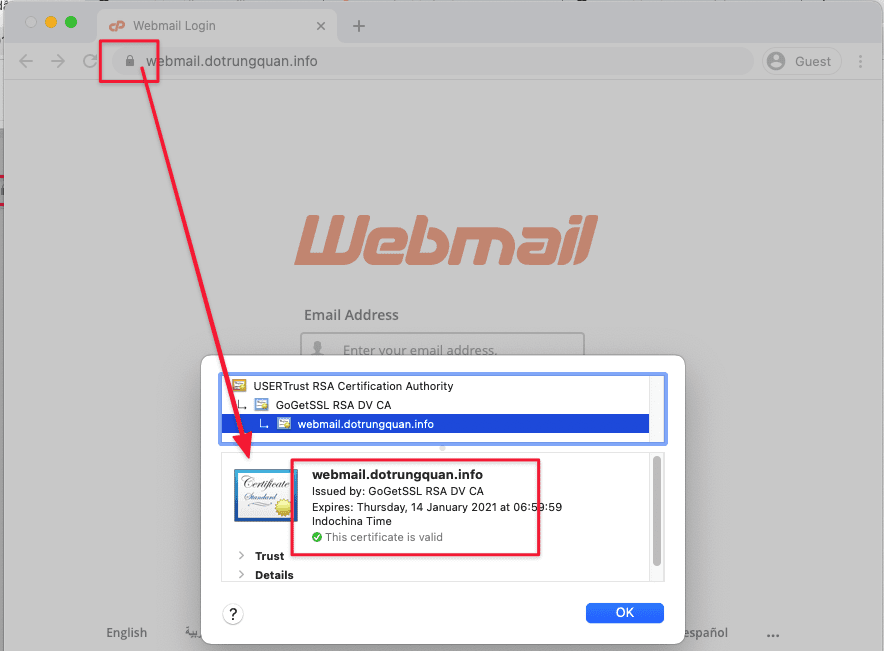
Method 1: Check directly on the website
You access the website in the browser, click on the padlock icon => the screen will display the website’s SSL certificate expiration date.
Method 2: Check on SSL Shopper
You access the page https://www.sslshopper.com/ssl-checker.html => Enter the domain name and click Check SSL => This page will show detailed information about the website’s certificate.
So I have completed the installation guide for SSL Mail Hosting. Hope this article helps you install SSL mail hosting successfully.
To refer to the documentation for using mail, you can access the Pro Mail Hosting Guide at the link below:
- Hotline 247: 028 888 24768 (Ext 0)
- Ticket/Email: You can use your email to register for the service and send it directly to: support@azdigi.com
About the author

Thạch Phạm
Đồng sáng lập và Giám đốc điều hành của AZDIGI. Có hơn 15 năm kinh nghiệm trong phổ biến kiến thức liên quan đến WordPress tại thachpham.com, phát triển website và phát triển hệ thống.