
After learning through PART 1: REGISTRATION OF DOMAIN/HOSTING – OVERVIEW OF WORDPRESS. Next, let’s start building your first website with Astra Theme.
Astra is a free WordPress theme developed in 2017 by Brainstorm Force. Astra brings the perfect theme for building blogs, landing pages, e-learning websites with the advantage of being compatible with many other plugins. Some of the advantages of Astra Theme are:
- Fast loading speed
- Compatible with Elementor and many more plugins
- Simple customization suitable for blogging needs
- The pre-built website templates are incredibly diverse…
Requirement
Performed Part 1 and Part 2
- Part 1: Guide to domain and hosting registration
- Part 2: An overview of the functionality of WordPress
I. Install Themes, Plugins and Astra Theme components
1. Install Astra Theme
Currently, AZDIGI is giving away a full set of Astra Themes, you can see the demo themes here. In this article, I will guide you on Astra Theme. This Astra theme will require and install 2 files, including:
- astra.zip (Preset) click to download
- astra-child.zip (install later and activate the child theme) click to download
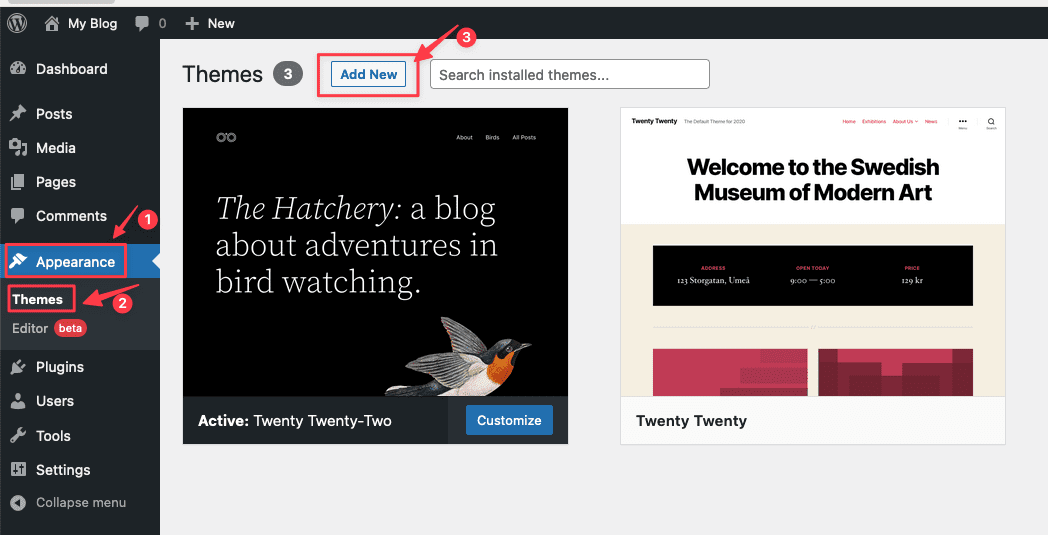
To install the Astra theme, first, login to the admin page => go to Appearance => Theme. Here, you will see all the themes you have installed on your site. To add another theme, click Add New.
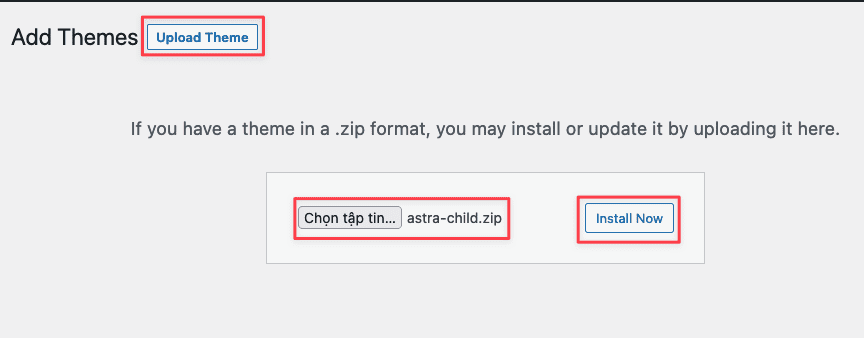
Next, click Upload Theme => Select the downloaded Theme file to your computer => Install Now.
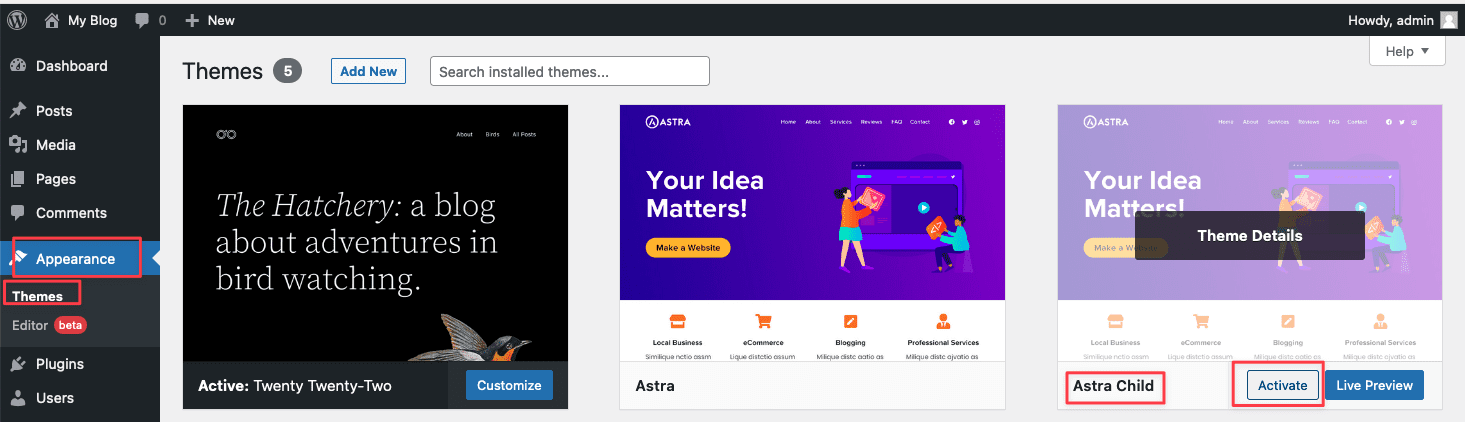
After the installation is complete, select Appearance => Theme then select Astra Child and activate this theme.
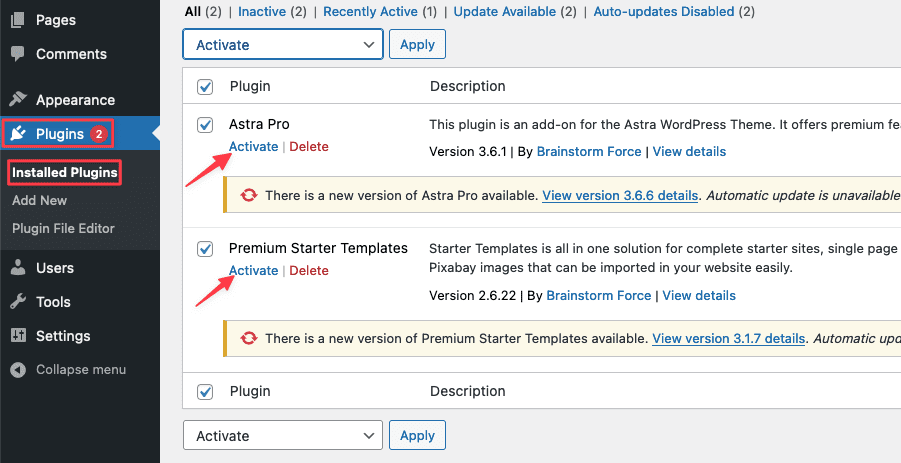
2. Install the required Theme Plugin
Astra will ask to install the following 2 plugin themes to install addons and themes: You can click on the attached link to download it directly.
- Astra addon plugin (click to download)
- Astra premium sites (click to download)

After the installation is complete, click Activate to activate these 2 plugins.
3. Activate the Astra license
With just the above steps, you can deploy your website with Astra. However, the free interface store will limit many useful interfaces and features. However, the free interface store will limit many useful interfaces and features. you can send a support request to the Technical Team to activate the license.
4. Choose Theme and import demo
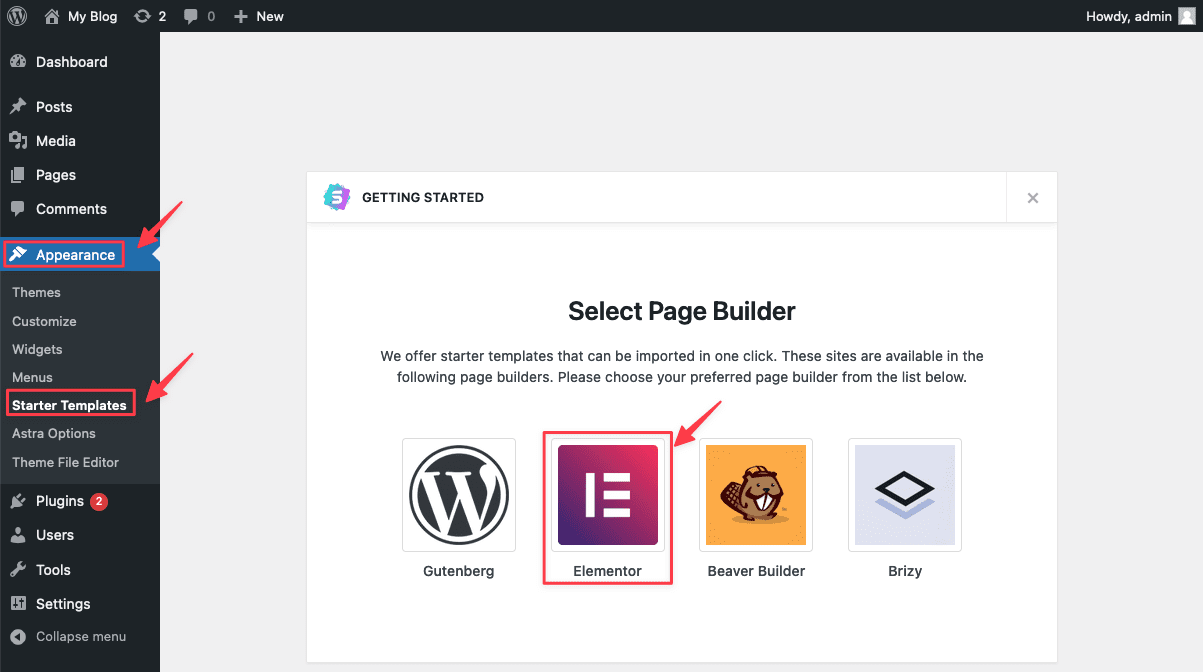
To find and select a template, select Appearance => Starter Templates, you will see many Page Builders and I will select Elementor as the Builder.
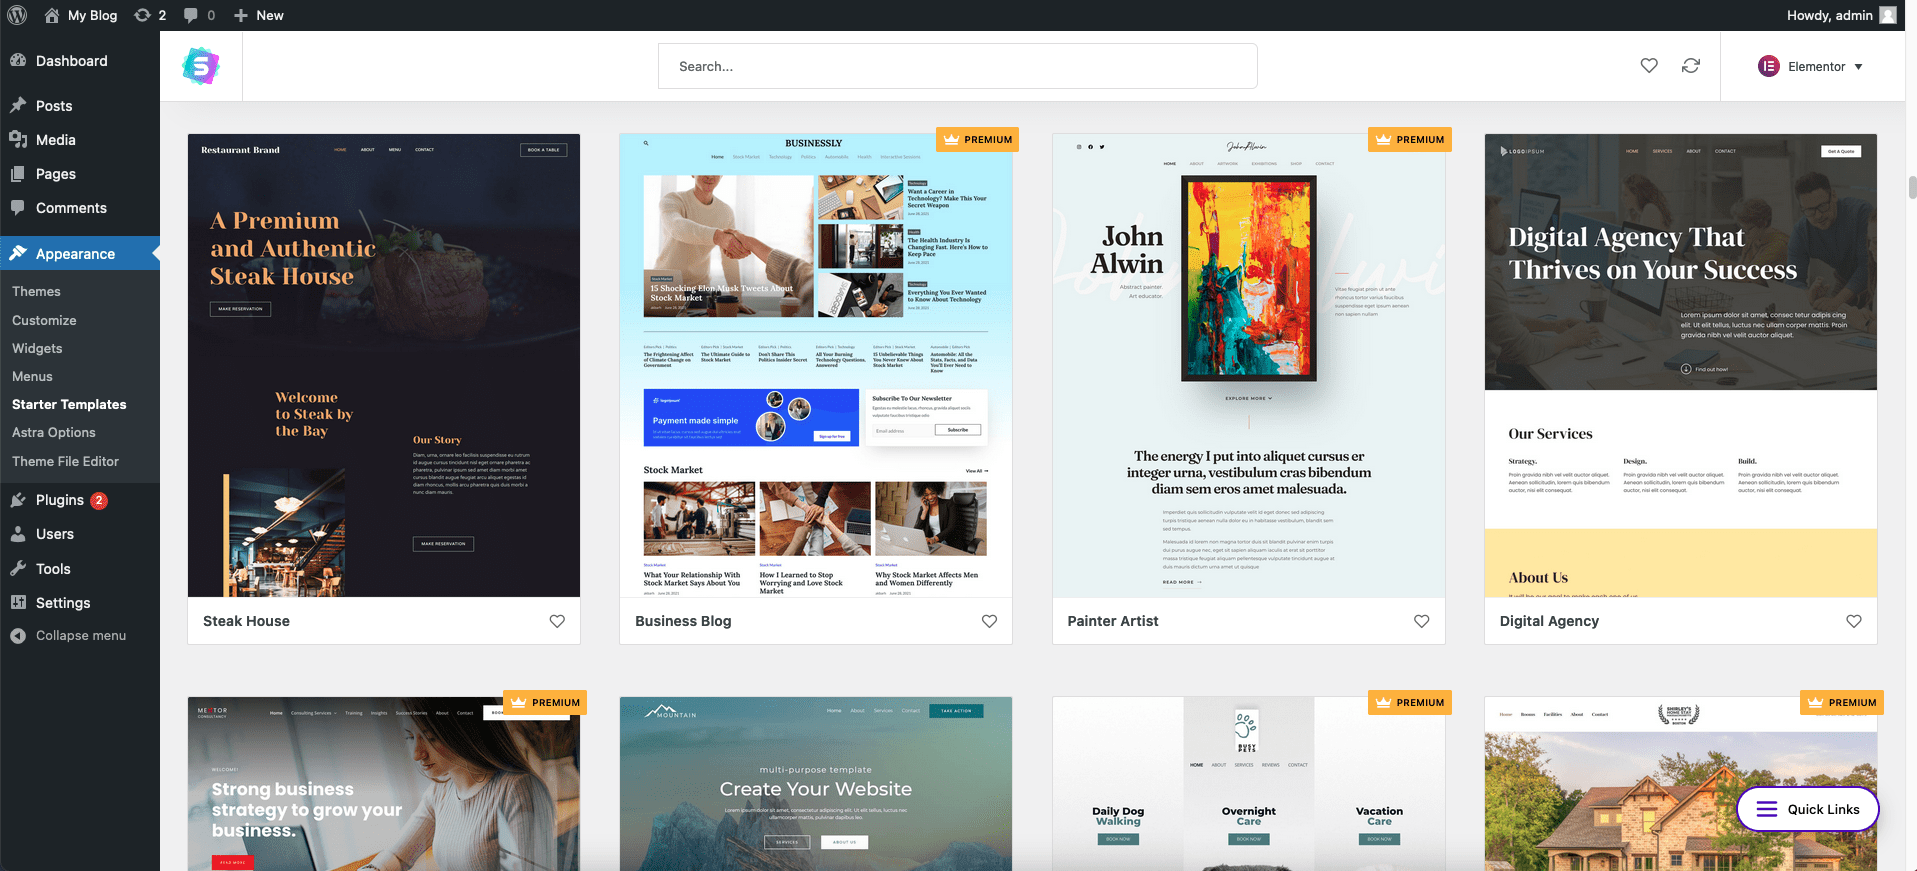
Once selected, you will see all the Page Builder Elementor templates. To use, please click on that template.
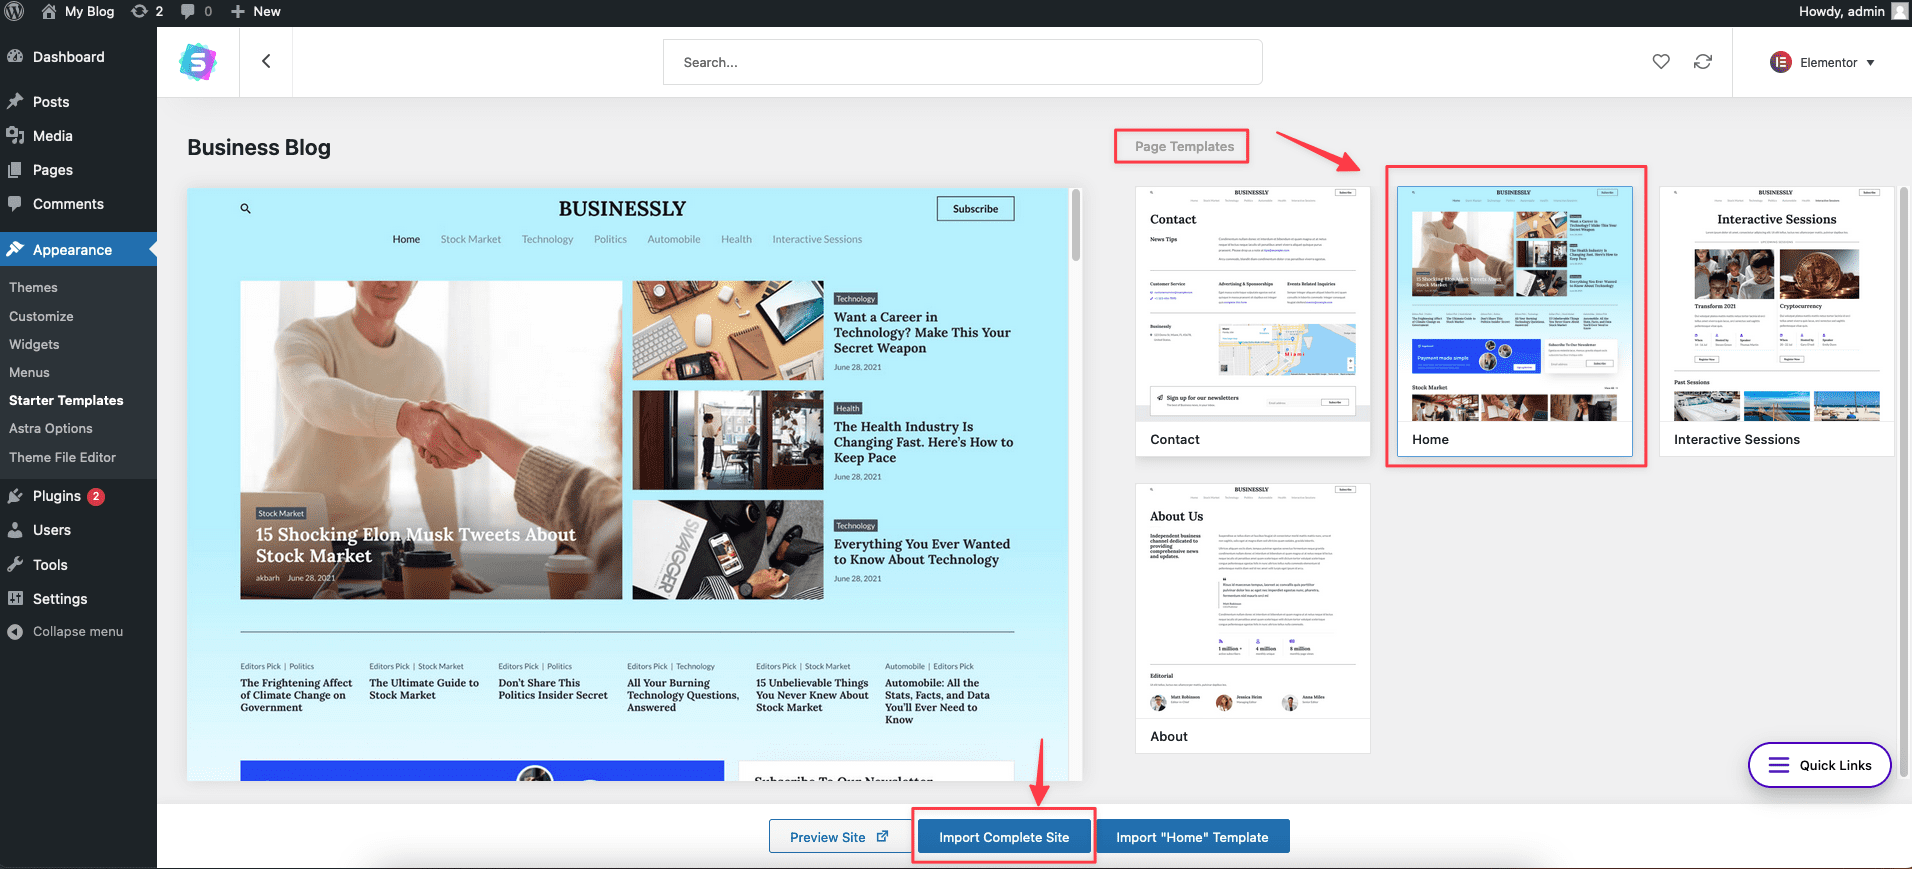
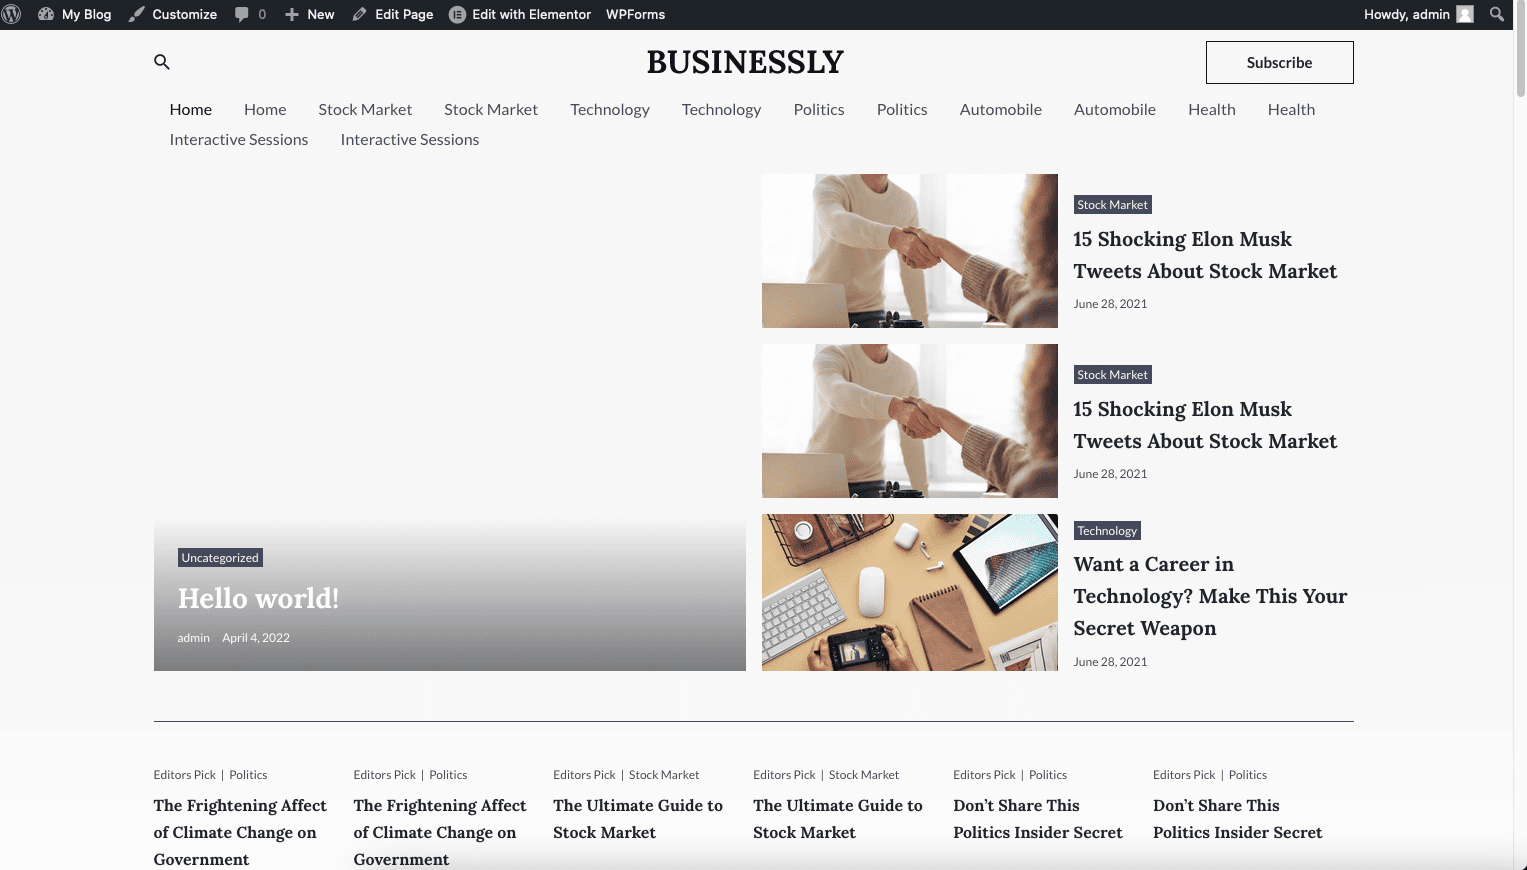
Once you have access to the template, you can view the Page Templates section and select the display template you want to use, or if you want to preview it, select Preview Site. Then select Import Complete Site to import the template data.
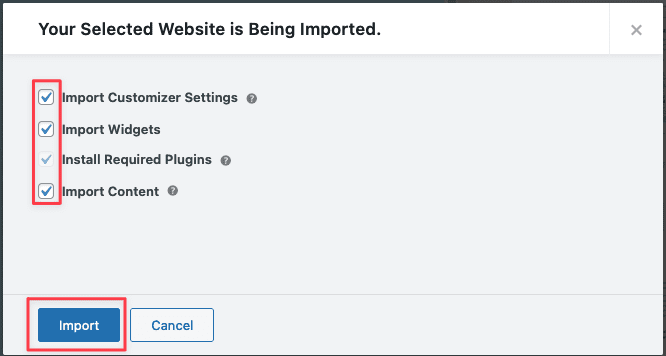
In the template, there will be imported components, including:
- Import Customizer Settings
- Import Widgets
- Install Required Plugins
- Import Content
Then you click Import to start the process.
Importing data can take 5-10 minutes, you should not close your browser and the window you are importing until it is complete.
If you get the message Imported Successfully!, the import was successful. You can now access the web to check.
II. Set up theme options and customizer in Astra
1. Astra Options
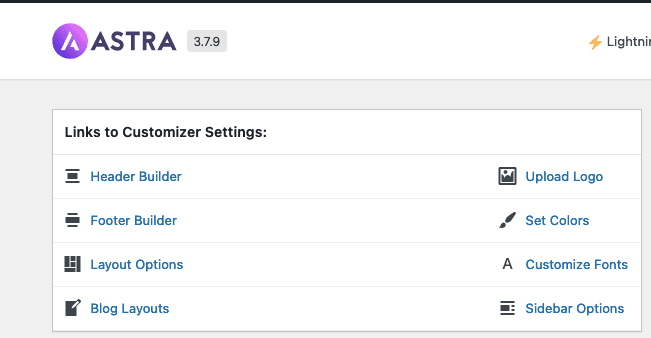
In the Astra Options section, you will find some special features of the theme:
Links to Customizer Settings:
- Header Builder
- Footer Builder
- Layout Options
- Blog Layouts
Available Astra Pro Modules:
This page will install some of the available modules and is only for the PRO version.

Extend Astra with free plugins!
This section will serve to install some free Plugins to use.
2. Customizer in Astra
This is an important part because it will help you fix the entire template and information of this Astra theme template. To Customize, you access
Appearance => Customize.

The Customize section will include the following items: And I will go into each part.
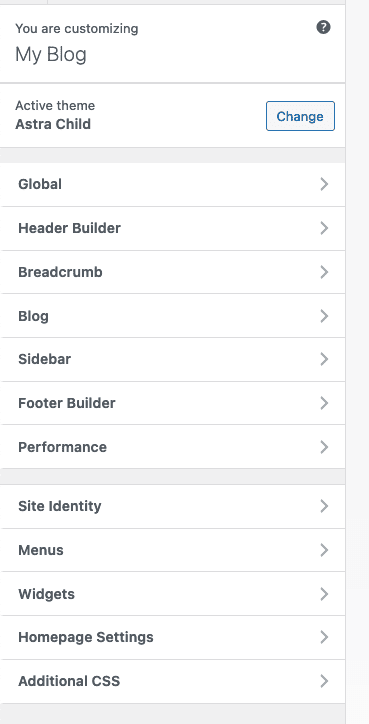
1. Global
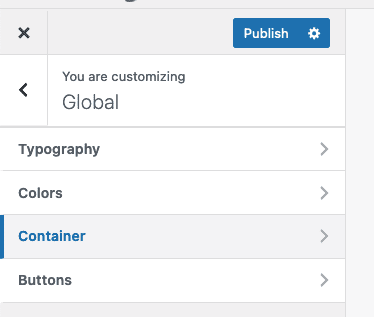
- Typography: Change font style, font size
- Colors: Allows you to change the color of the website
- Container: Allows you to modify the layout of Page and Post
- Buttons: Allows you to modify the buttons in your website to different formats.
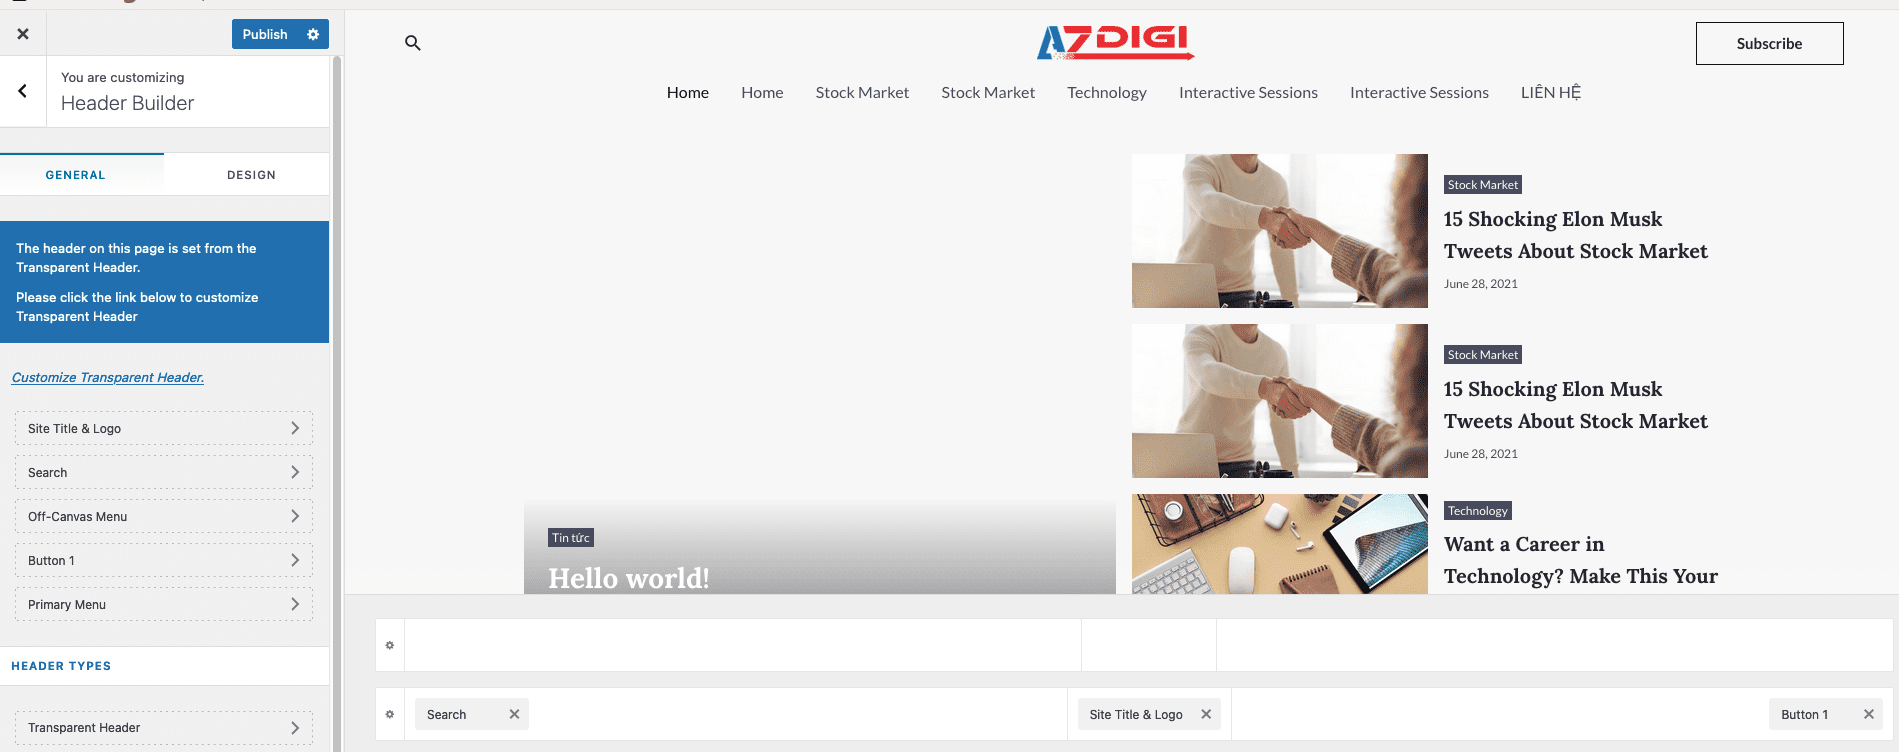
2. Header Builder
The Header Builder feature helps you edit the Header section. There are 2 parts, GENERAL and DESIGN, which help you to edit almost the entire upper part of the web.
- Site Title & Logo
- Search
- Off-Canvas Menu
- Button
- Primary Menu
To use, you just need to click on the above features and the customize interface will appear .
3. Breadcrumb
Breadcrumbs are a set of links that help users locate their current position in the site structure. In Breadcrumb, there are 3 main parts:
- Header Position
- Separator
- Alignment

4. Blog
In this function, you can edit and change the blog and specifically the format of a post. When modified, all your posts will be applied according to the structure you customized.
- Blog/Archive
- Content Width
- Post Structure
- Post Content
- Single Post
- Content Width
- Structure
- Title
- Total Number of Related Posts
- Grid Column Layout
- Posts Query
- Posts Structure
- Meta
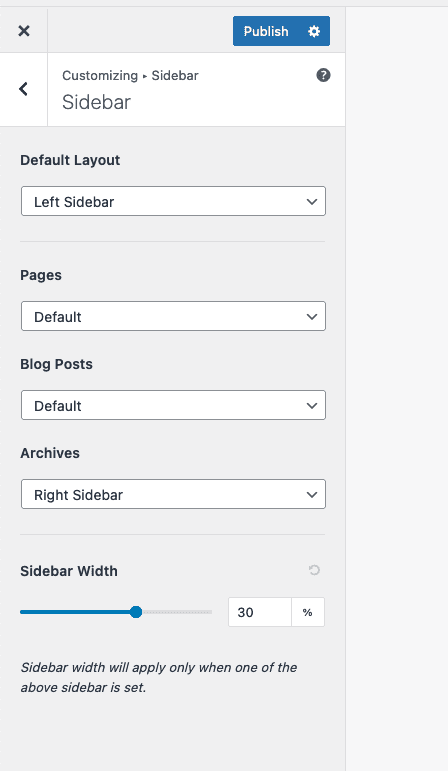
5. Sidebar
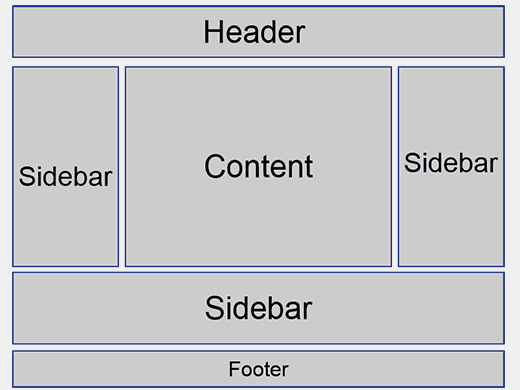
The sidebar is where users can add arbitrary content: new posts, calendars, searches, etc. Sidebar is used very flexibly, you can use the sidebar in the header, footer, page vertical bar…
In this Astra theme, there are not many available Sidebars. However, you can add using Elementor.
6. Footer Builder
Similar to the Header Builder built on top of the website. Footer Builder builds the bottom, footer of the website.
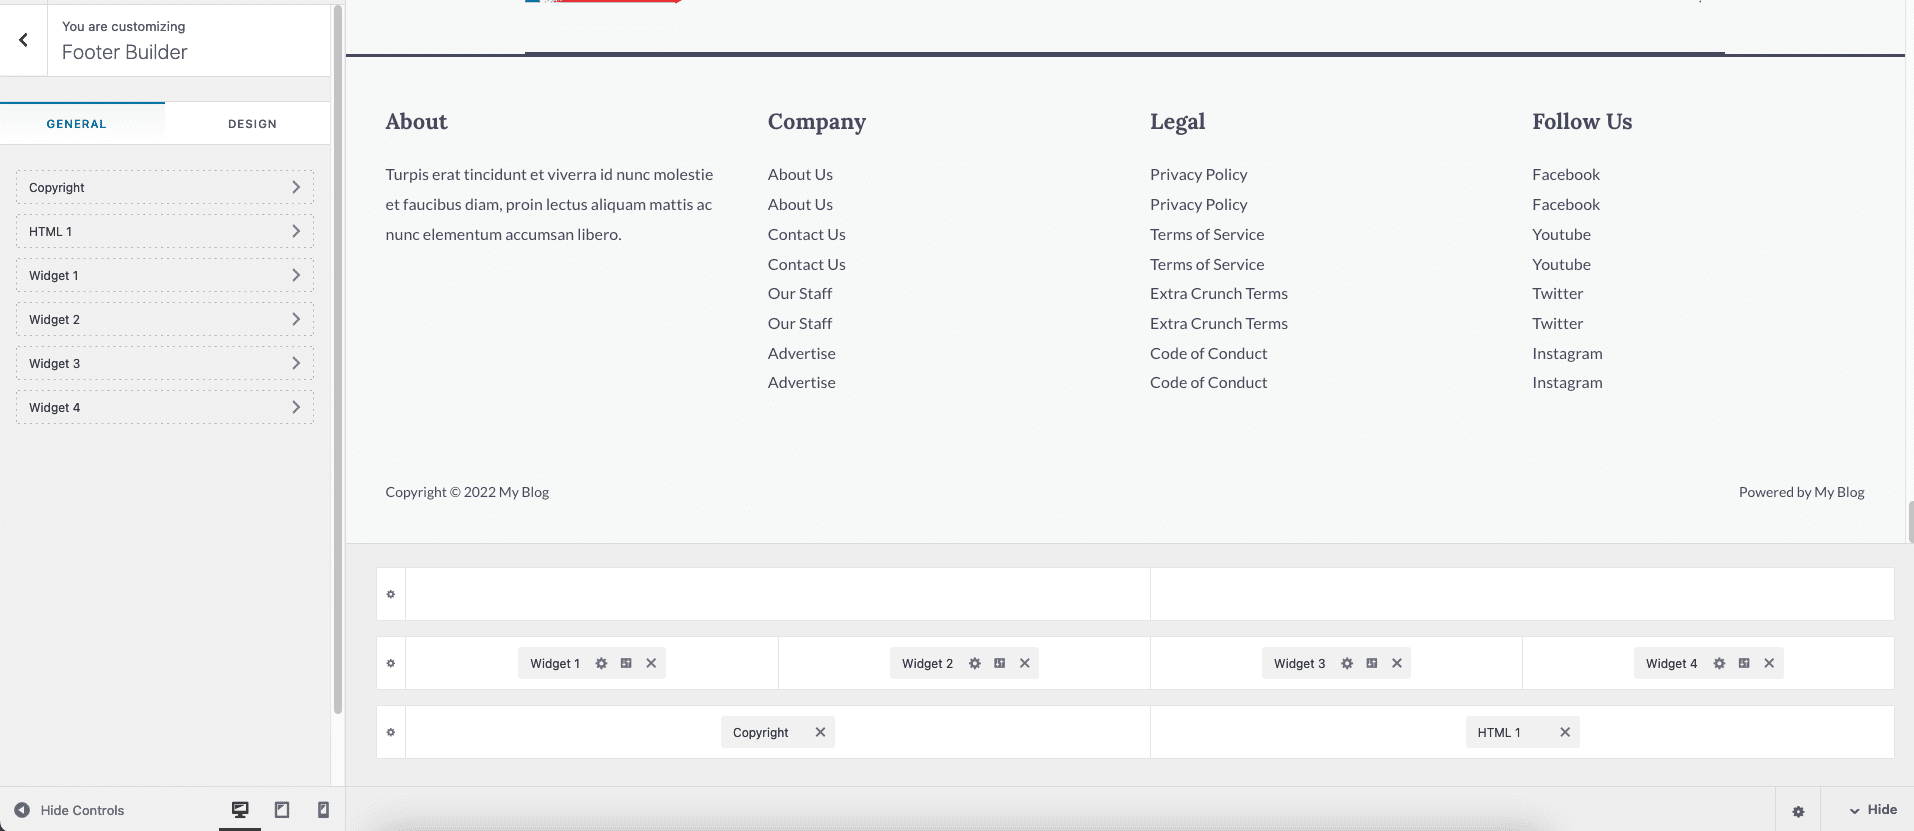
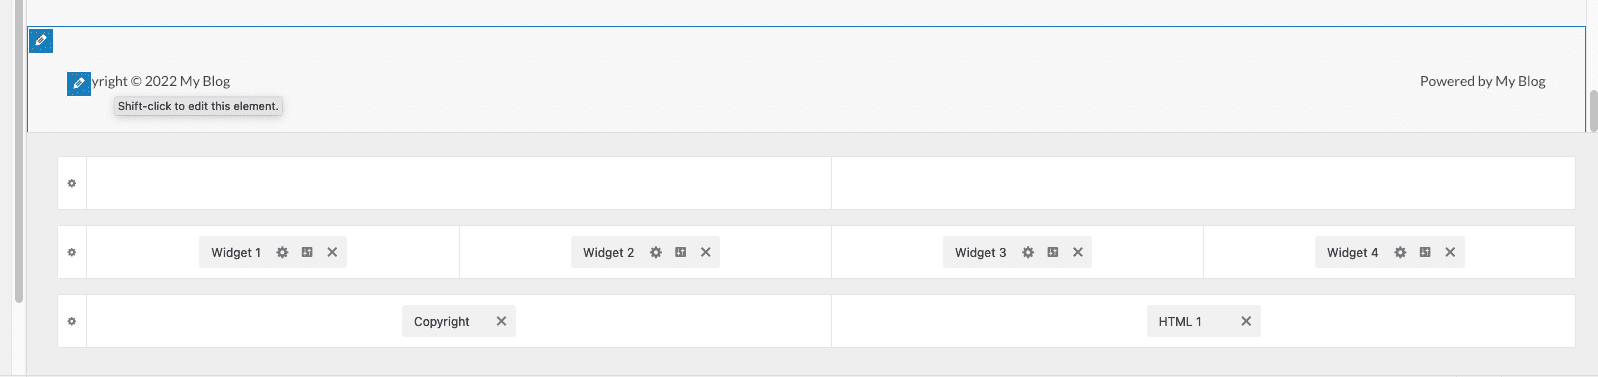
In the footer of the website, there are many areas with pre-made Widgets. You can edit these Widgets directly or add new Widgets to build a more beautiful footer.
To edit, hover your mouse over the Widgets and select General or Design.
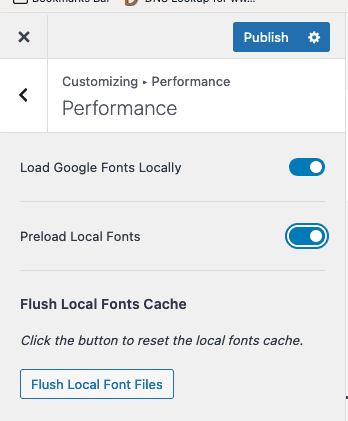
7. Performance
Performance is the developer’s built-in automatic performance optimization feature. In the Astra theme, the developer only has 2 main features available:
- Load Google Fonts Locally
- Preload Local Fonts
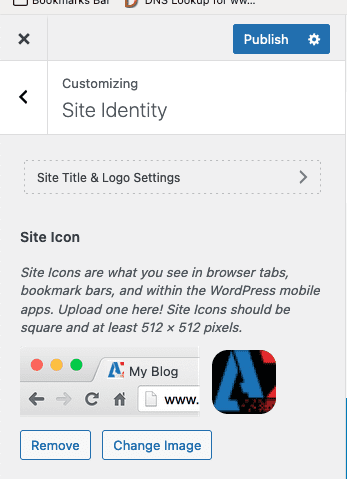
8. Site Identity
The Site Identity section links to the Header Builder quite a bit. Because here, you can customize Site Title & Logo Settings and Site Icon aka Favicon.
9. Menu
In addition to customizing the menu in Appearance => Menus, you can also customize the menu directly here. To add a new menu, click Add Items.
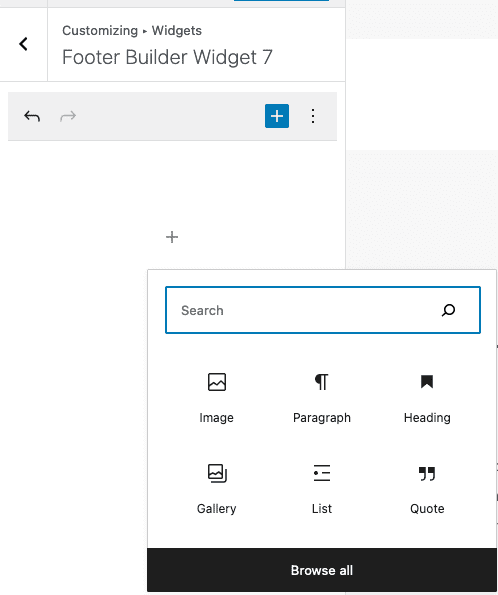
10. Widgets
Widget WordPress (referred to as Widget) is a system of WordPress tools that allows you to add new content, shape the list of posts. Thereby displaying the latest posts on the bars for visitors to search and track the posts easily.

Astra theme has built-in 10 Widgets with different positions and you can add multiple blocks in each Widget.
For each block, you can use it as a post editor.
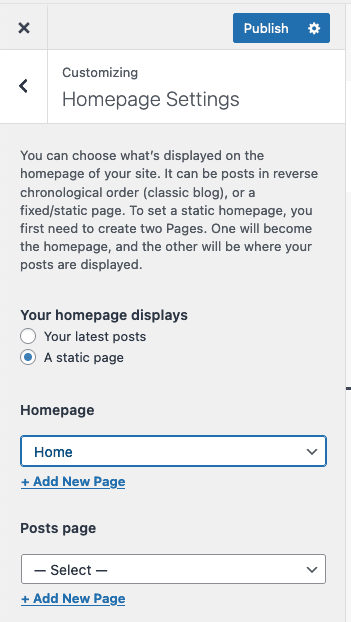
11. Homepage Settings
Homepage Settings – you will rarely use this section because you already use the Elementor to build. The important part here is choosing what your homepage will show. And the default in Homepage Settings will take the Page name is Home for display.
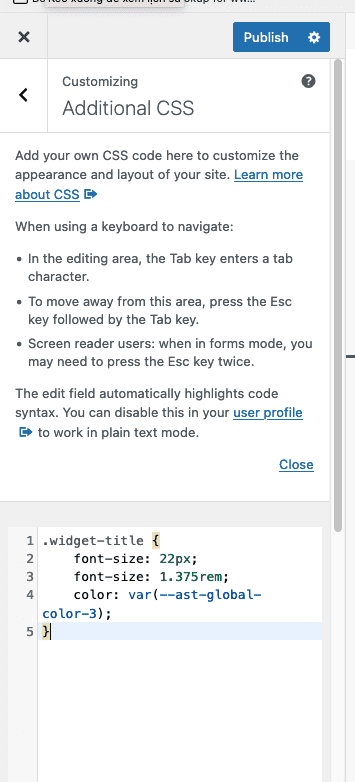
12. Additional CSS
Additional CSS Most website builders often work with this part. Instead of having to edit the CSS code directly in the theme, which will affect the theme and cause unexpected errors, you can edit the CSS in this section.
III. Elementor Tool
Overview and interface editing operations in Elementor. To edit the interface with the Elementor tool, do the following:
First, you need to determine the interface to fix and the page that belongs to that interface. For example, I will edit the homepage interface, there are 2 ways for you to enter and edit the homepage interface.
- Method 1: Go to Pages => All Page=> Select the page to edit => click Edit with Elementor
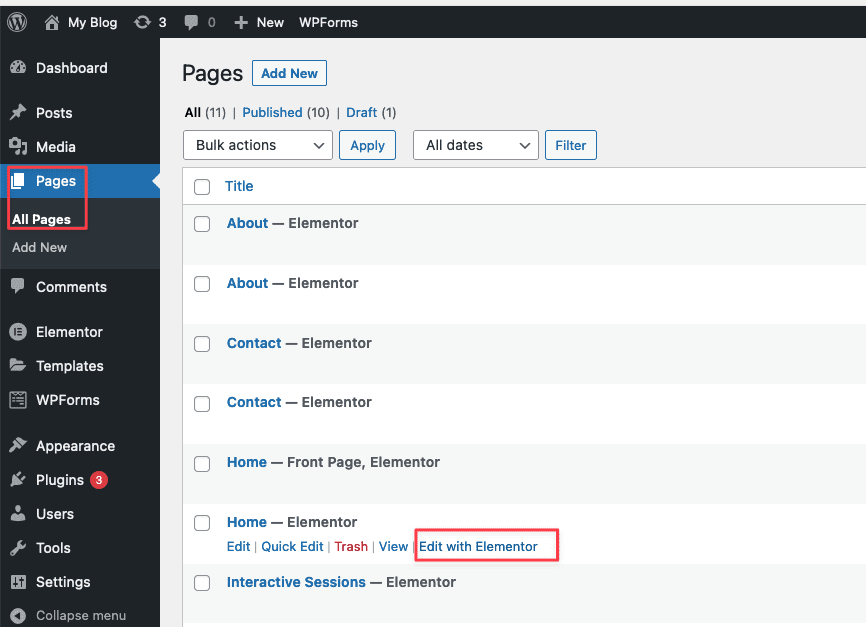
- Method 2: Access the homepage of the website, On Toolbar , select Edit with Elementor

After accessing, you will see the following functions:
- BASIC: Basic functions
- PRO: Advanced functions
- GENERAL
- SITE
- WOOCOMMERCE
- ELEMENTOR HEADER & FOOTER BUILDER
- ULTIMATE ADDONS
- WORDPRESS
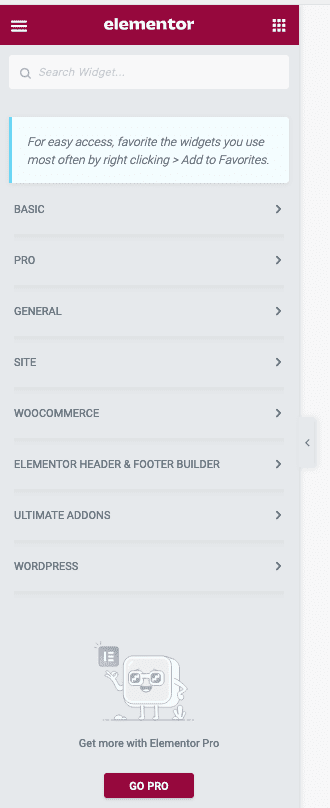
Like other page builders, Elementor’s dashboard is a collection of elements and tools for page creation. Elementor’s working interface is stable and intuitive. In particular, they do not take up much space on the editing screen, which is very useful if your computer screen is not large.
Elementor will work based on 4 page layout structure elements as follows:
- Section: This is a working area on the page, each page will have many sections
- Inner Section: Each section will be able to add multiple inner sections (but not required)
- Columns: Columns are in a section or inner section, each section or inner section will have many columns
- Element: In each column, there are many elements, each element can be an image, text, icon, video, etc.
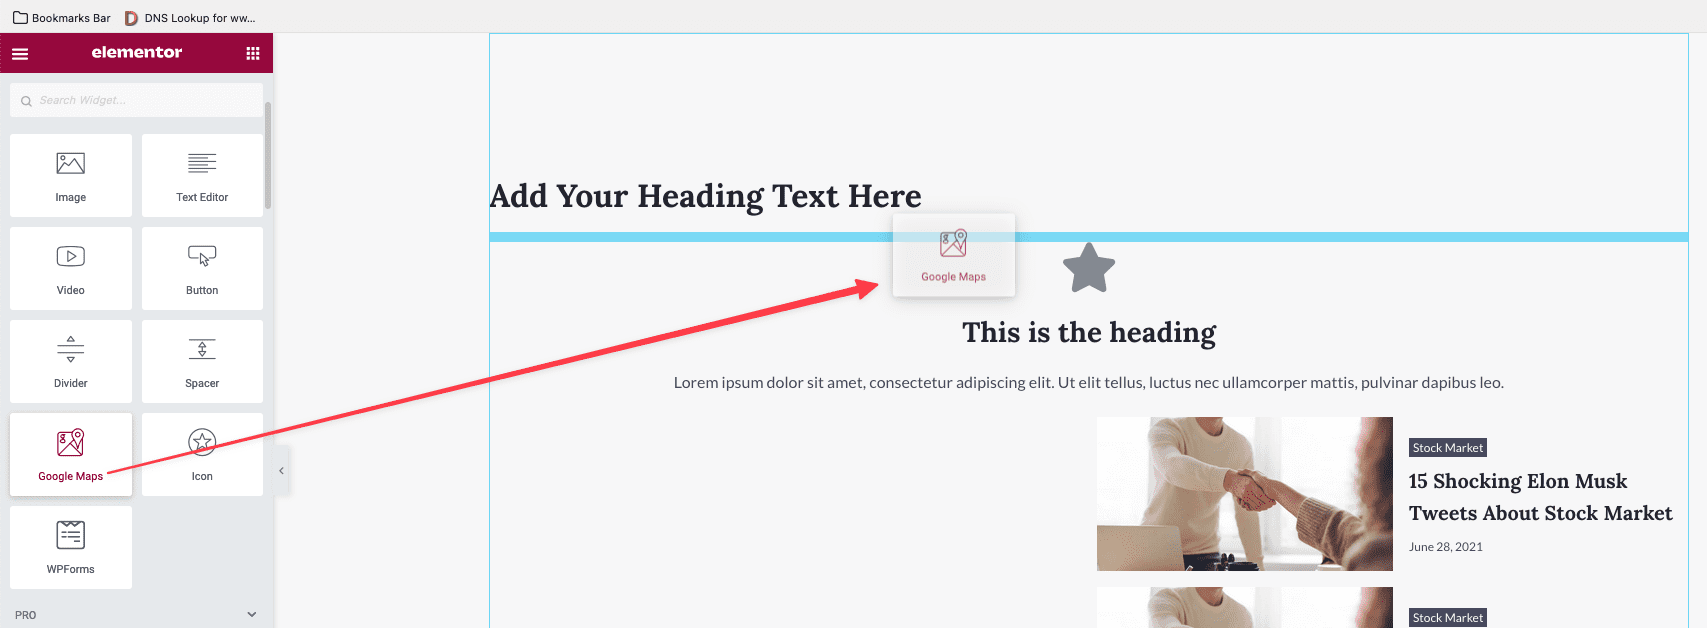
When using Elementor, all operations you use are drag/drop. For example, if you want to add Maps to your homepage, find Google Maps in the menu bar, then hold down your mouse and drag it to the location you want to display and drop it.
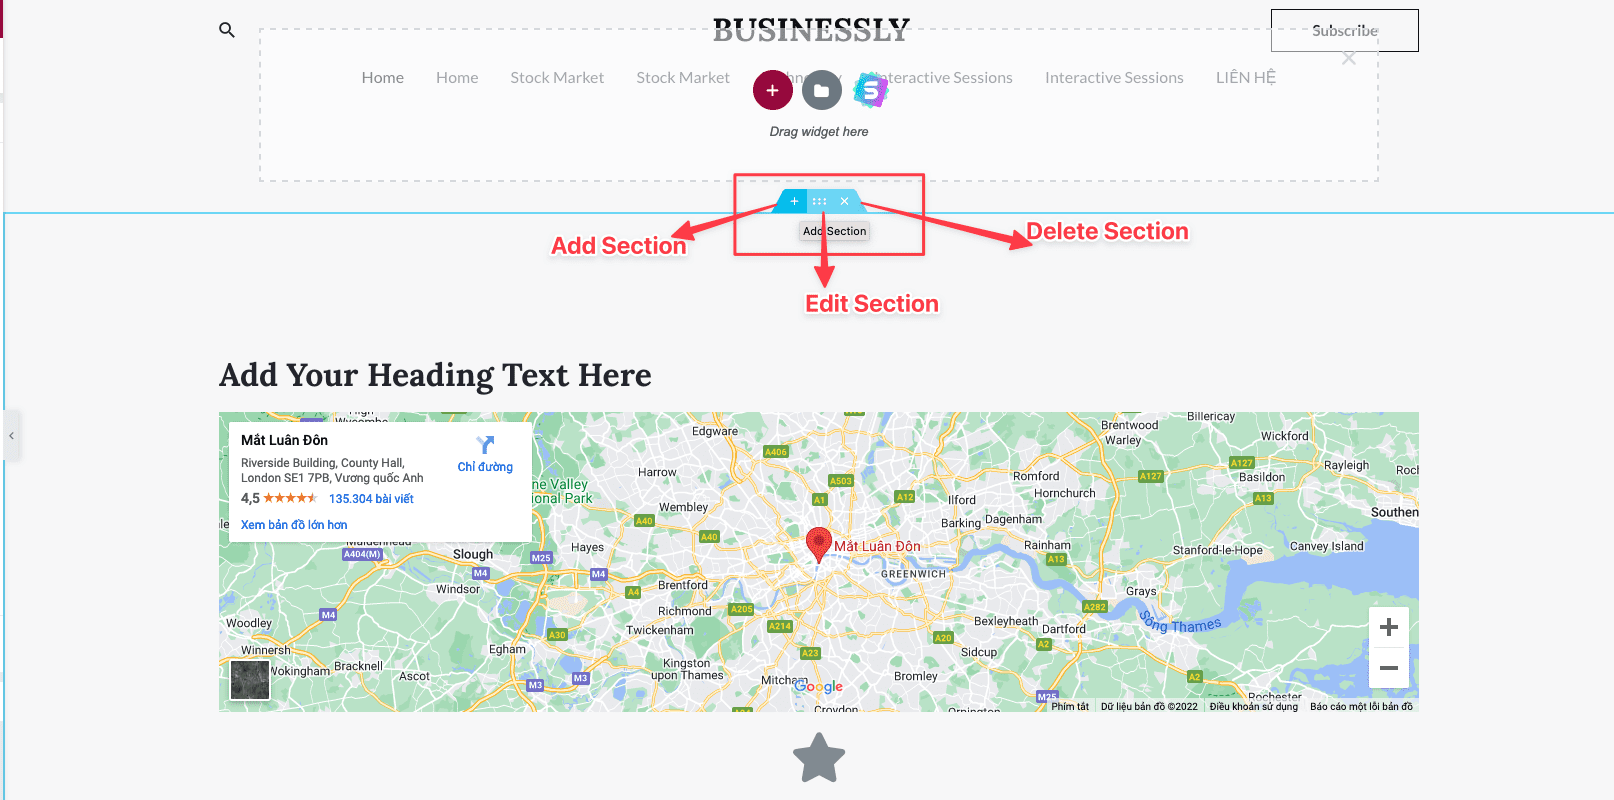
After dragging/dropping, you will see the interface with Section appears. In these sections, there will be 3 parts for you to manipulate:
- Add Section: Add another Section
- Edit Section: Edit the current Section
- Delete Section: Delete the current Section
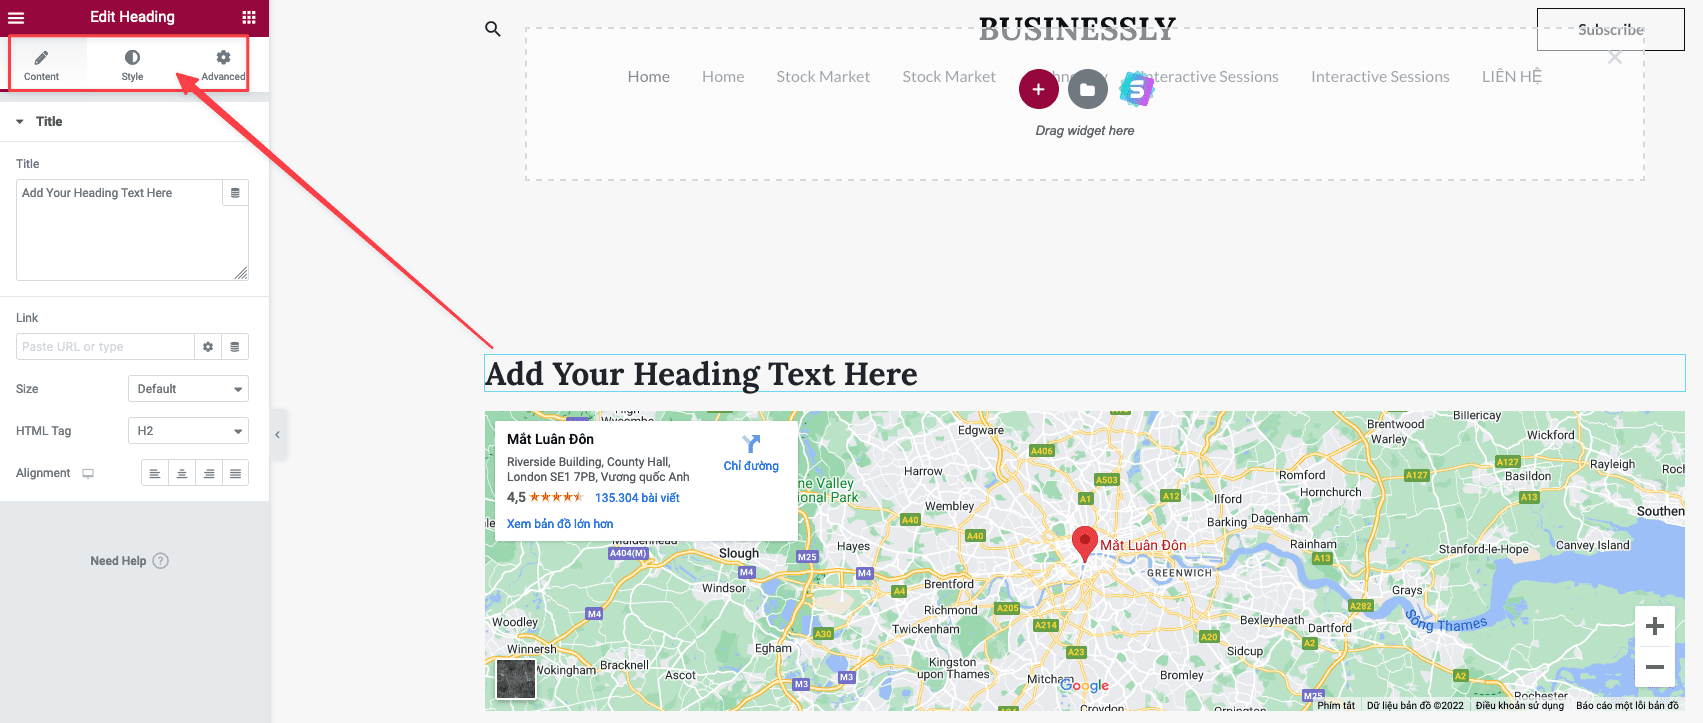
In these sections, there will be 3 items:
- Content: Used to edit the content of that section
- Style: Used to edit the interface, color, font
- Advanced: Advanced customization, allows custom CSS
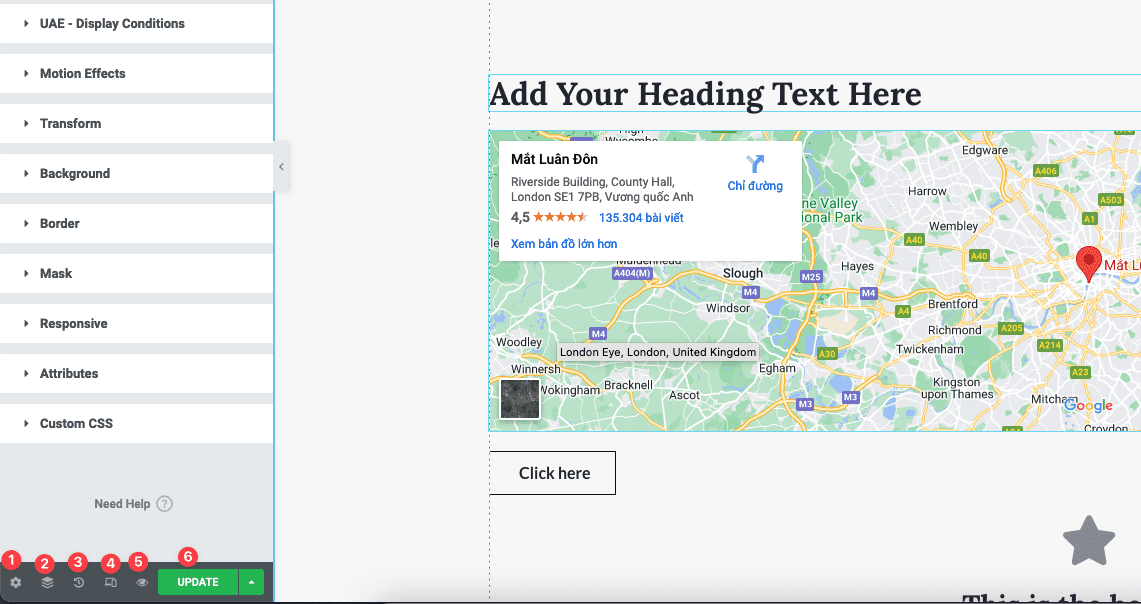
In addition, the corner below has some other features, such as:
- Cài đặt: general post options like title, background style, layout, etc.
- Nagivator: layered post manager, you can manage element position by drag and drop here.
- History: your edits and layouts will be saved, you can undo any mistakes.
- Responsive mode: previews of posts across devices, including computers, tablets, and mobile devices.
- You can edit the post appearance to suit each device separately without affecting other devices.
- Preview icon: Preview the post before publishing.
- Publish: publish a post (post, page).
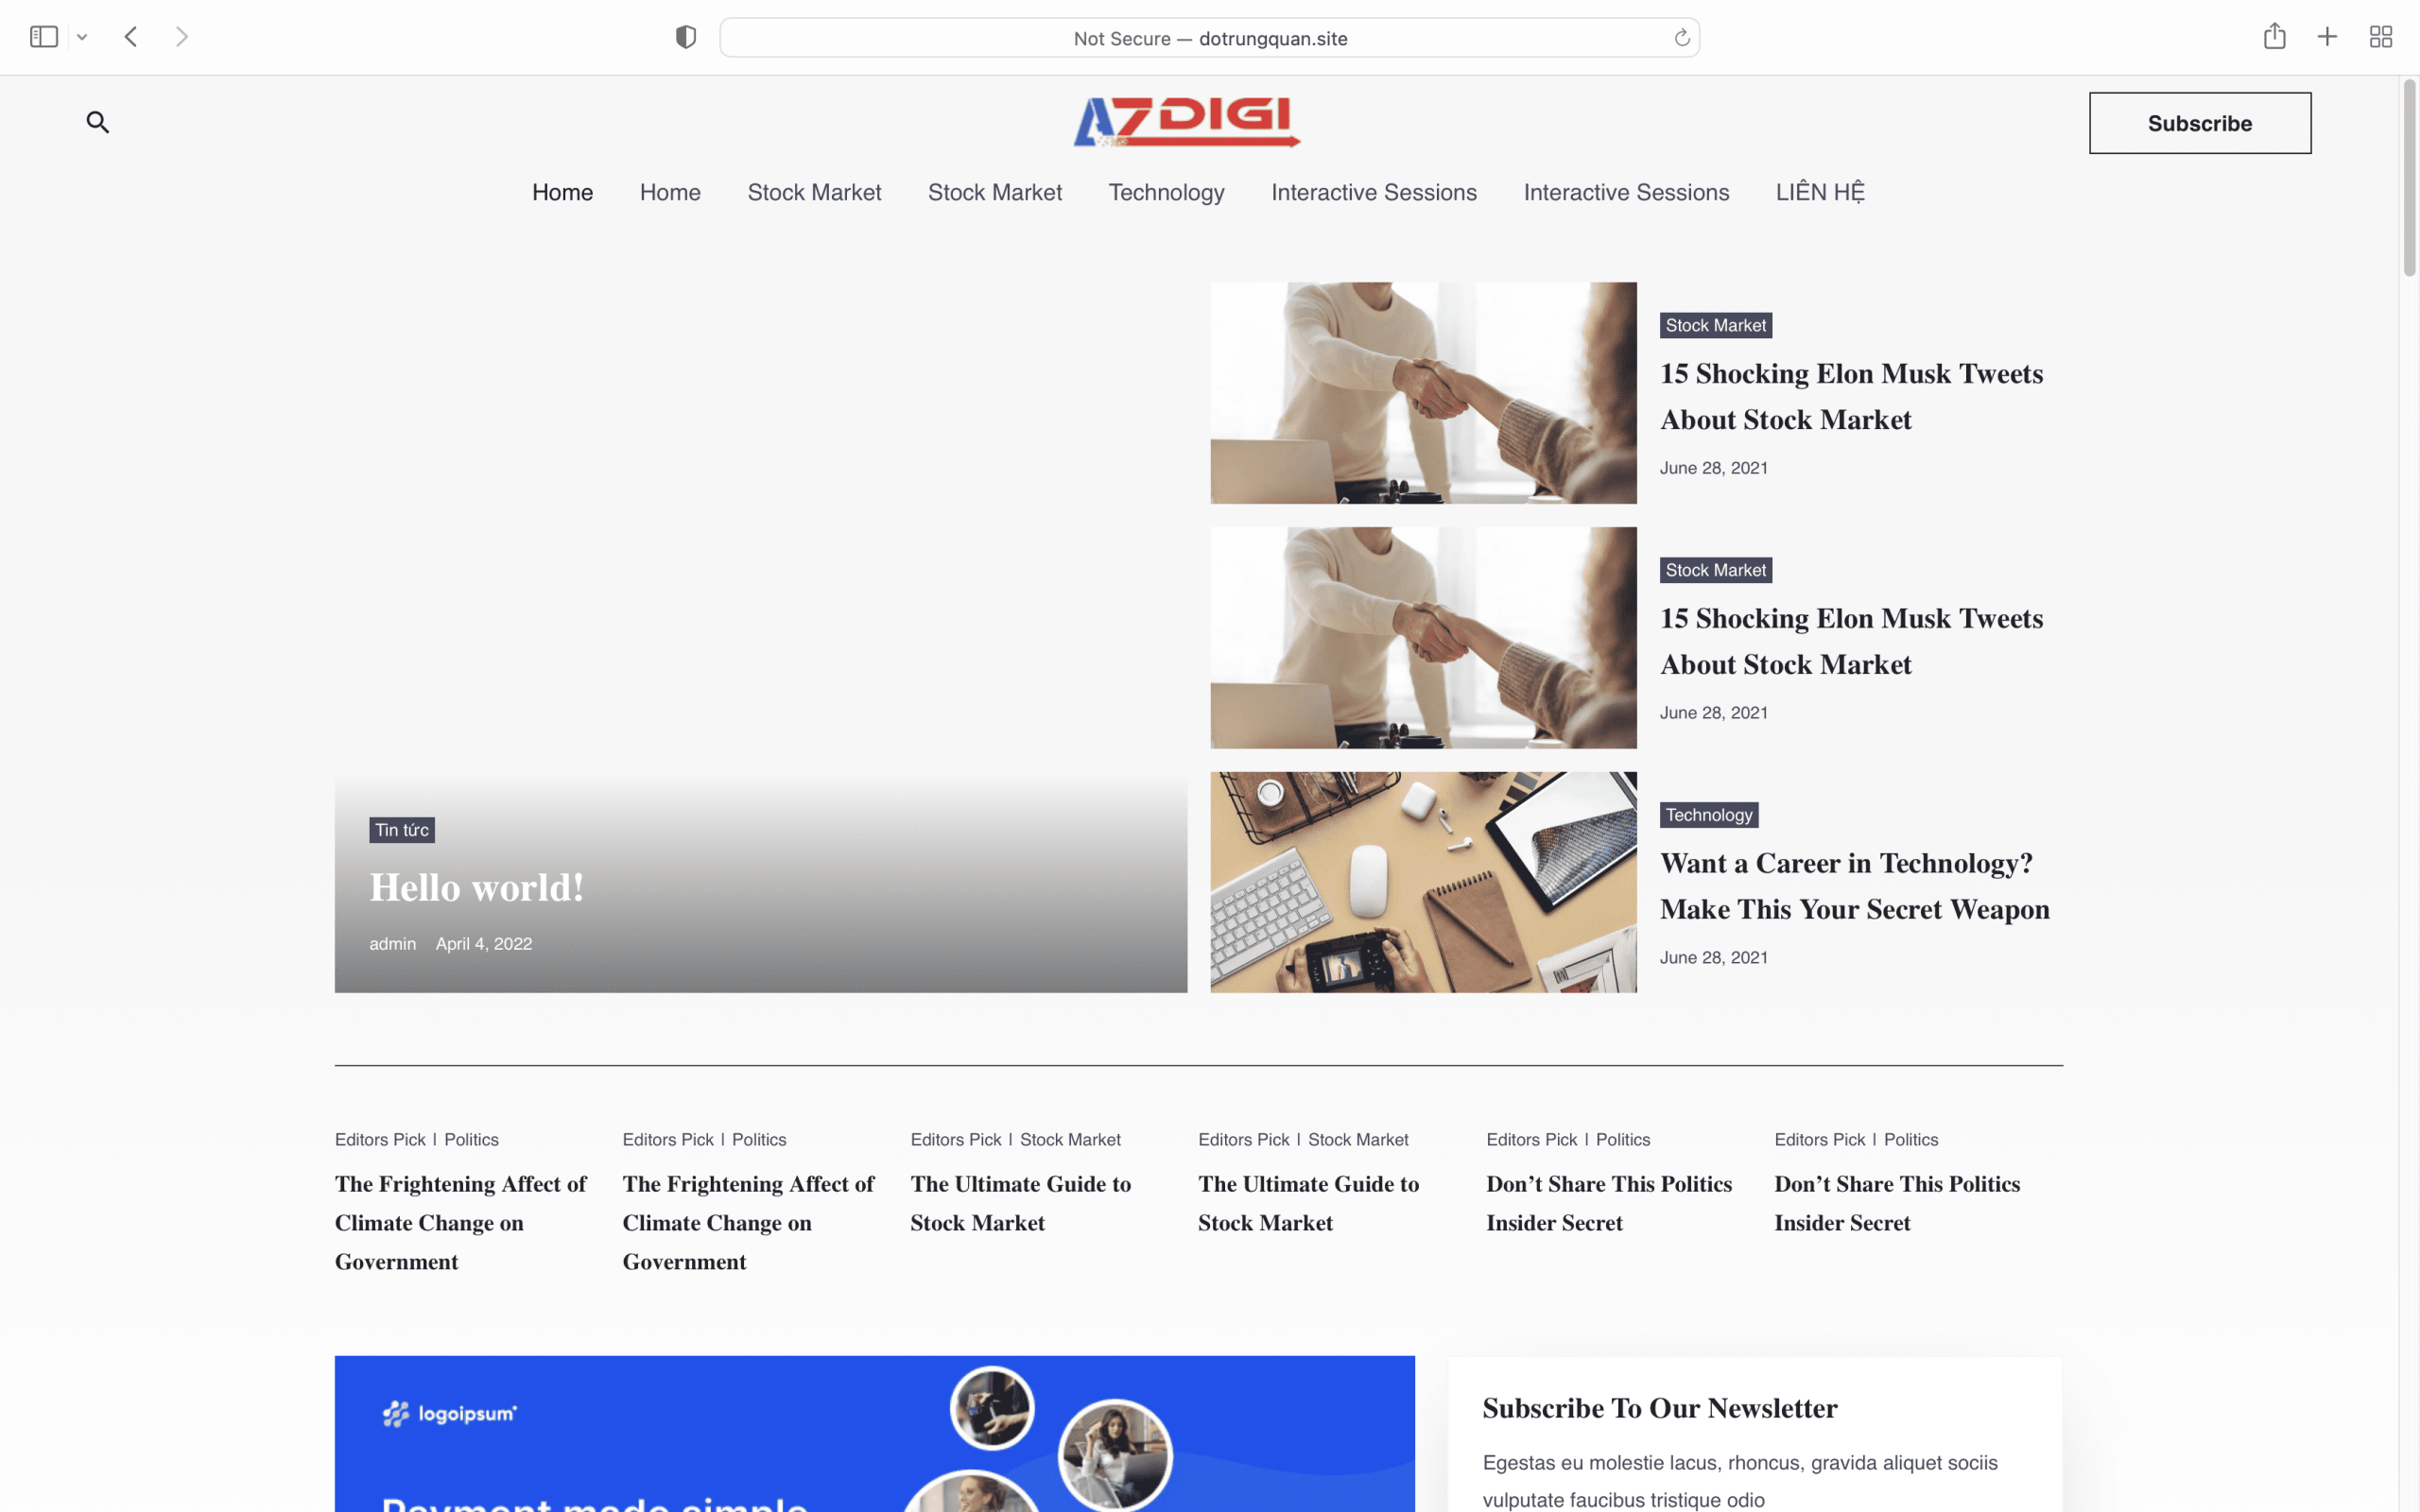
After updating the changes, you can revisit the website to check.
III. Summary
Hopefully, through this article, you will confidently deploy a beautiful website for your company or your own. Wish you success!
If you need assistance, you can contact support in the ways below:
- Hotline 247: 028 888 24768 (Ext 0)
- Ticket/Email: You use the email to register for the service and send it directly to: support@azdigi.com .
- Click on the AZDIGI website to refer to the best Hosting/VPS service in Vietnam.
You might also like
About the author

Thạch Phạm
Đồng sáng lập và Giám đốc điều hành của AZDIGI. Có hơn 15 năm kinh nghiệm trong phổ biến kiến thức liên quan đến WordPress tại thachpham.com, phát triển website và phát triển hệ thống.