In this article, AZDIGI will show you how to install a WordPress plugin to your website using the two most common ways.
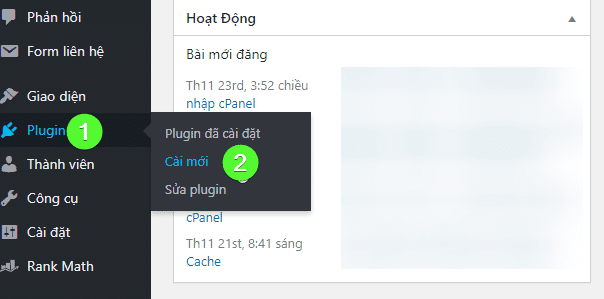
Method 1: Install the plugin from the WordPress Plugin Library
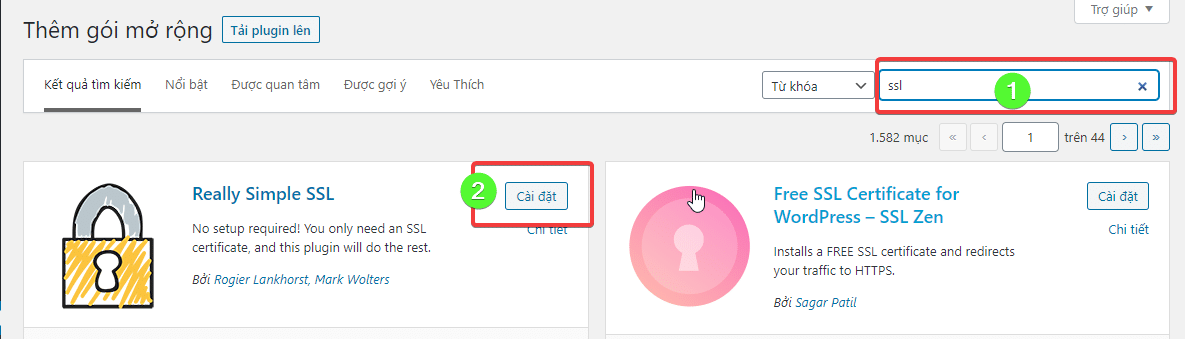
You access the WordPress admin => Plugins => New install
As shown below, enter the name of the plugin you are looking for and click Install. Once the installation is complete, activate the plugin.
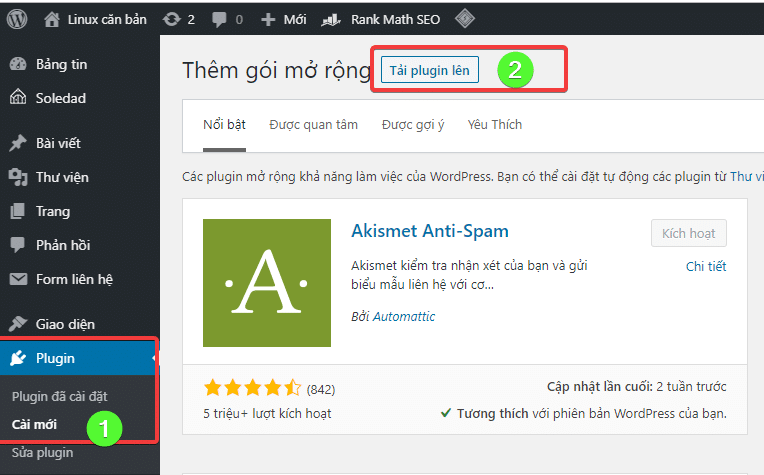
Method 2: Install from uploaded zip file
This case applies when you already have the original plugin or have purchased the plugin from another developer.
You also click Plugin => New install => Upload plugin
Here you click Choose file to find the plugin file on your personal computer and select Install to get started.
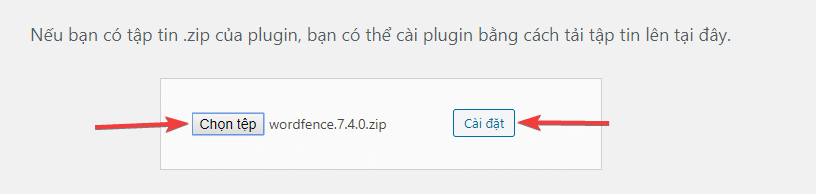
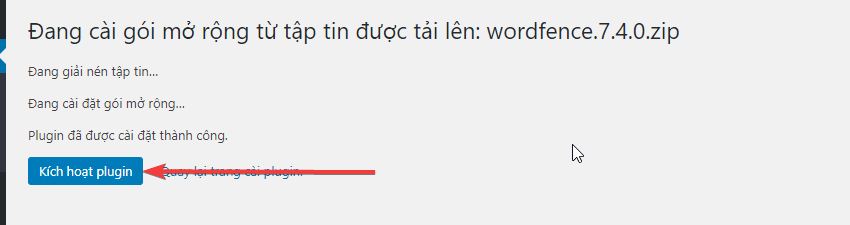
After the installation is complete, click Activate Plugin.
After activating the plugin, you can start using it right away. Usually, plugins will have a settings page in the Settings section of the WordPress Admin interface.
About the author

Thạch Phạm
Đồng sáng lập và Giám đốc điều hành của AZDIGI. Có hơn 15 năm kinh nghiệm trong phổ biến kiến thức liên quan đến WordPress tại thachpham.com, phát triển website và phát triển hệ thống.