Continuing the website building guide series at AZDIGI, in this article, let’s learn what WordPress is and an overview of its features with AZDIGI.
WordPress is an open-source platform that supports almost all the necessary features for users. It has a diverse range of free interface themes and a rich plugin library. With WordPress, even someone who is not a professional or a web developer can design a website for themselves.
I. Steps to Install WordPress
1. Install WordPress
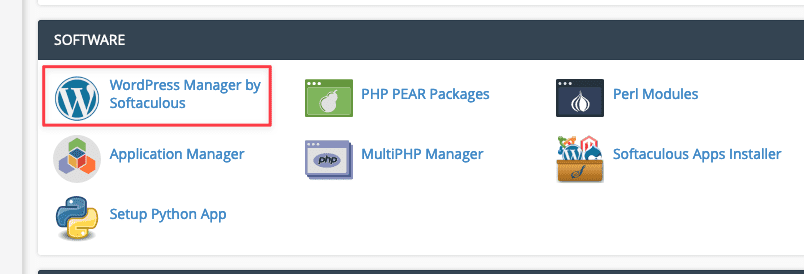
Firstly, log in to cPanel and navigate to SOFTWARE, then select WordPress Manager by Softaculous

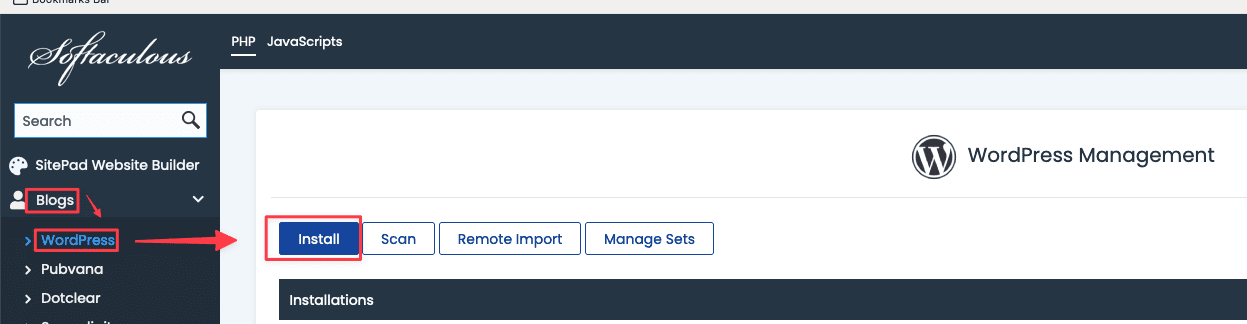
Next, select Blogs => WordPress => Install to begin the installation process.
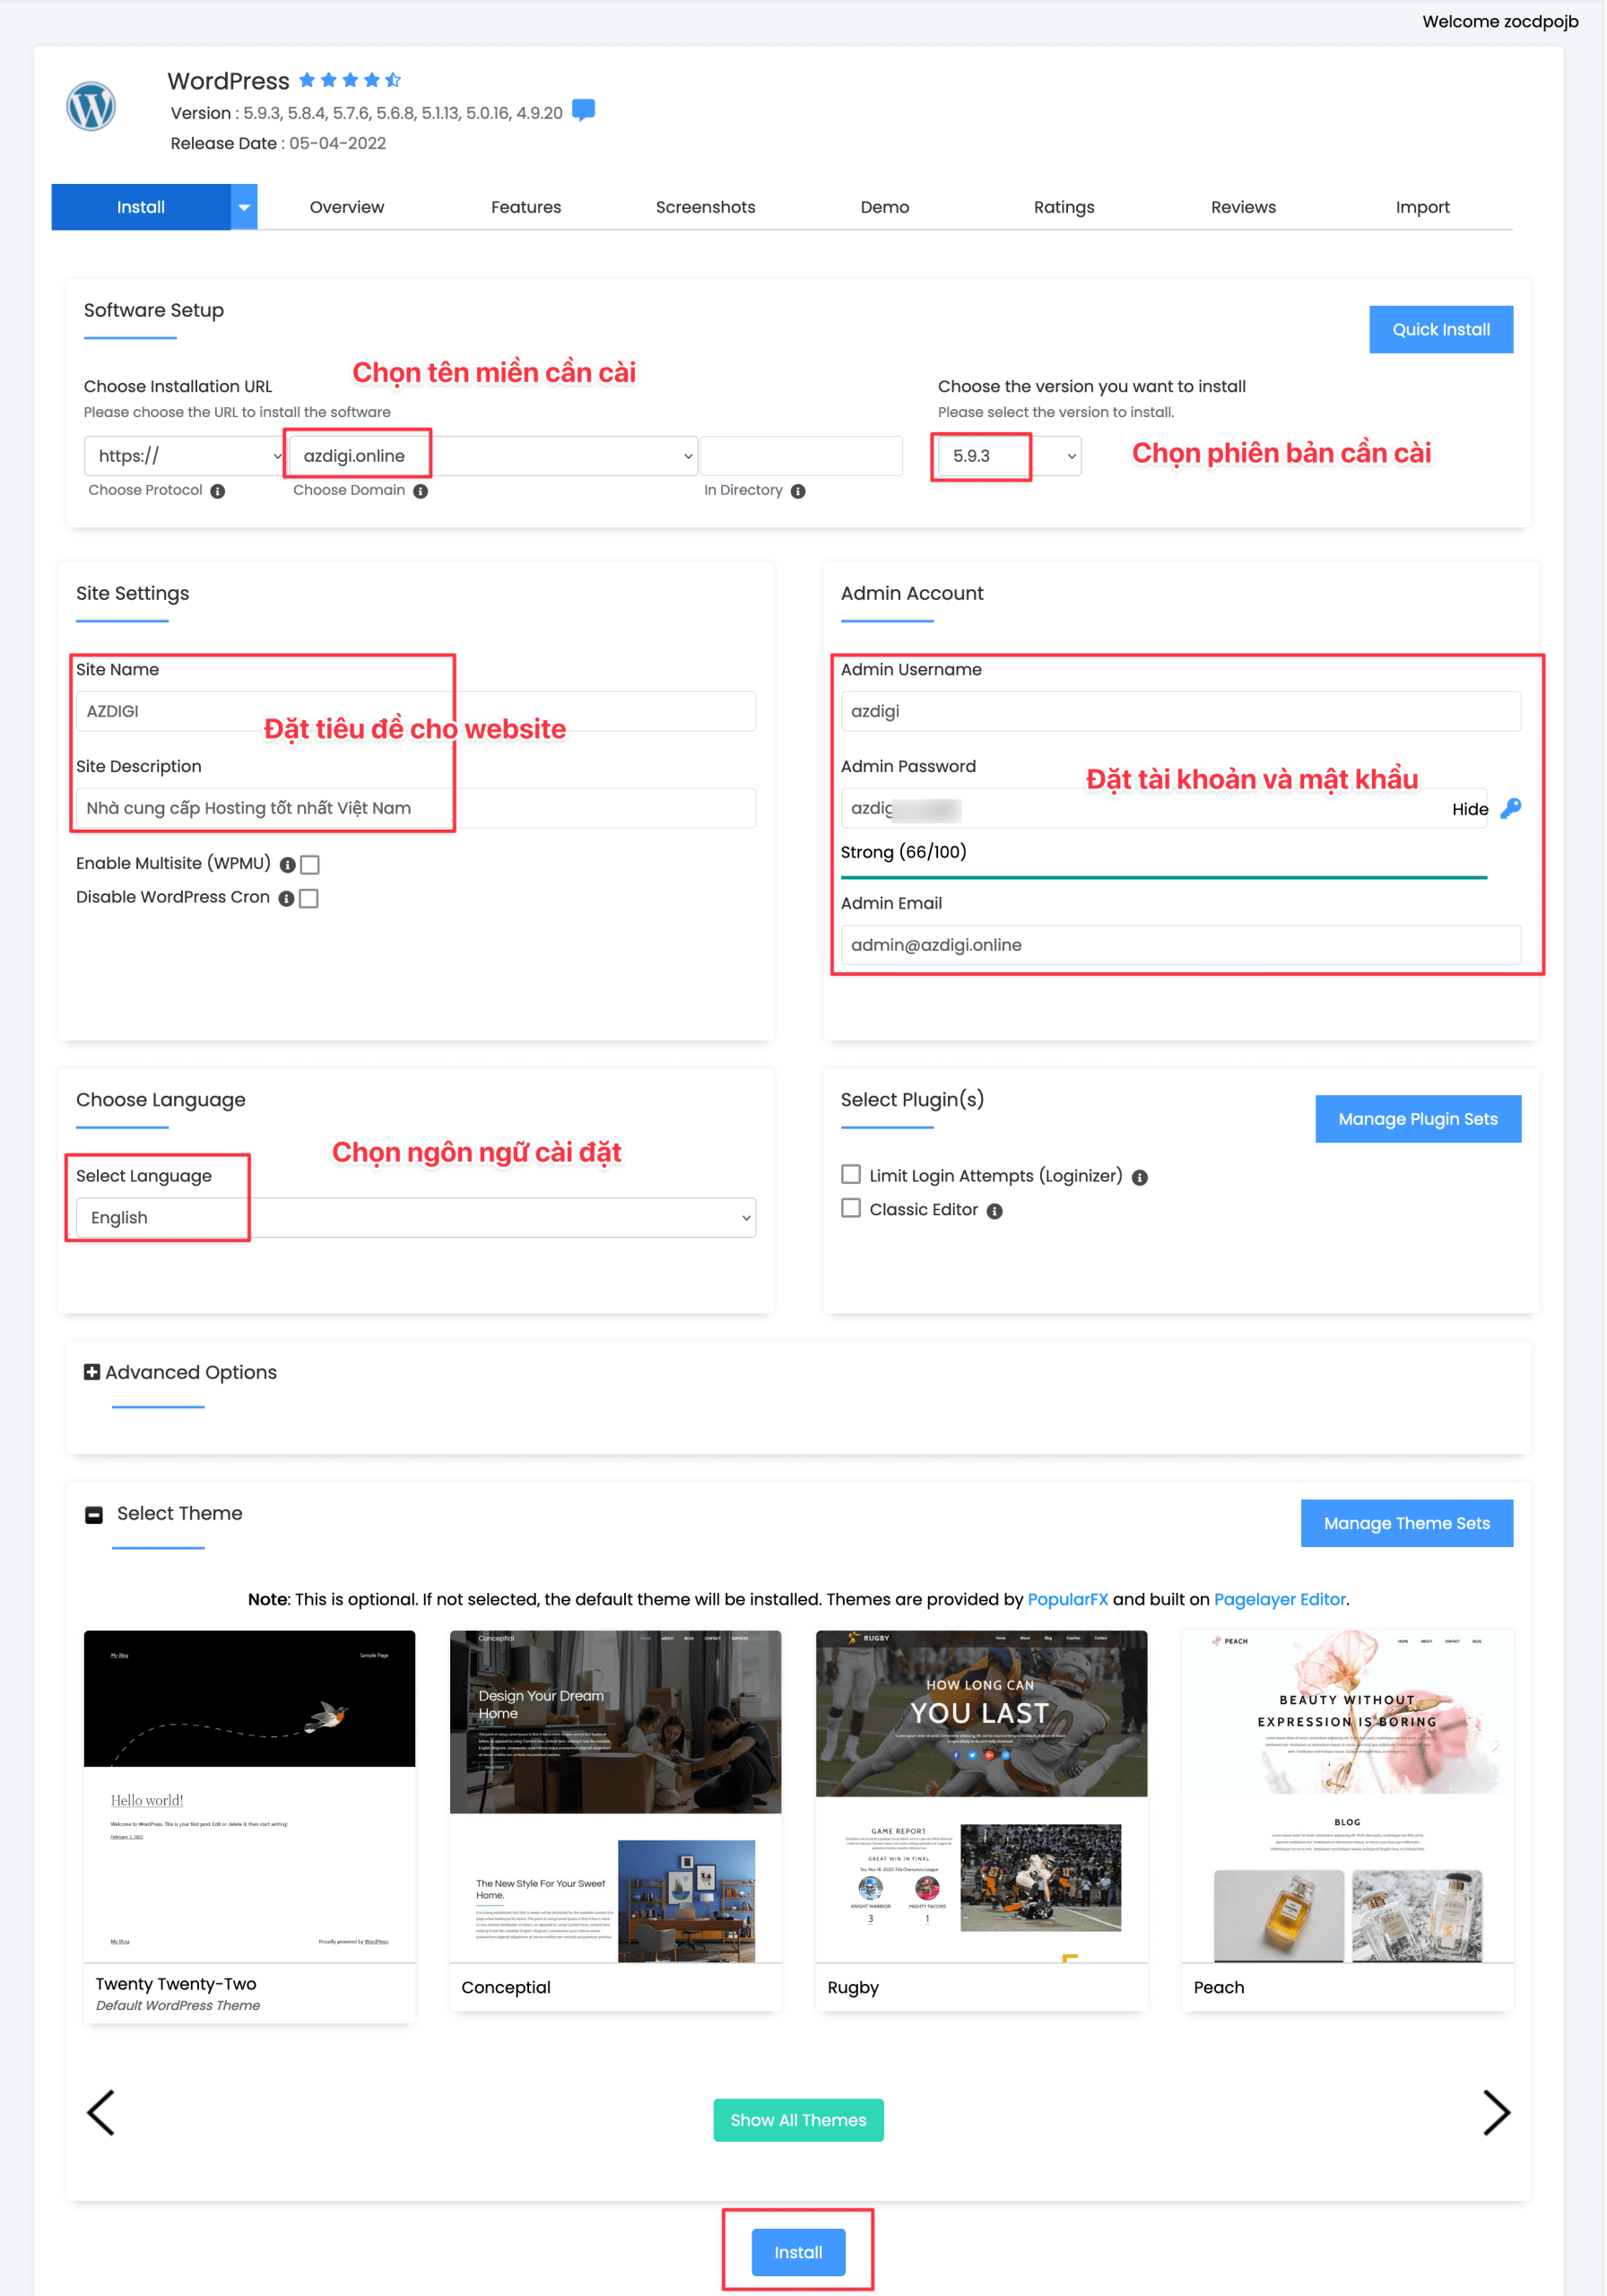
The WordPress installation interface will appear, Enter and select the required information as shown below to set up:
- Choose Installation URL: Select the domain name to install.
- Site Settings: Enter the website name and description.
- Admin Account: Enter the website’s admin login name and password.
- Choose Language: Select the language for the website.
Finally, click Install to install WordPress.
2. Administrator
2.1 Log in to the Administrator account
There are two ways to log in to the WordPress administrator account: directly via WordPress Manager and by using user/password credentials.
2.1.1: Log in via WordPress Manager
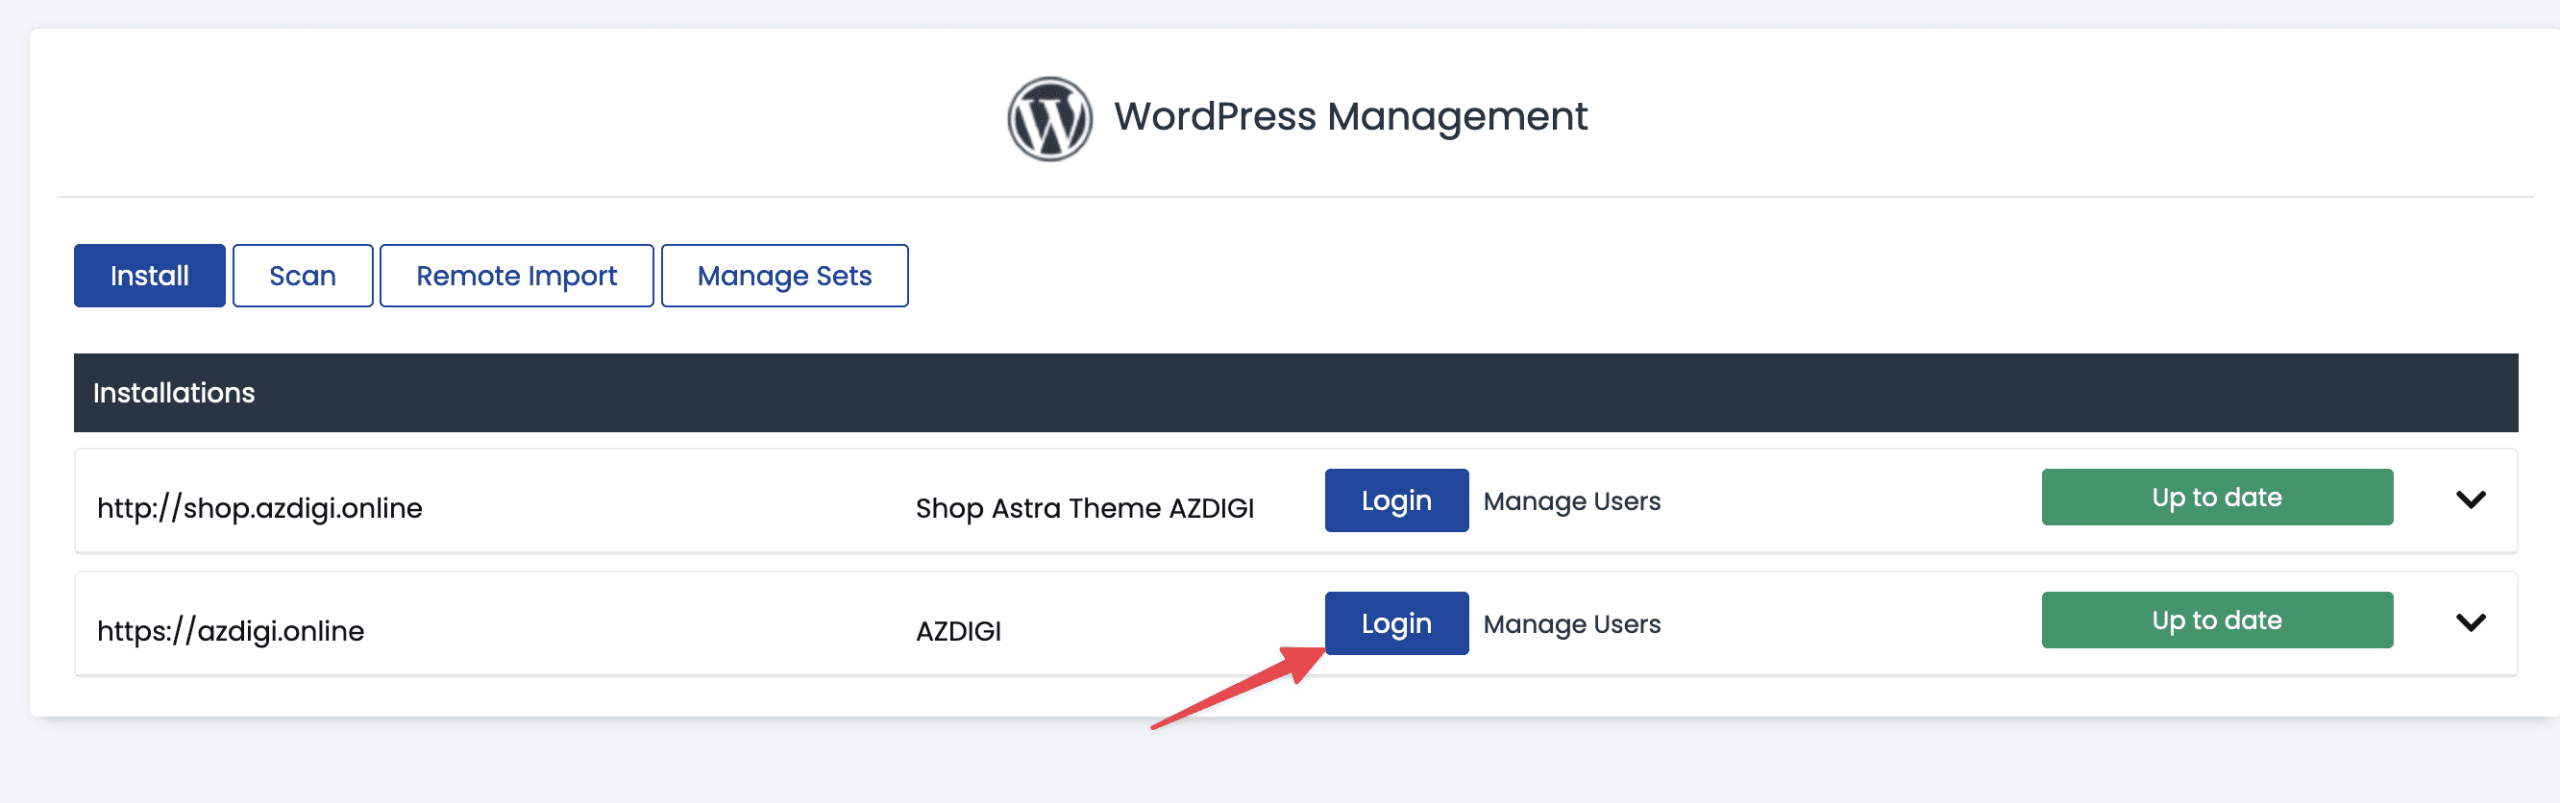
In cPanel, navigate to SOFTWARE and select WordPress Manager by Softaculous
The system will list your websites, click Login to log in directly to WordPress.
Note: If your websites do not appear here, click Scan to allow the system to search for them.
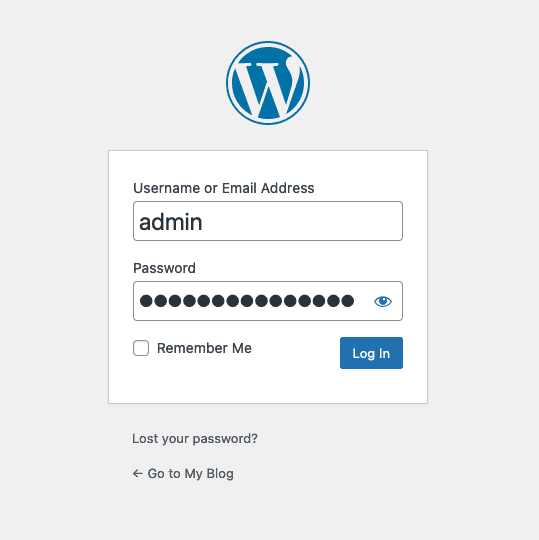
2.1.2: Log in via user and password
To access the WordPress admin panel, you can use either of the following links to log in:
https://my-domain/wp-login.php
https://my-domain/wp-admin/
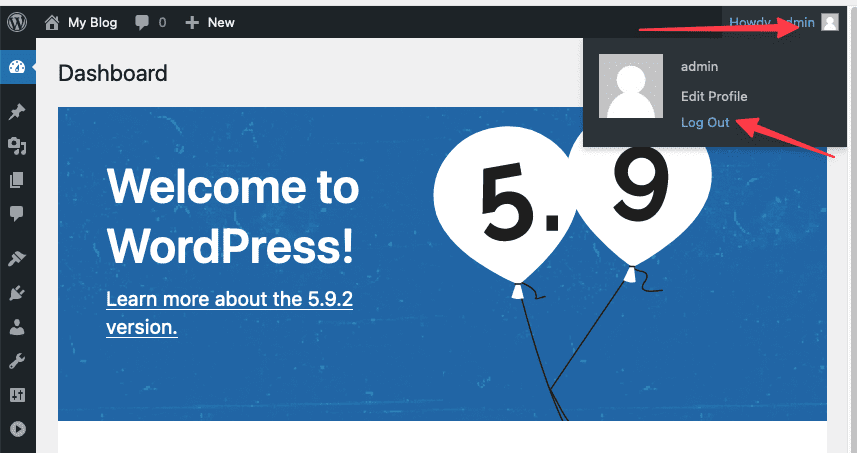
2.2 Log out of the WordPress Administrator account
To log out of the WordPress admin panel, click the profile icon in the top right corner. Then click Log Out.
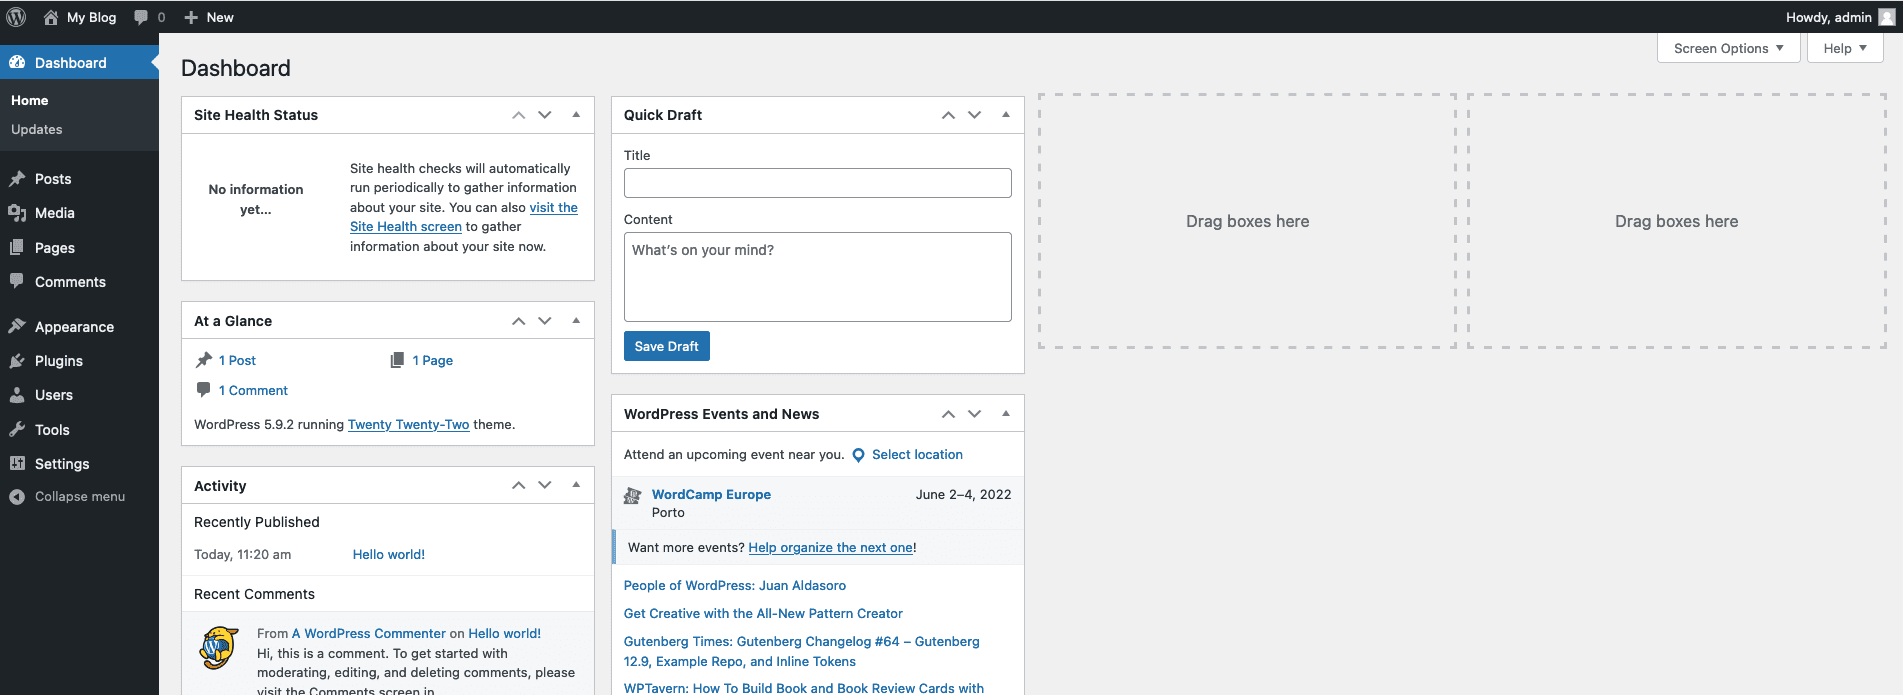
2.3 Dashboard
After logging in, you will be taken to the dashboard to manage the website. Here, you can create posts, categories, pages, tags; edit, change the interface, and website settings.
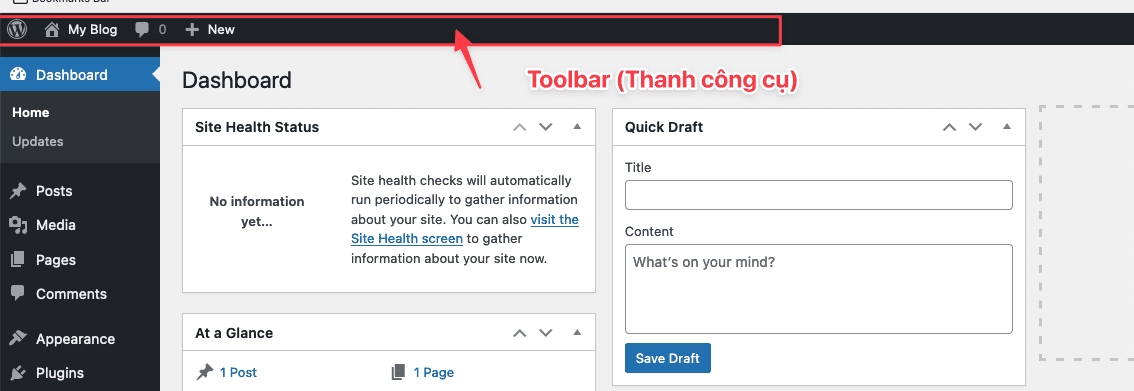
2.3.1 Toolbar
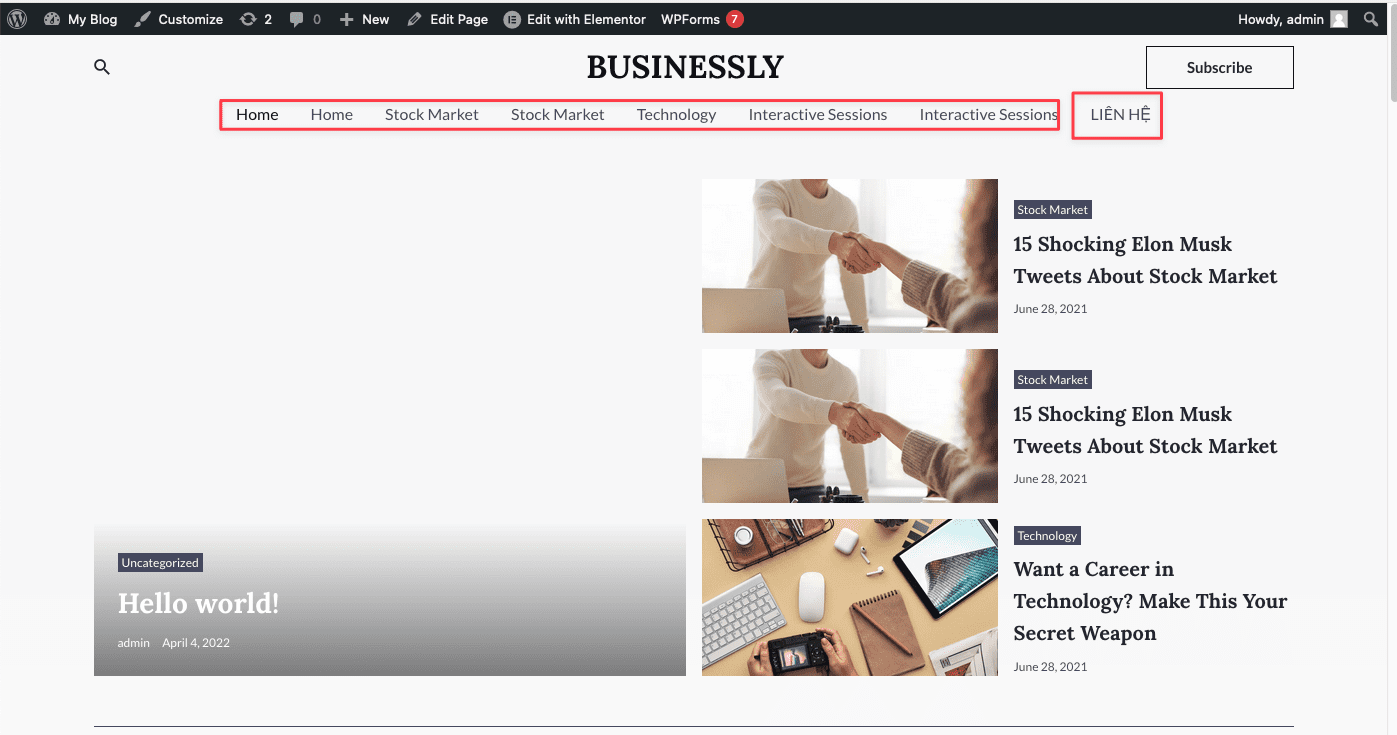
At the top of the screen, you will see a toolbar. This toolbar remains unchanged and appears whenever you log in as an admin. It contains the title of your website and some quick access options, such as adding new posts, pages, media or images. You also see your name in the top right corner. Clicking on your name will give you options such as accessing your profile and logging out.
2.3.2 Screen Options
There are two small boxes just below the Toolbar. One is Screen Options and the other is Help. Clicking on them will bring up a dropdown menu of options. Under the Screen Options field, you will find some options to set up your current page. You can select which windows will be displayed on the page.

2.3.3 Menu
There is a menu located on the left-hand side of the dashboard. This menu includes links to all of the administrative functions of WordPress. Using the pointer to navigate the menu. By hovering over each item, you’ll see its individual options. You can access menu items by clicking on them.

And in this menu, what features are there? Let’s find out.
- Dashboard: This is where WordPress displays an overview of recent activities on your website.
- Posts: In this section, you can add and edit posts, categories, and tags.
- Media: This section allows you to upload images and multimedia files such as videos and music.
- Pages: In this section, you can create and edit pages on your website.
- Comments: This section allows you to manage comments that users have left on your website.
- Appearance: In this section, you can manage and edit the design, widgets, and menus on your website.
- Plugins: In this section, you can install, activate, or deactivate WordPress plugins.
- Users: This section allows you to manage users. You can add new users and set user permissions here.
- Tools: You can import or export posts, pages, multimedia, and other functions through WordPress tools.
- Settings: In this section, you can set website and plugin attributes. You can edit the page title, URL, language, comments, multimedia settings, etc.
- Collapsing menu: Clicking this button allows you to collapse or expand the menu.
Note: Some plugins also create their own menu items, you can find them under Tools or Settings.
3. Theme
3.1 Install Theme
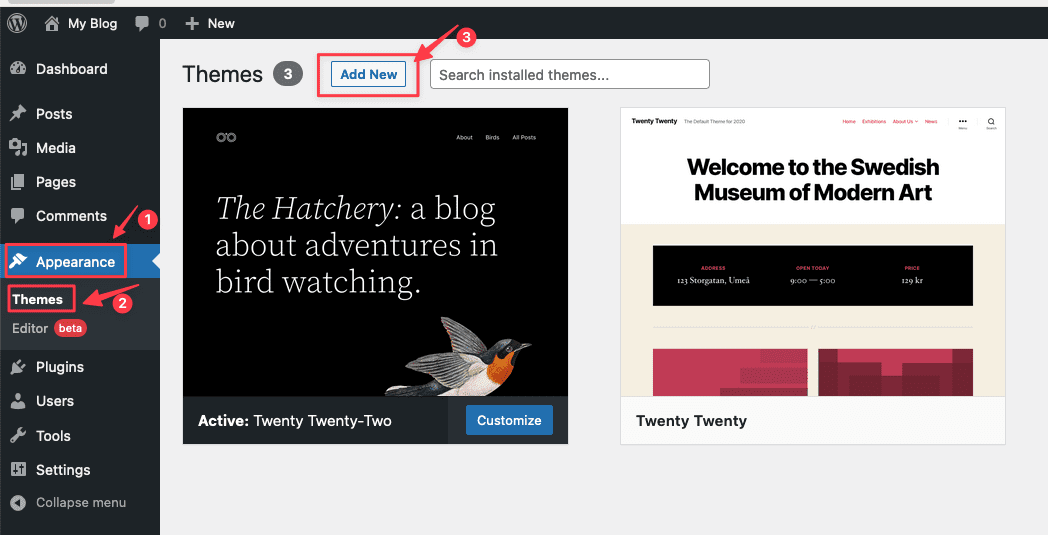
To install the Astra theme, first, login to the admin page => go to Appearance => Theme. Here, you will see all the themes you have installed on your site. To add another theme, click Add New.
4. Plugins
A plugin is a software that extends the functionality of WordPress. Plugins allow you to add more features to your website without requiring programming knowledge.
4.1 Where to find plugins?
You can find WordPress plugins at the WordPress plugin repository at: https://wordpress.org/plugins/. Currently, the WordPress plugin repository has more than 55,000 plugins.
4.2 Install Plugin
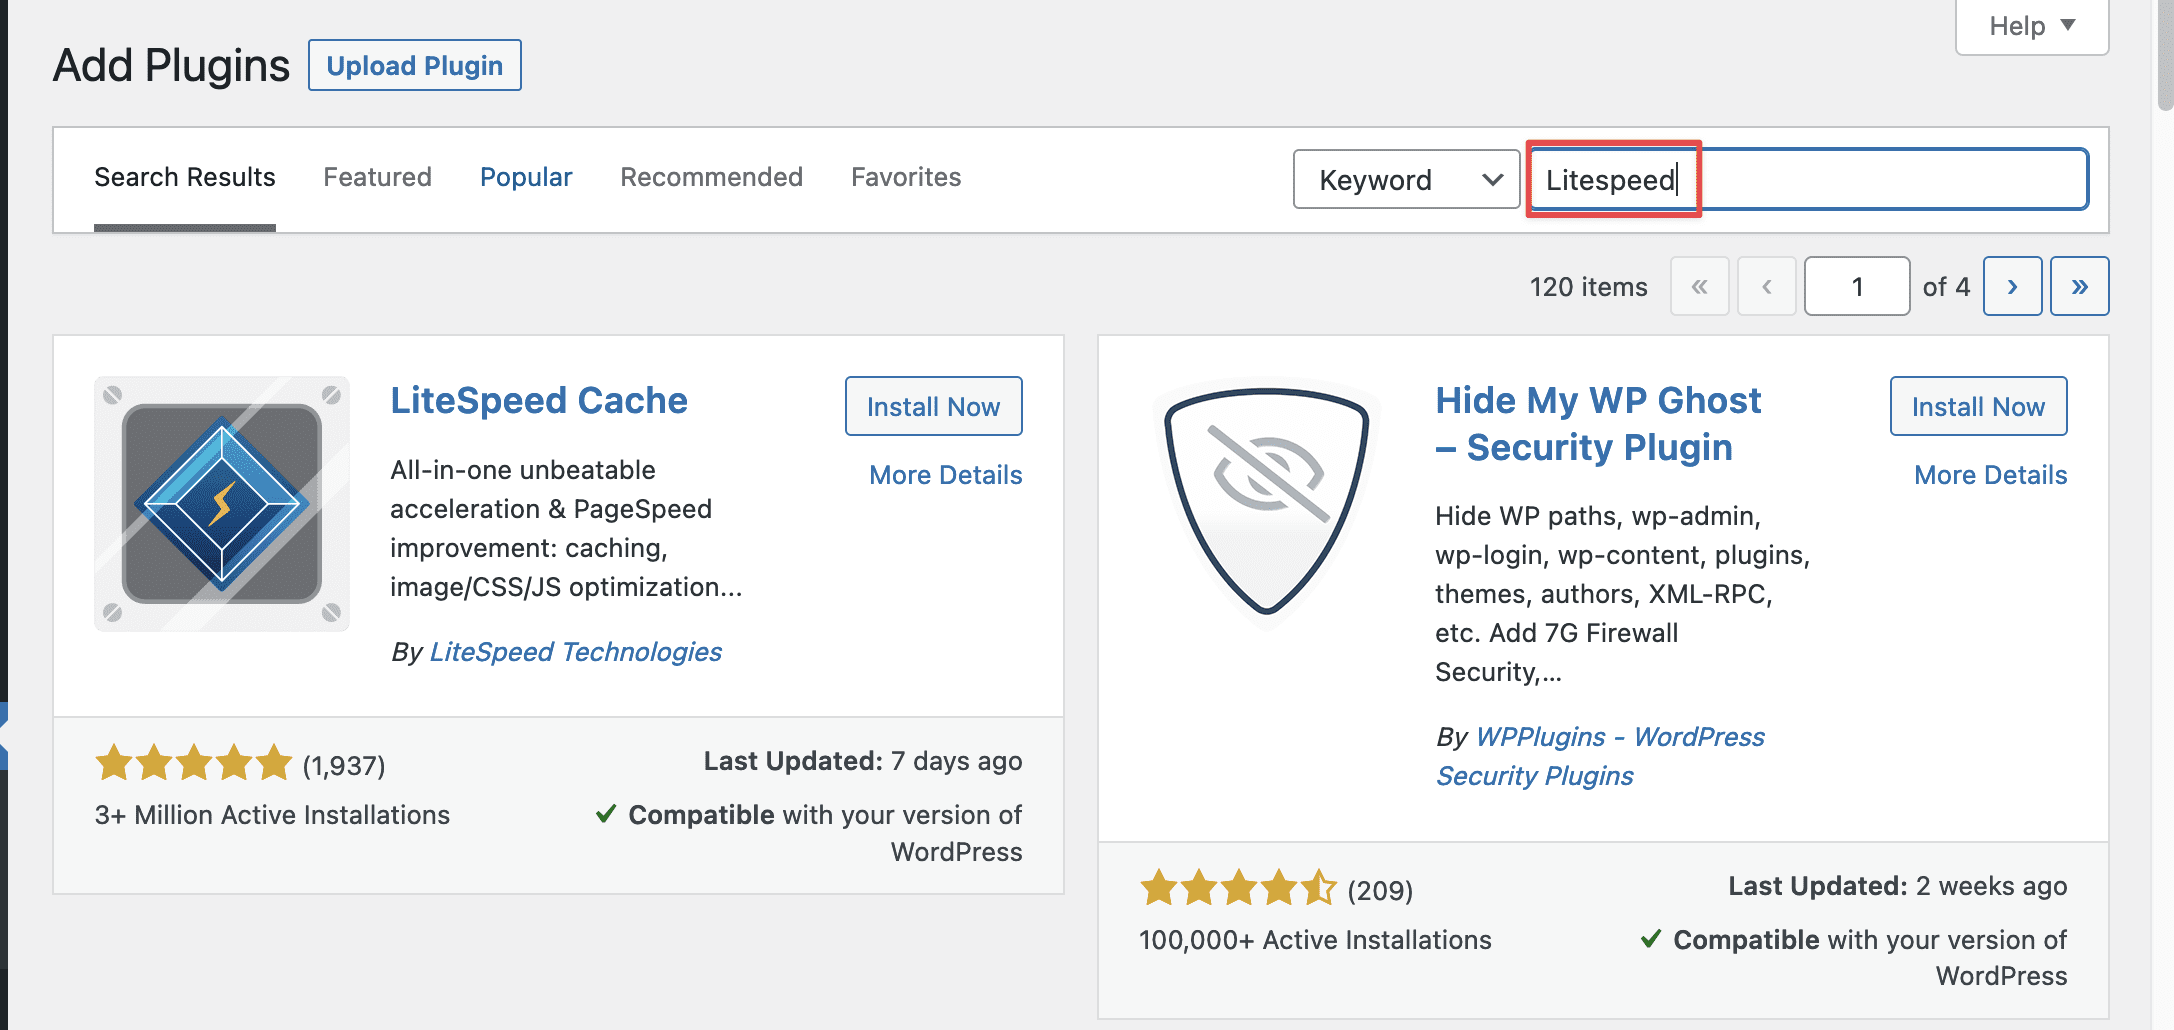
First, log in to the WordPress admin. Here, you will see all the plugins you have installed on your website. To add another plugin, simply click on the Add New button.

Or you can install from the WordPress plugin repository. It allows you to search for the plugin you need directly from your website’s admin page. If you know the name of the plugin, you can simply use the search box to find it.
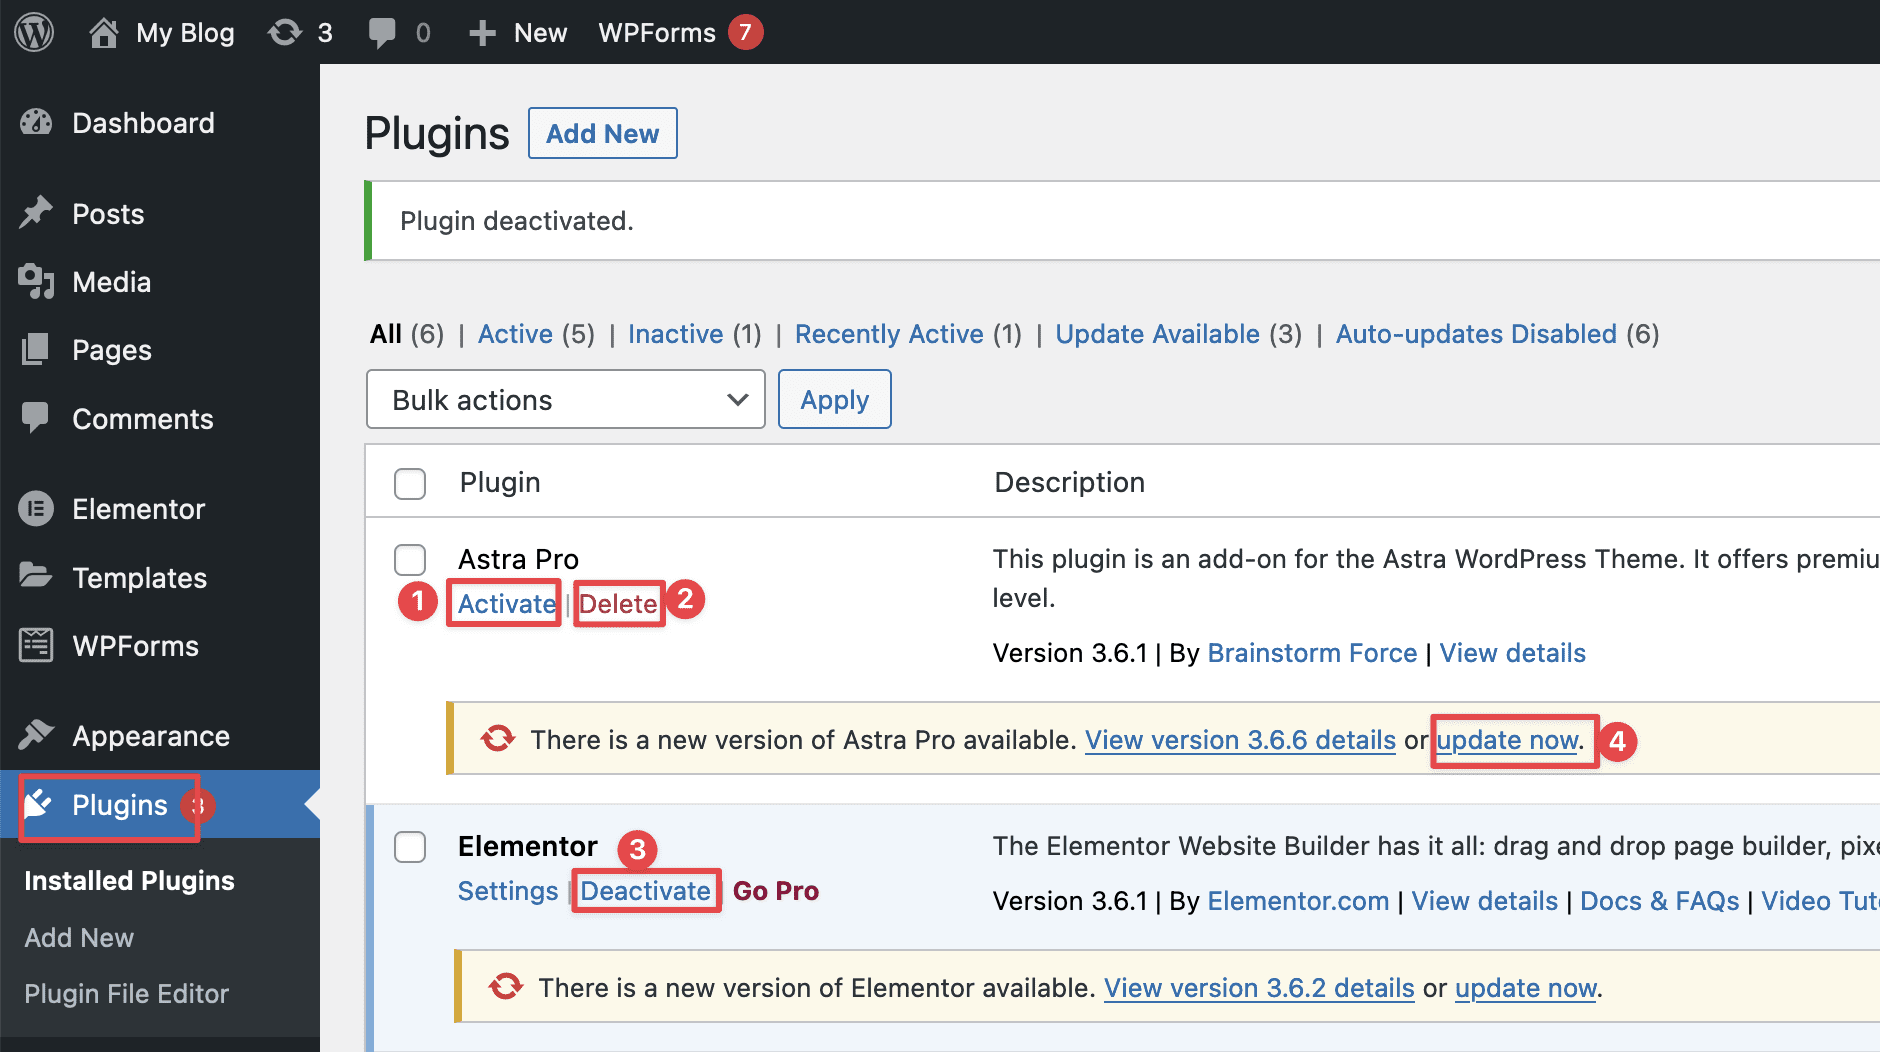
4.3 How to update, delete, activate, and deactivate plugins
To update, delete, activate, or deactivate plugins, you can access the Plugins and click on the following options:
- Activate
- Delete
- Deactivate
- Update
5. Pages and Posts
5.1 The difference between Pages and Posts
Pages are used to publish information that has a long-term nature, for example About, Contact, etc. If you create a new page, it will appear on the web as a post. You will need to add it to the website’s menu.
Posts are the content of your blog, news, and events. They are usually arranged in chronological order – the latest post is placed at the top. Older posts are moved down and stored in the archive.
5.2 WordPress Posts, edit Demo Posts in WordPress
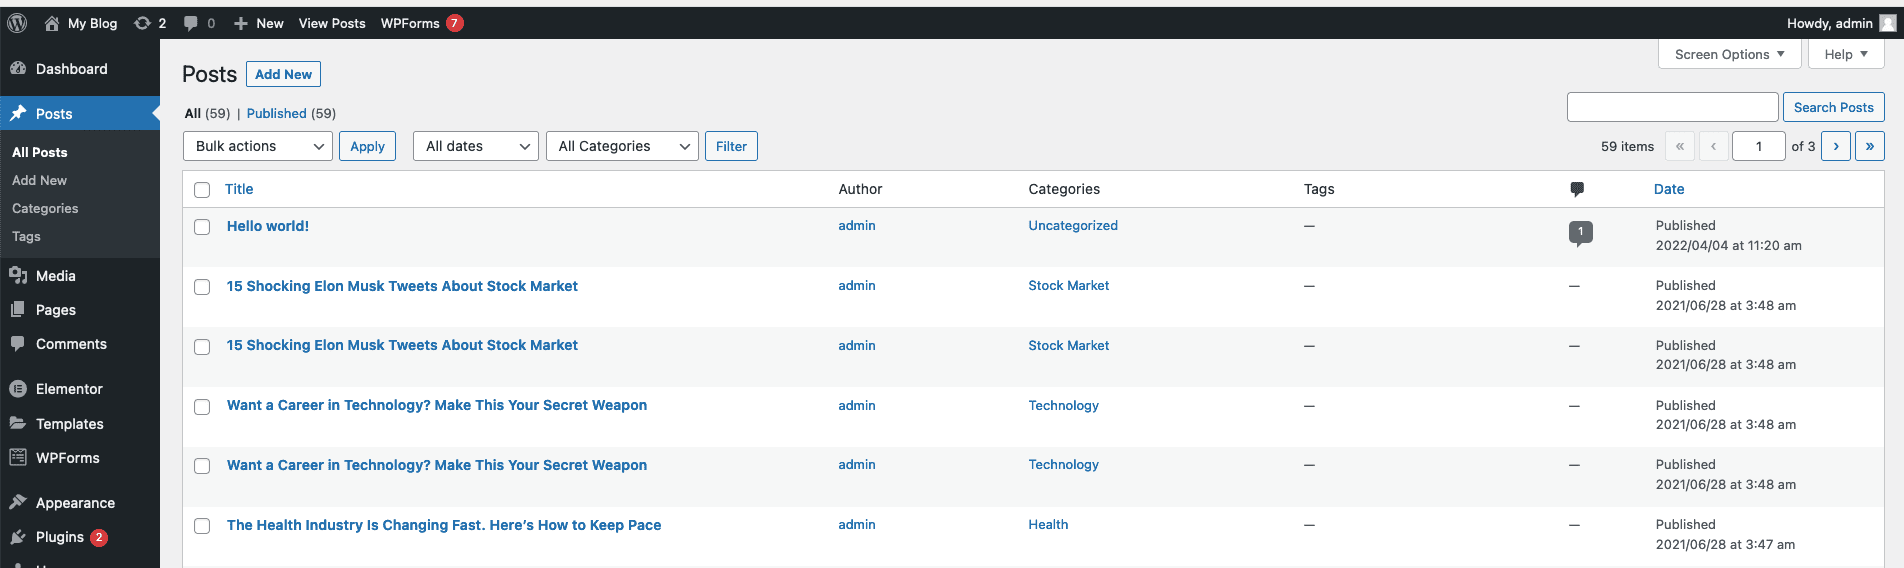
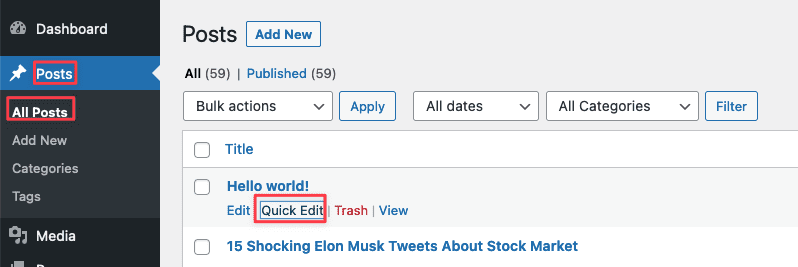
When you click on Posts in the WordPress menu, you will see a list of all posts, including information such as author, category, creation or modification date. Above the list of posts at the top of the page, you will find information such as the number of published posts as well as the number of drafts and those in the trash. You can also filter them by category or post date.
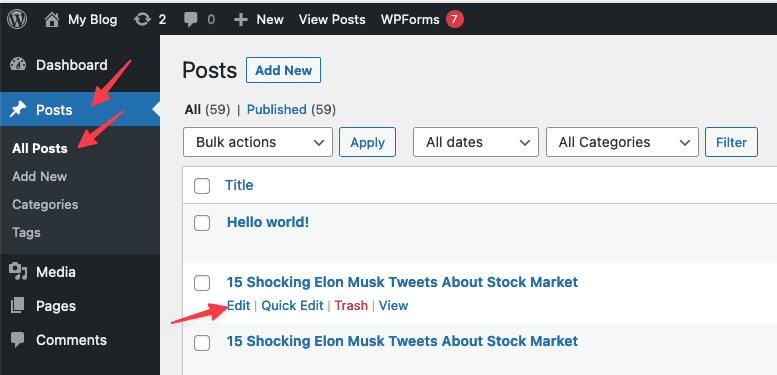
When you hover over the name of a post, you will see some links below it, including:
- Edit: Allows you to edit your post. You can also edit a post by clicking on its title.
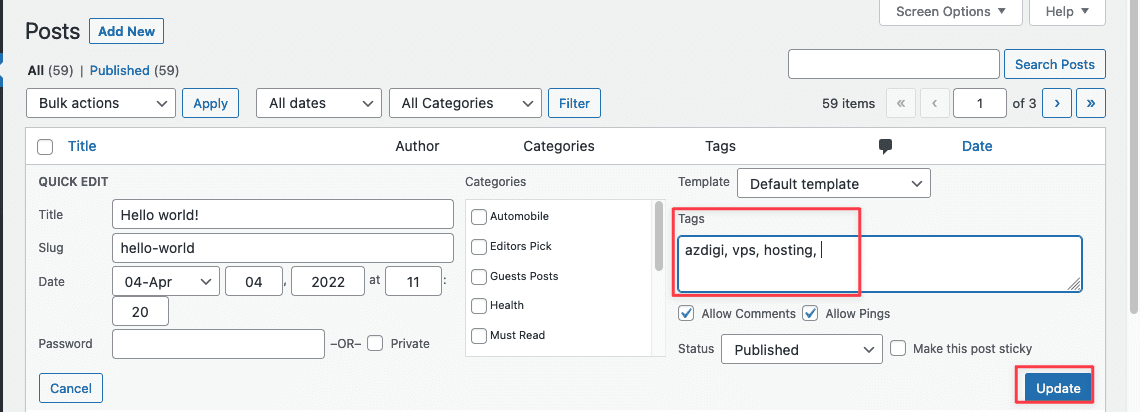
- Quick Edit: Here you can edit some basic information about the post such as Title, Slug, Date, Author, Allow Comments, and some other features.
- Trash: This option moves the post to the trash folder. If you empty the trash folder, the post will be permanently deleted.
- View: If the post has not been published, it will display a preview. If it has been published, it will be displayed on the page.
5.2.1 Add a post
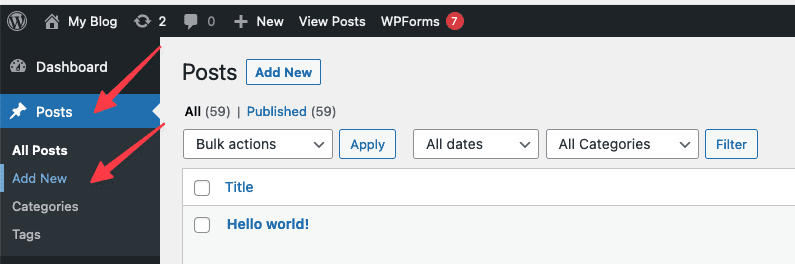
To add a new post to your website, move the mouse to the Posts menu. You will see the option to Add new.
5.3 WordPress Pages, edit demo pages
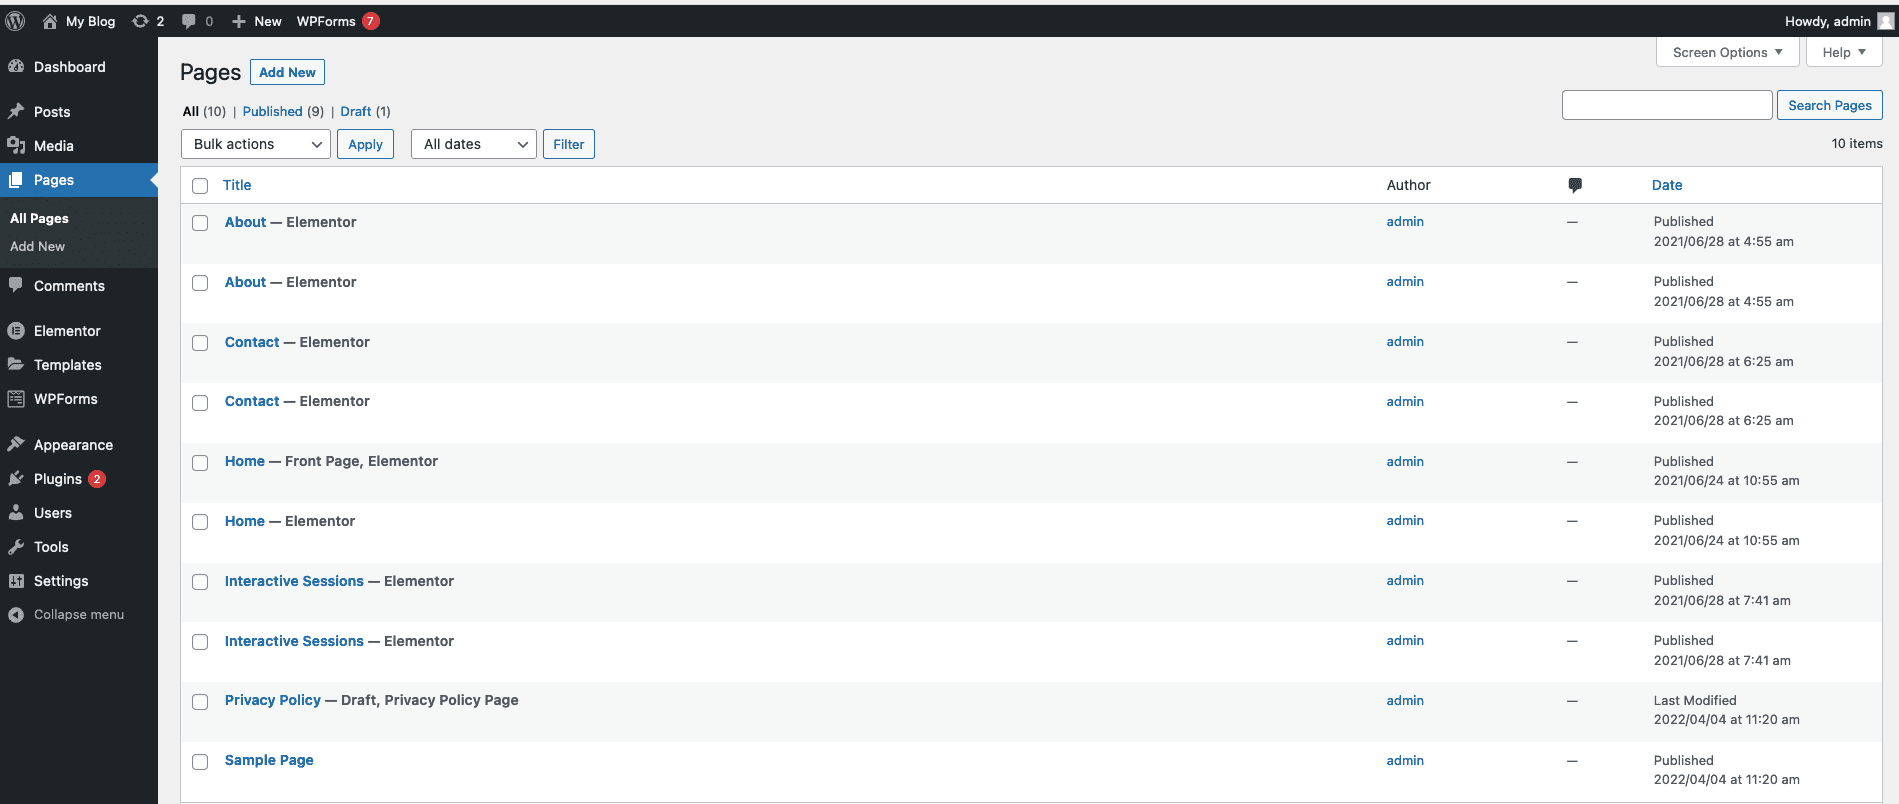
To view the list of pages, select Pages in the WordPress menu. A list of pages on the website will appear on the screen. On the list, you will find the total number of pages, the number of pages you have published, and the number of drafts.
In the list of pages, you can find the name of the author, comments, and the publication or edit date of each page.
When you hover over the page name, you will see some options as below. And similar to post options:
- Edit: Allows you to edit your page. You can also edit a page by clicking on its title.
- Quick Edit: Here you can edit some basic information about the page such as Title, Slug, Date, Allow Comments, and some other features.
- Trash: This option moves the page to the trash folder. If you empty the trash folder, the page will be permanently deleted.
- View: To view the page or see a preview.
5.3.1 Add a page
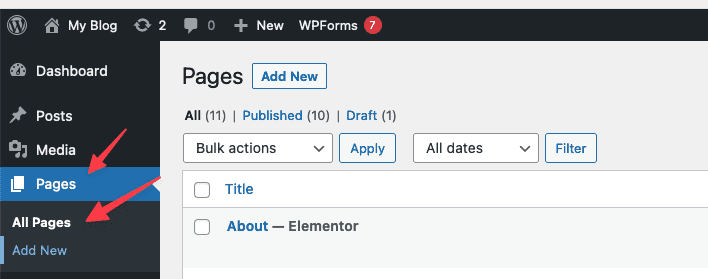
To add a new post to your website, move your mouse to the Pages menu. You will see the option to Add New, click on it.
5.4 Edit, Delete Posts/Pages
5.4.1 Edit a Post/Page
If you need to edit an existing post or page, go to the list of all Posts/Pages in wp-admin. Click on the name of the post/page you want to edit. You can also click on Edit under the title of the post/page when you hover over it with your mouse.
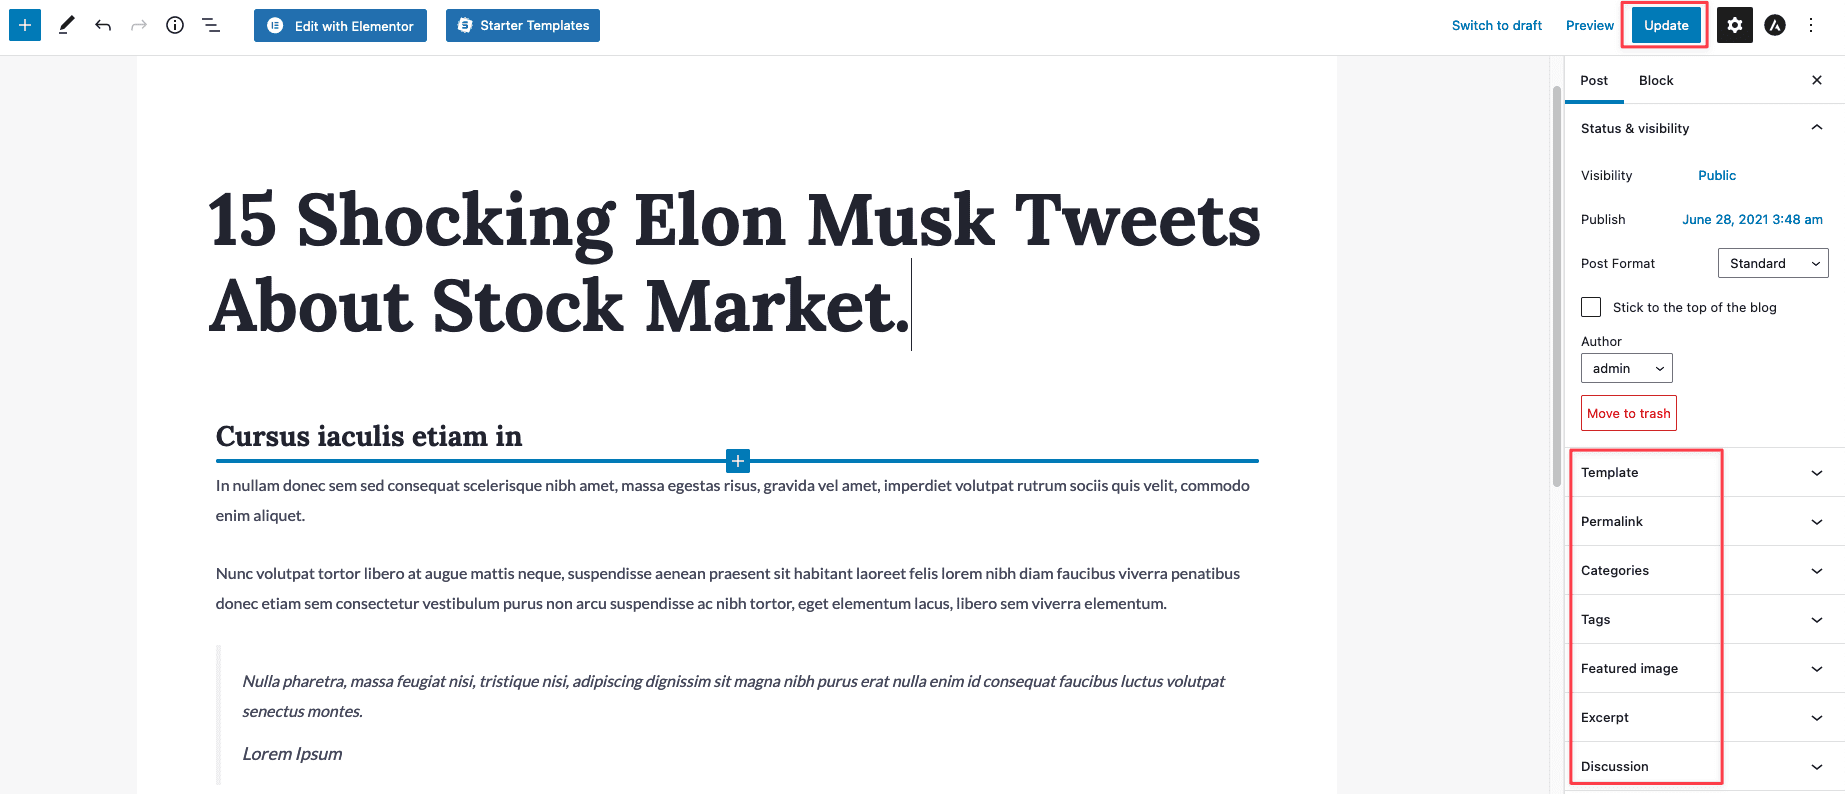
In the next window, you will see the content of the post/page you want to edit. Remember to save your changes after you finish editing the post/page.
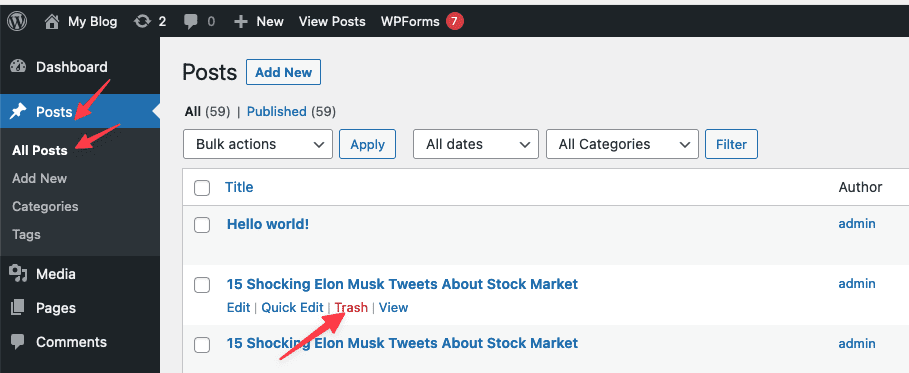
5.4.2 Delete a Post/Page
If you want to delete a post or page, move your mouse to the title of the post/page, click Trash. By clicking on Trash, you have moved the post/page to the trash.
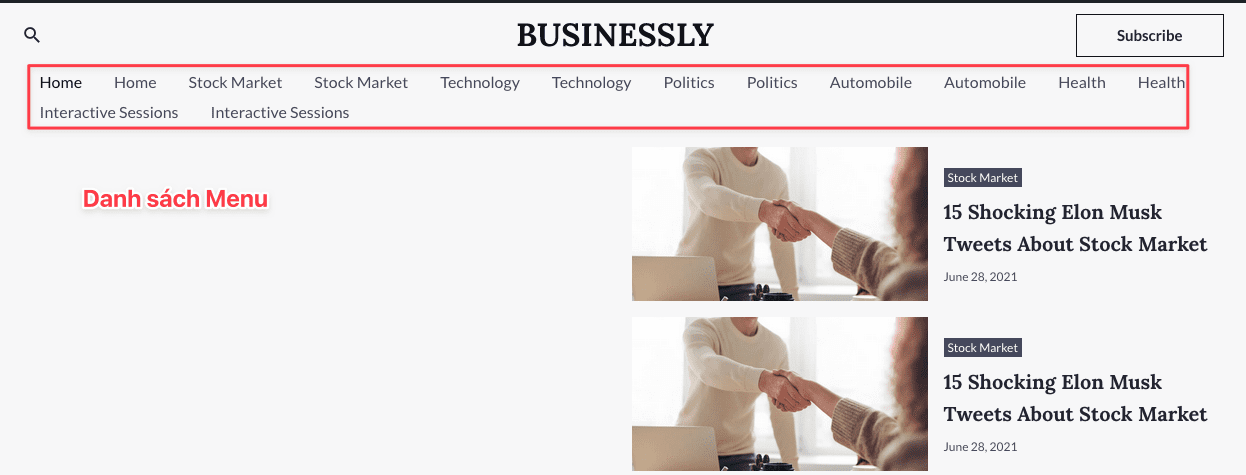
5.5 Add a page to the menu and edit the menu
Below you will see your website with all your existing menus. Now I will add a page to this menu.
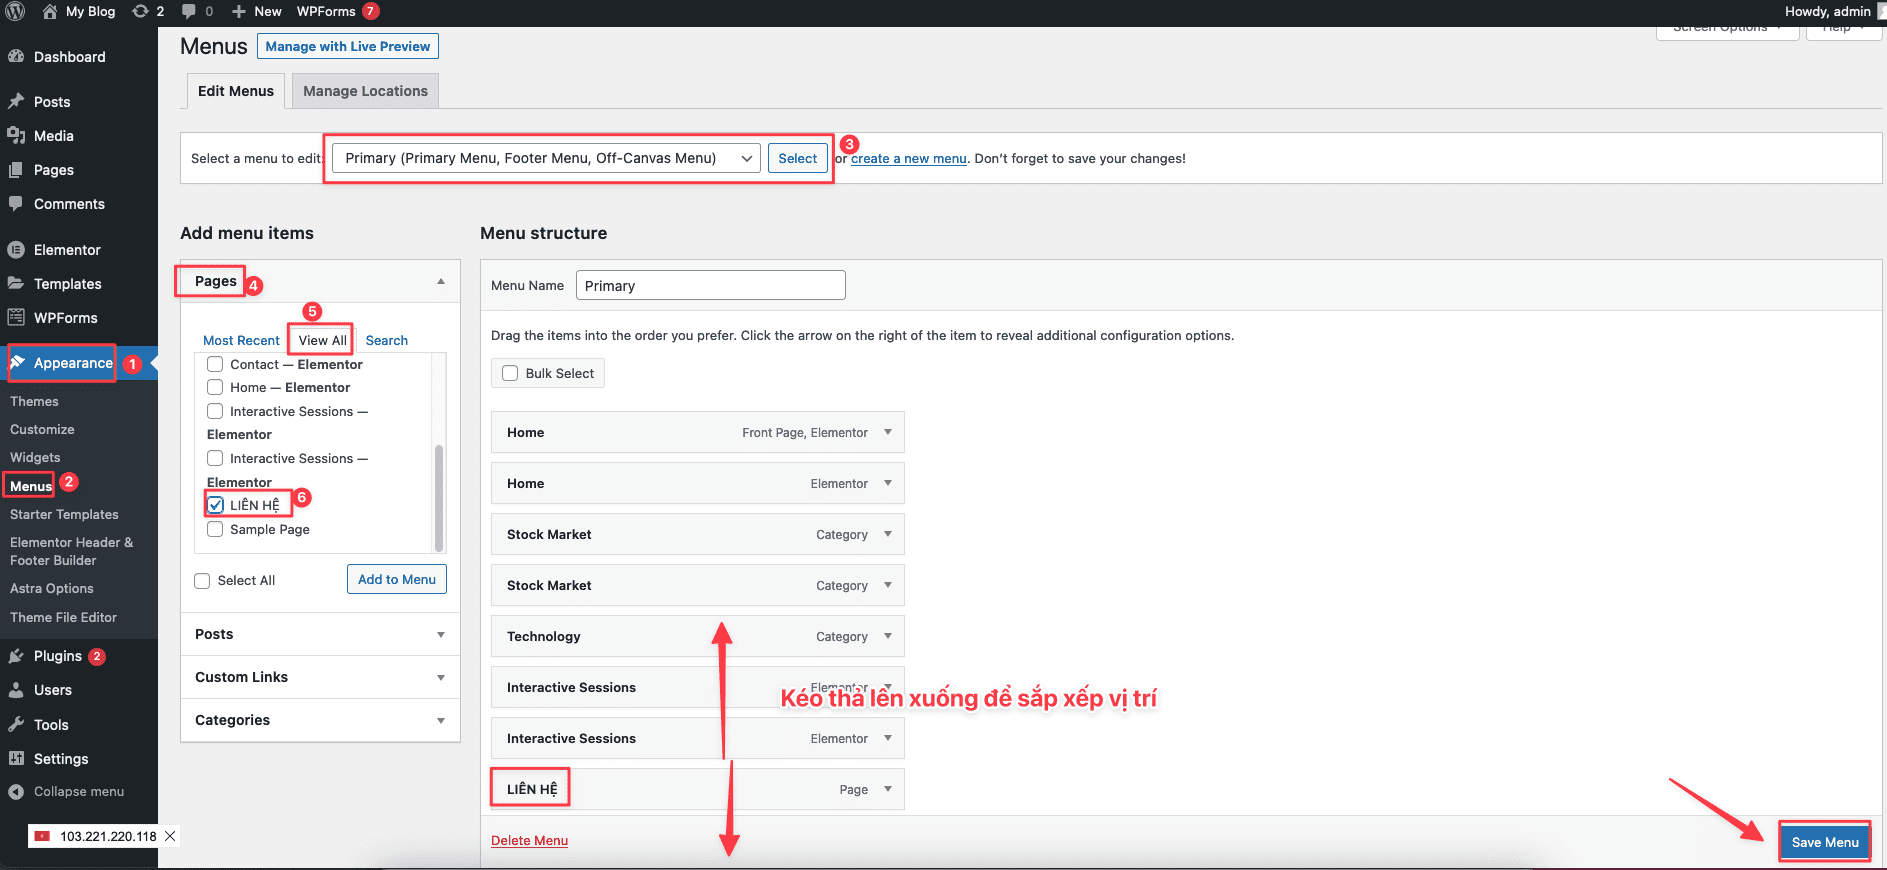
Go to Appearance => Menus. In the Select a menu to edit section, choose the location of the menu. The menu at the top of the page will be the Primary Menu.
In the Add menu items column, you will see:
- Page
- Posts
- Custom Links
- Categories
I will add a Contact page to the menu, so I will tick this page and select Add to Menu, choose the position in order by dragging and dropping, and select Save Menu to save.
Now go back to your website to check the newly added menu.
6. Categories and Tags
6.1 Categories
Categories in WordPress are used to classify similar content into a group, which is an excellent way to organize and classify posts into specific groups.
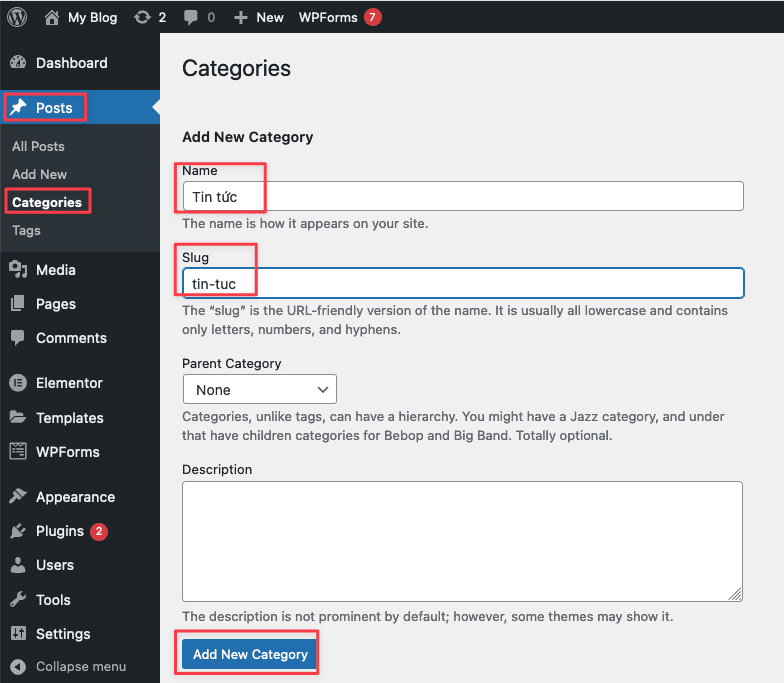
6.1.1 Create Categories
To create a category, you access Posts => Categories. Then enter all the information and click Add New Category.
- Name: Enter the category name.
- Slug: Static path. Should only contain lowercase letters and hyphens –
- Parent: Parent category (can be selected or not)
- Description: Add a brief description of your category (can be added or not)
6.1.2 Edit Categories
To edit a category, move your mouse over the category name.

You will see the following 4 options:
- Edit
- Quick Edit – Quickly edit the category name and slug.
- Delete
- View
If you want to delete multiple categories at once, click the checkbox next to the category name, then select Delete in the Bulk Actions box and click Apply.
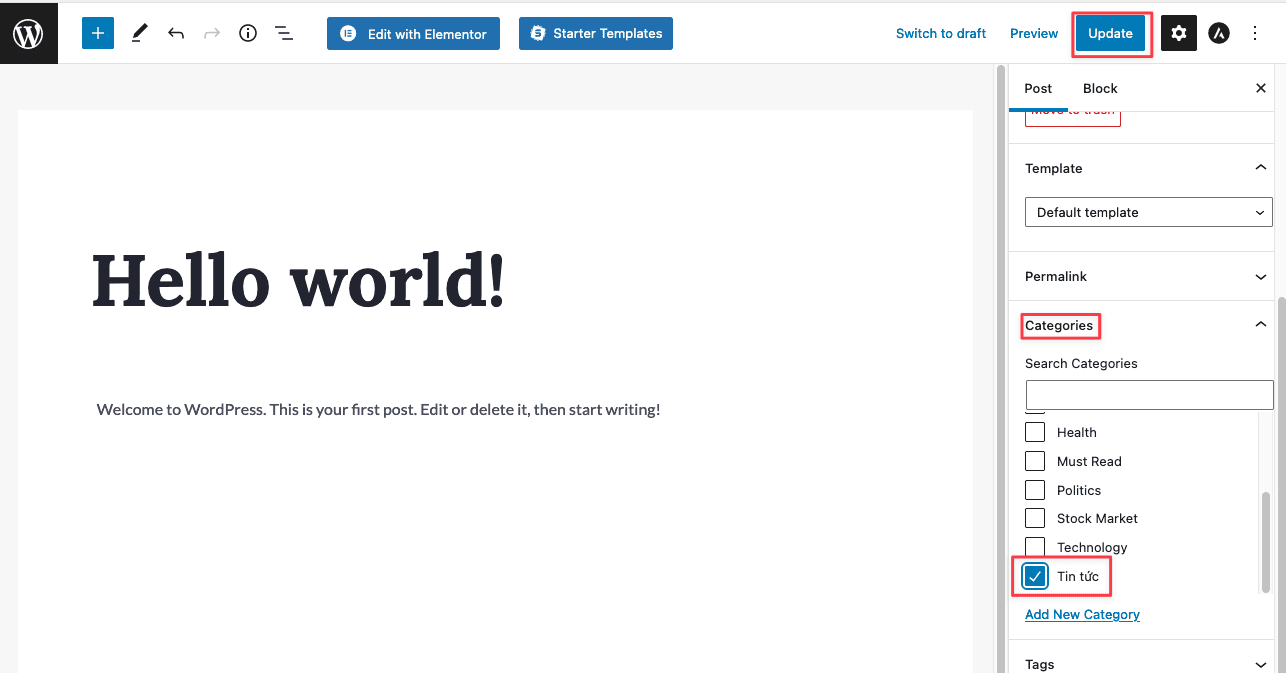
6.1.3 Add Posts to Categories
When creating a new post, simply check and select the categories you want in the right sidebar.
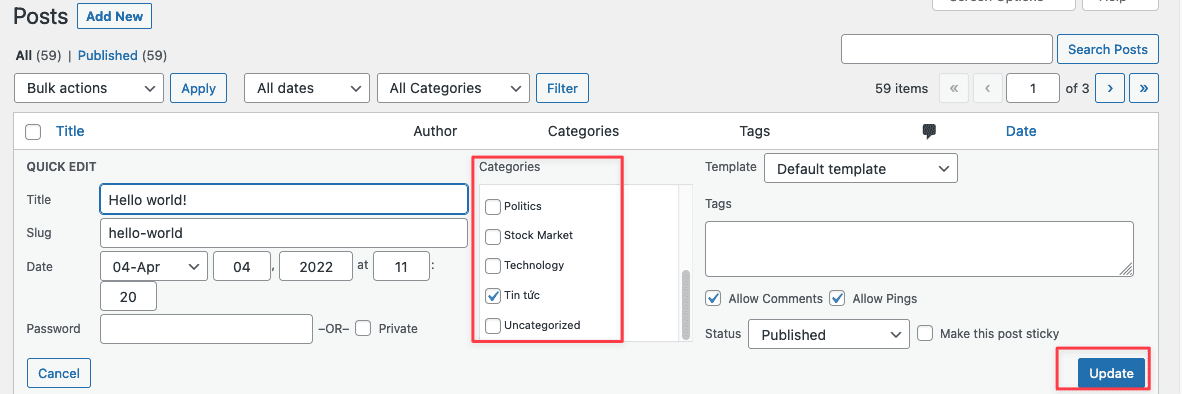
6.1.4 Change Categories for Posts
To change the category for a post, on the list of posts page, hover over the post title you want to change and select quick edit.
Then choose the category you want and click update.
6.2 Tags
Tags are keywords that describe a post. They include information that the post refers to. You can assign multiple tags to a post. When creating tags, you should not create tags that are the same as the category name.
You cannot add tags to a page, only to a post.
6.2.1 Create a tag
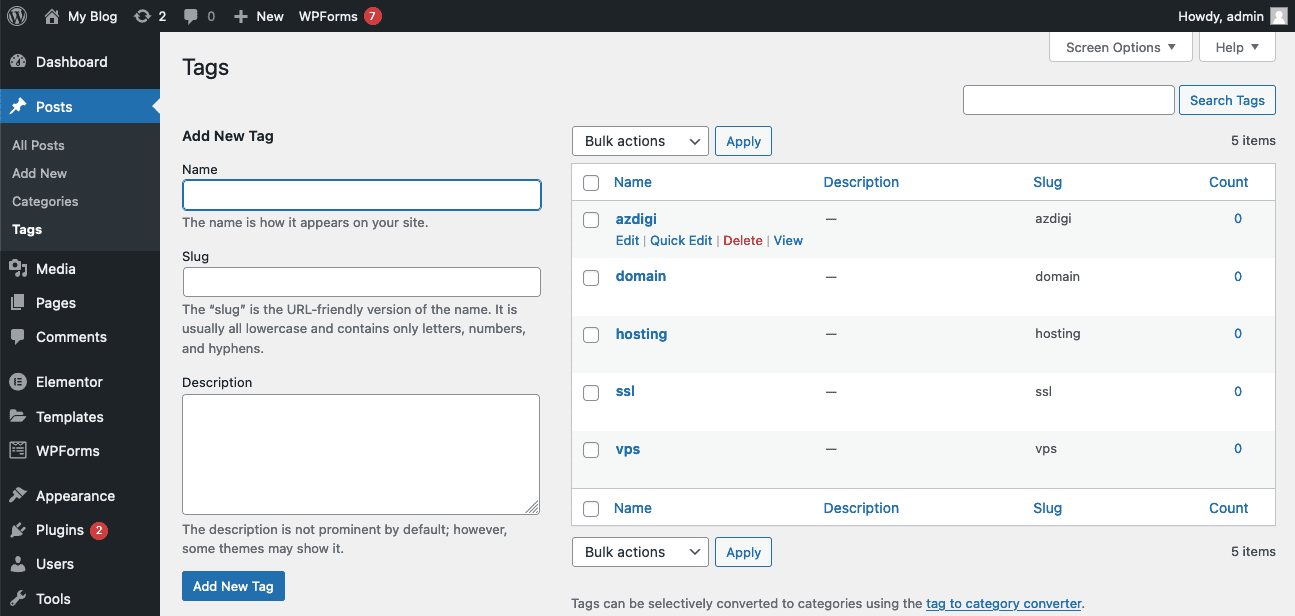
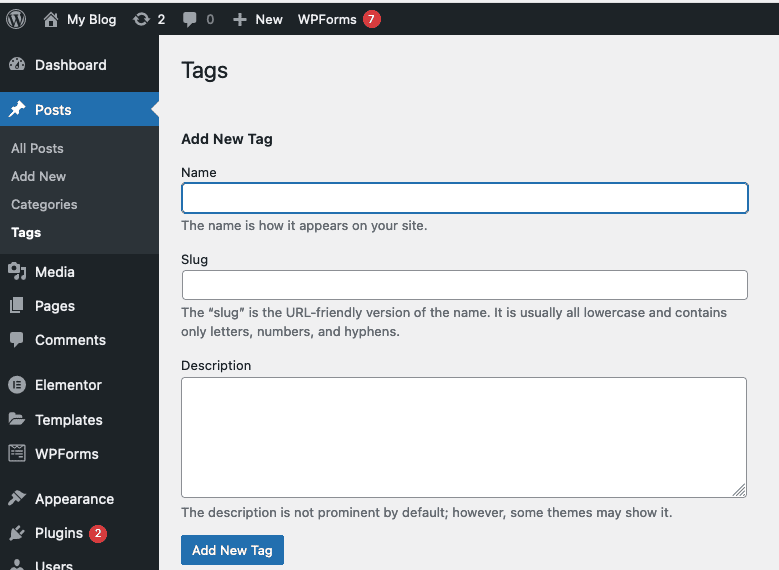
To create a tag, access Posts => Tags, which includes:
- Name: Enter the name of the tag.
- Slug: Static path. Should only contain lowercase letters and hyphens.
- Add a short description of your tag (you can add it or not)
After filling in the information, click Add New Tag to create the tag.
6.2.2 Edit tag
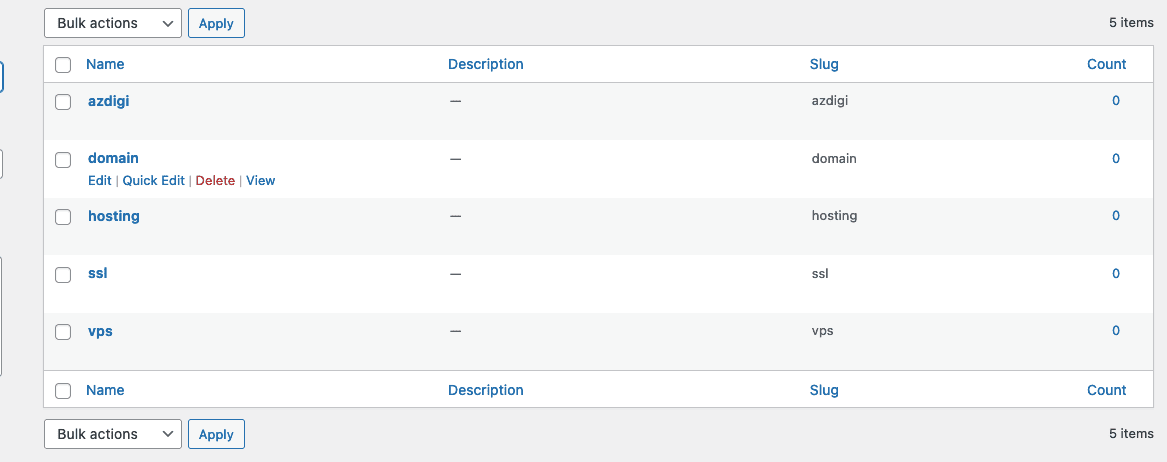
To edit a tag, move the mouse over the tag to be edited. You will see the following 4 options:
- Edit
- Quick Edit – Quickly edit the tag name and slug.
- Delete
- View
If you want to delete multiple categories at once, click the checkbox next to the category name, then select Delete in the Bulk Actions box and click Apply.
6.2.2 Add tags to posts
In WordPress, you can add tags to your post when you create or edit it. You can find the tag box in the sidebar on the right side of the screen.
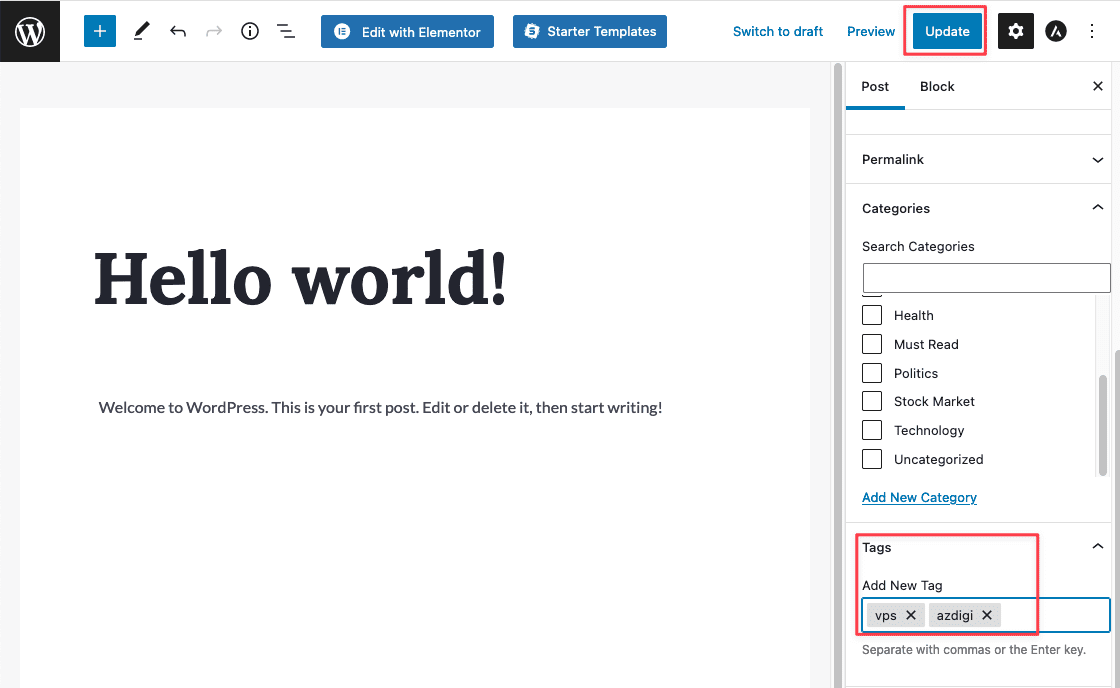
You can also quickly add tags by hovering over the post title and selecting Quick Edit.
7. Media
Add tags when creating/editing new posts. The Media Library contains all the files you have uploaded to your WordPress website. It includes images, videos, text files, PDF files, audio files, and many other types of files.
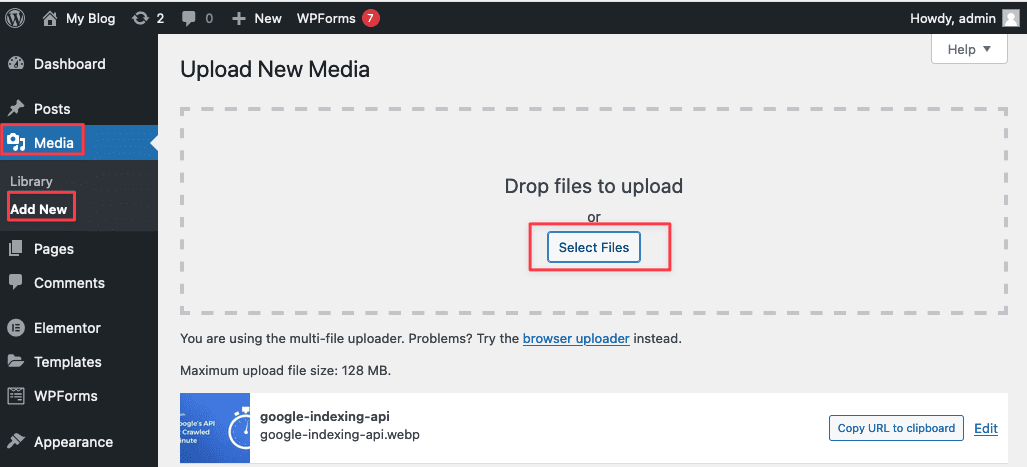
To access the Media Library, click on Media in the menu bar.
7.1 Upload images to WordPress
To upload images to WordPress, in the Media Library section, click Add New, then simply drag and drop the image from your computer into the WordPress upload box.
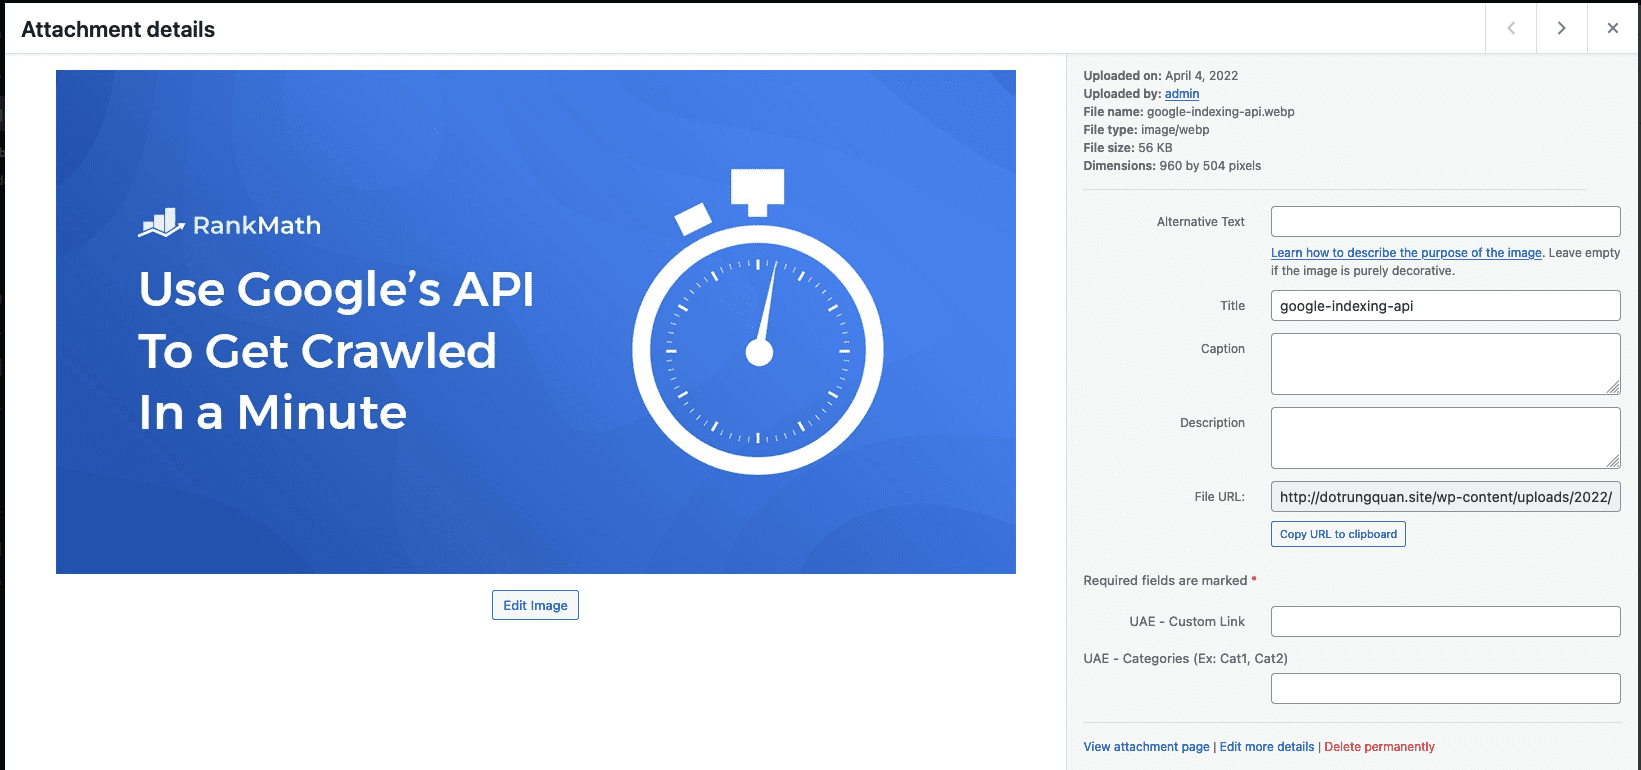
7.2 Edit image attributes
To edit the attributes of a file, left-click on the file you want to edit. A window will open allowing you to edit the attributes of the file.
Here you will see some information such as:
- Alternative text: This is the alt tag that contains the text that will be displayed as a replacement when the image is faulty. This tag is very important for SEO
images. - Title: Title of the image.
- Caption: Caption for the image.
- Description: Description of the image.
After editing, click the X in the top right corner to close the window.
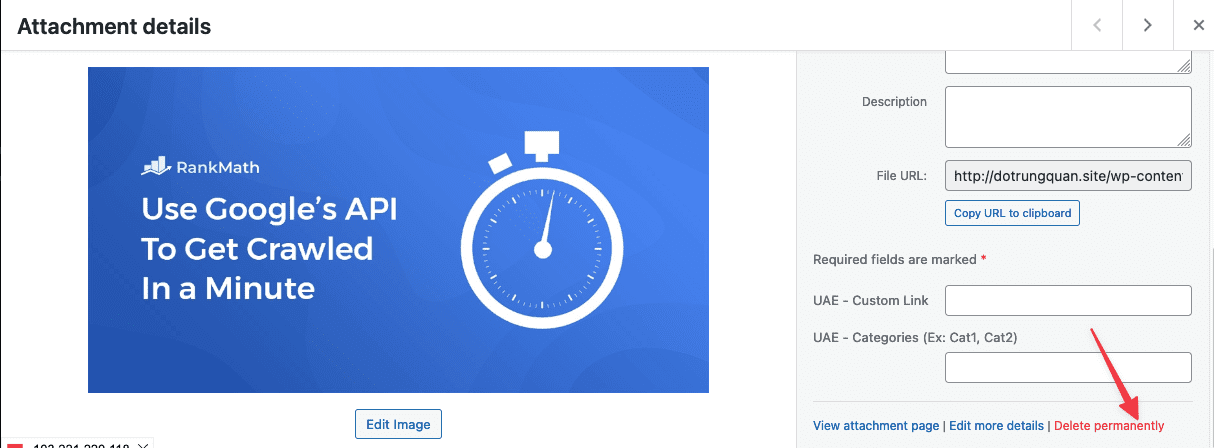
7.3 Delete images
To delete a file from your library, click on the file and then click on Delete Permanently.
8. Comments
WordPress allows you to set up comments for posts on your website. Visitors can leave comments to interact with your post.
8.1Comment Setup
To set up comments, go to Settings => Discussion. Here, you can enable or disable comments by checking or unchecking the box that says “Allow people to submit comments on new posts.”
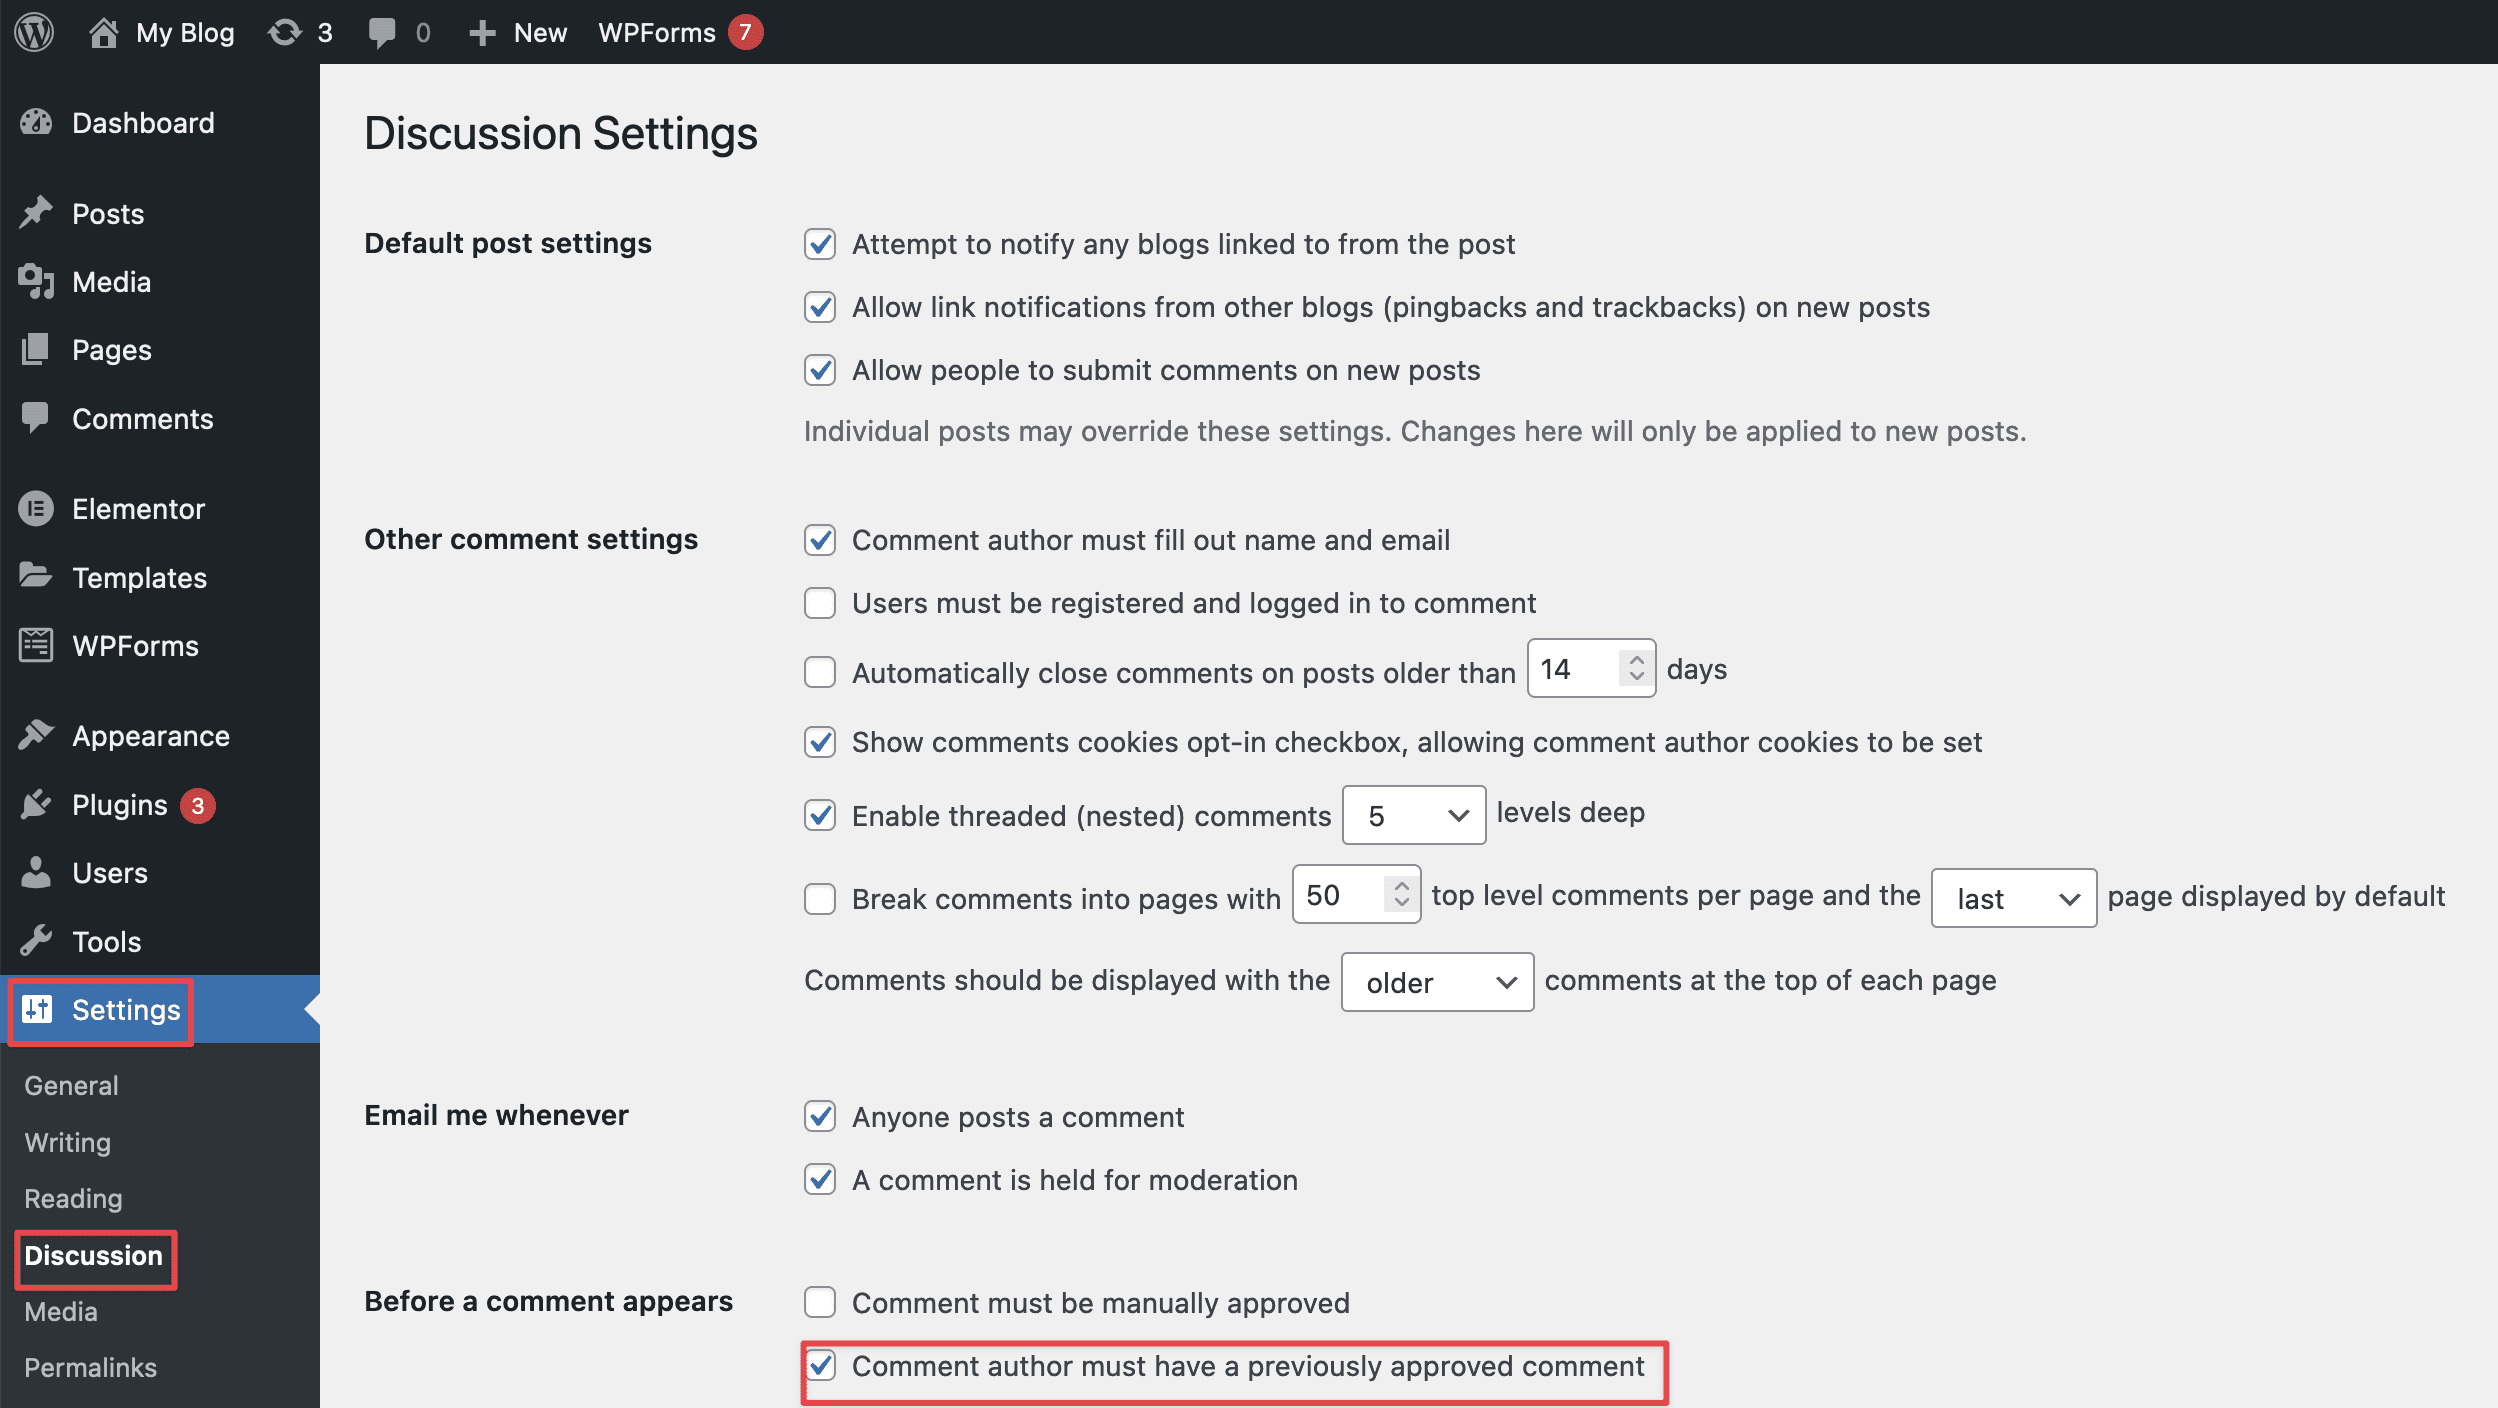
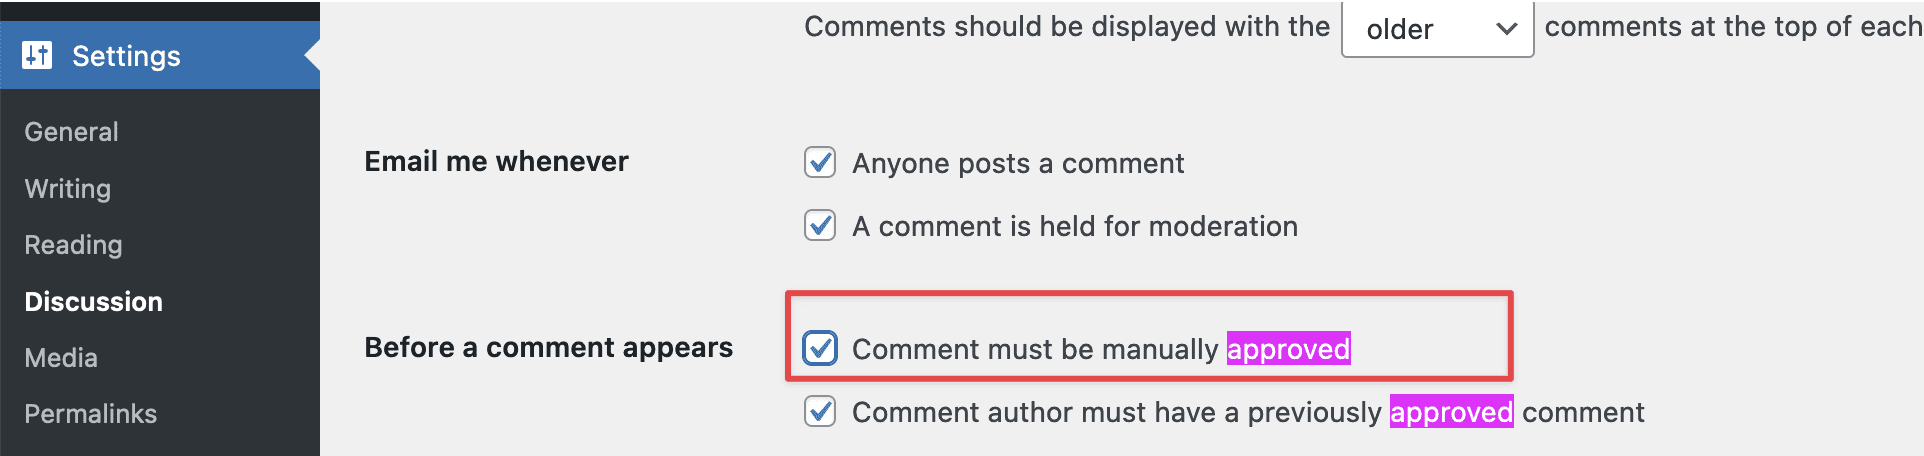
To enable or disable comment moderation, check or uncheck the box that says “Comment must be manually approved.”
After completing the setup, scroll down to the bottom of the page and click on the “Save changes” button for the changes to take effect.
8.2 Comment List
To manage comments, go to the Comments menu. Here, you will see a list of all the comments on your website and can manage them.
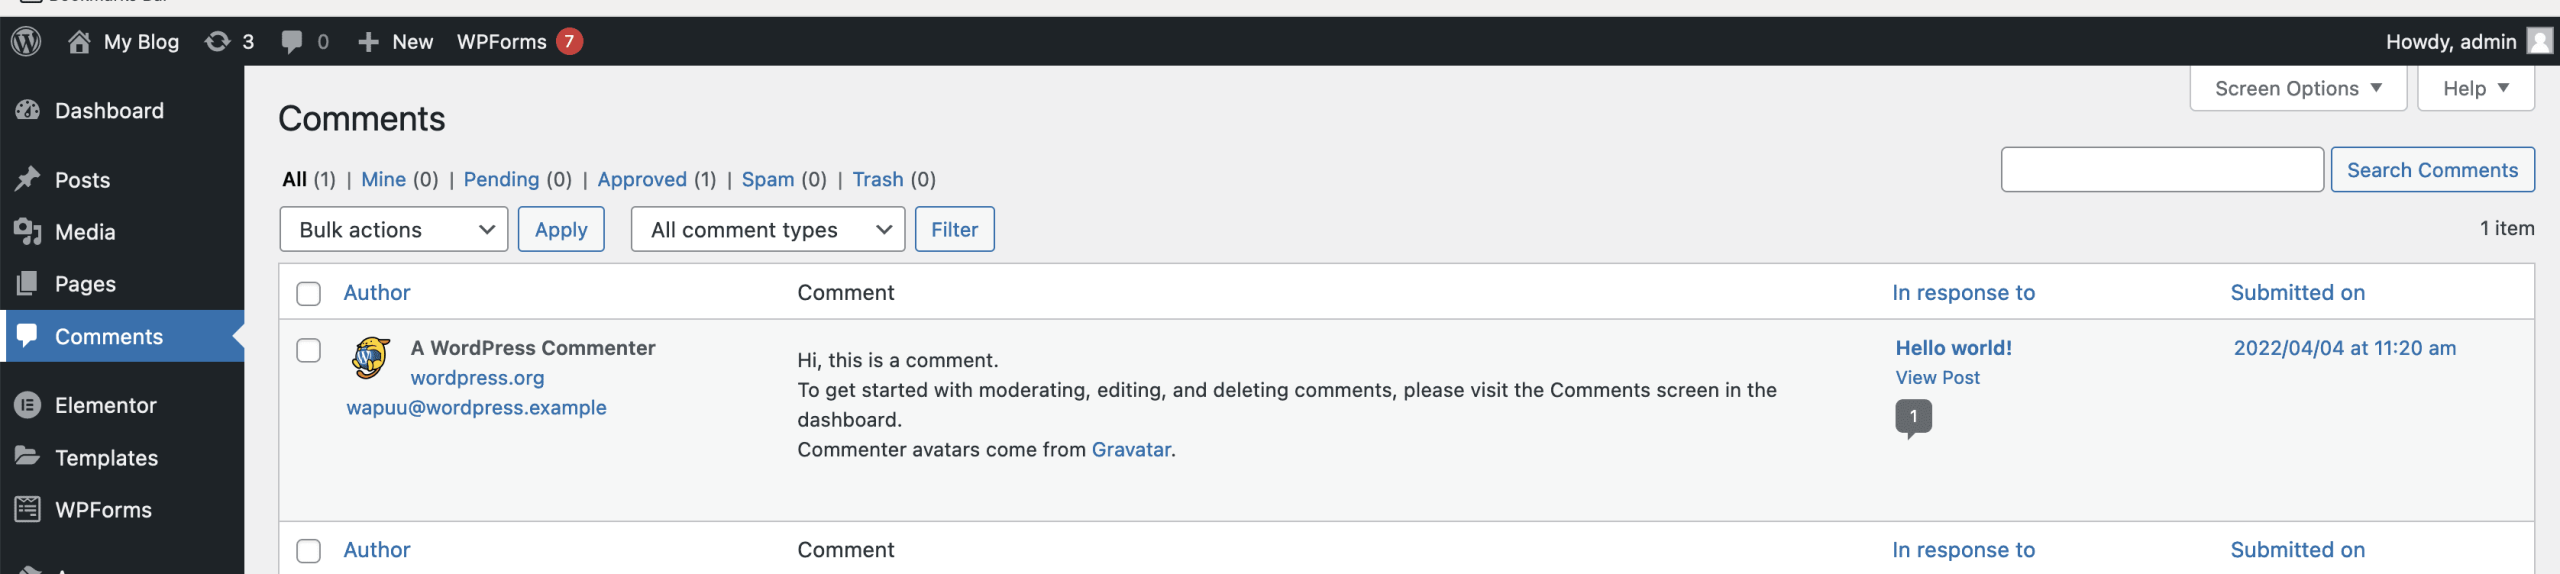
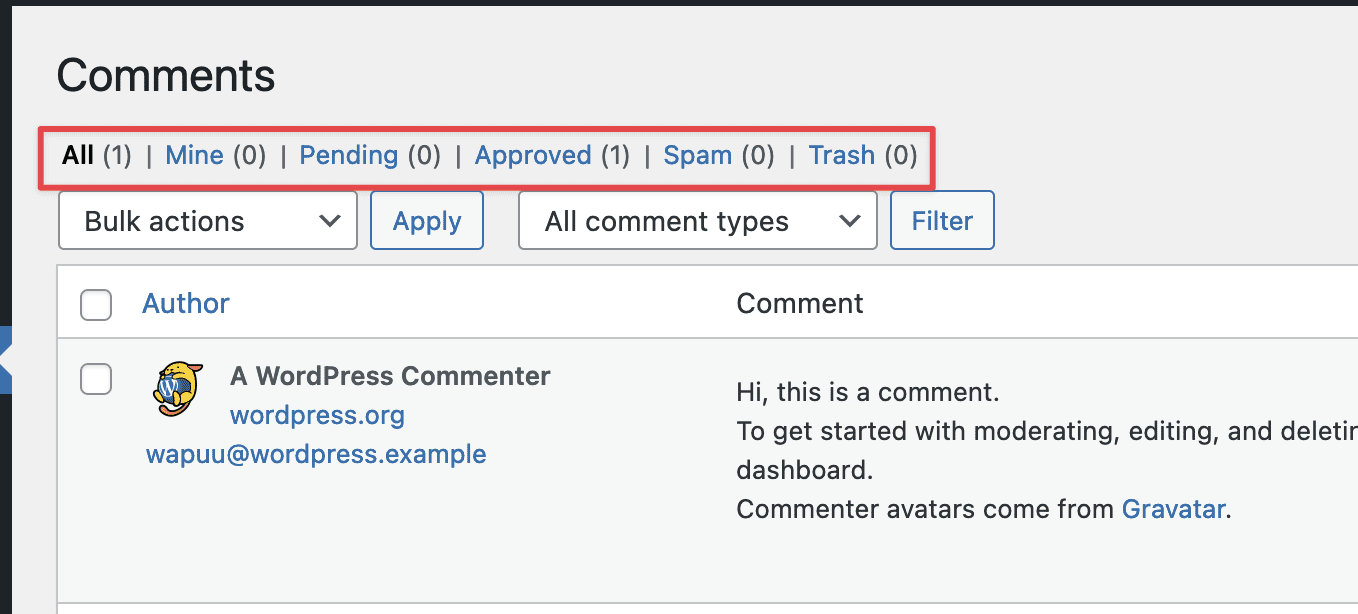
8.3 Filter Comments
At the top of the list, you will find links to filter visitor comments. You can choose to display comments: All, Mine, Pending, Approved, Spam, or Trash.
8.4 Comment Management
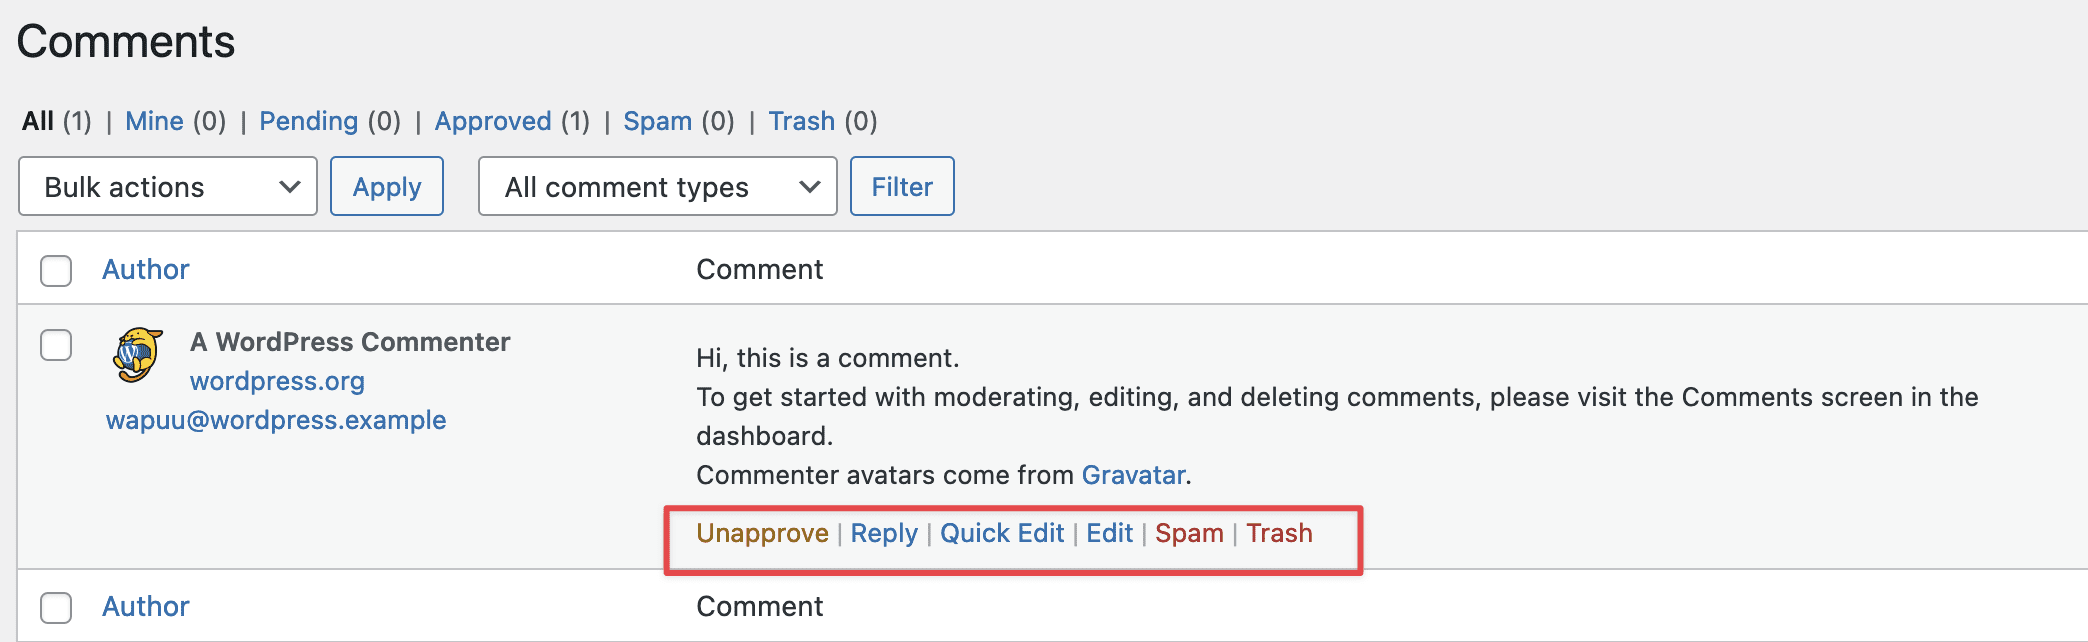
To manage a comment, hover over the comment and options will appear:
- Unapprove: This feature allows you to reject a visitor’s comment. The comment will not be displayed.
- Reply: Clicking on this option will open a form for you to reply to the visitor’s comment.
- Quick Edit: This option allows you to edit the username, email, URL, and content of the comment.
- Edit: Like Quick Edit, but also allows you to edit the status of the comment.
- Spam: Mark the comment as spam.
- Trash: Move the comment to the trash.
9.Settings
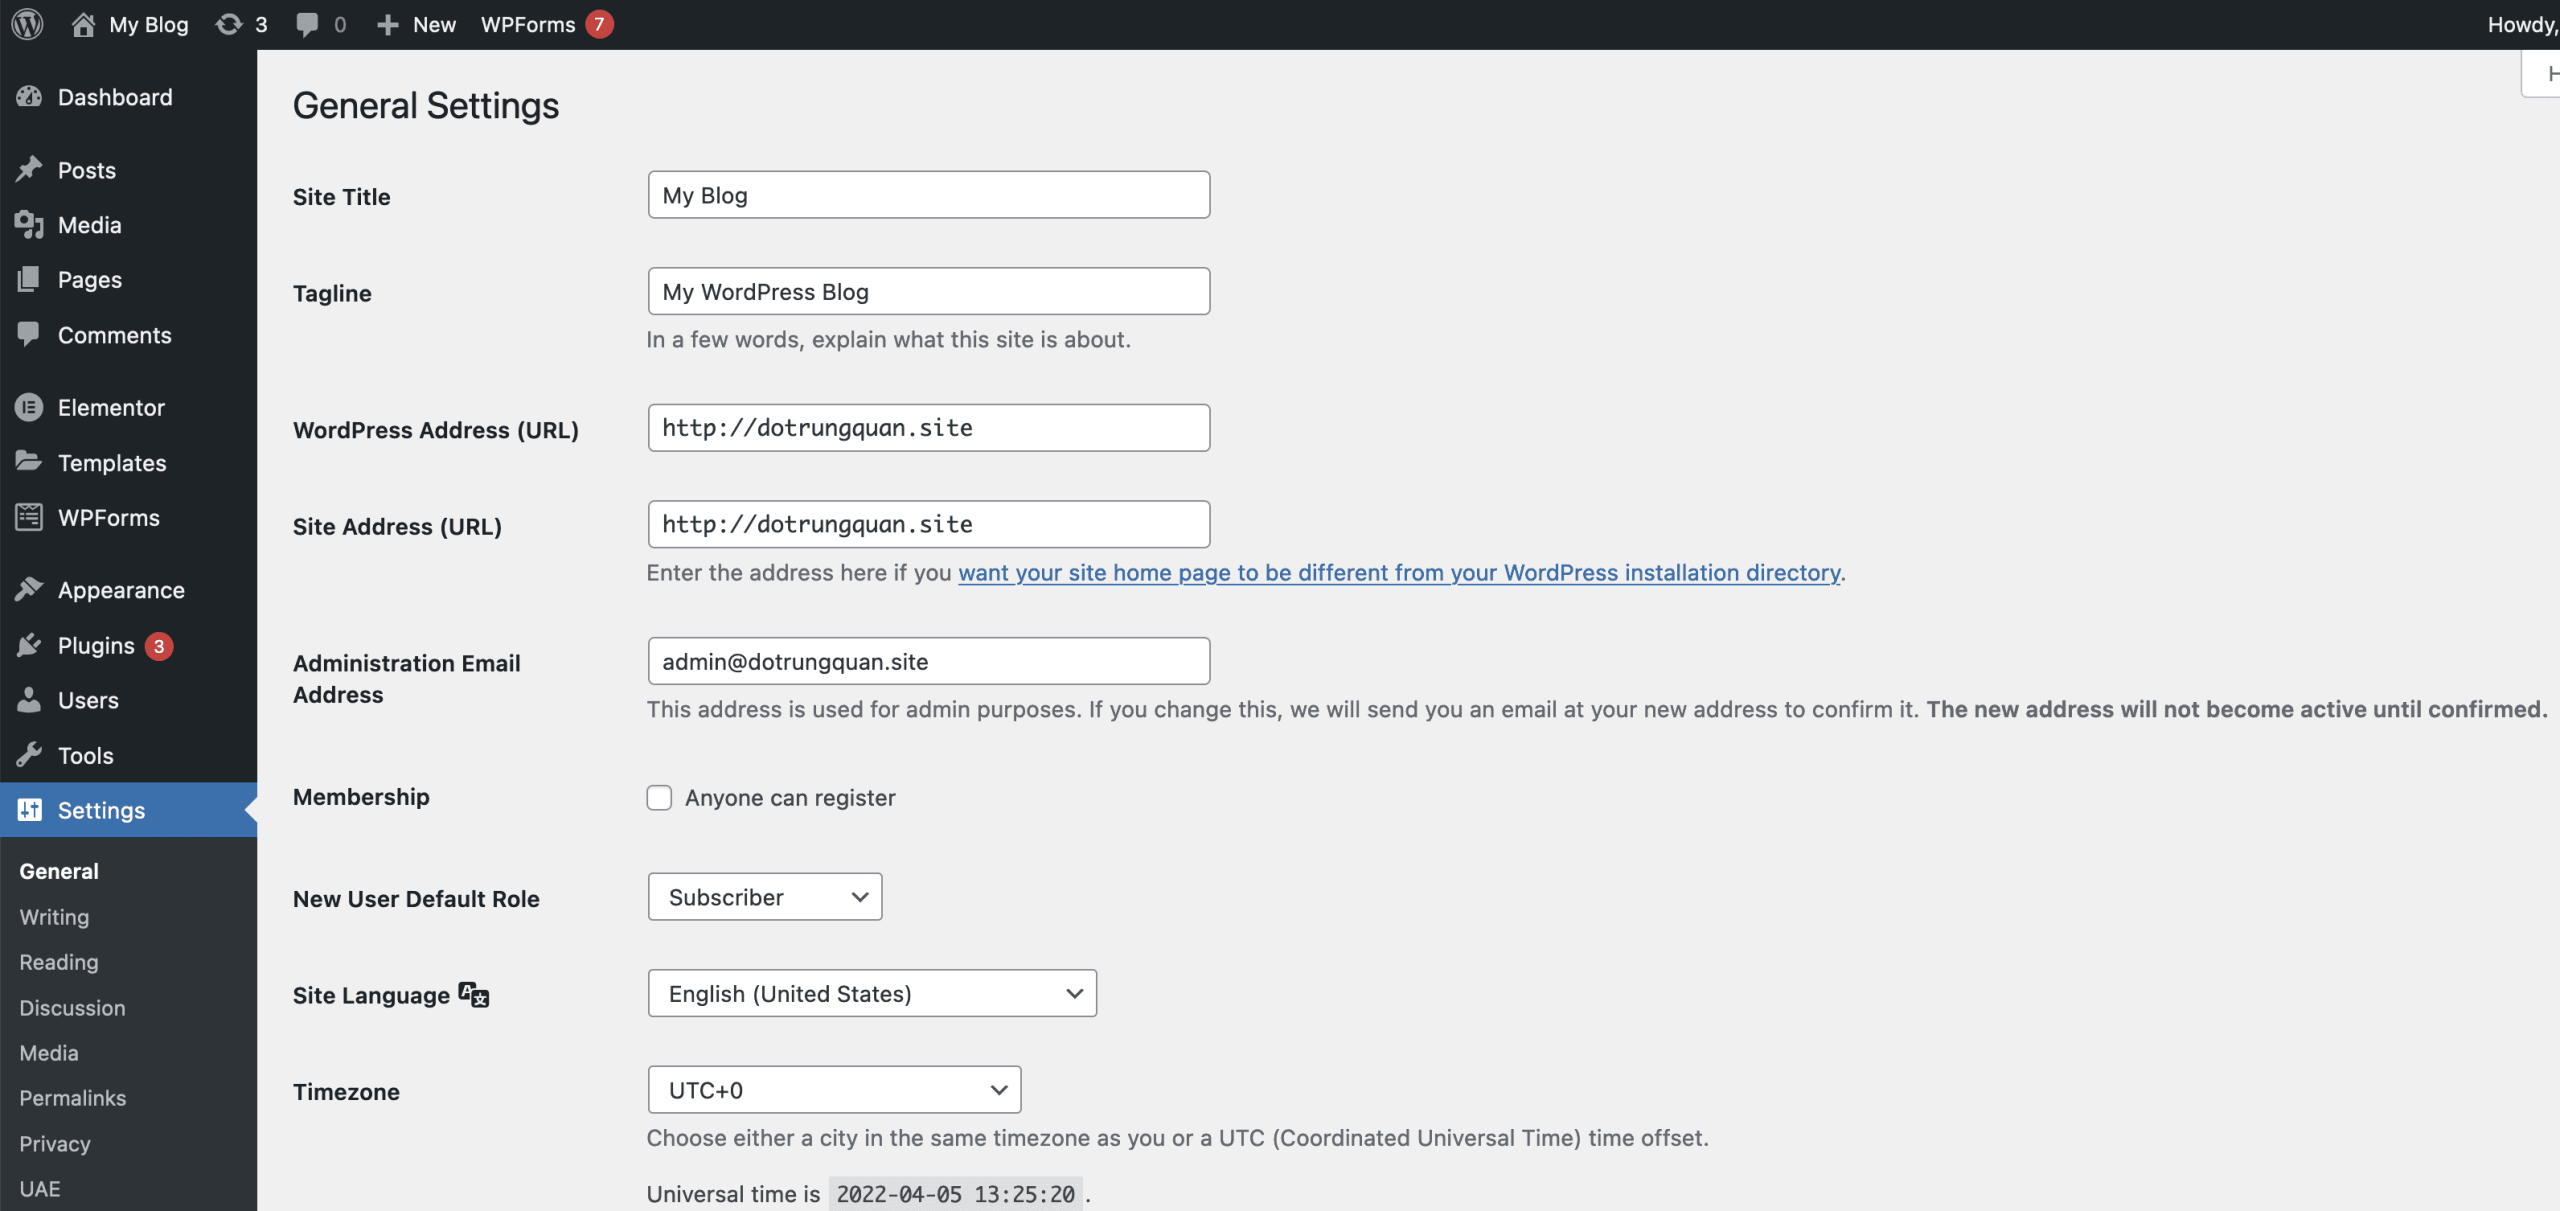
9.1 General Settings
In General Settings, you can set some basic page attributes. This includes the page title, slogan, URL, and email address of the site administrator. Additionally, you can set the language, time zone, and date and time. You can also set the role of new website users. Remember to click on “Save changes” at the bottom of the page whenever you make changes to the settings.
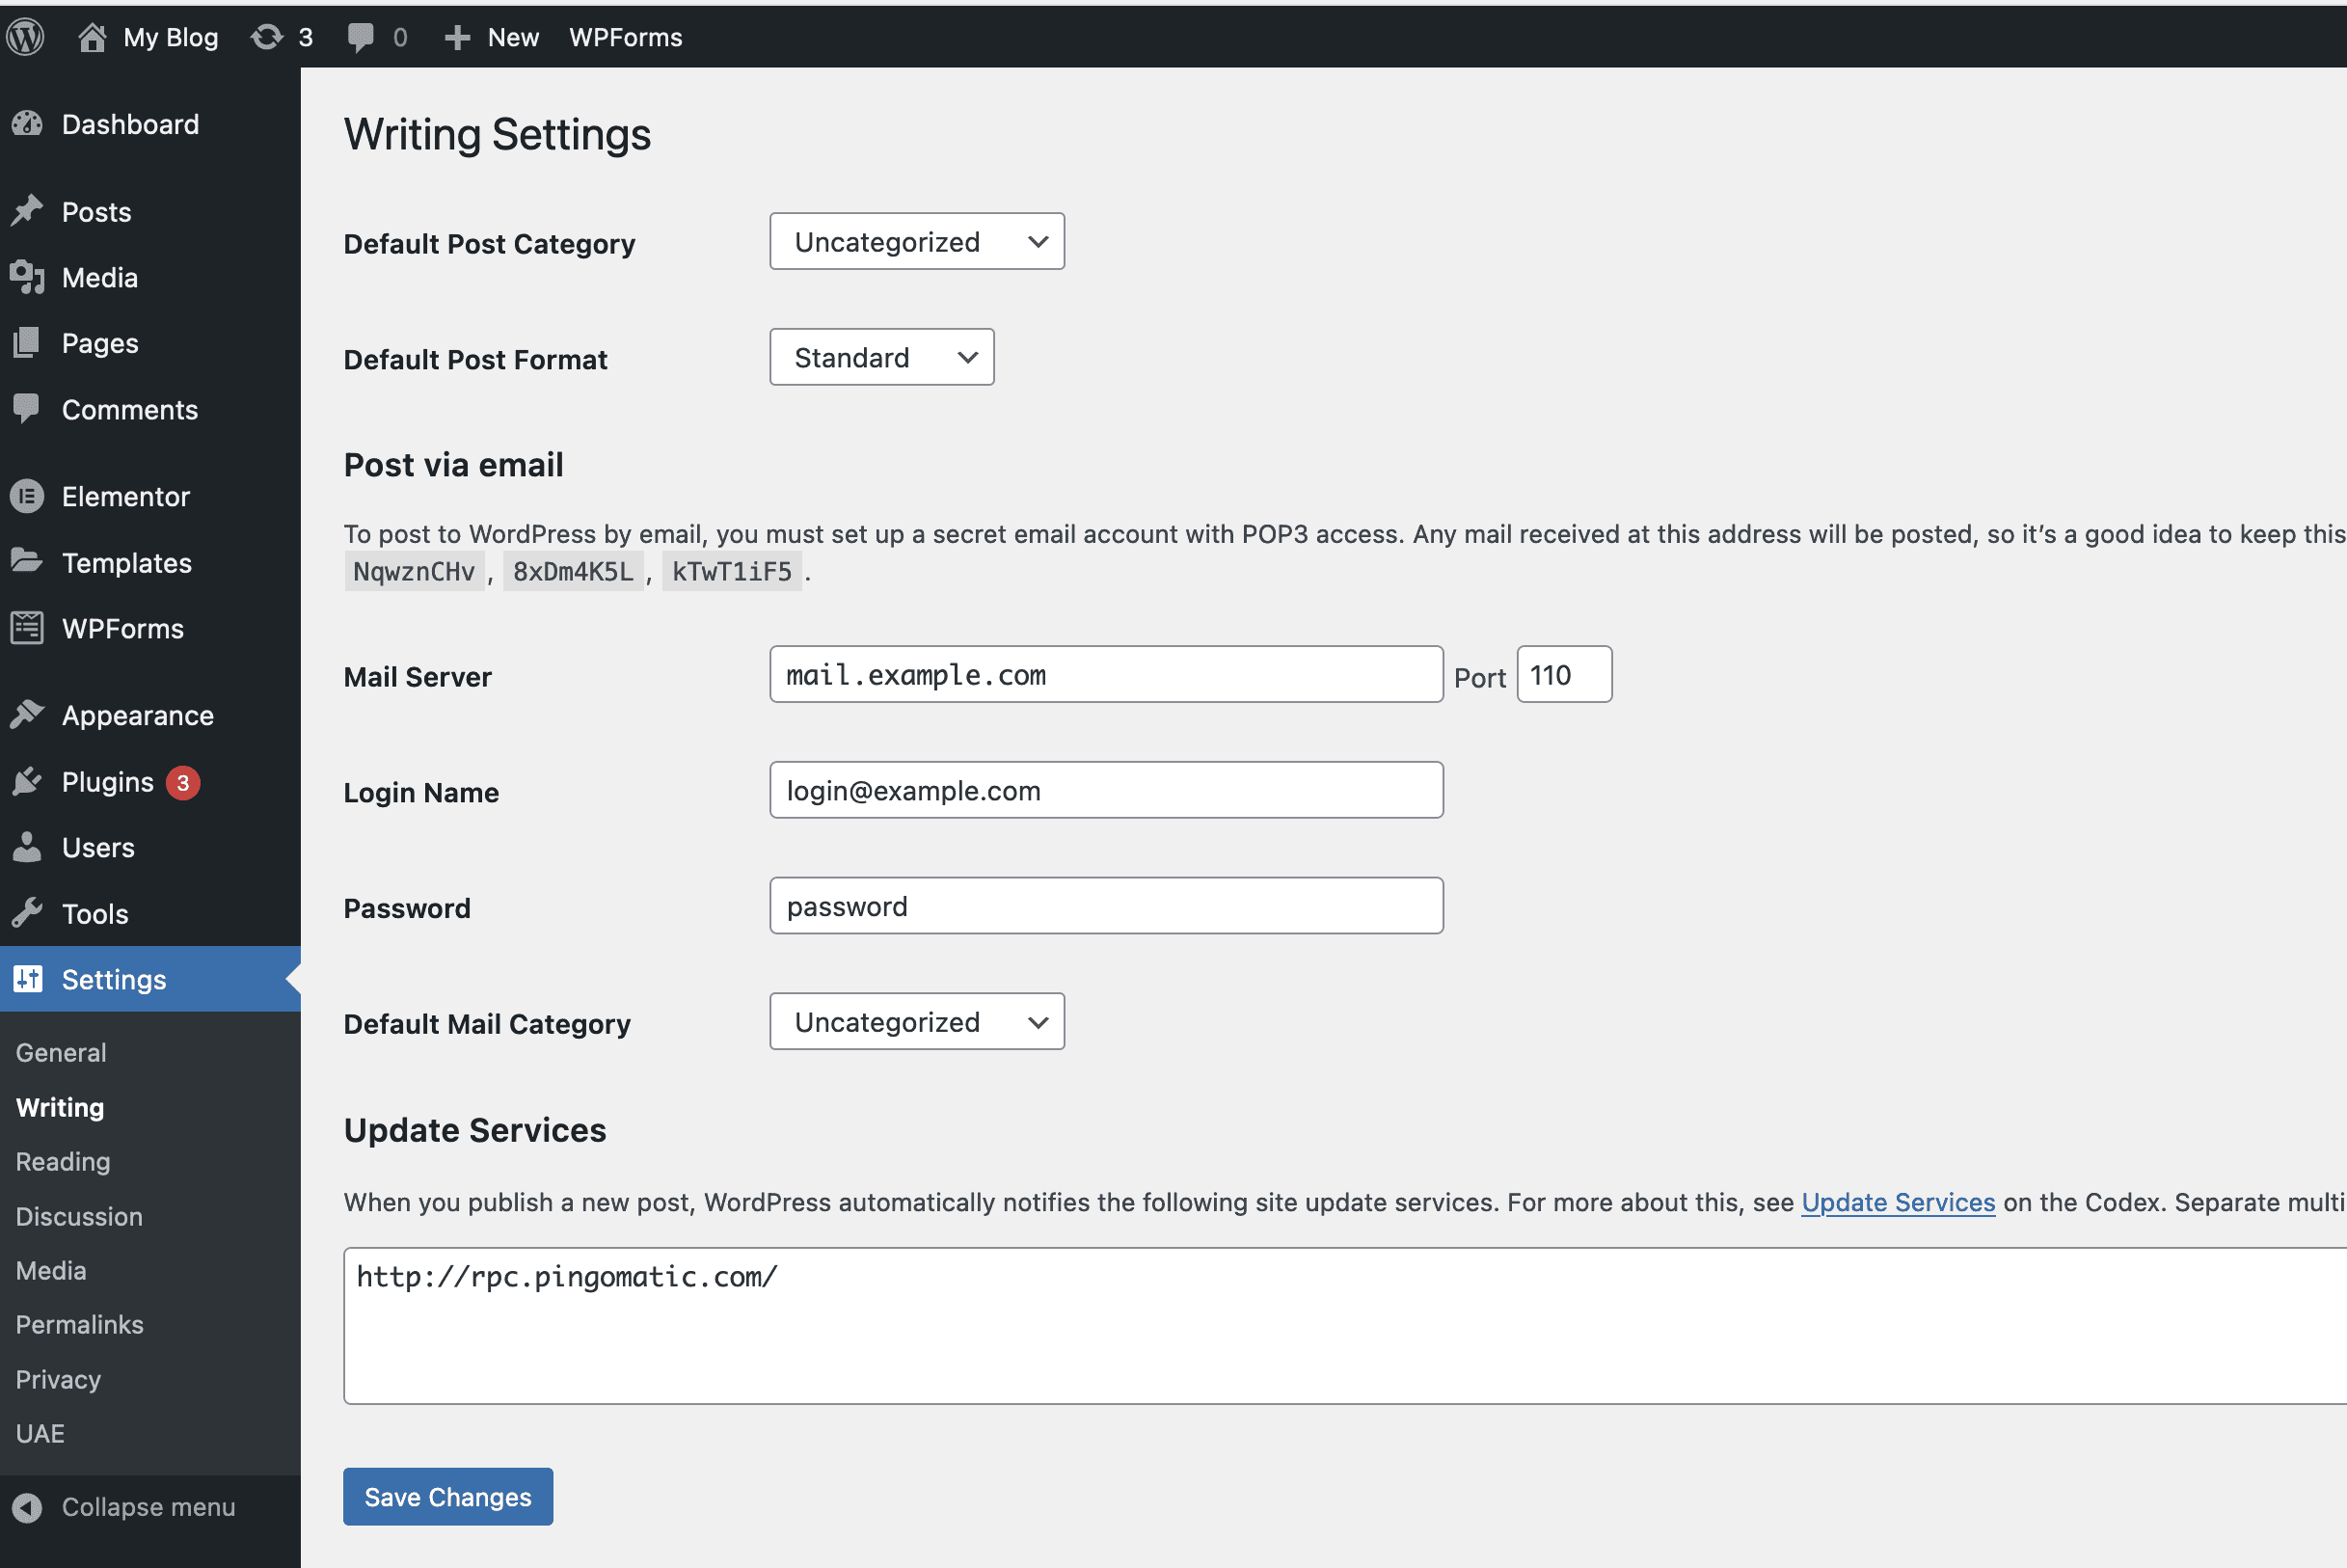
9.2 Write Settings
This section contains some options related to the content of the website. You can choose the default category and format for posts or set up email publishing for posts. Remember to click on “Save changes” at the bottom of the page whenever you make changes to the settings.
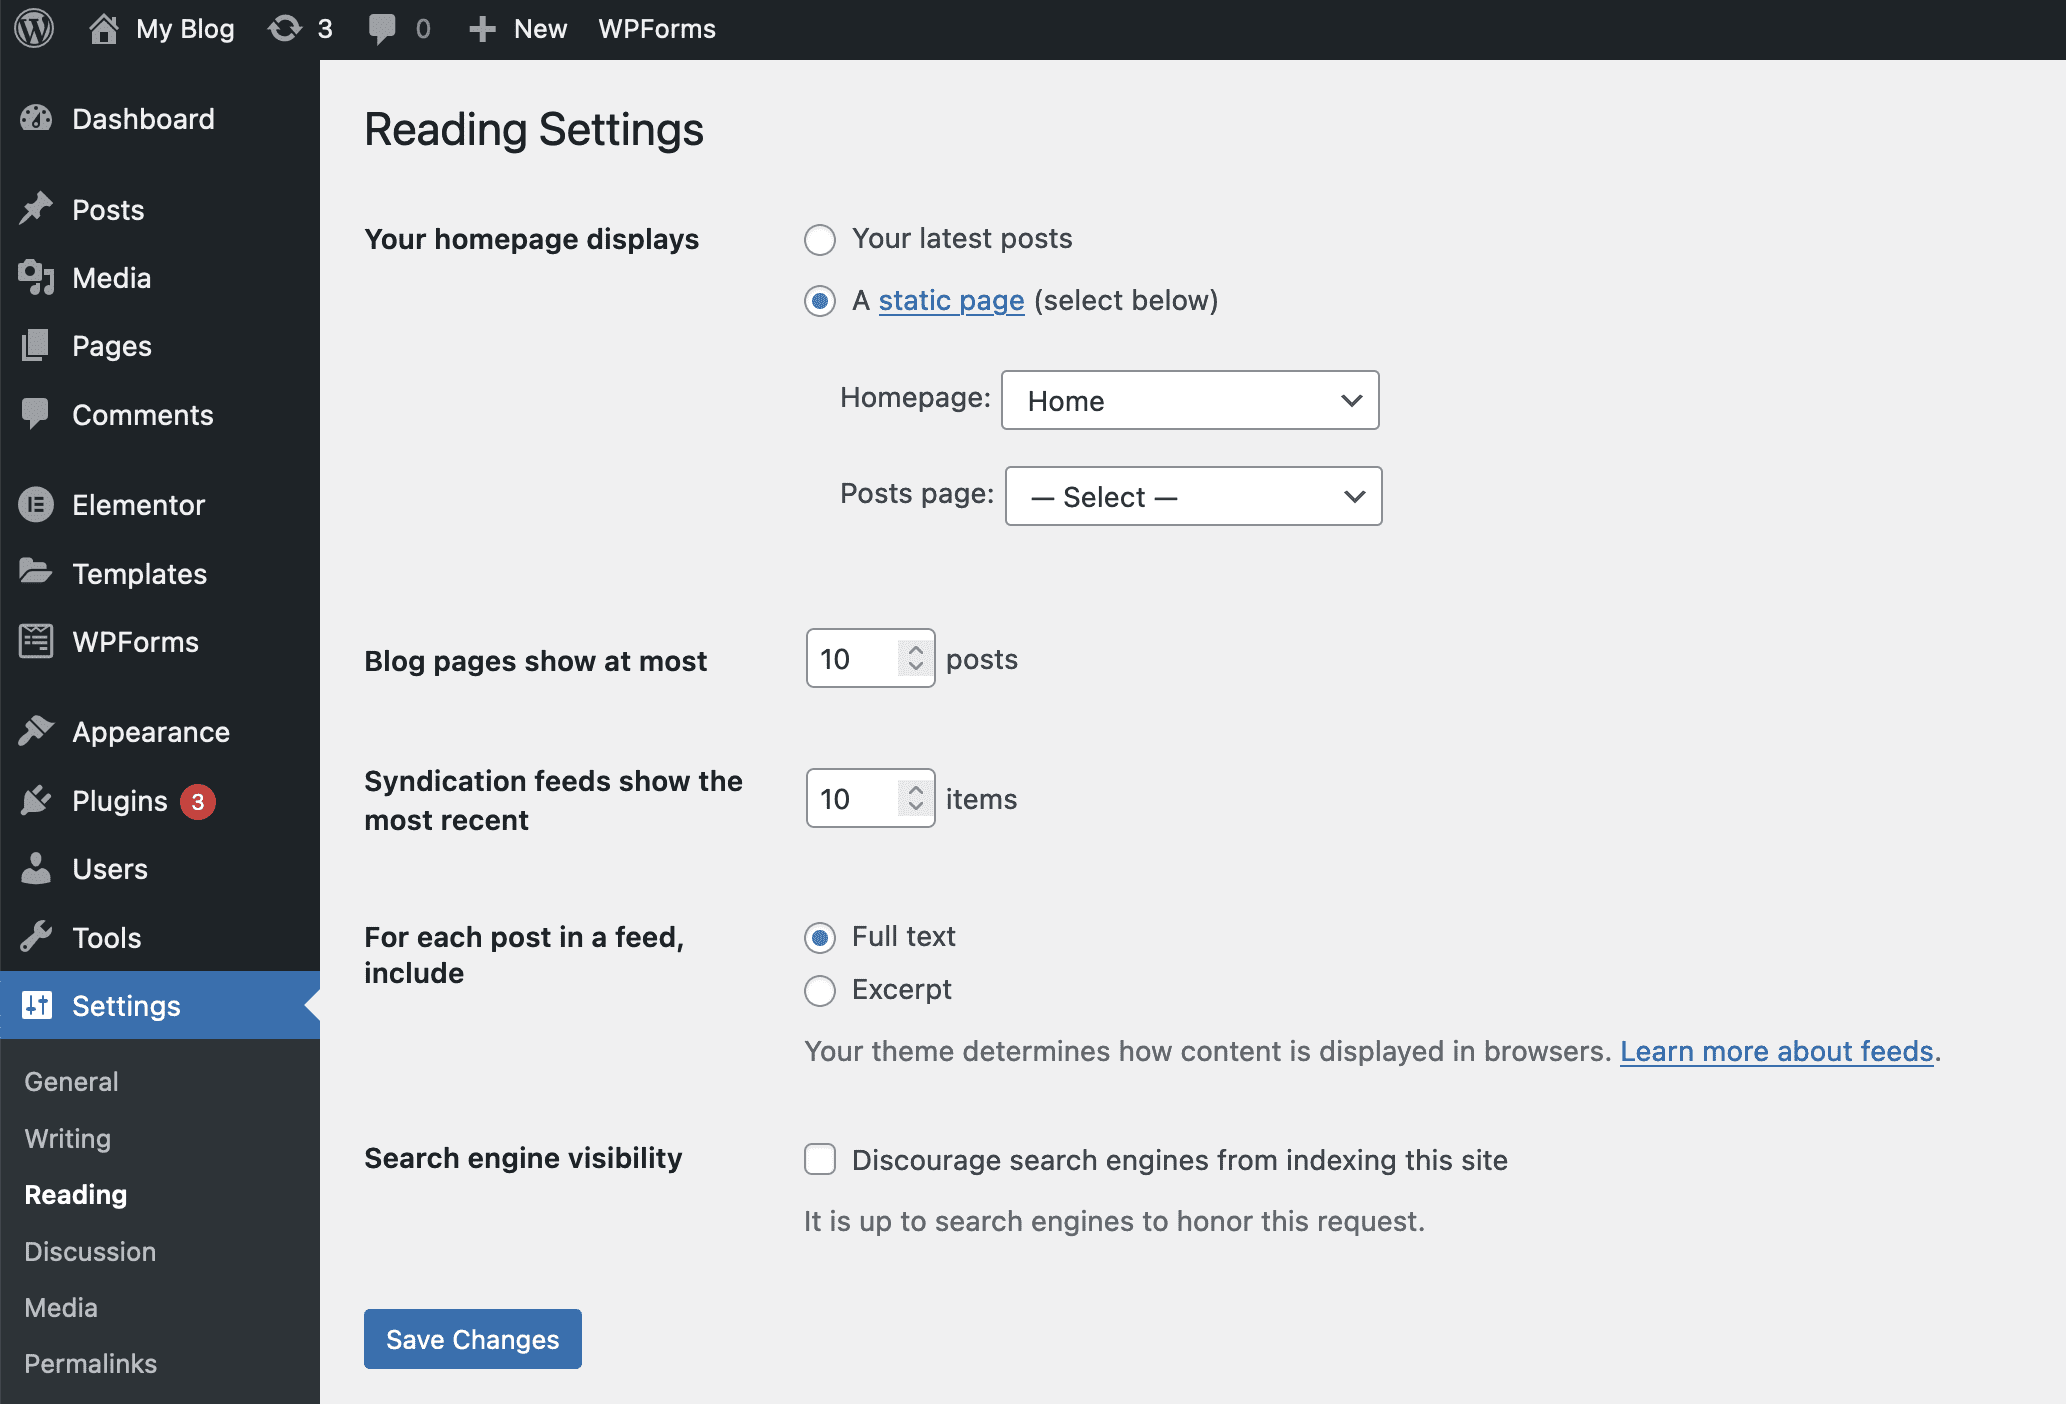
9.3 Reading Settings
This feature allows you to configure how pages are displayed. You can choose to view the home page or the latest posts here.
You can edit the number of posts that appear in RSS and the display format in RSS as Full Text or Summary – I recommend that you choose to display Summary to avoid article copying via RSS.
The last choice is Search Engine Visibility. If you check this box, your website will be hidden from search engines – meaning that Google will not be able to index your website.
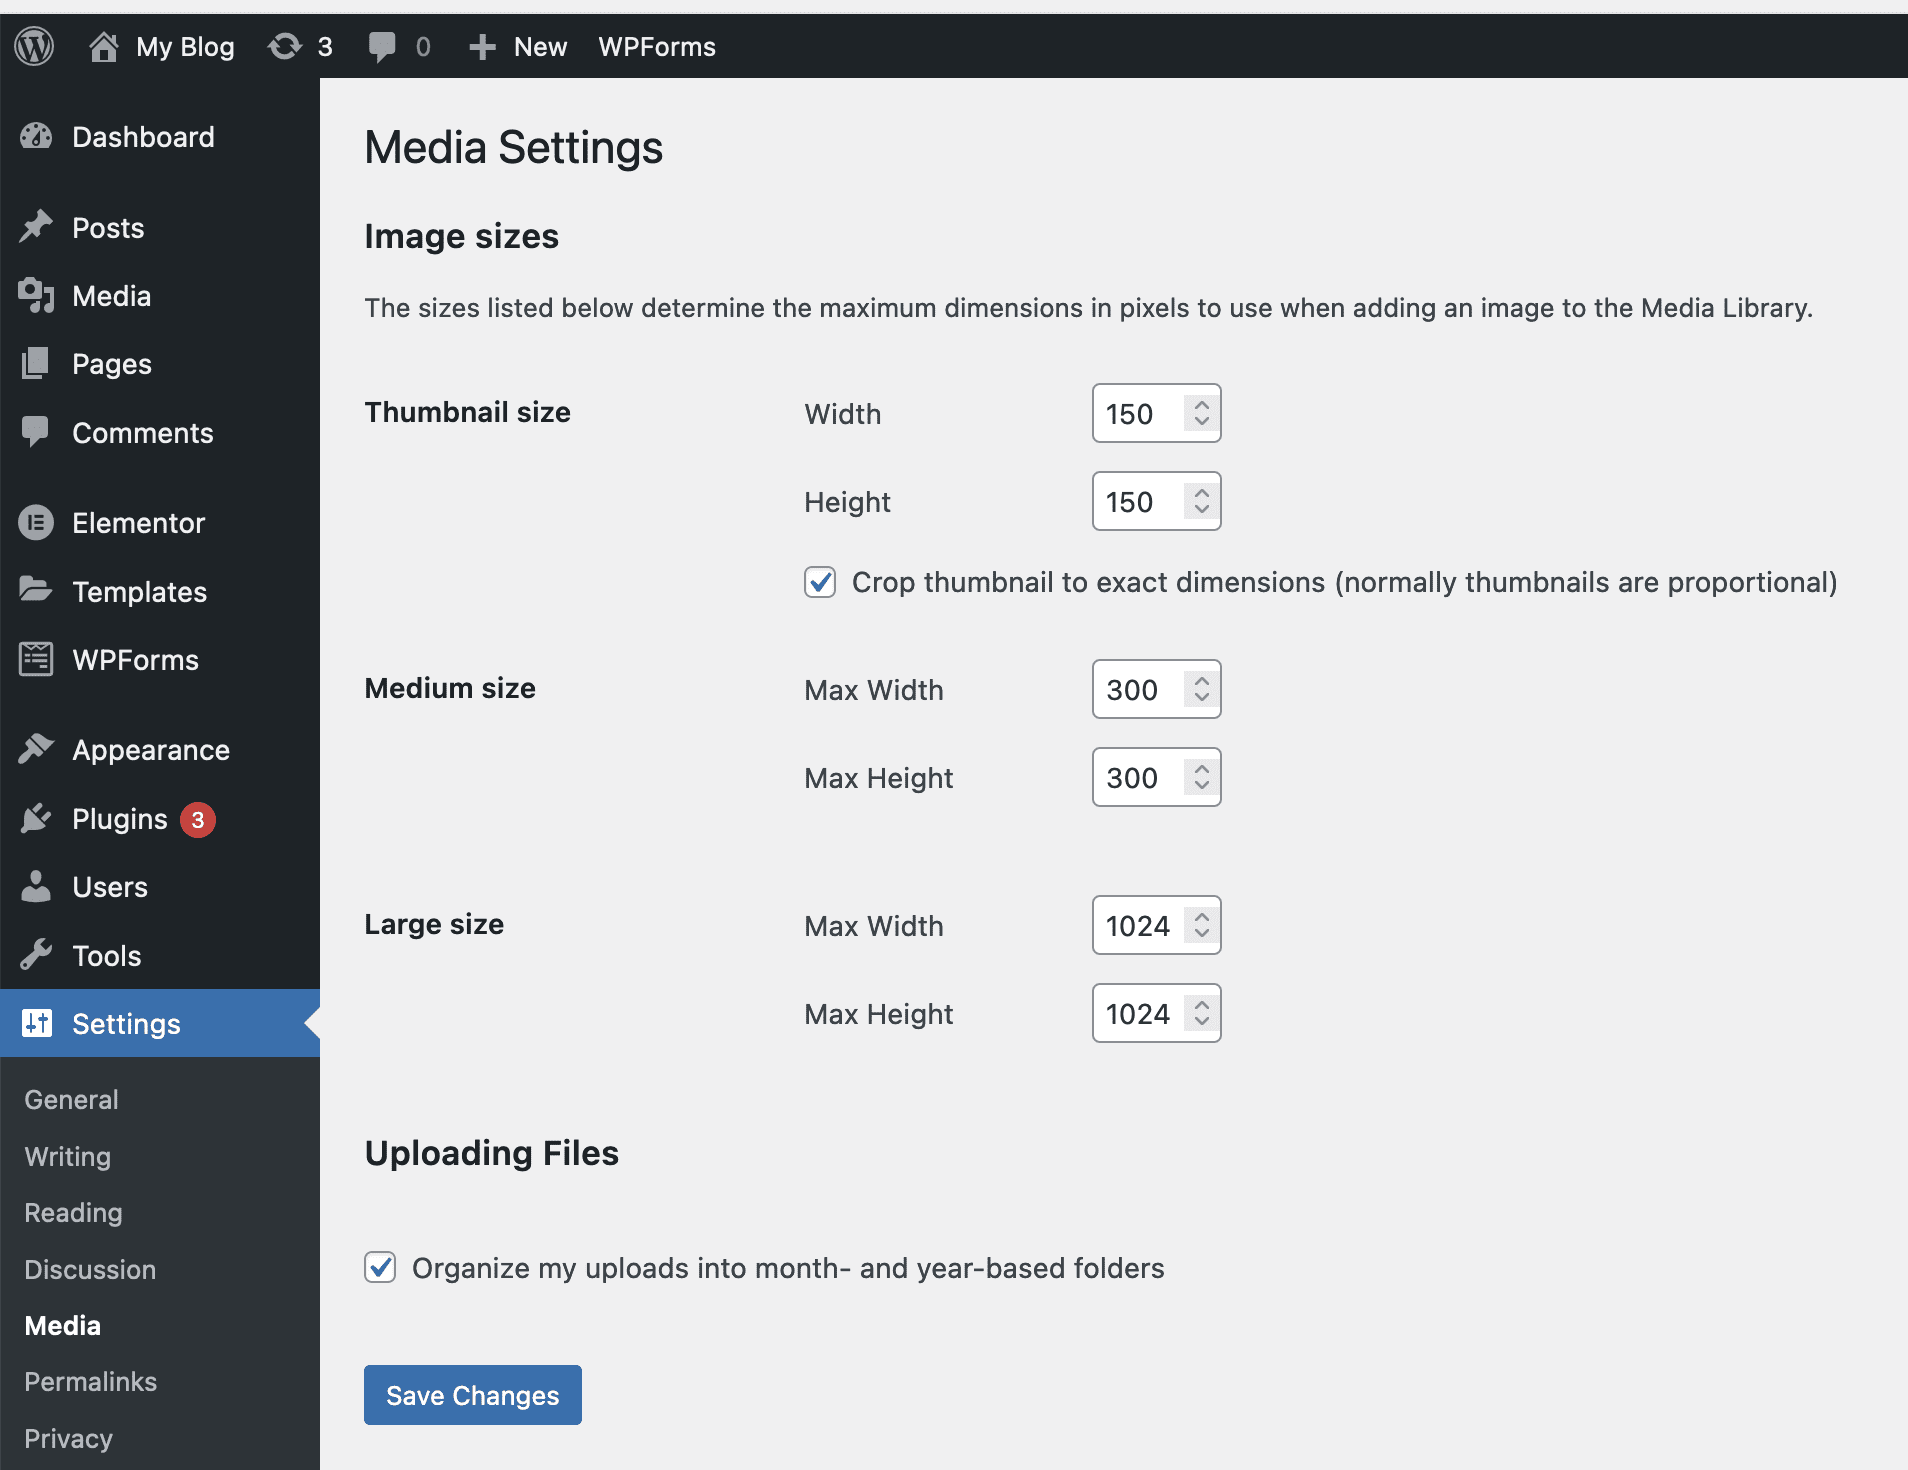
9.4 Media Settings
In the Media settings, you can choose the size of the images that will be created when you upload website images. You can specify the size of thumbnail images and both medium and large image sizes.
Next, you can choose to sort folders by month and year of upload. You should check this box to easily categorize uploaded files.
9.5 Permalink Settings
This is where you will turn on the static permalink feature for the entire website instead of using the dynamic permalink structure. Static permalinks mean that your post, page, category, tag, etc. address will be represented by a specific name instead of a number.
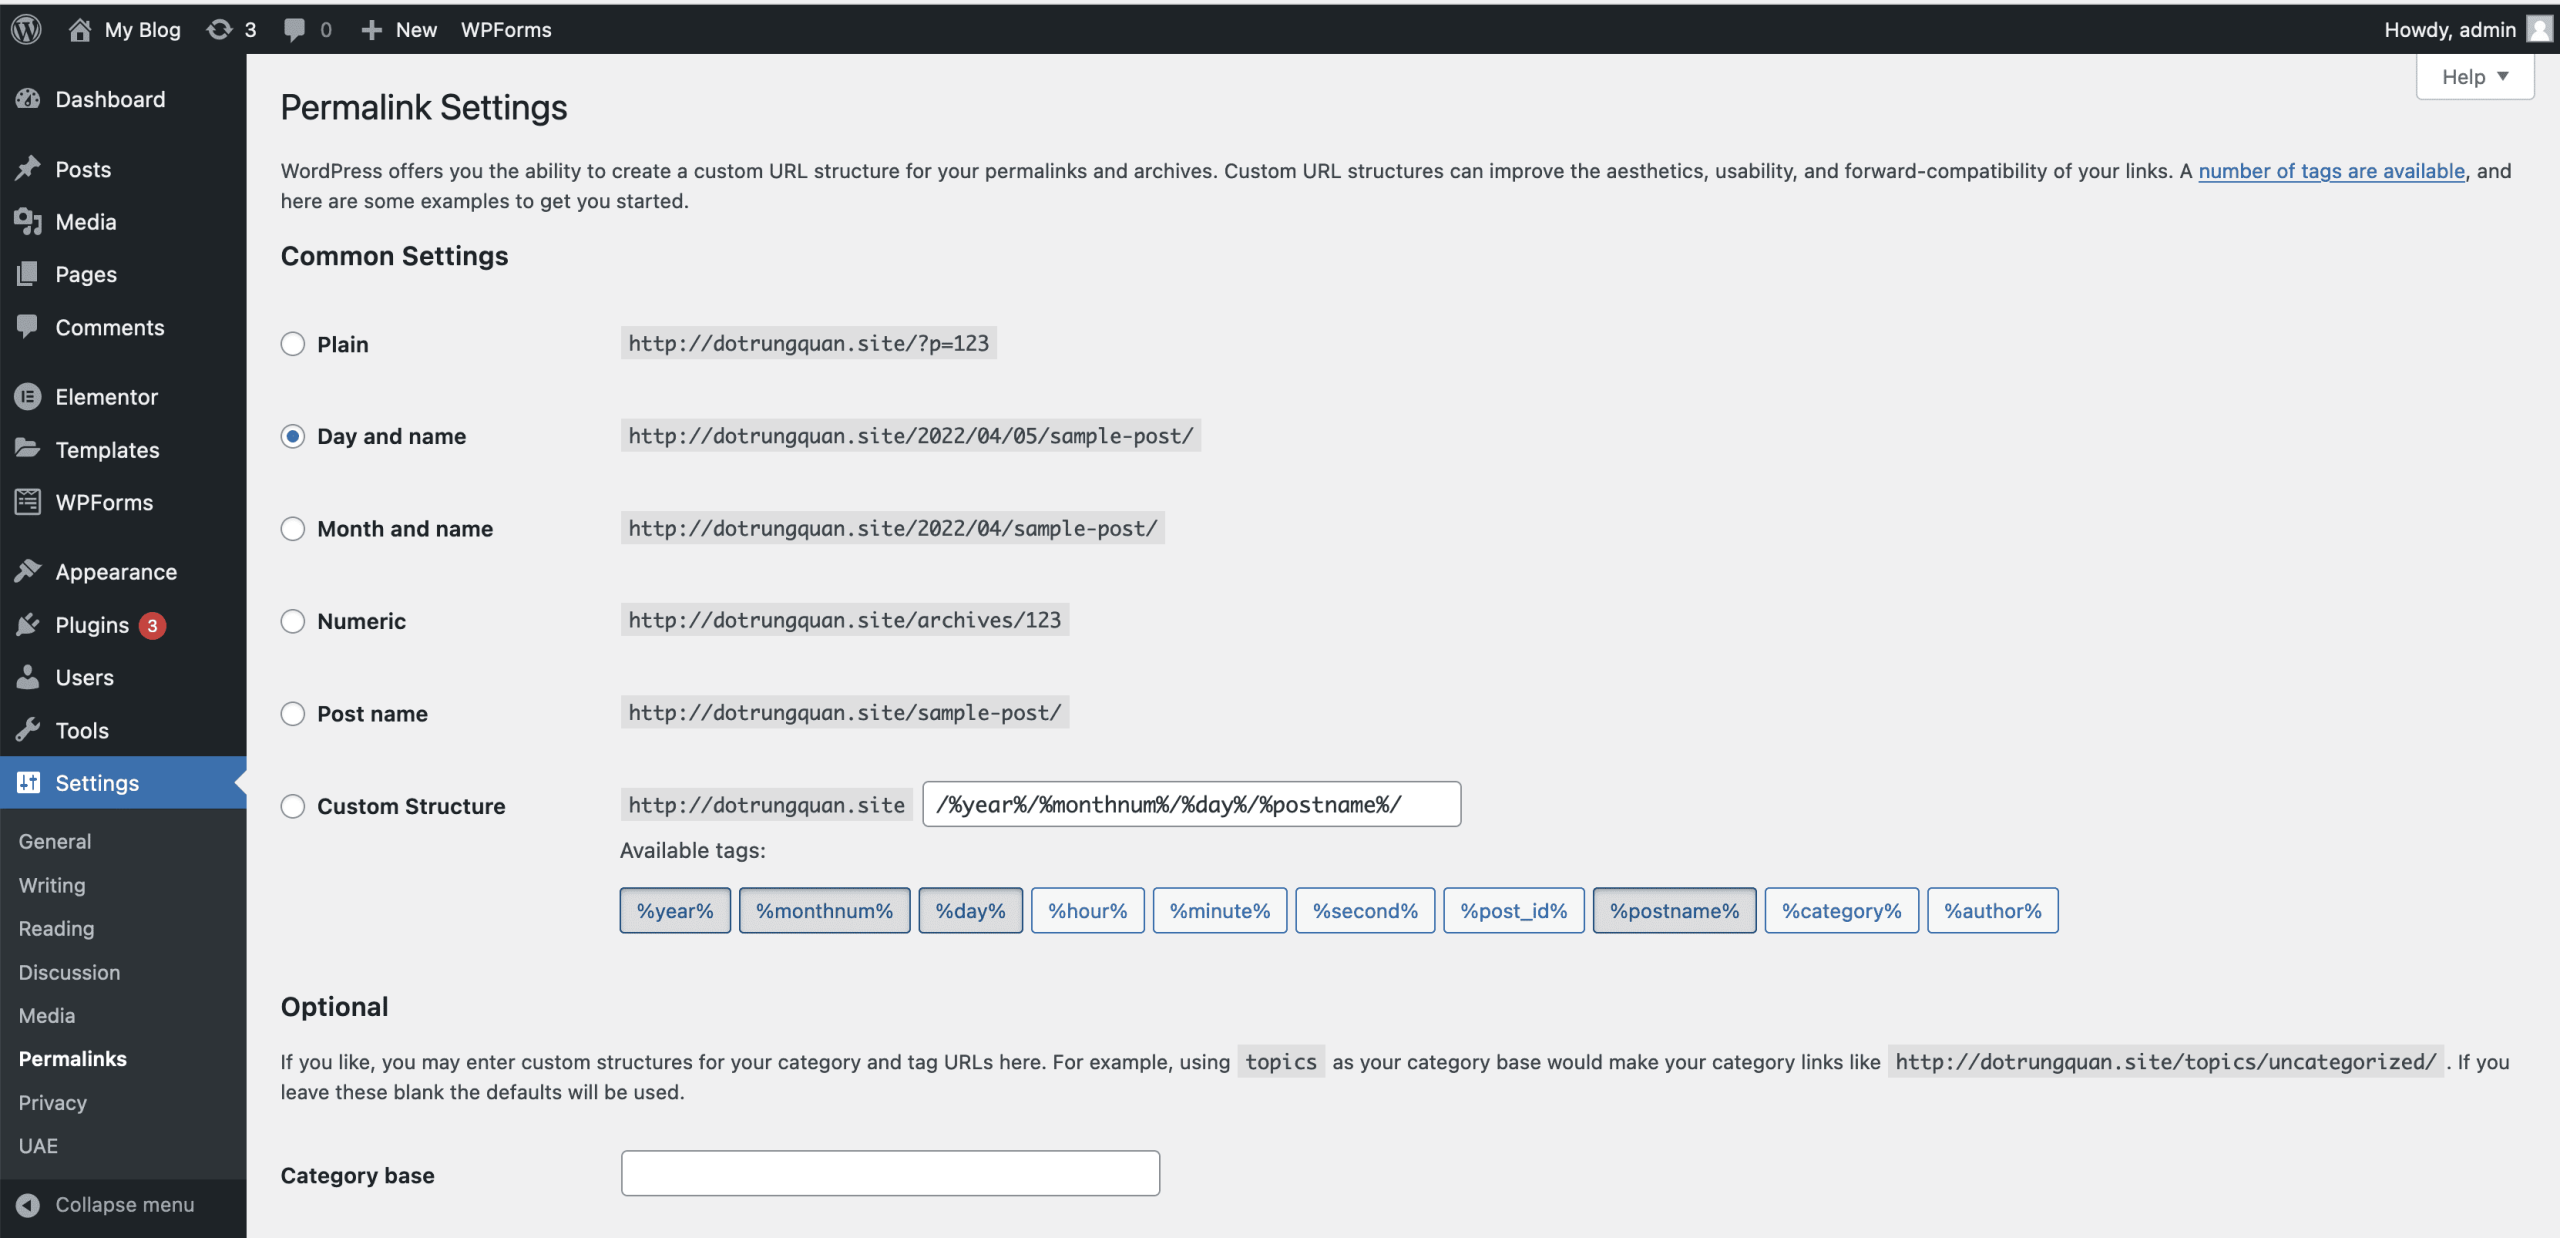
- Common Settings
- Default: Default permalink structure (dynamic permalink).
- Day and name: permalink structure with full display of post posting date and post name.
- Month and name: permalink structure with display of month, year, and post name.
- Numeric: Permalink structure displays the post ID instead of the name.
- Post name: Displays only the post name in the permalink.
- Custom Structure: Customize the permalink structure as desired, see the end of the article for more information.
- Optional: Optional settings.
- Category base: The name of the parent permalink for the category page. By default, it will be http://domain/category/category-name/, if you enter “category” here, it will display as http://domain/category/category-name.
- Tag base: The name of the parent permalink for tag pages. By default, it will be http://domain/tag/tag-name/, if you enter “the” here, it will display as http://domain/the/tag-name.
- Custom Structure
If you choose this option, you can structure the permalink as you like. The structure is determined here through structure keywords (enclosed by %), below are some structure keywords:
- %year% – post posting year.
- %monthnum% – post posting month.
- %day% – post posting date.
- %hour% – post posting hour.
- %minute% – post posting minute.
- %second% – post posting second.
- %post_id% – post ID number.
- %postname% – post name (reduced to “post-title”)
- %category% – the category name of the post (if you choose 2 categories, it will display 1 of the 2 and be fixed).
- %author% – the author name of the post.
10. Secure WordPress website always safe
Website protection is always the top issue of website administrators, somehow we must constantly strengthen the Website’s security to avoid attacks from hackers to destroy or steal personal data. One of the ways to enhance security is to create difficulty when logging into the administration page. Below are 3 articles on how to ensure WordPress website security, please take a look.
- Set up security questions when logging in to WordPress
- Secure WordPress website with Wordfence plugin
- Some ways to keep your WordPress website safe
III. Summary
Hopefully, this article will help you master the functions inside WordPress in order to become the best WordPress website owner.
If you need assistance, you can contact support in the ways below:
- Hotline 247: 028 888 24768 (Ext 0)
- Ticket/Email: You use the email to register for the service and send it directly to: support@azdigi.com
You might also like
- Building an e-commerce website with Astra Theme
- Building a News Website with Astra Theme
- Building an e-commerce website with MyThemeShop
- Rank Math and Elementor Plugin - The Perfect SEO Duo for WordPress
- How to install WP-CLI for WordPress administration
- What’s New in WordPress 7.0? A Detailed Look at the Armstrong Release
About the author

Thạch Phạm
Đồng sáng lập và Giám đốc điều hành của AZDIGI. Có hơn 15 năm kinh nghiệm trong phổ biến kiến thức liên quan đến WordPress tại thachpham.com, phát triển website và phát triển hệ thống.